
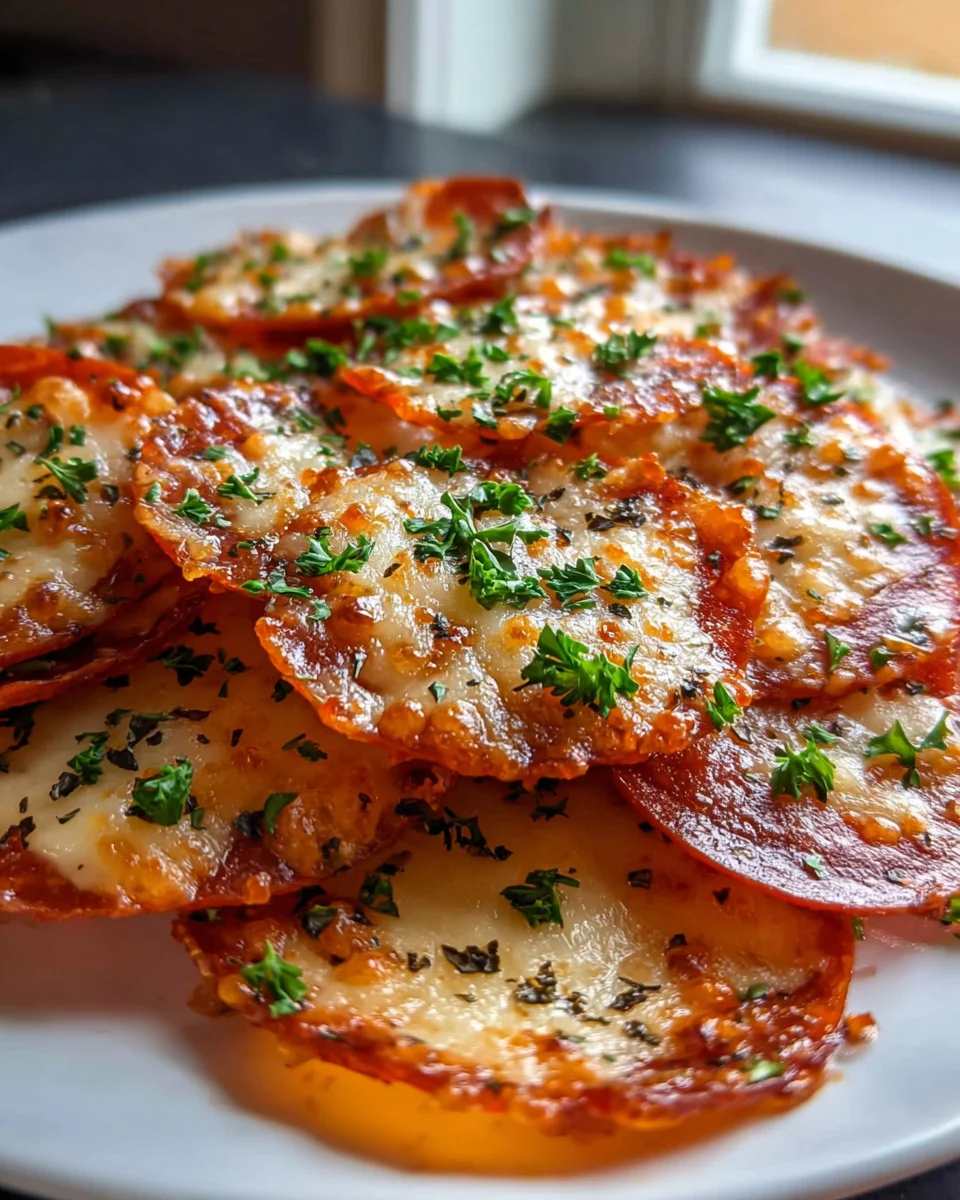
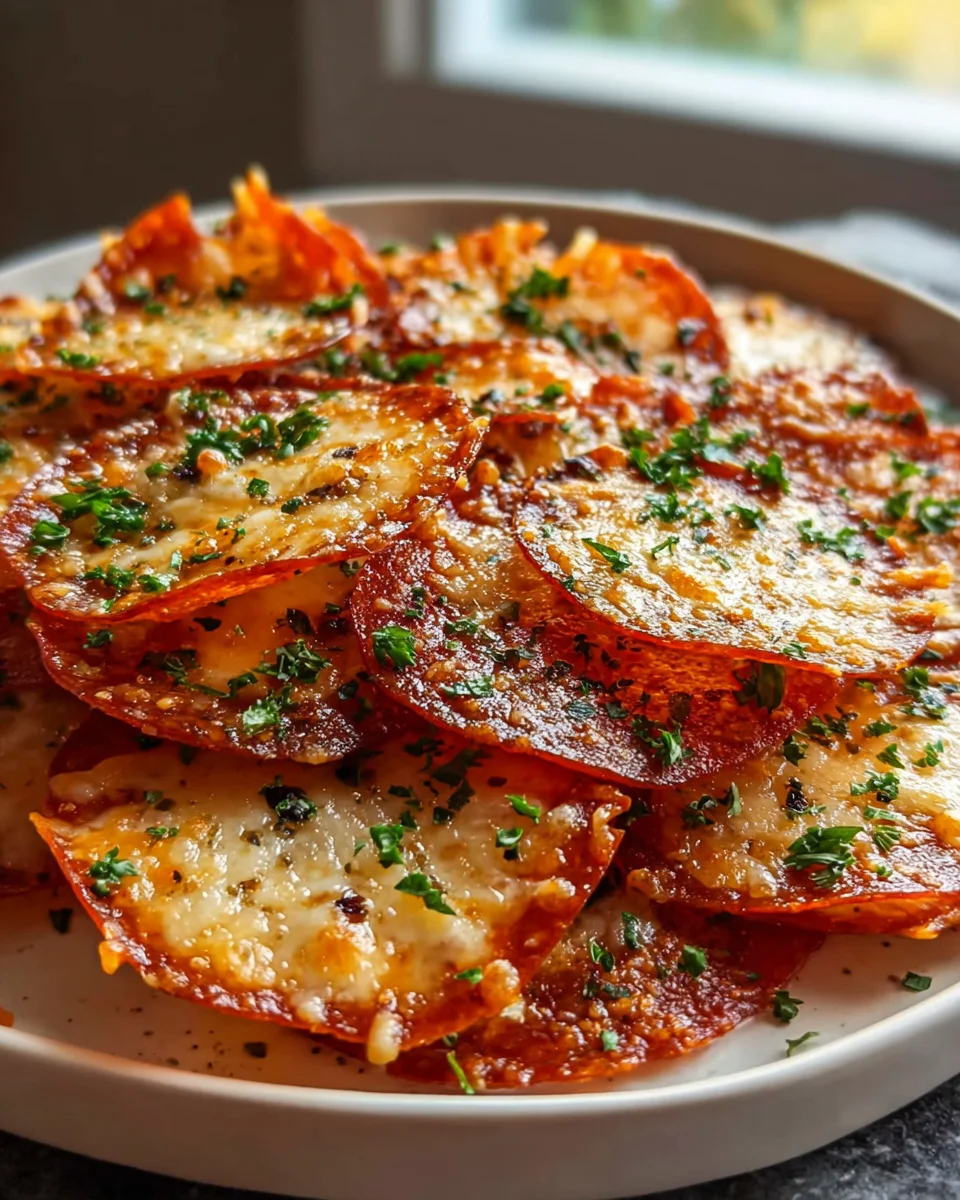
Beef Pepperoni Cheese Crisps
Hey there, fellow snack lovers! Get ready to meet your new obsession because I’ve truly outdone myself with these incredible Beef Pepperoni Cheese Crisps. Forget everything you thought you knew about quick, satisfying snacks because this dish is about to completely change the game. Imagine taking thin, savory slices of delicious beef pepperoni, baking them until they’re perfectly crisp and golden, then topping each one with a generous sprinkle of your favorite melty cheese. The result? A crunchy, salty, and utterly addictive bite that explodes with flavor.
What makes these Beef Pepperoni Cheese Crisps so special, you ask? It’s the magical transformation that happens in the oven! The beef pepperoni crisps up beautifully, becoming almost like a chip, providing an incredible texture that perfectly complements the gooey, savory cheese. This isn’t just a snack; it’s a brilliant solution for anyone looking for a low-carb, high-flavor option that truly delivers on taste. You’ll love them because they’re ridiculously easy and quick to prepare, incredibly satisfying, and hit all those savory cravings without any fuss. Whether you’re serving them up as a unique appetizer, enjoying them as a quick afternoon treat, or needing a crowd-pleasing game-day snack, I promise you these will be a massive hit. Get ready for a simple recipe that brings maximum deliciousness!
Welcome to my kitchen! Today, we’re diving into a truly addictive snack that’s incredibly simple to make but bursting with flavor: Beef Pepperoni Cheese Crisps. Imagine perfectly crispy, savory cheese infused with the rich, slightly spicy notes of beef pepperoni. These aren’t just a snack; they’re a revelation, perfect for entertaining, a quick protein boost, or just satisfying that craving for something salty and crunchy. Let’s get cooking!
Ingredient Notes
Making delicious Beef Pepperoni Cheese Crisps hinges on just a few key ingredients. Quality truly makes a difference here, so let’s talk about what we need.
Beef Pepperoni
-
The Star: Naturally, good quality beef pepperoni is essential. I recommend choosing a brand you love for its flavor profile – whether you prefer it mild or with a bit of a kick. The beef pepperoni will render its flavorful oils into the cheese, creating an incredible depth of taste. If your pepperoni comes in a stick, slice it very thinly, about 1/16th of an inch. If you’re using pre-sliced, ensure they are not too thick, as thinner slices tend to crisp up better.
-
Substitutions for Pepperoni: While the essence of this dish is beef pepperoni, if you wanted to explore variations, other thinly sliced, cooked beef-based cured meats could work. Think of a spicy beef salami, or even finely minced and lightly crisped beef bacon bits. However, to truly get that “pepperoni crisp” experience, stick with beef pepperoni if you can find it.
Cheese
-
The Binder & Crisper: For the best crisps, you’ll want to use a low-moisture, good melting cheese. My go-to choices include freshly grated Monterey Jack, sharp cheddar, or even a low-moisture part-skim mozzarella. A blend of these can also be fantastic! I always suggest grating your own cheese from a block. Pre-shredded cheeses often contain anti-caking agents that can hinder their ability to melt and crisp perfectly. Freshly grated cheese melts more smoothly and creates a superior crisp texture.
-
Substitutions for Cheese: Experiment with different types! Provolone will give you a slightly sharper, nuttier crisp. A good quality, aged Parmesan can be sprinkled on top for an extra layer of salty umami and even more crispiness, though I wouldn’t use it as the sole cheese due to its different melting properties. Just steer clear of high-moisture cheeses like fresh mozzarella, as they release too much water and won’t crisp up properly.
Optional Flavor Boosters
-
Subtle Enhancements: To really make the flavors pop, I sometimes add a tiny pinch of garlic powder or onion powder to my grated cheese before forming the crisps. A little sprinkle of dried oregano can also complement the pepperoni beautifully. If you like an extra kick, a few red pepper flakes (especially if your beef pepperoni is on the milder side) will do the trick. Just be mindful not to overdo it – we want the pepperoni and cheese to be the stars!
Step-by-Step Instructions
Making these Beef Pepperoni Cheese Crisps is surprisingly straightforward. Here’s how I get them perfectly golden and crunchy every time:
Step 1: Preheat and Prep Your Baking Sheets
-
First things first, let’s get that oven ready. I preheat my oven to 375°F (190°C). This temperature is ideal for getting the cheese to melt and crisp without burning too quickly.
-
Next, and this is absolutely critical for easy removal and perfect crisping, I line one or two baking sheets with parchment paper or a silicone baking mat. Do not skip this step! The cheese will stick to an unlined pan, making removal a nightmare.
Step 2: Arrange Your Crisps
-
Now for the fun part! I like to create individual crisps, and my preferred method for these particular crisps is to start with the cheese. I take small mounds of my freshly grated cheese (about 1.5 to 2 tablespoons per crisp) and place them on the prepared baking sheet. Make sure to leave plenty of space between each mound – at least 2-3 inches. They will spread out quite a bit!
-
Once the cheese mounds are laid out, I place one or two thin slices of beef pepperoni on top of each cheese mound. If your pepperoni slices are large, you can tear them into smaller pieces to fit better. For extra flavor, I sometimes sprinkle a tiny dash of garlic powder or dried oregano over the pepperoni and cheese at this stage.
Step 3: Bake Until Golden and Crispy
-
Carefully slide your baking sheet into the preheated oven. Now, here’s where you need to become an attentive baker! These crisps cook relatively quickly. I typically bake them for about 6-10 minutes. The exact time will depend on your oven and the type of cheese you’re using.
-
What you’re looking for is for the cheese to be completely melted, bubbly, and spread out into a thin disc. The edges should be beautifully golden brown and look visibly crisp. The pepperoni will also render its fat and crisp up nicely. Keep a close eye on them, especially after the 6-minute mark, as they can go from perfectly golden to burnt in a flash.
Step 4: Cool and Enjoy!
-
Once they’re perfectly golden and crispy, carefully remove the baking sheet from the oven. Resist the urge to pick them up immediately! They will be soft right out of the oven. Let them cool on the baking sheet for about 2-3 minutes. This cooling period is essential for them to set and become truly crisp.
-
After a few minutes, use a thin spatula to carefully transfer the Beef Pepperoni Cheese Crisps to a wire rack to cool completely. As they cool, they will harden and become perfectly crunchy. Once cool, they are ready to be devoured!
Tips & Suggestions
I’ve made countless batches of cheese crisps over the years, and I’ve picked up a few tricks to ensure they turn out perfectly every time. Here are my top tips and suggestions for your Beef Pepperoni Cheese Crisps:
-
The Parchment Paper/Silicone Mat Rule: I cannot stress this enough – always use parchment paper or a silicone baking mat. It makes all the difference for non-stick baking and ensures your crisps lift off easily without breaking. Trust me, cleaning melted, stuck-on cheese from a baking sheet is not fun!
-
Don’t Overcrowd the Pan: Give each cheese mound ample space to spread. If you place them too close together, they’ll merge into one giant crisp, or won’t crisp up evenly at the edges. I usually do about 6-9 crisps per standard baking sheet.
-
Watch Like a Hawk: Ovens vary, and cheese crisps can go from perfectly golden to burnt in a matter of seconds. Stay near your oven during the last few minutes of baking. You’re looking for deep golden edges and a bubbly, set center.
-
Uniformity for Even Cooking: Try to make your cheese mounds roughly the same size and your pepperoni slices similar in thickness. This helps ensure that all your crisps cook evenly and are done at the same time.
-
Enhance the Spice: If you love a bit more heat, a sprinkle of extra red pepper flakes over the pepperoni before baking will certainly amplify the warmth. You can also experiment with a very tiny dash of smoked paprika for an extra layer of savory depth.
-
Serving Suggestions: These Beef Pepperoni Cheese Crisps are fantastic on their own as a low-carb, high-flavor snack or appetizer. They’re also great served with a simple, non-alcoholic marinara dipping sauce on the side. I love crumbling them over a fresh green salad for an amazing crunchy, savory topping instead of croutons, or even serving them alongside a simple bowl of tomato soup. They add a fantastic textural contrast and burst of flavor!
-
Cooling is Crucial: Patience is a virtue, especially when it comes to cooling your crisps. They gain their ultimate crunchiness as they cool down completely. If you try to move them too soon, they might be pliable and tear.
Storage
If you manage to have any Beef Pepperoni Cheese Crisps leftover (which is a rare feat in my house!), proper storage is key to maintaining their delightful crunch.
-
Cool Completely Before Storing: This is the most important rule for storing any crisp food. If you store them while they’re still warm, the residual heat will create condensation inside your container, turning your perfectly crisp treats soft and chewy. Always allow them to cool completely on a wire rack until they are at room temperature.
-
Airtight Container: Once fully cooled, transfer your Beef Pepperoni Cheese Crisps to an airtight container. This will protect them from moisture in the air, which is the enemy of crispiness.
-
Room Temperature Storage: I find these crisps are best stored at room temperature, not in the refrigerator. The fridge can introduce moisture and cause them to soften. A cool, dry pantry is ideal.
-
Separation if Stacking: If you need to stack them in your container, I recommend placing a small piece of parchment paper between the layers. This prevents them from sticking together and helps to protect their fragile texture.
-
Shelf Life: For optimal crispness and flavor, I recommend enjoying your Beef Pepperoni Cheese Crisps within 2-3 days of baking. They will still be perfectly edible after that, but they might start to lose some of their initial crunch.
-
Re-crisping (Optional): If your crisps have softened a bit over time, don’t despair! You can often bring back some of their crispness with a quick refresh. Simply place them back on a parchment-lined baking sheet and pop them into a warm oven (around 250°F / 120°C) for about 5-10 minutes, or until they feel firm and crisp again. Let them cool completely before serving.
Final Thoughts
And there you have it! I truly hope you’re inspired to whip up a batch of these incredible Beef Pepperoni Cheese Crisps. They truly are a revelation – a perfect marriage of crispy, savory cheese with the rich, zesty punch of beef pepperoni. What makes these Beef Pepperoni Cheese Crisps a must-try for me is how effortlessly they come together, yet deliver such an impressive burst of flavor and a satisfying crunch. Whether you’re seeking a quick low-carb snack, a crowd-pleasing appetizer, or just a delightful little treat, you’ll find yourself reaching for this recipe again and again. Go ahead, give them a try; I promise you won’t be disappointed by the sheer deliciousness of these crisps!
Leave a Comment