
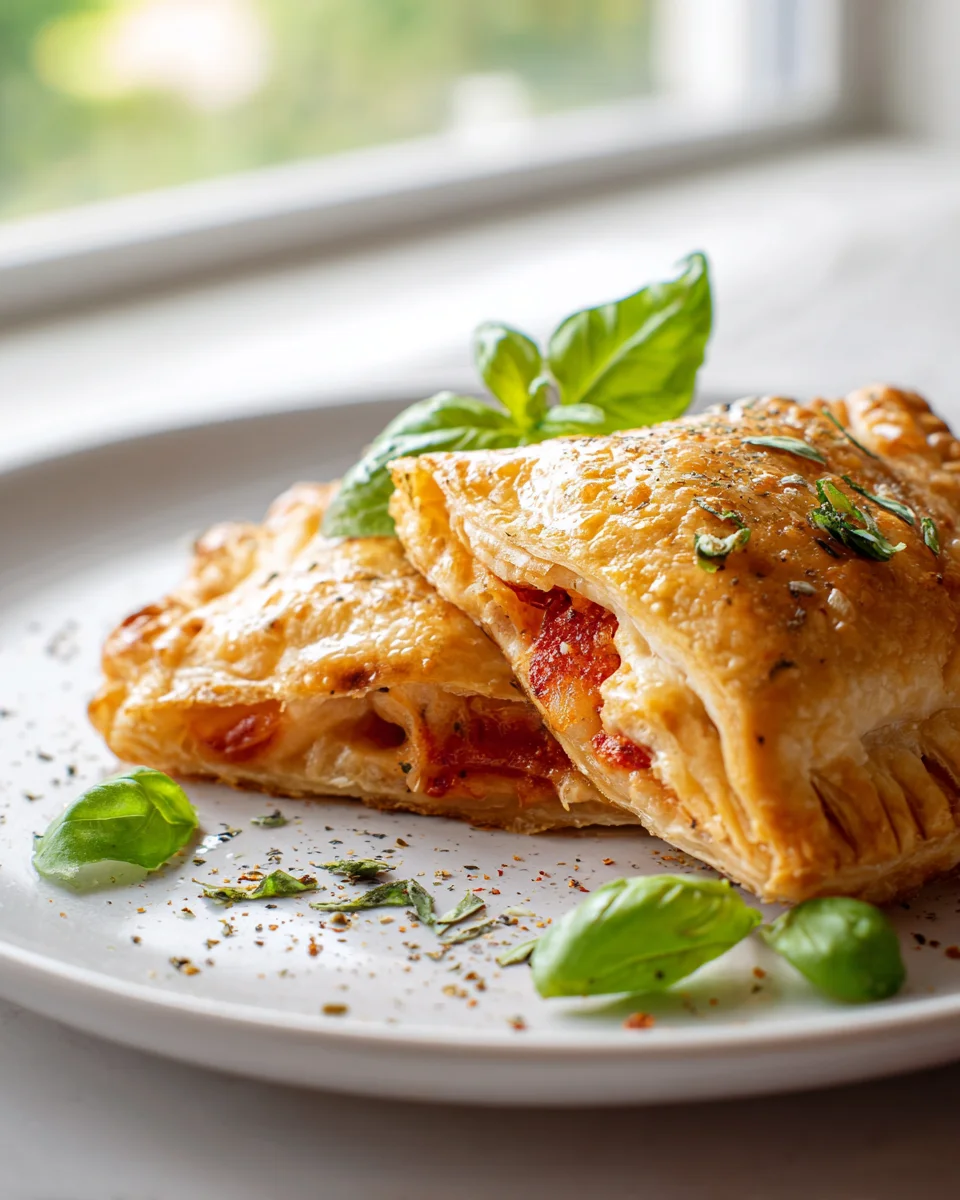
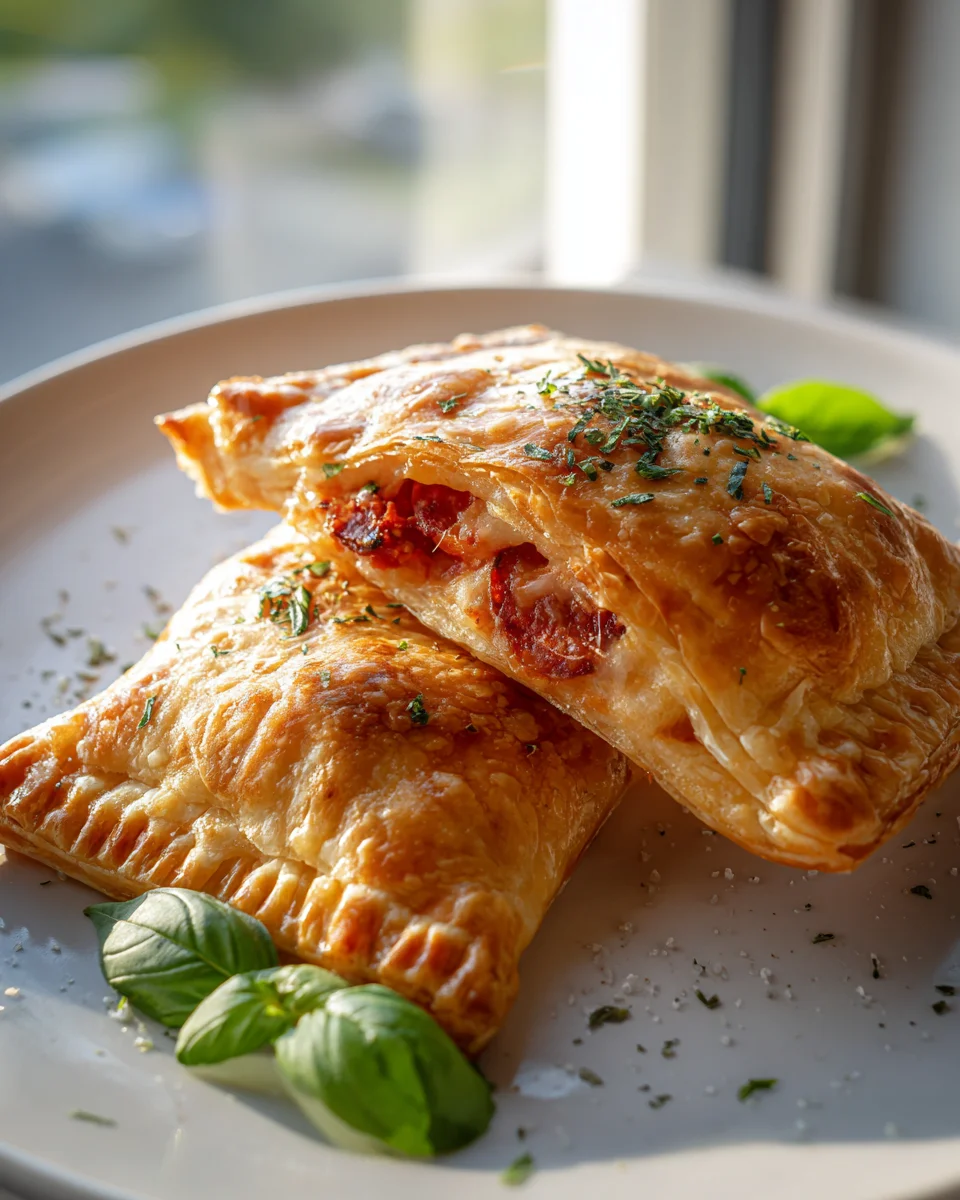
Puff Pastry Pizza Hot Pockets With Flaky Crust
Oh, if there’s one thing I adore, it’s taking a beloved classic and giving it a delightful twist that makes it even better. And let me tell you, these Puff Pastry Pizza Hot Pockets With Flaky Crust are exactly that! Forget everything you thought you knew about a simple pizza pocket, because we’re about to elevate your snack game to an entirely new level of deliciousness.
What makes this recipe truly special, you ask? It’s all in that incredible crust! We’re ditching the usual, sometimes-chewy dough for glorious, buttery puff pastry. Imagine biting into a golden, impossibly flaky exterior that shatters gently, revealing a warm, gooey, classic pizza filling bursting with your favorite sauce, melty cheese, and any toppings you desire. That delicate crispness of the pastry combined with the savory heart of pizza is an absolute game-changer. It’s light, airy, and oh-so-satisfying – a stark contrast to heavier, denser crusts.
You are going to absolutely fall in love with these handheld wonders! They’re perfect for so many occasions: a lightning-fast weeknight dinner when paired with a fresh salad, an irresistible after-school snack, the star of your next casual get-together, or even a super fun lunch that beats any delivery. They’re mess-free, infinitely customizable, and incredibly comforting. Plus, using ready-made puff pastry means you get all the gourmet appeal without any of the fuss of making dough from scratch, making them surprisingly easy to whip up.
In essence, we’re taking all the comfort and joy of a cheesy, saucy pizza and tucking it into a perfectly portioned, golden-brown package with a luxurious, flaky crust. Get ready to experience your pizza cravings satisfied in the most elegant and delicious way possible. You might just find yourself making these on repeat!
Welcome to the ultimate guide for creating irresistibly flaky and flavorful Puff Pastry Pizza Hot Pockets! These aren’t just any hot pockets; they’re elevated with the magic of puff pastry, giving you that coveted crisp, airy, and buttery crust with every bite. Perfect for a quick lunch, an easy dinner, or a crowd-pleasing snack, these pizza pockets are fully customizable and surprisingly simple to make. Let’s dive into perfecting these golden-brown pockets of joy!
Ingredient Notes
Crafting the perfect Puff Pastry Pizza Hot Pockets starts with understanding the role of each ingredient. The beauty of this recipe lies in its versatility, allowing you to tailor the fillings to your personal preferences, but some core components are essential for that signature flaky crust and delicious pizza flavor.
- Puff Pastry: This is the star of our show, providing that incredibly flaky, buttery crust. I always opt for all-butter puff pastry if I can find it, as it truly makes a difference in flavor and texture. Most readily available puff pastry comes in pre-rolled sheets, usually found in the frozen section of your grocery store. You’ll need to thaw it properly before use – typically overnight in the refrigerator or for about 30-45 minutes at room temperature. Avoid rushing the thawing process, as it can make the pastry difficult to work with. If you only have a block of puff pastry, simply roll it out into a roughly 10×14-inch rectangle.
- Pizza Sauce: The foundation of any good pizza! You can use your favorite store-bought marinara or pizza sauce for convenience. Look for one with a good balance of sweetness and acidity. Alternatively, whipping up a quick homemade sauce is always an option if you have a bit more time. I recommend a thicker sauce rather than a watery one to prevent the pastry from becoming soggy.
- Mozzarella Cheese: Low-moisture, part-skim mozzarella is my go-to. It melts beautifully without releasing too much water, which again helps prevent a soggy bottom. Shredding your own from a block is often preferred over pre-shredded varieties, as the latter sometimes contain anti-caking agents that can affect the melt and texture. Feel free to mix in other cheeses like provolone for extra tang or a sprinkle of Parmesan for a salty kick.
- Fillings (Cooked & Cooled!): This is where you can get creative! The absolute most critical tip for fillings is that they must be cooked and completely cooled before adding them to the pastry. Hot or even warm fillings will steam the pastry, making it soggy and preventing that desirable flaky rise.
- Meats: Cooked ground beef, mini pepperoni, crumbled cooked beef sausage, or diced cooked chicken are all fantastic choices. Remember, ensure they are fully cooked and excess grease drained.
- Vegetables: Diced bell peppers, onions, mushrooms, and olives work wonderfully. For veggies that release a lot of water (like mushrooms or onions), I always recommend sautéing them beforehand to remove moisture. Let them cool completely.
- Egg Wash: A simple mixture of one egg beaten with a tablespoon of water or milk. Brushing this over the pastry before baking gives your hot pockets that gorgeous, golden-brown, glossy finish and helps achieve a richer color.
- Optional Flavor Boosters: A pinch of dried oregano, basil, or Italian seasoning mixed into the sauce or sprinkled over the fillings can really enhance the pizza flavor. A touch of garlic powder or red pepper flakes is also great if you like a little kick.
Step-by-Step Instructions
Making these Puff Pastry Pizza Hot Pockets is a fun and straightforward process. Follow these steps for perfect results every time!
- Prepare Your Fillings: This is a crucial first step! If you’re using ground beef or beef sausage, cook it thoroughly in a skillet, breaking it up as it browns. Drain off any excess grease and set aside to cool completely. If adding vegetables like mushrooms or onions, sauté them until softened and any excess moisture has evaporated, then also set them aside to cool fully. All fillings must be at room temperature or even slightly chilled before they meet the puff pastry.
- Thaw the Puff Pastry: Take your puff pastry sheets out of the freezer. If thawing in the refrigerator, give it several hours or overnight. For a quicker thaw at room temperature, it usually takes about 30-45 minutes. You want it pliable but still cool. Unwrap the pastry carefully on a lightly floured surface or a piece of parchment paper.
- Preheat Oven & Prep Baking Sheet: Preheat your oven to 400°F (200°C). Line a large baking sheet with parchment paper or a silicone baking mat. This prevents sticking and makes cleanup a breeze.
- Roll and Cut the Pastry: Gently unfold your puff pastry sheet. If it’s very thick, you can lightly roll it out with a rolling pin to an even thickness, roughly 10×12 inches, but don’t overwork it. Using a sharp knife or pizza cutter, cut each pastry sheet into four equal rectangles (you’ll get 8 rectangles if using two sheets). I aim for roughly 5×6-inch rectangles.
- Assemble the Hot Pockets:
- Place a small dollop (about 1-2 tablespoons) of pizza sauce onto one half of each pastry rectangle, leaving a border around the edges. Don’t overdo the sauce, or it can make the pastry soggy.
- Next, sprinkle a generous amount of shredded mozzarella cheese over the sauce.
- Add your cooled fillings – a tablespoon or two of cooked ground beef, pepperoni, sautéed veggies, or a combination. Again, don’t overfill! Too much filling makes it hard to seal and can lead to leakage.
- Fold and Seal: Carefully fold the unfilled half of the pastry over the filling, creating a pocket. Line up the edges and gently press down around the perimeter to seal. Use a fork to crimp the edges firmly, creating a decorative and secure seal. This step is important to keep the filling inside during baking.
- Vent and Egg Wash: With a small knife, cut two or three small slits on the top of each hot pocket. These vents allow steam to escape, preventing the pastry from bursting and ensuring an even, flaky rise. In a small bowl, whisk one egg with a tablespoon of water or milk to create an egg wash. Lightly brush the tops of each hot pocket with the egg wash. This gives them that beautiful golden sheen.
- Bake to Golden Perfection: Carefully transfer the assembled hot pockets to your prepared baking sheet. Bake for 18-22 minutes, or until the pastry is puffed, deeply golden brown, and looks wonderfully flaky. Baking times can vary depending on your oven, so keep an eye on them.
- Cool and Serve: Once baked, remove the hot pockets from the oven. Let them cool on the baking sheet for 5-10 minutes before serving. The filling will be very hot, and this cooling time allows everything to set, preventing burns and making them easier to handle. Serve warm, perhaps with extra marinara sauce for dipping!
Tips & Suggestions
To ensure your Puff Pastry Pizza Hot Pockets are absolute perfection, here are a few insider tips and suggestions:
- Preventing a Soggy Bottom: This is arguably the most important tip!
- Cool Fillings: As mentioned, ensure all your fillings are completely cold before assembling.
- Drain Excess Moisture: If using meat, drain all grease. If using watery vegetables like mushrooms or spinach, sauté them first to cook out their moisture, then cool completely.
- Thick Sauce: Use a thicker pizza sauce, or if your sauce seems thin, gently simmer it for a few minutes to reduce it slightly.
- Don’t Overfill: Less is often more. Overfilling not only makes sealing difficult but can also create too much internal moisture.
- Achieving the Best Seal: A good seal is key to keeping your delicious filling locked inside. After folding the pastry and pressing the edges, really commit to the fork crimp. Press down firmly enough to meld the two pastry layers together without tearing. You can also lightly moisten the edges with a tiny bit of water before folding for extra adhesion.
- Uniformity for Even Baking: Try to make your hot pockets roughly the same size and thickness. This ensures they all bake evenly and are ready at the same time. Don’t overcrowd the baking sheet, as this can lead to steaming rather than baking, resulting in a less crispy crust. Give each hot pocket a little breathing room.
- Flavor Variations are Endless: While we’re making pizza hot pockets, the concept is incredibly adaptable!
- Cheese Blends: Experiment with Monterey Jack, cheddar, or a blend of Italian cheeses for different flavor profiles.
- Protein Power: Beyond ground beef and pepperoni, consider cooked shredded chicken with BBQ sauce, or even a vegetarian option with roasted vegetables and feta.
- Veggie Delight: Load them up with finely diced and pre-cooked broccoli, corn, or sun-dried tomatoes.
- Serve with Dipping Sauces: While delicious on their own, serving these hot pockets with a side of extra warm marinara sauce, ranch dressing, or even a spicy arrabiata sauce can take them to the next level.
- Don’t Rush the Cooling: It’s tempting to bite into them immediately, but giving them 5-10 minutes to cool allows the molten cheese and fillings to set, preventing messy spills and burnt tongues. The pastry also crisps up a bit more as it cools.
Storage
One of the best things about these Puff Pastry Pizza Hot Pockets is how well they store, making them perfect for meal prep or having delicious snacks ready to go.
- Refrigeration (Cooked):
- Allow the cooked hot pockets to cool completely to room temperature.
- Store them in an airtight container in the refrigerator for up to 3-4 days.
- For best results when reheating, use an oven or air fryer to help crisp up the pastry again. Microwave reheating is convenient but will likely result in a softer crust.
- Freezing (Cooked):
- Once fully baked and completely cooled, arrange the hot pockets in a single layer on a baking sheet and flash freeze them for about an hour until solid. This prevents them from sticking together.
- Transfer the frozen hot pockets to a freezer-safe bag or airtight container. They can be stored in the freezer for up to 2-3 months.
- To reheat from frozen, place them on a baking sheet and bake in a preheated oven at 350°F (175°C) for 15-20 minutes, or until heated through and the pastry is crisp. An air fryer also works wonderfully for reheating from frozen.
- Freezing (Unbaked):
- You can also freeze these hot pockets unbaked! After assembling, crimping, and egg washing (but before cutting the vent slits), place them on a parchment-lined baking sheet and flash freeze until solid.
- Once solid, transfer them to a freezer-safe bag or container. They can be stored for up to 1 month.
- When you’re ready to bake, transfer the frozen hot pockets to a prepared baking sheet, make the vent slits, and bake directly from frozen in a preheated 400°F (200°C) oven. You’ll need to add an extra 5-10 minutes to the baking time compared to fresh, so expect around 25-30 minutes, or until deeply golden brown and puffed. This is a fantastic make-ahead option for busy days!
Final Thoughts
And there you have it! I truly hope you’re as excited as I am about trying out these incredible Puff Pastry Pizza Hot Pockets With Flaky Crust. What I love most about this recipe is the way it perfectly marries the satisfying flavors of a classic pizza with the irresistible, buttery layers of a truly flaky puff pastry. It’s not just a snack; it’s a delightful experience.
Imagine biting into that golden, airy crust, giving way to a warm, savory filling – bursting with gooey cheese and your favorite pizza toppings. Whether you’re looking for a fun new lunch idea, an impressive appetizer for a gathering, or just a comforting treat to enjoy, these Puff Pastry Pizza Hot Pockets With Flaky Crust are an absolute game-changer. They’re simple to assemble, look fantastic, and taste even better. Trust me, once you make them, they’ll quickly become a cherished favorite in your kitchen. Happy cooking!


Leave a Comment