
Giant Cinnamon Buns Baked In One Pan (bakery Style Rise)
Oh, prepare yourselves, because I am absolutely bursting to share this recipe with you! When I set out to create the ultimate breakfast indulgence that feels fancy but isn’t a huge fuss, I landed on something truly magical: Giant Cinnamon Buns Baked In One Pan (bakery Style Rise).
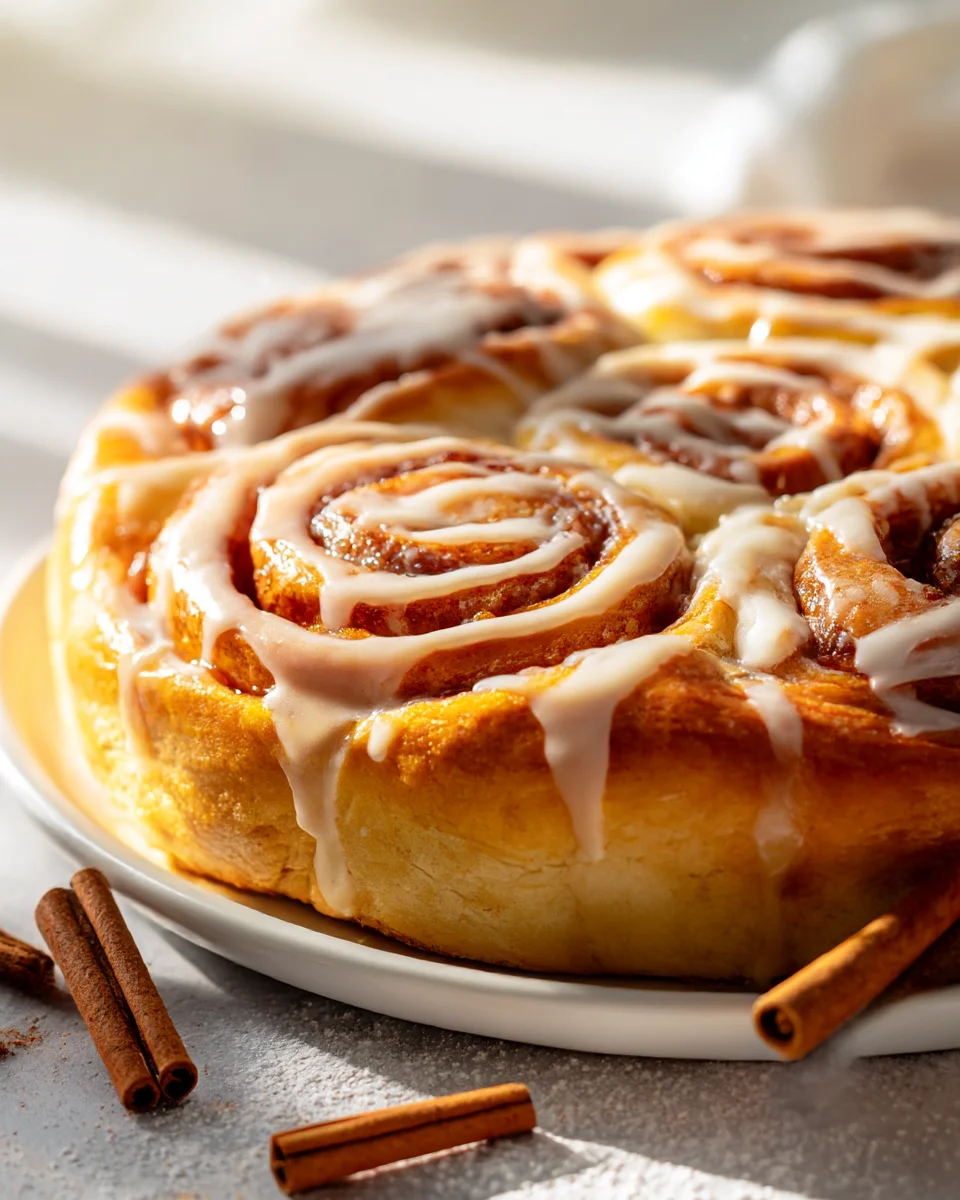
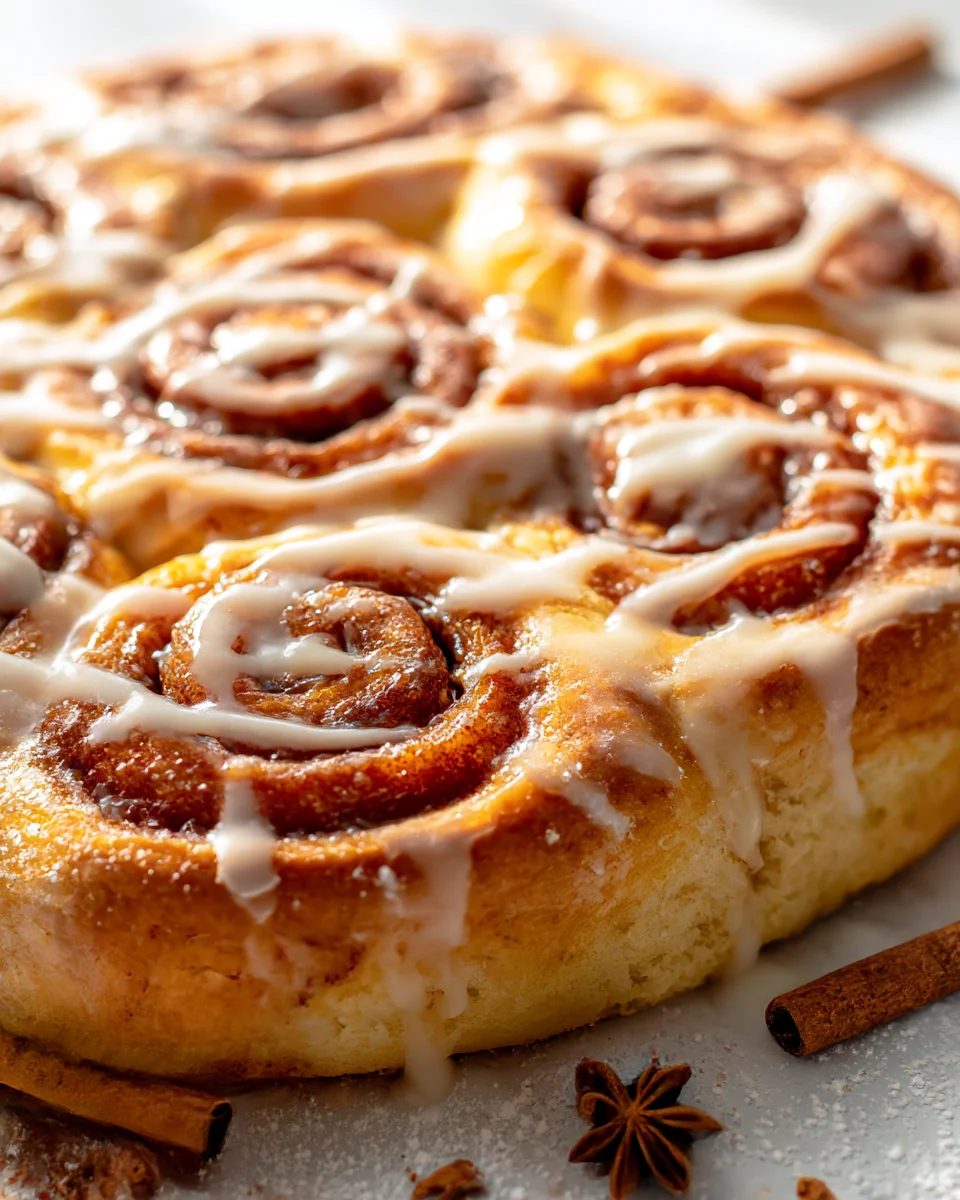
You know that glorious moment when you walk into a bakery and the aroma of freshly baked cinnamon rolls just envelops you? That’s precisely the experience I wanted to capture, but with the added bonus of baking them right in your own kitchen, all in one glorious pan! What makes these giants truly special is that incredible “bakery style rise.” We’re talking about soft, pillowy dough that practically melts in your mouth, spiraling around a generous, sticky-sweet cinnamon filling. And the best part? Baking them all together in one pan means less cleanup for you, plus it creates those irresistibly gooey edges that everyone fights over.
I promise you, these aren’t just any cinnamon buns; they are an event! Imagine pulling a single pan from the oven, brimming with these golden-brown beauties, each one plump and perfectly risen, waiting to be slathered with a decadent glaze. Whether you’re aiming to impress guests at brunch, treat your family to a weekend delight, or simply indulge in a moment of pure culinary bliss, this recipe delivers big on flavor, presentation, and sheer comfort. Get ready to bake a batch of pure happiness – I truly think you’re going to fall head over heels for these!
Ingredient Notes
Crafting these giant, bakery-style cinnamon buns truly starts with understanding the role each ingredient plays. I’ve found that using quality ingredients makes all the difference in achieving that perfect rise, tender crumb, and irresistible flavor.
- Strong Bread Flour: This is my secret weapon for that impressive “bakery style rise” and chewiness. Bread flour has a higher protein content than all-purpose flour, which means it develops more gluten. This gluten network traps gases from the yeast, giving your buns incredible structure and a light, airy texture despite their size. While all-purpose flour can work in a pinch, you might not get quite the same lofty rise or chewiness.
- Active Dry or Instant Yeast: Fresh yeast is paramount! Always check the expiration date. Active dry yeast needs to be proofed first in warm milk to ensure it’s alive and kicking, while instant yeast can often be mixed directly with the dry ingredients. If your yeast doesn’t foam or bubble after 5-10 minutes of proofing, it’s likely dead, and you’ll need a new batch.
- Whole Milk: For ultimate richness and a tender dough, whole milk is my go-to. The fat content contributes to a softer bun. It also helps activate the yeast effectively, so ensure it’s warmed to the correct temperature (105-115°F / 40-46°C). You could use a non-dairy alternative like almond or soy milk, but the final texture might be slightly less rich.
- Unsalted Butter: Used generously in the dough, filling, and frosting, butter adds incredible flavor and tenderness. Using unsalted butter allows me to control the salt content precisely. Make sure your butter for the dough and frosting is softened to room temperature for easier mixing. For the filling, it needs to be very soft, almost spreadable.
- Granulated Sugar & Brown Sugar: Granulated sugar in the dough feeds the yeast and adds sweetness. For the filling, light or dark brown sugar is essential. Its molasses content adds moisture, depth of flavor, and that characteristic gooey stickiness that makes these buns so irresistible.
- Large Eggs: Room temperature eggs are crucial for emulsifying into the dough evenly, contributing to richness, color, and structure. They also help keep the buns moist.
- Fine Sea Salt: Don’t skip the salt! It balances the sweetness, enhances all the other flavors, and, critically, strengthens the gluten structure in the dough, which supports that amazing rise.
- High-Quality Cinnamon: The star of the show! Invest in good quality ground cinnamon. The aroma and flavor truly shine here.
- Vanilla Extract: A touch of vanilla in both the dough and the cream cheese frosting really elevates the overall flavor profile.
- Full-Fat Cream Cheese: For that tangy, luxurious cream cheese frosting, full-fat cream cheese is a must. Ensure it’s softened to room temperature so it beats smoothly without lumps.
Step-by-Step Instructions
Get ready to bake some seriously impressive, giant cinnamon buns! This process is all about patience and a little technique to ensure that bakery-style rise and incredible flavor.
- Activate the Yeast: In a large mixing bowl (or the bowl of your stand mixer), combine the warm whole milk (105-115°F / 40-46°C) with 1 tablespoon of granulated sugar and the active dry yeast. If using instant yeast, you can skip the proofing step and add it directly with the dry ingredients later. Let it sit for 5-10 minutes until foamy. This confirms your yeast is alive.
- Prepare the Dough: To the foamy yeast mixture, add the remaining granulated sugar, softened unsalted butter, large eggs, vanilla extract, and sea salt. Mix well. Gradually add the bread flour, mixing on low speed with a dough hook (or by hand with a sturdy spoon) until a shaggy dough forms. Increase speed to medium-low and knead for 8-10 minutes, or until the dough is smooth, elastic, and pulls away cleanly from the sides of the bowl. If kneading by hand, this will take about 12-15 minutes on a lightly floured surface.
- First Rise (Bulk Fermentation): Lightly grease a large bowl with a little oil. Transfer the dough to the bowl, turning once to coat. Cover the bowl tightly with plastic wrap or a damp kitchen towel. Let it rise in a warm, draft-free place for 1 to 1.5 hours, or until it has doubled in size. This slow rise is crucial for developing flavor and tenderness.
- Prepare the Filling: While the dough is rising, in a medium bowl, combine the very soft unsalted butter, light brown sugar, and ground cinnamon. Mix thoroughly until it forms a thick, spreadable paste. Set aside.
- Roll Out the Dough: Once the dough has doubled, gently punch it down to release the air. Transfer it to a lightly floured surface. Using a rolling pin, roll the dough into a large rectangle, approximately 24 inches long by 18 inches wide, and about 1/4 inch thick. This generous size is key for truly giant buns!
- Spread the Filling: Evenly spread the cinnamon-sugar filling over the entire surface of the rolled-out dough, leaving a small 1/2-inch border along one of the long edges (this helps seal the roll).
- Roll the Buns: Starting from the long edge opposite the bare border, carefully and tightly roll the dough into a log. Aim for a snug roll to prevent gaps. Once rolled, pinch the seam closed along the bare edge to seal the log.
- Cut the Giant Buns: Using a sharp, non-serrated knife or, even better, a piece of unflavored dental floss, cut the log into 8-10 giant, thick slices, each about 2 to 2.5 inches wide. For dental floss, slide it under the log, cross the ends over the top, and pull to slice cleanly.
- Second Rise (Proofing): Lightly grease a 9×13-inch baking pan. Arrange the cut cinnamon buns in the prepared pan, leaving a little space between each as they will expand significantly. Cover the pan loosely with plastic wrap or a damp towel. Let them rise again in a warm, draft-free place for 45-60 minutes, or until they have nearly doubled in size and are puffy. This second rise is vital for that fluffy, bakery-style texture. For an overnight option, refrigerate the covered pan after arranging the buns; pull them out 1-2 hours before baking to warm up and finish proofing.
- Bake the Buns: Preheat your oven to 375°F (190°C). Once the buns are nicely puffed, remove the plastic wrap and place the pan in the preheated oven. Bake for 25-30 minutes, or until the tops are golden brown and the centers are cooked through. If they start to brown too quickly, you can loosely tent them with foil.
- Prepare the Cream Cheese Frosting: While the buns are baking, beat the softened full-fat cream cheese and softened unsalted butter together in a medium bowl until smooth and creamy. Gradually add the powdered sugar, mixing on low speed until combined, then increase to medium and beat until light and fluffy. Stir in the vanilla extract.
- Frost and Serve: As soon as the buns come out of the oven, generously spread the cream cheese frosting over the warm buns. The warmth will slightly melt the frosting, allowing it to seep into all those delicious nooks and crannies. Serve immediately and enjoy your giant, bakery-style creation!
Tips & Suggestions
Achieving truly bakery-style giant cinnamon buns in one pan is incredibly satisfying. Here are my top tips to ensure your success:
- Don’t Skimp on Kneading: For that perfect “bakery style rise,” proper gluten development is essential. If using a stand mixer, let it run the full 8-10 minutes. If kneading by hand, don’t stop until the dough is smooth, elastic, and springs back when poked. This makes for a soft, chewy bun.
- Warmth is Your Friend for Rising: Yeast loves warmth. A great trick is to preheat your oven to its lowest setting for just 1-2 minutes, then turn it off and place your dough bowl (covered!) inside. The residual warmth creates an ideal environment for rising. Just be sure it’s not too hot!
- The “Giant” Factor: To get truly giant buns, make sure you roll your dough into a generous 24×18-inch rectangle. When cutting, aim for slices that are 2 to 2.5 inches thick. This allows them to puff up beautifully in the pan.
- The One-Pan Secret: Baking these buns snuggled together in one pan is what gives them their irresistible soft, gooey sides. As they rise and bake, they press against each other, creating that classic bakery texture. Don’t worry if they touch; that’s the goal!
- Avoid Overbaking: This is crucial for moist, tender buns. Overbaking can lead to dry cinnamon buns. Keep an eye on them; once the tops are golden brown and they’re cooked through (internal temperature around 200°F / 93°C if you have a thermometer), pull them out. A slightly gooey center is heavenly!
- Overnight Proofing for Convenience & Flavor: For freshly baked buns in the morning with minimal fuss, prepare the buns through step 9 (arranging them in the pan). Cover tightly with plastic wrap and refrigerate overnight (8-12 hours). In the morning, pull them out of the fridge and let them sit at room temperature for 1-2 hours to warm up and finish their final proof before baking. This also develops a deeper, richer flavor.
- Dental Floss for Perfect Cuts: For clean, even cuts on your giant cinnamon bun log, use unflavored dental floss! Slide a long piece under the log, cross the ends over the top at your desired cut point, and pull. It’s much cleaner than a knife for gooey dough.
- Don’t Be Shy with the Frosting: These giant buns deserve a generous slathering of that creamy, tangy frosting. Apply it while the buns are still warm so it melts slightly and coats every nook and cranny.
- Flavor Variations: Feel free to get creative! Add a teaspoon of orange or lemon zest to the dough or filling for a citrusy twist. Chopped pecans or walnuts can be added to the filling for a nutty crunch.
Storage
You’ve put in the effort to create these magnificent giant cinnamon buns, so proper storage is key to keeping them fresh and delicious for as long as possible. Although, let’s be honest, they rarely last long!
- Room Temperature: If your buns are unfrosted, they can be stored in an airtight container at room temperature for up to 2 days. Once frosted, I generally prefer to store them in an airtight container at room temperature for no more than 1 day due to the cream cheese frosting, especially if your kitchen is warm. For best quality, consume them on the day they are baked.
- Refrigeration: For frosted buns, storing them in an airtight container in the refrigerator will extend their shelf life to 3-5 days. The cold temperature can firm up the buns and make them a little less tender, but reheating them gently usually brings back some of their softness.
- Reheating: To reheat refrigerated or room-temperature buns, place them in the microwave for 15-30 seconds, or until just warm and soft. Alternatively, you can warm them in an oven preheated to 300°F (150°C) for 5-10 minutes, covered loosely with foil to prevent drying out.
- Freezing Baked Buns (Unfrosted): If you want to bake a batch but save some for later, let the buns cool completely after baking, but before frosting. Wrap each bun individually in plastic wrap, then place them in a freezer-safe bag or container. They will keep well for up to 1 month. Thaw at room temperature, then warm in the oven or microwave and frost just before serving.
- Freezing Baked Buns (Frosted): You can also freeze frosted buns! Place them on a baking sheet and freeze until the frosting is solid (about 1-2 hours). Then, wrap each bun individually in plastic wrap and place in a freezer-safe bag or container. Thaw overnight in the refrigerator, then warm gently in the microwave or a low oven.
- Freezing Unbaked Buns: For a true “bake-from-frozen” experience, after the second rise (step 9), place the entire pan of unbaked buns directly into the freezer. Once solid, you can either keep them in the pan or transfer the frozen buns to a freezer-safe bag. To bake, transfer the frozen buns back to a greased baking pan (if you removed them) and thaw overnight in the refrigerator. In the morning, let them sit at room temperature for about 30-60 minutes before baking as directed. This ensures they proof fully before hitting the oven.
Final Thoughts
And there you have it! I truly hope you’re as excited as I am about trying out this incredible recipe. I promise, once you experience the magic of baking these Giant Cinnamon Buns Baked In One Pan (bakery Style Rise), your breakfast and brunch game will be forever changed.
What makes this recipe a must-try, you ask? It’s the sheer genius of baking them all together in one pan, which not only simplifies the process but also ensures every single bun is incredibly gooey, tender, and infused with that irresistible cinnamon swirl. The ‘bakery style rise’ isn’t just a promise; it’s a magnificent reality, delivering rolls that are impressive in both size and fluffiness.
Imagine pulling apart those enormous, soft spirals, each one generously coated in a decadent frosting. These Giant Cinnamon Buns Baked In One Pan (bakery Style Rise) are more than just a sweet treat; they’re an experience, perfect for sharing (or not!) and guaranteed to bring smiles all around. Go ahead, give them a try – I know you’ll love them!
Leave a Comment