
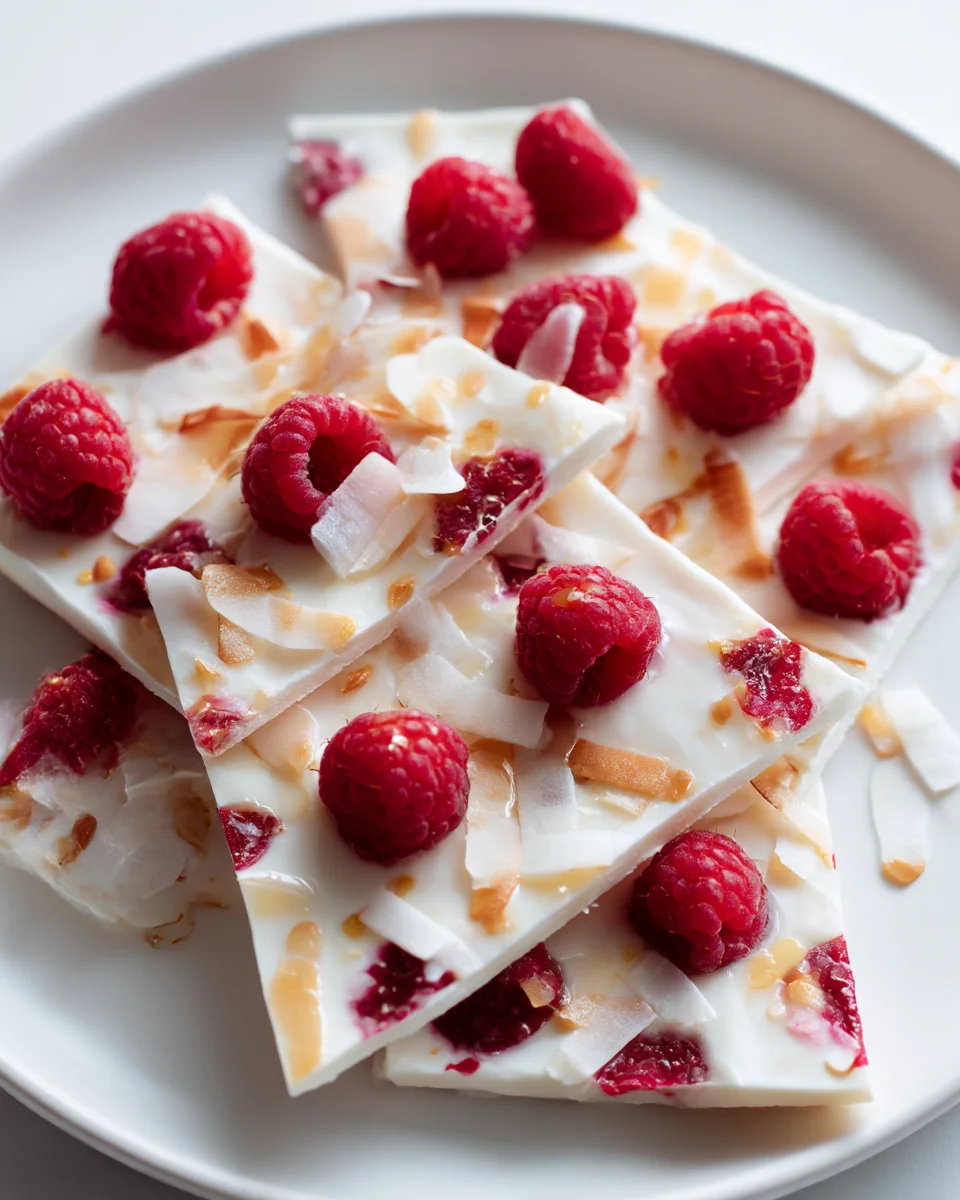
Frozen Raspberry Yogurt Bark
Oh my goodness, do I have a treat for you today! I’m so excited to share my recipe for Frozen Raspberry Yogurt Bark. This isn’t just any dessert; it’s a total game-changer, especially as the days get warmer. What makes this bark so special, you ask? Well, it’s the ultimate blend of creamy, tangy, and incredibly refreshing – a healthy indulgence that feels utterly luxurious. It offers that satisfying chill without any of the guilt, making it my go-to for a quick pick-me-up.
I know you’ll absolutely adore this recipe because it’s incredibly easy to whip up, requires just a few simple ingredients, and delivers a burst of vibrant, natural flavor in every bite. It’s perfect for a quick, guilt-free snack, a light dessert after dinner, or even a fun, healthy breakfast treat. Imagine smooth, cool yogurt swirled with the bright, tart sweetness of raspberries, all solidified into a delightful, snappable mosaic. It’s like having a little piece of summer in your freezer, ready whenever you need it. Trust me, once you try this effortlessly delicious frozen goodness, you’ll wonder how you ever lived without it!
Ingredient Notes
Creating delicious Frozen Raspberry Yogurt Bark starts with choosing the right ingredients. Each component plays a crucial role in the final texture and flavor, so let’s dive into what makes this treat so special.
The Yogurt Base
- Greek Yogurt: This is my go-to for yogurt bark, and for good reason! Its thick, creamy consistency is absolutely essential for achieving that perfect, firm, yet slightly smooth bark texture. Regular yogurt has too much water, which can make your bark icy and brittle. Full-fat Greek yogurt will give you the most decadent, rich result, but 2% will also work beautifully. I find that the higher fat content helps prevent excessive iciness.
- Substitutions for Yogurt: If you’re dairy-free or prefer an alternative, a thick, plain coconut yogurt or almond yogurt can work wonderfully. Just ensure it’s a variety specifically formulated to be thick and creamy, not a thin, drinkable kind. Always opt for plain or unsweetened varieties so you can control the sweetness yourself.
The Star: Raspberries
- Fresh Raspberries: Vibrant and tart, fresh raspberries are fantastic for this bark. Their bright color pops against the white yogurt, and when they freeze, they offer a delightful burst of flavor. Gently press them into the yogurt so they adhere well.
- Frozen Raspberries: Don’t have fresh? Frozen raspberries are a perfectly acceptable, and often more economical, alternative. You can place them directly on the yogurt—they might release a little juice as they thaw slightly before freezing, which creates a lovely marbled effect, adding to the visual appeal.
- Other Berry Options: While this recipe is all about raspberries, feel free to experiment with other berries! Blueberries, sliced strawberries, or blackberries would also be delicious, either on their own or in combination with raspberries. Just remember to slice larger fruits like strawberries for easier eating once frozen.
Sweetener & Flavor Enhancers
- Maple Syrup or Honey: I love using a touch of pure maple syrup or honey to sweeten my yogurt bark. They both dissolve easily into the yogurt and provide a natural, nuanced sweetness. Adjust the amount to your personal preference—I usually start with a tablespoon or two for every cup of yogurt.
- Agave Nectar: This is another great vegan alternative for sweetness, offering a neutral flavor profile.
- Vanilla Extract: A splash of good quality vanilla extract really elevates the flavor of the yogurt. It adds a subtle warmth and depth that complements the tartness of the raspberries beautifully.
- Lemon Zest (Optional): For an extra bright, fresh flavor, a little finely grated lemon zest mixed into the yogurt or sprinkled over the top can be truly magical with the raspberries.
Optional Toppings for Crunch & Texture
- Granola: A sprinkle of your favorite granola adds a wonderful crunchy texture that contrasts beautifully with the smooth yogurt.
- Chopped Nuts: Almonds, pistachios, or walnuts add healthy fats and a satisfying crunch.
- Mini Chocolate Chips: Who can say no to a little chocolate? Dark or white mini chocolate chips are a delightful addition, especially with raspberries.
- Coconut Flakes: Toasted or untoasted coconut flakes can add a tropical twist.
With these ingredient insights, you’re well on your way to crafting a truly delicious and refreshing Frozen Raspberry Yogurt Bark!
Step-by-Step Instructions
Making Frozen Raspberry Yogurt Bark is incredibly simple, requiring minimal effort for maximum deliciousness. Follow these steps to create your perfect batch!
- Prepare Your Baking Sheet: First things first, get a large baking sheet ready. Line it with parchment paper. This is a critical step! The parchment paper ensures your yogurt bark won’t stick and will be super easy to lift off and break once it’s frozen solid. Don’t skip this, or you might end up with a sticky situation.
- Mix the Yogurt Base: In a medium bowl, combine your plain Greek yogurt with your chosen sweetener (maple syrup or honey) and a splash of vanilla extract. Stir everything together until it’s well combined and smooth. Taste it! This is your chance to adjust the sweetness to your liking. If you’re using lemon zest, stir it in now too.
- Spread the Yogurt: Pour the yogurt mixture onto your parchment-lined baking sheet. Using an offset spatula or the back of a spoon, gently spread the yogurt into an even layer, about ¼ to ½ inch thick. Try to get it as uniform as possible across the entire surface. This ensures even freezing and consistent texture when you break it apart.
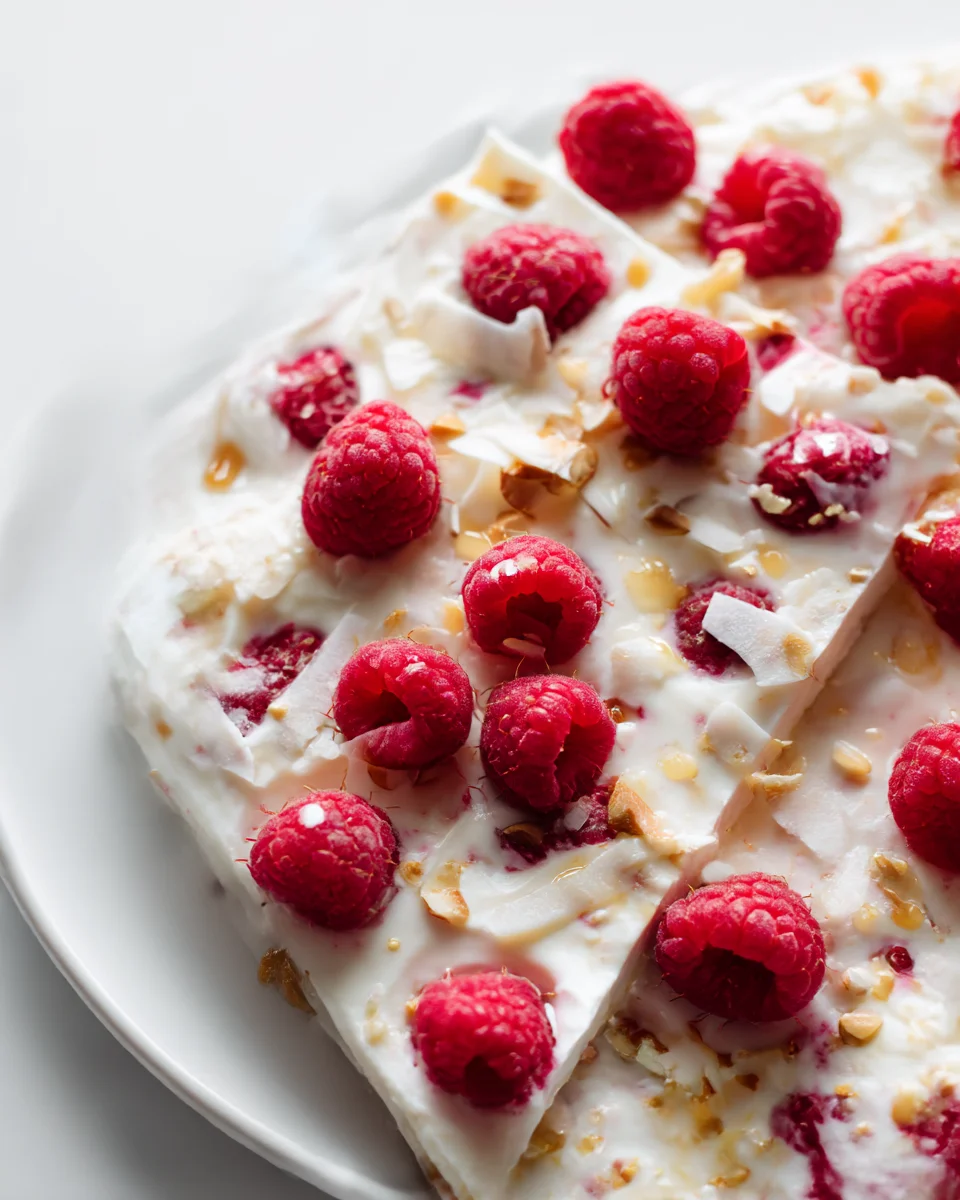
- Arrange the Raspberries: Now for the star of the show! Evenly scatter your fresh or frozen raspberries over the spread yogurt. If you like, you can gently press some of the raspberries into the yogurt slightly to ensure they adhere well. For a beautiful marbled effect, you could even take a knife or skewer and gently swirl some of the raspberries into the yogurt, creating lovely streaks of pink.
- Add Optional Toppings: If you’re using any additional toppings like granola, chocolate chips, or chopped nuts, sprinkle them generously over the raspberries and yogurt layer. This is where you can really customize your bark!
- Freeze Until Solid: Carefully transfer the baking sheet to your freezer. Make sure it’s placed on a flat surface so the yogurt doesn’t shift or spill. Allow it to freeze for at least 3-4 hours, or until it’s completely solid and firm to the touch. The freezing time will depend on the thickness of your bark and the temperature of your freezer. I usually leave mine overnight to be extra sure.
- Break and Serve: Once the yogurt bark is fully frozen, remove the baking sheet from the freezer. Lift the parchment paper with the frozen bark off the sheet. Now comes the fun part! Gently break the bark into irregular pieces. You can snap it by hand, or for cleaner breaks, you can use a large knife to cut it into your desired shapes and sizes.
And just like that, you have a beautiful, healthy, and refreshing Frozen Raspberry Yogurt Bark ready to enjoy!
Tips & Suggestions
Making Frozen Raspberry Yogurt Bark is straightforward, but a few tricks can elevate your creation from good to absolutely fantastic. Here are my top tips and suggestions to help you get the most out of this delightful treat!
Achieving the Perfect Texture
- The Thicker, The Better (for yogurt!): As I mentioned in the ingredient notes, the secret to a creamy, non-icy bark lies in using thick Greek yogurt. If your yogurt seems a little too thin, you can line a sieve with cheesecloth and let it drain in the fridge for an hour or two to remove excess whey. This will result in an even richer, firmer bark.
- Even Thickness is Key: When spreading the yogurt, strive for an even ¼ to ½ inch thickness across the entire baking sheet. If parts are too thin, they’ll be brittle and might break too easily or melt quickly. If parts are too thick, they’ll take longer to freeze and might be too hard to bite into.
Flavor Variations & Customization
- Berry Blends: Don’t limit yourself to just raspberries! A mix of raspberries and blueberries creates a beautiful color contrast and a blend of tart and sweet. You could also try sliced strawberries or blackberries.
- Tropical Twist: Add finely diced mango or pineapple chunks along with the raspberries. A sprinkle of toasted coconut flakes would complement this beautifully.
- Citrus Boost: Enhance the raspberry flavor with a tablespoon of fresh lime juice or a teaspoon of orange zest mixed into the yogurt.
- Spiced Delight: For a warmer flavor, a pinch of ground cinnamon or cardamom in the yogurt base can be surprisingly delicious, especially with berries.
- Nut Butter Swirl: For an added protein and flavor boost, gently dollop small amounts of almond or peanut butter over the yogurt before adding the raspberries, then swirl lightly with a knife.
- “Dessert” Bark: Drizzle with a thin layer of melted dark chocolate after it’s frozen (then refreeze briefly) for an extra special treat. Or, sprinkle with mini marshmallows alongside your raspberries.
Presentation & Serving
- Irregular Shapes are Charming: Part of the appeal of bark is its rustic, broken look. Don’t worry about perfect squares; embrace the natural breaks.
- Serve Immediately: Frozen yogurt bark melts relatively quickly, especially on a warm day. Serve it straight from the freezer. If you’re serving a crowd, consider bringing out smaller batches at a time.
- Kid-Friendly Fun: Let children help with scattering the raspberries and other toppings. They love being involved, and they’ll be more excited to eat a snack they helped create!
Troubleshooting
- Too Icy? This usually means your yogurt was too thin or had too much water content. Next time, try draining your yogurt or using a full-fat Greek variety.
- Melting Too Fast? Ensure your freezer is set to a sufficiently cold temperature. Work quickly when breaking and serving the bark.
With these tips, your Frozen Raspberry Yogurt Bark will be a hit every time, perfect for a healthy snack, a light dessert, or a refreshing breakfast on the go!
Storage
Once you’ve made a batch of delicious Frozen Raspberry Yogurt Bark, you’ll want to make sure you store it properly so you can enjoy it for as long as possible. Proper storage is key to maintaining its texture, flavor, and preventing freezer burn.
How to Store Your Frozen Raspberry Yogurt Bark
After breaking your frozen yogurt bark into pieces, follow these simple steps for optimal storage:
- Use an Airtight Container: This is the most crucial step. Transfer the broken pieces of yogurt bark into an airtight freezer-safe container. This type of container will protect the bark from absorbing any unwanted odors from your freezer and, more importantly, prevent freezer burn. Freezer burn occurs when food is exposed to air, leading to dehydration and ice crystal formation, which can ruin the texture and flavor of your bark.
- Layer with Parchment Paper (Optional but Recommended): If you’ve made a large batch and are layering pieces on top of each other, place a small piece of parchment paper between the layers. This prevents the pieces from sticking together, making it much easier to grab just one or two pieces when you’re ready for a snack without having to chip away at a solid block.
- Avoid Over-Packing: While you want to utilize space efficiently, don’t jam the pieces too tightly into the container. Leave a little room for air circulation, which can help maintain the frozen consistency.
Where to Store Your Frozen Raspberry Yogurt Bark
- Always in the Freezer: This might seem obvious, but it’s worth reiterating. Frozen Raspberry Yogurt Bark must be kept in the freezer at all times to maintain its solid, refreshing state. Do not store it in the refrigerator, as it will quickly thaw and become a messy puddle.
Shelf Life
- Generally 2-3 Weeks: When stored correctly in an airtight container, your Frozen Raspberry Yogurt Bark can last beautifully in the freezer for about 2 to 3 weeks. Beyond this, while it might still be safe to eat, you might notice a slight degradation in quality, particularly if any freezer burn has begun to set in. The raspberries might also start to lose some of their vibrant freshness over a prolonged period.
Handling and Serving from Storage
- Grab and Go: The beauty of yogurt bark is its convenience. Simply take a piece or two directly from the freezer when you’re ready to enjoy it. There’s no need to thaw it, as it’s meant to be eaten frozen.
- Work Quickly: Remember that yogurt bark melts relatively fast, especially on warmer days or if handled for too long. If you’re serving it to guests, take it out just before you plan to serve.
By following these simple storage guidelines, you can ensure that every piece of your Frozen Raspberry Yogurt Bark remains a delightful and refreshing treat, ready whenever a craving strikes!
Final Thoughts
There you have it! My hope is that you’re now ready to dive into making this absolutely delightful Frozen Raspberry Yogurt Bark. I truly believe this recipe is a must-try for so many wonderful reasons. It’s incredibly simple to whip up, yet it delivers such a vibrant burst of flavor and a wonderfully refreshing coolness that’s simply irresistible.
Whether you’re looking for a guilt-free treat, a quick and easy snack for any time of day, or a light dessert to satisfy your sweet tooth, this Frozen Raspberry Yogurt Bark ticks all the boxes. It’s beautiful to look at, joyfully delicious, and surprisingly wholesome. Go ahead, give it a try – I promise you’ll be glad you did. Enjoy every delightful crunch and creamy bite!


Leave a Comment