
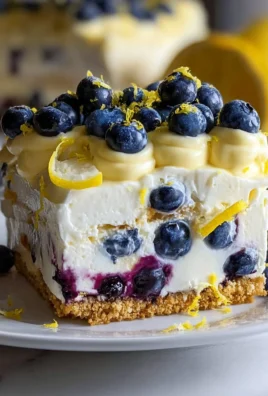
No Bake Pineapple Heaven Cheesecake Dessert
Oh my goodness, get ready to discover your new favorite dessert! I’m absolutely thrilled to share with you the recipe for No Bake Pineapple Heaven Cheesecake Dessert. What makes this treat truly special, you ask? Well, for starters, it’s right there in the name: “No Bake!” That means you can create a show-stopping, creamy, dreamy cheesecake without ever having to turn on your oven. Perfect for those scorching summer days, busy holidays, or anytime you crave something utterly delightful without the fuss of traditional baking.
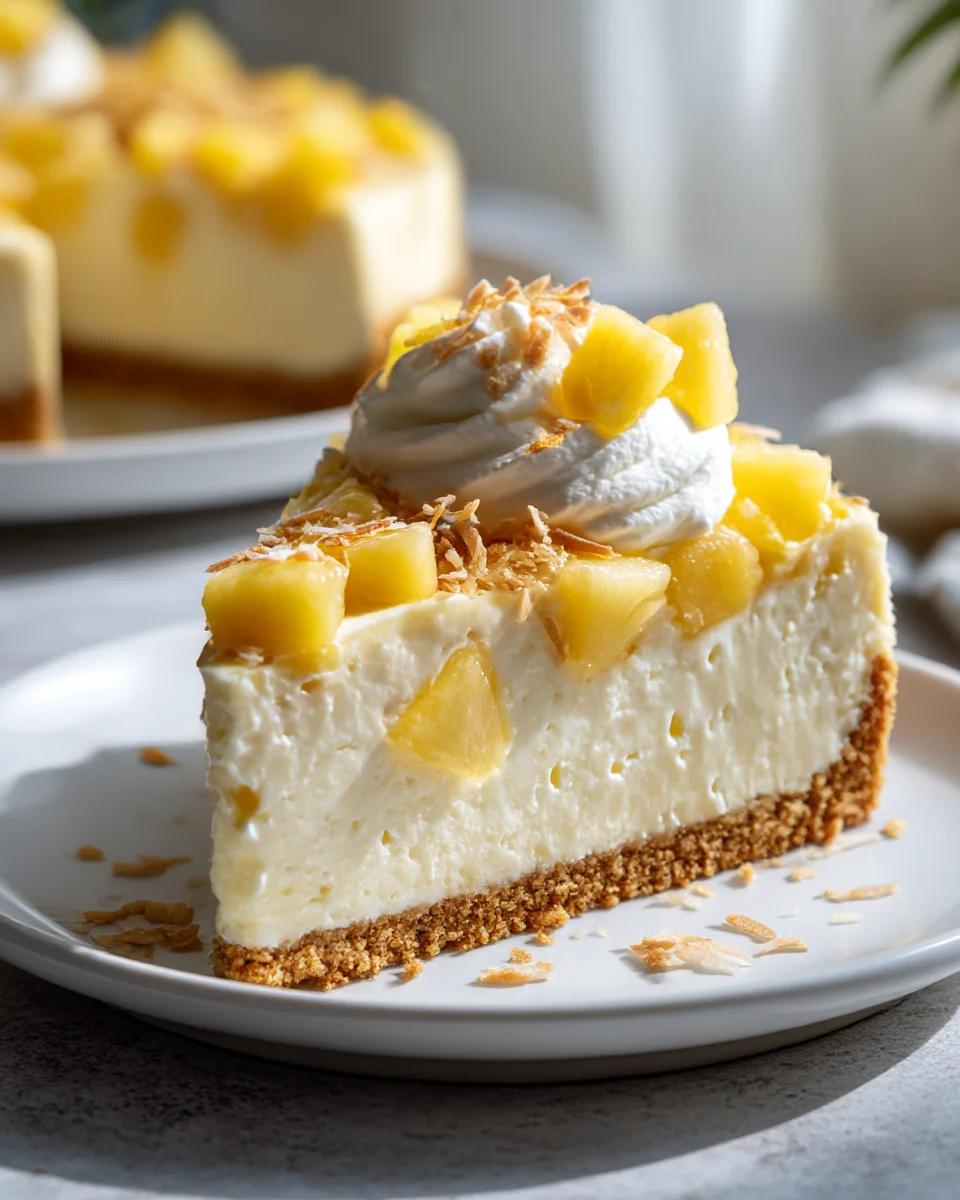
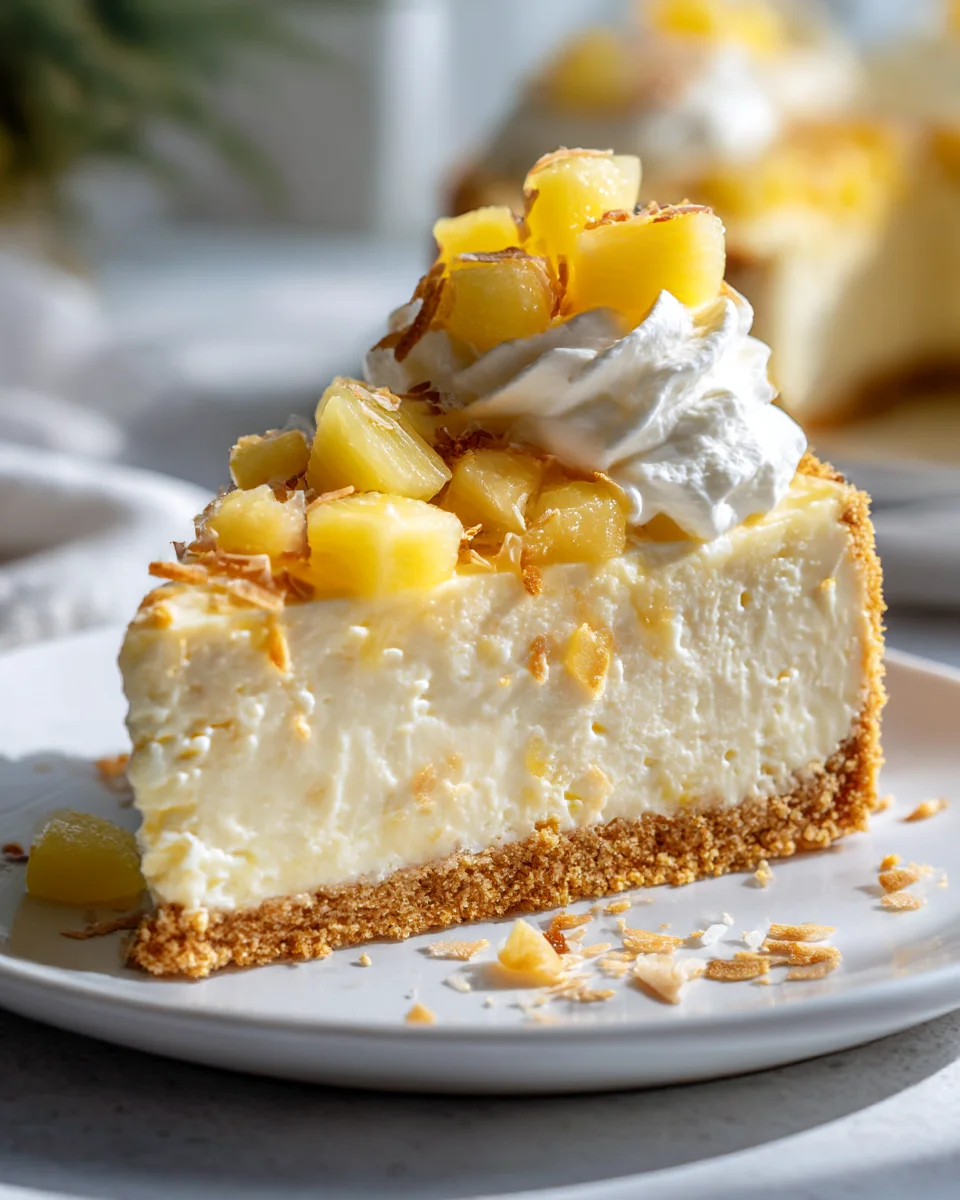
You are going to absolutely adore this dessert because it brings together the best of all worlds. Imagine a luscious, velvety smooth cheesecake filling, bursting with the bright, sweet, and tangy taste of tropical pineapple, all nestled atop a buttery graham cracker crust. It’s a little slice of paradise that’s incredibly refreshing yet wonderfully decadent. Every spoonful is a mini-vacation for your taste buds, striking that perfect balance between rich indulgence and light, fruity zest.
In a nutshell, this is a chilled cheesecake masterpiece that’s incredibly easy to assemble. We’re talking about a simple crust, a vibrant pineapple-infused cream cheese filling, and then just letting your refrigerator do all the hard work. It’s the kind of dessert that looks impressively fancy but comes together with minimal effort, leaving you more time to relax and enjoy the “heaven” part of this incredible creation. Trust me, once you try a bite, you’ll understand why I call it heaven!
Ingredient Notes
Oh, you’re in for a treat with this No Bake Pineapple Heaven Cheesecake Dessert! It’s truly a slice of sunshine, and what makes it even better is how simple the ingredients are to bring together. I’ve found that using quality ingredients really elevates this dessert from good to absolutely heavenly. Here’s a rundown of what you’ll need and some handy substitutions I often use.
For the Crust:
- Graham Cracker Crumbs: These are the classic choice for a reason – they provide that perfect balance of sweetness and a slightly sandy texture that holds up beautifully. You’ll need about 1 ½ cups, which usually comes from one sleeve of graham crackers.
- Melted Unsalted Butter: About ⅓ cup. The butter acts as the binder for your crumbs, creating a firm, flavorful base. If you only have salted butter, that’s perfectly fine; just know your crust might be ever-so-slightly saltier, which can actually be a nice contrast.
- Substitutions: Not a fan of graham crackers, or simply don’t have them on hand? Digestive biscuits, vanilla wafers, or even shortbread cookies work wonderfully. Just crush them finely and proceed as directed. For a gluten-free option, use gluten-free graham crackers or your favorite gluten-free cookie crumbs.
For the Pineapple Heaven Filling:
- Full-Fat Cream Cheese: Two 8-ounce blocks, softened to room temperature. This is non-negotiable for that rich, creamy cheesecake texture. Make sure it’s full-fat; the reduced-fat versions can yield a runnier, less luxurious filling. Softened cream cheese is crucial for a lump-free, silky smooth mixture. I usually leave mine out on the counter for at least an hour before I start.
- Sweetened Condensed Milk: One 14-ounce can. This is what provides the primary sweetness and contributes significantly to the no-bake cheesecake’s creamy, dense consistency without needing gelatin or baking. Don’t confuse it with evaporated milk; they are very different!
- Crushed Pineapple: One 20-ounce can, very well drained. This is the “pineapple heaven” component! Draining it thoroughly is perhaps the most critical step for the filling. Excess liquid will make your cheesecake watery and prevent it from setting properly. I usually pour it into a fine-mesh sieve and press down with the back of a spoon, sometimes even transferring it to paper towels and squeezing gently to extract every last drop of juice.
- Whipped Topping (like Cool Whip): One 8-ounce tub, thawed. This adds incredible lightness and fluffiness to the filling, making it feel less dense and more ethereal. Make sure it’s fully thawed but still cold.
- Fresh Lemon Juice: 1-2 tablespoons. A little bit of fresh lemon juice brightens the flavors, cuts through the sweetness, and adds a subtle tang that really complements the pineapple. It also helps to slightly firm up the cream cheese mixture.
- Vanilla Extract: 1 teaspoon. Pure vanilla extract enhances all the other flavors beautifully.
- Substitutions: If you prefer to make your own whipped topping from heavy cream, you certainly can! Just whip 1 ½ cups of heavy cream with 2-3 tablespoons of powdered sugar and 1 teaspoon of vanilla extract until stiff peaks form, then gently fold that into your cream cheese mixture. It gives an even richer, fresher taste.
Optional Topping & Garnish:
- Extra Crushed Pineapple or Pineapple Chunks: A small can, well-drained, for a beautiful top layer.
- Maraschino Cherries: For a pop of color and retro charm.
- Toasted Coconut Flakes: These add a fantastic texture and another layer of tropical flavor.
- Fresh Mint Leaves: A sprig or two for an elegant touch.
Step-by-Step Instructions
Creating this No Bake Pineapple Heaven Cheesecake is such a joy, and the process is surprisingly straightforward. Just follow these steps, and you’ll have a showstopper dessert that everyone will adore!
Step 1: Prepare the Crust
- First things first, let’s get that base ready! In a medium bowl, combine your graham cracker crumbs with the melted butter. Use a fork or your fingers to mix until the crumbs are evenly moistened and resemble wet sand.
- Press this mixture firmly and evenly into the bottom of a 9-inch springform pan. You can use the bottom of a flat glass or a measuring cup to help you get a really compact and smooth layer.
- Once pressed, pop the pan into the refrigerator to chill while you prepare the filling. This helps the butter firm up and creates a stable crust.
Step 2: Drain the Pineapple (CRITICAL!)
- This step is absolutely crucial for a perfectly set cheesecake. Open your can of crushed pineapple and pour it into a fine-mesh sieve set over a bowl.
- Press down firmly on the pineapple with the back of a spoon or a spatula to extract as much liquid as possible. You’ll be surprised how much juice comes out!
- For extra assurance, I sometimes transfer the pressed pineapple to a double layer of paper towels and gently squeeze it again. Set the very well-drained pineapple aside.
Step 3: Make the Heavenly Filling
- In a large mixing bowl, beat the softened cream cheese with an electric mixer on medium speed until it’s completely smooth and creamy, with no lumps remaining. This usually takes 2-3 minutes.
- Pour in the sweetened condensed milk and continue to beat on medium speed until the mixture is well combined and silky smooth. Scrape down the sides of the bowl as needed to ensure everything is incorporated.
- Add the fresh lemon juice and vanilla extract, mixing until just combined.
- Now, gently fold in your very well drained crushed pineapple. Be careful not to overmix here; just fold until it’s evenly distributed.
- Finally, with a rubber spatula, carefully fold in the thawed whipped topping. Do this gently to maintain the light, airy texture of the whipped topping. Continue folding until no streaks of white remain, and the mixture is uniformly creamy and fluffy.
Step 4: Assemble the Cheesecake
- Retrieve your chilled crust from the refrigerator.
- Carefully spoon or pour the pineapple heaven filling over the graham cracker crust.
- Using an offset spatula or the back of a spoon, gently spread the filling evenly across the crust, smoothing out the top.
Step 5: Chill, Chill, Chill!
- This is where the magic truly happens. Cover the springform pan loosely with plastic wrap and transfer it to the refrigerator.
- Allow the cheesecake to chill for a minimum of 4-6 hours, but ideally, I recommend chilling it overnight. This extended chilling time is essential for the cheesecake to firm up properly and achieve that perfect sliceable consistency. Don’t rush this step, or your cheesecake might be too soft.
Step 6: Garnish and Serve
- Once your cheesecake is thoroughly chilled and set, remove the sides of the springform pan. If you used a regular pie plate, you can simply slice and serve directly from the dish.
- Now for the fun part – garnishing! Arrange additional well-drained crushed pineapple or pineapple chunks on top. Sprinkle with toasted coconut flakes, place a few vibrant maraschino cherries, or add a sprig of fresh mint for a pop of green.
- Slice with a sharp, warm knife (wiping it clean between slices for neatness) and serve immediately. Enjoy your glorious slice of pineapple heaven!
Tips & Suggestions
I’ve made this No Bake Pineapple Heaven Cheesecake countless times, and over the years, I’ve picked up a few tricks that really ensure success and make the process even more enjoyable. Here are my go-to tips and some creative suggestions for variations:
Mastering the Basics:
- Softened Cream Cheese is Your Best Friend: I cannot stress this enough. If your cream cheese isn’t completely at room temperature, you’ll end up with lumps, no matter how much you beat it. Forgetting to take it out? A quick trick is to unwrap the blocks and microwave them for about 15-20 seconds on low power, flipping halfway, just until slightly softened but not melted.
- Drain That Pineapple Like Your Cheesecake Depends On It: Seriously, this is the number one cause of a runny no-bake cheesecake. Use a fine-mesh sieve and press, press, press! If you think you’ve drained enough, drain a little more. You want the pineapple to be almost dry to the touch.
- Gentle Folding for Airiness: When incorporating the whipped topping into the cream cheese mixture, be gentle. Use a rubber spatula and fold it in with a light hand. Overmixing can deflate the whipped topping, leading to a denser cheesecake. We want that ethereal “heaven” texture!
- Patience with Chilling: While 4-6 hours is the minimum, an overnight chill is always best. It allows all the flavors to meld beautifully and ensures a perfectly firm, sliceable dessert. Plan ahead for best results!
- For Clean Slices: Before each cut, dip your knife in hot water and wipe it clean and dry. This helps create beautiful, neat slices without dragging the filling.
Creative Variations & Enhancements:
- Crust Adventures: Don’t feel limited to graham crackers!
- Coconut Crush: Add a couple of tablespoons of finely shredded toasted coconut to your graham cracker crust mixture for an extra tropical twist.
- Shortbread Elegance: Use finely crushed shortbread cookies for a richer, buttery crust.
- Vanilla Wafer Delight: Crushed vanilla wafers make for a sweet and delicate base.
- Tropical Boost: For an even more intense pineapple flavor, consider adding a tiny amount (about ¼ teaspoon) of pineapple extract to the filling, if you can find it.
- Coconut Infusion: If you love coconut, consider adding ½ cup of unsweetened shredded coconut to the filling along with the pineapple. It adds texture and deepens the tropical theme.
- Creamy Topping Swap: While whipped topping is classic, you can whip your own heavy cream with a touch of powdered sugar and vanilla for an even richer, fresher taste. Just remember to use about 1 ½ cups of cold heavy cream.
- Garnish Galore: Beyond the cherries and toasted coconut, think about:
- Fresh Pineapple Wedges or Rings: Arrange them artfully on top.
- Candied Pecans or Macadamia Nuts: For a delightful crunch.
- A Drizzle of Caramel or White Chocolate: For an extra touch of indulgence.
- Individual Servings: Instead of a large cheesecake, you can press the crust mixture into the bottom of cupcake liners set in a muffin tin, then spoon the filling on top for mini cheesecakes. Reduce chilling time slightly, perhaps 2-3 hours.
Storage
One of the best things about this No Bake Pineapple Heaven Cheesecake Dessert is how well it stores, meaning you can enjoy its delightful taste for days or even prepare it in advance for a special occasion. Proper storage is key to maintaining its freshness and texture.
Refrigeration:
- Airtight Container is Best: After serving, if you have leftovers (which is rare, but it happens!), it’s crucial to store your cheesecake in an airtight container. This protects it from absorbing odors from other foods in your refrigerator and prevents it from drying out.
- Cover Loosely: If you don’t have an airtight container large enough, you can cover the springform pan (with the sides still on, or with the cheesecake transferred to a serving plate) tightly with plastic wrap, then an additional layer of aluminum foil. Make sure the wrap isn’t touching the top of any delicate garnishes if you want them to remain pristine.
- Duration: This no-bake cheesecake will keep beautifully in the refrigerator for up to 3 to 5 days. After that, the texture might start to change slightly, becoming a bit softer.
- Best Served Chilled: Always serve the cheesecake cold directly from the refrigerator. The firmer it is, the better it tastes and holds its shape.
Freezing:
- Freezer-Friendly: Yes, you can absolutely freeze this No Bake Pineapple Heaven Cheesecake! It’s a fantastic option for making ahead or saving individual slices for later.
- Before Freezing: If freezing the whole cheesecake, ensure it has been thoroughly chilled and set in the refrigerator first. Remove the springform pan sides.
- Wrapping is Key: For best results, wrap the cheesecake (or individual slices) very tightly in multiple layers. Start with plastic wrap, ensuring it adheres well to all surfaces to prevent freezer burn. Then, add a layer of aluminum foil. If freezing slices, you might want to place them in an airtight freezer-safe container after wrapping.
- Garnish Consideration: If you plan to freeze the entire cheesecake, it’s best to freeze it without the fresh fruit garnishes (like fresh pineapple chunks or mint leaves). You can add those fresh elements just before serving after thawing. Toasted coconut or maraschino cherries can typically handle freezing well.
- Duration: When properly wrapped, your pineapple heaven cheesecake can be stored in the freezer for up to 1 to 2 months. Beyond that, the quality might start to decline.
- Thawing: When you’re ready to enjoy it, transfer the frozen cheesecake (still wrapped) to the refrigerator and let it thaw slowly overnight. A slow thaw helps maintain the texture. Do not thaw at room temperature, as this can affect the consistency.
Whether you’re making it for a party or just to treat yourself throughout the week, knowing how to store your No Bake Pineapple Heaven Cheesecake ensures every bite is as delicious as the first!
Final Thoughts
Well, friends, I truly hope you’re ready to experience a slice of pure joy with the No Bake Pineapple Heaven Cheesecake Dessert! This isn’t just another dessert; it’s an absolute game-changer in terms of ease and flavor. I love how effortlessly it comes together, meaning you can whip up something truly spectacular without ever turning on your oven. The combination of creamy cheesecake texture with that bright, tangy burst of pineapple is simply irresistible, creating a harmonious symphony of flavors that truly lives up to its “heavenly” name.
I find myself constantly craving the refreshing taste and the incredibly light, yet decadent, feel of this dessert. It’s perfect for summer gatherings, a special treat for a quiet evening, or whenever you need a little sunshine in your life. Trust me, once you try the No Bake Pineapple Heaven Cheesecake Dessert, you’ll understand why I believe it’s a must-try. Go ahead, give it a try – you deserve this delightful, no-fuss escape!
Leave a Comment