
Mini Creme Brulee Cheesecakes Decadent Dessert Recipe
Oh my goodness, get ready to elevate your dessert game because I’m about to introduce you to a showstopper: the Mini Creme Brulee Cheesecakes Decadent Dessert Recipe. Seriously, if you’ve ever dreamt of combining two of the most luxurious desserts into one perfect bite, your dreams are about to come true!
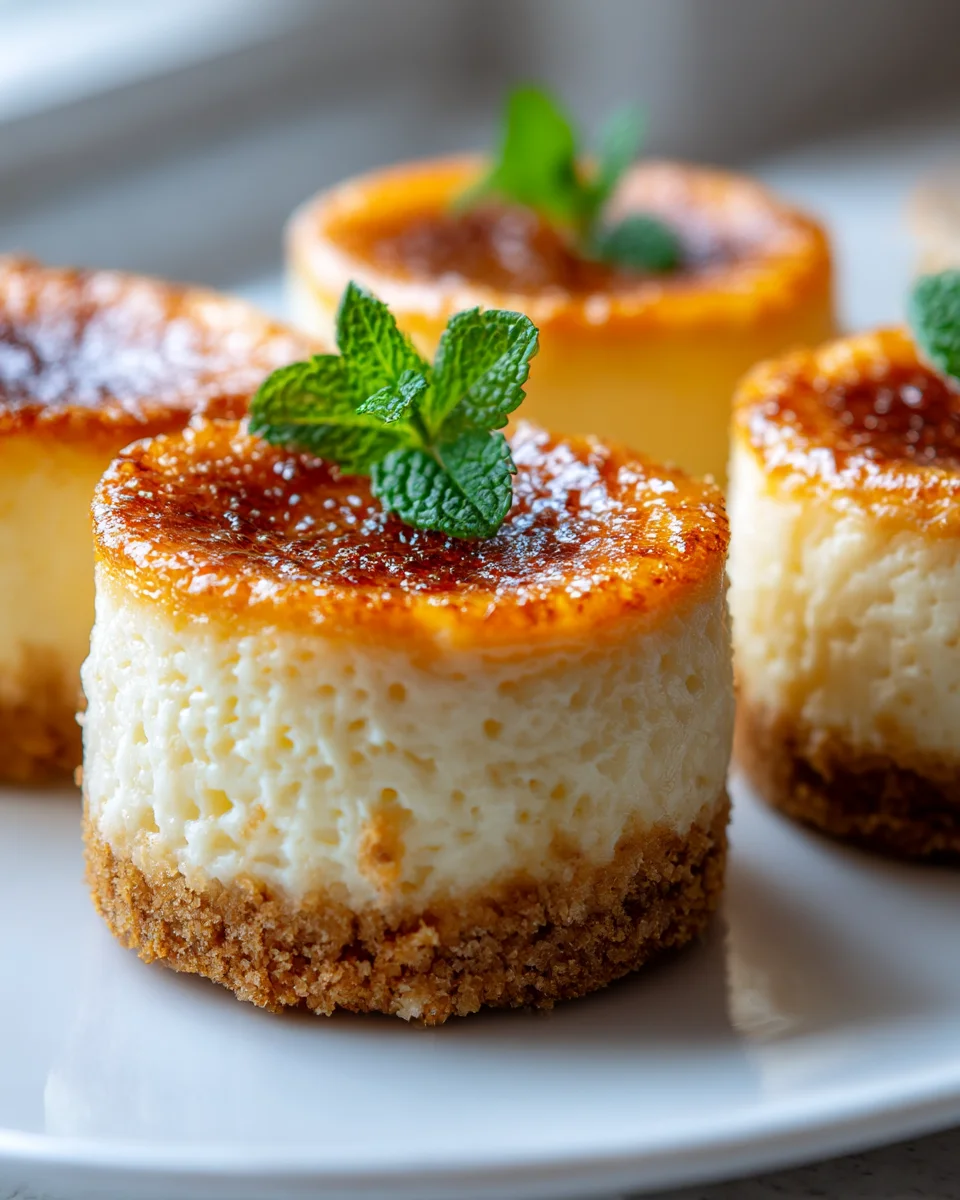
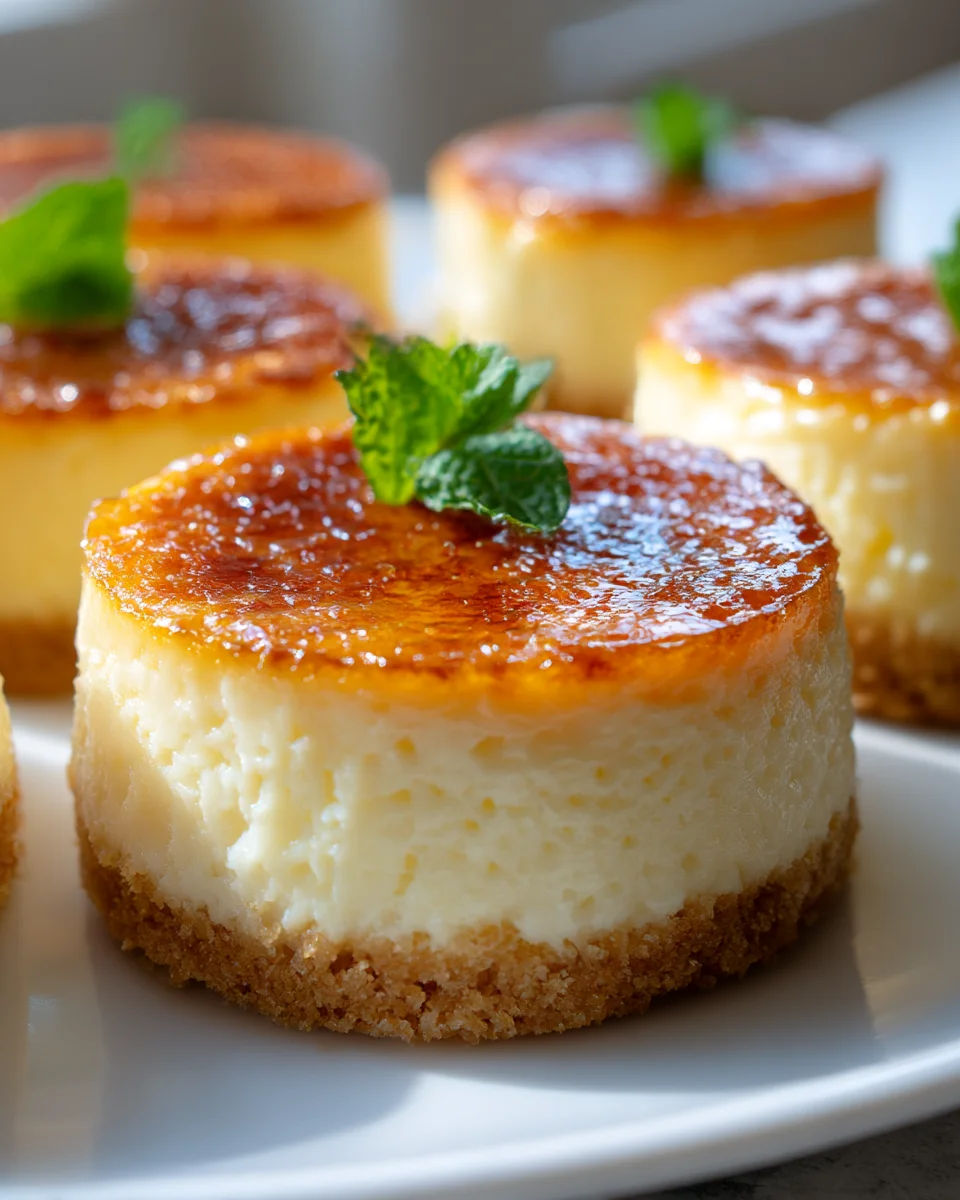
What makes this recipe so incredibly special, you ask? Well, it takes the silky, rich, and creamy indulgence of a classic cheesecake and marries it with the sophisticated elegance and satisfying crackle of a perfectly caramelized creme brulee topping. Imagine sinking your teeth through that crisp, golden sugar crust, only to be met by a smooth, velvety cheesecake underneath – it’s a symphony of textures and flavors that will send your taste buds straight to dessert heaven!
You are going to absolutely adore making (and devouring!) these mini cheesecakes. They’re individual portions, which makes them absolutely ideal for dinner parties, special celebrations, or even just when you want to treat yourself to something truly extraordinary. They look incredibly impressive, yet I promise you, they are surprisingly approachable to make. Each bite-sized beauty offers that delightful contrast: the sweetness of the caramelized sugar giving way to a rich, tangy cheesecake base. Get ready to impress everyone (including yourself!) with this utterly decadent creation.
Ingredient Notes
Creating these Mini Creme Brulee Cheesecakes is a delightful journey, and the right ingredients are your best companions! Here are some notes on what you’ll need and how you can play around with them.
- Full-Fat Cream Cheese: This is the star of our show, and trust me, full-fat is your best friend here. It provides that classic, rich, and ultra-creamy texture we all adore in a cheesecake. Make sure it’s softened to room temperature before you begin – this is crucial for a smooth, lump-free batter. If you opt for reduced-fat, the texture might be slightly less decadent, but it will still be delicious.
- Granulated Sugar: We use this in two ways. For the cheesecake batter, it provides the perfect sweetness, balancing the tang of the cream cheese. For the brulee topping, a fine layer of granulated sugar is essential for achieving that iconic crackly, caramelized crust. Don’t swap this for powdered sugar on top, as it won’t caramelize properly.
- Large Eggs: Eggs act as a binding agent, giving our cheesecakes structure and richness. Like the cream cheese, having them at room temperature helps them incorporate more smoothly into the batter, leading to a more uniform bake and preventing cracks.
- Heavy Cream (or Heavy Whipping Cream): This adds an incredible richness and a silky smooth mouthfeel to the cheesecake batter. There isn’t a direct substitute that will yield the same luxurious texture, so I recommend sticking with it for the best results.
- Non-Alcoholic Vanilla Extract or Vanilla Bean Paste: For a dessert this elegant, a good quality vanilla makes a huge difference. I prefer non-alcoholic vanilla extract or vanilla bean paste for its pure, intense flavor without any unwanted bitterness. Vanilla bean paste will give you those beautiful flecks of vanilla bean throughout, adding to the visual appeal.
- Graham Cracker Crumbs: These form the classic, buttery base for our mini cheesecakes. You can buy them pre-crushed or crush your own graham crackers. As a substitution, digestive biscuits or even vanilla wafers make excellent alternatives for the crust, offering a slightly different but equally delicious flavor profile.
- Melted Unsalted Butter: This binds our crust together and gives it a wonderful richness. Unsalted butter allows you to control the salt content in your recipe.
Step-by-Step Instructions
Let’s get baking! Here’s how we bring these gorgeous Mini Creme Brulee Cheesecakes to life.
- Prepare Your Pan: First things first, preheat your oven to 325°F (160°C). Line a 12-cup standard muffin tin with paper liners. I like to lightly spray the inside of the liners with non-stick spray, just to be extra sure they don’t stick.
- Make the Crust: In a medium bowl, combine your graham cracker crumbs and melted butter. Mix until the crumbs are evenly moistened, resembling wet sand. Spoon about 1 tablespoon of this mixture into the bottom of each prepared liner. Using the bottom of a small glass or your fingers, press the crumbs firmly into an even layer.
- Pre-bake the Crust (Optional, but Recommended): For a sturdier crust, you can bake these for 5-7 minutes. This helps set them before adding the filling. Let them cool slightly while you prepare the cheesecake batter.
- Prepare the Cheesecake Batter: In a large mixing bowl, using an electric mixer (stand or hand-held) on medium speed, beat the softened full-fat cream cheese until it’s completely smooth and creamy, with no lumps. This usually takes about 2-3 minutes.
- Add Sugar: Gradually add the granulated sugar to the cream cheese, beating until well combined and lightened, scraping down the sides of the bowl as needed.
- Incorporate Eggs and Vanilla: Reduce the mixer speed to low. Add the eggs one at a time, beating just until each egg is incorporated. Do not overmix here – overmixing can introduce too much air, which can cause cracks in your cheesecakes. Stir in the non-alcoholic vanilla extract or vanilla bean paste.
- Add Heavy Cream: Finally, pour in the heavy cream and mix on low speed just until it’s fully combined and the batter is smooth. Give it one last scrape down of the bowl to ensure everything is mixed.
- Fill the Liners: Divide the cheesecake batter evenly among the 12 prepared muffin cups, filling each about two-thirds full.
- Bake the Cheesecakes: Carefully transfer the muffin tin to your preheated oven. Bake for 20-25 minutes, or until the edges are set but the centers still have a slight jiggle when gently shaken.
- Cool Slowly: Once baked, turn off the oven and prop the oven door open slightly (you can use a wooden spoon). Let the cheesecakes cool in the oven for about 15-20 minutes. This slow cooling helps prevent cracking.
- Chill Thoroughly: Remove the cheesecakes from the oven and transfer them to a wire rack to cool completely to room temperature. Once cooled, place them in the refrigerator for at least 4 hours, but preferably overnight, to allow them to set completely.
- The Creme Brulee Topping: Just before serving, remove the cheesecakes from their liners. Sprinkle about 1-2 teaspoons of granulated sugar evenly over the top of each chilled cheesecake.
- Torch and Serve: Using a culinary torch, caramelize the sugar until it melts and turns a deep amber color, forming a hard, crackly crust. Be careful not to burn it! Serve immediately, and enjoy that satisfying crack!
Tips & Suggestions
Making these mini cheesecakes is a joy, and with a few insider tips, you’ll achieve perfection every time:
- Room Temperature Ingredients are Key: I cannot stress this enough! Ensure your cream cheese and eggs are at room temperature. This makes for a wonderfully smooth, lump-free batter that incorporates air evenly and bakes beautifully. Cold ingredients can lead to a lumpy batter and potentially overmixing.
- Don’t Overmix the Batter: Once you add the eggs, mix only until just combined. Overmixing introduces too much air, which can cause your cheesecakes to puff up excessively in the oven and then sink and crack as they cool.
- The Water Bath Secret (for larger cheesecakes, but helpful to know): While not strictly necessary for mini cheesecakes in paper liners, a water bath is a common technique for larger cheesecakes to ensure even, gentle baking and prevent cracking. For these minis, the slow cooling in the turned-off oven provides a similar benefit.
- Achieving the Perfect Brulee:
- Even Sugar Layer: Sprinkle the granulated sugar as evenly as possible over the chilled cheesecakes. This ensures uniform caramelization.
- Use a Good Culinary Torch: A quality kitchen torch is essential for a beautiful brulee. Hold the flame a few inches above the sugar, moving it constantly in small circles until the sugar melts, bubbles, and turns a rich amber color.
- Don’t Rush It: Patience is a virtue here. Go slow to prevent burning the sugar. A slightly lighter caramel is better than a burnt one, which will taste bitter.
- Broiler Alternative (Use with Extreme Caution): If you don’t have a culinary torch, you can try placing the sugared cheesecakes under a broiler on high for 1-2 minutes. Watch them constantly – they can go from perfect to burnt in seconds. The result might not be as even as with a torch, and it’s riskier. I highly recommend investing in a torch if you plan to make creme brulee often!
- Chill, Chill, Chill: Don’t skip the refrigeration step! It’s crucial for the cheesecakes to set completely, ensuring a firm texture and preventing them from falling apart when handled.
- Garnish for Extra Flair: Once torched, these mini cheesecakes look stunning on their own, but a few fresh berries (raspberries, blueberries, or sliced strawberries), a small sprig of fresh mint, or a dusting of cocoa powder can add an extra touch of elegance.
- Make Ahead: The cheesecake portion of this recipe is perfect for making a day or two in advance. Store them chilled in an airtight container, and then brulee just before serving for that ultimate crisp sugar crust.
Storage
To keep your Mini Creme Brulee Cheesecakes fresh and delicious:
- Refrigeration: Any leftover un-brulee’d cheesecakes should be stored in an airtight container in the refrigerator for up to 3-4 days. It’s best to brulee them just before serving to ensure the sugar crust is perfectly crisp.
- Brulee’d Cheesecakes: Once you’ve torched the sugar, the crisp crust will soften over time due to moisture from the cheesecake. For the best experience, I always recommend caramelizing the sugar right before you plan to serve them. If you do have leftovers with the brulee’d topping, they will still be tasty the next day, but the sugar crust won’t have that satisfying crack.
- Freezing: You can absolutely freeze the un-brulee’d mini cheesecakes! Once completely chilled and set, place them on a baking sheet and freeze for about an hour until firm. Then, transfer them to an airtight freezer-safe container or freezer bag. They can be stored for up to 1 month. When ready to enjoy, thaw them overnight in the refrigerator, and then brulee just before serving.
`
Final Thoughts
`
`
And there you have it! I truly hope you’re as excited as I am about trying this exquisite Mini Creme Brulee Cheesecakes Decadent Dessert Recipe. It’s more than just a dessert; it’s an experience that perfectly marries the rich, creamy indulgence of cheesecake with the delightful, crackling crispness of a classic creme brulee. Each miniature bite is a testament to simple elegance and incredible flavor.
`
`
I promise you, these individual treats are a showstopper, ideal for any gathering or simply as a special indulgence for yourself. This Mini Creme Brulee Cheesecakes Decadent Dessert Recipe is a must-try for anyone looking to create something truly memorable and utterly delicious. Dive in and enjoy every decadent moment!
`

Leave a Comment