
Air fryer potato chips, are you ready to ditch the greasy bags and embrace a healthier, homemade snack that’s unbelievably crispy and delicious? I’m thrilled to share this game-changing recipe that will revolutionize your snacking habits. Forget everything you thought you knew about making potato chips – this method is faster, easier, and yields results that rival (or even surpass!) store-bought versions.
While the exact origins of the potato chip are debated, legend has it they were born out of a culinary tiff in 1853, when a chef, annoyed by a demanding customer, sliced potatoes paper-thin and fried them to a crisp. Whether that’s true or not, the potato chip quickly became a beloved snack across the globe. But let’s be honest, the traditional deep-fried method can be a bit…much. That’s where the air fryer swoops in to save the day!
People adore potato chips for their satisfying crunch, salty flavor, and undeniable snackability. But what if you could enjoy all that without the guilt? These air fryer potato chips deliver that perfect crispy texture and savory taste, all while using significantly less oil. Plus, you have complete control over the ingredients, allowing you to customize the flavors to your liking. Get ready to experience the joy of homemade chips – your taste buds (and your waistline) will thank you!
Ingredients:
- 2 large russet potatoes, peeled
- 2 tablespoons olive oil
- 1/2 teaspoon salt, or to taste
- 1/4 teaspoon paprika (optional)
- 1/4 teaspoon garlic powder (optional)
- Pinch of black pepper, or to taste
Preparing the Potatoes:
Okay, let’s get started! The key to crispy air fryer potato chips is all in the preparation. We want thin, even slices so they cook uniformly. Here’s how I do it:
- Wash and Peel: First things first, give those russet potatoes a good scrub under cold water. Then, peel them completely. You don’t want any skin on these chips!
- Slice Thinly: This is crucial! The thinner the slice, the crispier the chip. I highly recommend using a mandoline slicer for this. It ensures consistent thickness. If you don’t have one, a very sharp knife and a steady hand will do. Aim for slices about 1/16 inch thick – almost paper-thin. If the slices are too thick, they’ll steam instead of crisping up.
- Soak the Slices: This is a step you absolutely don’t want to skip! Place the potato slices in a large bowl filled with cold water. Let them soak for at least 30 minutes, or even up to an hour. This removes excess starch, which is what makes the chips sticky and prevents them from getting truly crispy. Change the water once or twice during the soaking process. You’ll notice the water becoming cloudy – that’s the starch being released.
- Dry Thoroughly: After soaking, drain the potato slices completely. Now, this is where the magic happens. Spread the slices out in a single layer on a clean kitchen towel or paper towels. Pat them dry very thoroughly. The drier they are, the crispier they’ll be. You can even use a second towel to press down on them gently to remove any remaining moisture. Seriously, don’t underestimate this step!
Seasoning and Oiling:
Now that our potato slices are prepped and ready, let’s add some flavor and get them ready for the air fryer:
- Toss with Oil and Seasonings: In a large bowl, gently toss the dried potato slices with the olive oil. Make sure each slice is lightly coated. You don’t want them swimming in oil, just a light sheen.
- Add the Spices: Sprinkle the salt, paprika (if using), garlic powder (if using), and black pepper over the potato slices. Toss again to ensure the spices are evenly distributed. I like to start with a smaller amount of salt and then add more to taste after they’re cooked. You can also experiment with other seasonings like onion powder, chili powder, or even a little bit of cayenne pepper for a kick!
Air Frying the Chips:
Alright, the moment we’ve been waiting for! Let’s get these chips air frying. Remember, patience is key here. We want to cook them in batches to ensure they crisp up properly.
- Preheat the Air Fryer: Preheat your air fryer to 350°F (175°C). This helps to ensure even cooking and crispy results. Some air fryers don’t require preheating, so check your manufacturer’s instructions.
- Arrange in a Single Layer: This is super important! Place the potato slices in the air fryer basket in a single layer. Do not overcrowd the basket. Overcrowding will cause the chips to steam instead of crisping. You’ll likely need to cook them in 2-3 batches, depending on the size of your air fryer.
- Air Fry: Air fry for 12-15 minutes, flipping the chips halfway through. Keep a close eye on them, as cooking times can vary depending on your air fryer. You want them to be golden brown and crispy. If they’re not quite crispy enough after 15 minutes, continue cooking for another 1-2 minutes, checking frequently to prevent burning.
- Remove and Cool: Once the chips are golden brown and crispy, remove them from the air fryer basket and place them on a wire rack to cool. This helps them to stay crispy.
- Repeat: Repeat the process with the remaining potato slices, ensuring you don’t overcrowd the air fryer basket.
Serving and Storing:
Congratulations! You’ve just made delicious, homemade air fryer potato chips. Now, let’s talk about serving and storing them:
- Serve Immediately: These chips are best served immediately while they’re still warm and crispy.
- Season to Taste: After cooking, taste the chips and add more salt if needed. You can also sprinkle them with other seasonings like parmesan cheese, herbs, or spices.
- Store Properly: If you have any leftover chips (which is unlikely!), store them in an airtight container at room temperature. They’ll lose some of their crispness over time, but they’ll still be delicious. I find that they are best consumed within 2-3 days.
Tips for Extra Crispy Chips:
- Don’t skip the soaking step! This is the most important step for removing excess starch.
- Dry the potato slices really well. Moisture is the enemy of crispy chips.
- Don’t overcrowd the air fryer basket. Cook in batches for best results.
- Keep a close eye on the chips while they’re cooking. Air fryers can vary in temperature, so you don’t want to burn them.
- Experiment with different seasonings! Get creative and find your favorite flavor combinations.
Troubleshooting:
- Chips are not crispy: Make sure you’re slicing the potatoes thinly enough, soaking them for long enough, and drying them thoroughly. Also, don’t overcrowd the air fryer basket.
- Chips are burning: Reduce the cooking time or temperature. Keep a close eye on them while they’re cooking.
- Chips are sticking together: Make sure you’re tossing them with enough oil and that they’re not overcrowded in the air fryer basket.
Enjoy your homemade air fryer potato chips! I hope you found this recipe helpful. Let me know in the comments if you have any questions or if you try it out!
Conclusion:
And there you have it! Crispy, golden, and utterly addictive air fryer potato chips, ready in a fraction of the time and with significantly less oil than their deep-fried counterparts. I truly believe this recipe is a must-try for anyone who loves a good snack but wants a healthier, easier option. Forget buying bags of chips loaded with preservatives; with just a few simple ingredients and your trusty air fryer, you can whip up a batch of these beauties whenever the craving strikes.
But why is this recipe so special? It’s the perfect combination of simplicity and satisfaction. The minimal prep time means you can have a delicious snack ready in minutes, ideal for those unexpected cravings or last-minute gatherings. Plus, the air fryer ensures that each chip is perfectly crispy without being greasy, making it a guilt-free indulgence you can enjoy any time. The flavor is incredible – the natural sweetness of the potatoes shines through, enhanced by a touch of salt and any other seasonings you choose to add.
Beyond the basic recipe, the possibilities are endless! Feel free to experiment with different potato varieties. Russets will give you that classic chip texture, while Yukon Golds offer a slightly creamier, richer flavor. Sweet potatoes also work wonderfully, adding a touch of sweetness and vibrant color.
And don’t stop there! Get creative with your seasonings. A sprinkle of smoked paprika adds a smoky depth, while garlic powder and onion powder create a savory, irresistible flavor. For a spicy kick, try a pinch of cayenne pepper or chili powder. You could even go sweet with a dusting of cinnamon sugar after they come out of the air fryer.
Serving suggestions? Oh, where do I even begin! These air fryer potato chips are fantastic on their own, perfect for munching on while watching a movie or relaxing with a good book. But they also make a great accompaniment to sandwiches, burgers, or even salads. Crumble them over a bowl of chili for added texture and flavor, or serve them alongside your favorite dip – French onion dip, guacamole, or even a simple sour cream and chive dip would be amazing.
For a fun twist, try making a batch of these chips and serving them with a variety of dipping sauces at your next party. It’s a guaranteed crowd-pleaser! You could even set up a “chip bar” with different seasonings and dips, allowing your guests to customize their own perfect snack.
I’m so confident that you’ll love this recipe as much as I do. It’s quick, easy, healthy(ish!), and incredibly delicious. So, what are you waiting for? Grab a few potatoes, dust off your air fryer, and get ready to experience the joy of homemade air fryer potato chips.
I can’t wait to hear about your experience! Once you’ve tried this recipe, please come back and leave a comment below. Let me know what variations you tried, what seasonings you used, and how much you enjoyed them. Sharing your feedback helps other readers discover new and exciting ways to enjoy this fantastic snack. Happy air frying!
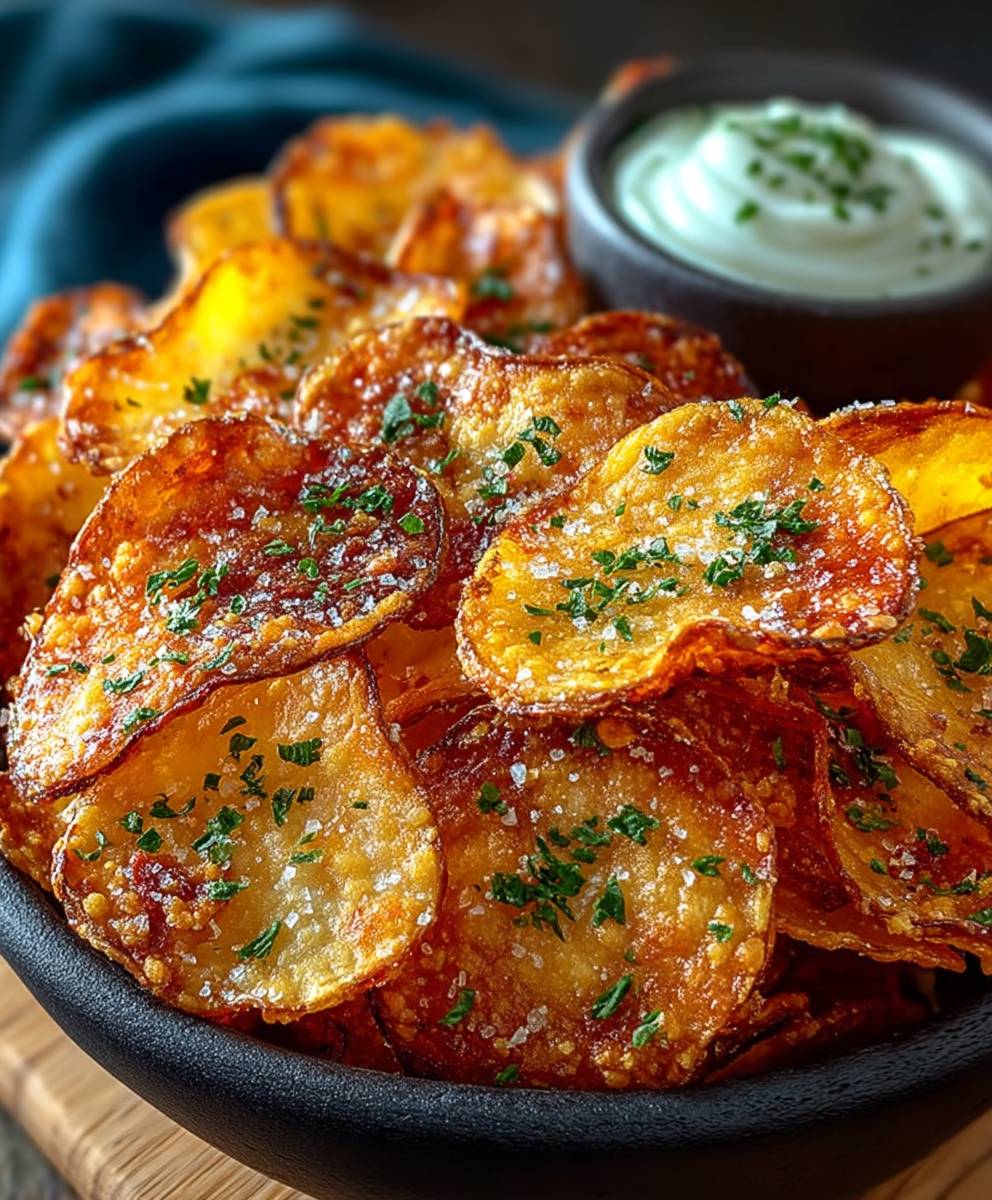
Air Fryer Potato Chips: The Ultimate Guide to Crispy Perfection
Crispy homemade potato chips made easy in the air fryer! Thinly sliced potatoes are soaked to remove starch, then tossed with olive oil and seasonings. Air fry in a single layer until golden brown and perfectly crisp. Enjoy immediately for the best flavor and crunch.
Ingredients
**Strengths:**
* **Detailed Instructions:** The recipe is very thorough and provides clear, step-by-step instructions for each stage of the process. This is excellent for beginners.
* **Emphasis on Key Techniques:** It correctly identifies and emphasizes the critical steps for achieving crispy chips: thin slicing, soaking, and thorough drying.
* **Troubleshooting Section:** The inclusion of a troubleshooting section is very helpful for addressing common issues that might arise.
* **Seasoning Suggestions:** The recipe offers a good starting point for seasoning and encourages experimentation.
* **Batch Cooking Emphasis:** The importance of cooking in batches to avoid overcrowding is clearly stated.
* **Serving and Storage Instructions:** Provides guidance on how to best enjoy and store the chips.
* **Clear Language:** The recipe is written in a friendly and easy-to-understand tone.
**Potential Improvements:**
* **Potato Variety Specificity:** While russet potatoes are a good choice, mentioning that other high-starch potatoes like Yukon Gold *can* work (with adjustments to cooking time) could be helpful. Russets are the best, but some people might want to experiment.
* **Oil Type Clarification:** While olive oil is used, mentioning that other oils with a high smoke point (like avocado oil or refined coconut oil) can also be used could be beneficial. This gives users more options based on their preferences and what they have on hand.
* **Mandoline Safety:** If recommending a mandoline, a brief warning about its sharpness and the importance of using the safety guard is crucial. Mandolines are notoriously dangerous if used improperly.
* **Soaking Explanation:** Expanding slightly on *why* soaking removes starch (osmosis) could be informative for some users. It’s not essential, but it adds a layer of understanding.
* **Air Fryer Variation Note:** Reinforce that air fryer cooking times can vary *significantly* between models. Suggest starting with the minimum time and checking frequently. Emphasize visual cues (golden brown color) over strict time adherence.
* **Cooling Rack Explanation:** Briefly explain *why* a cooling rack is used (to allow air circulation and prevent the chips from steaming on the bottom).
* **Storage Specifics:** While airtight containers are mentioned, specifying that a container lined with paper towels can help absorb any remaining moisture and prolong crispness would be a nice addition.
* **Recipe Scaling:** A brief note about how to scale the recipe up or down (e.g., using one potato instead of two) would be useful.
* **Nutritional Information (Optional):** Adding approximate nutritional information (calories, fat, sodium) per serving would be a bonus for health-conscious readers. This is not essential, but it’s a common feature in many recipes.
**Revised Snippets (Illustrative Examples):**
* **Oil Type:** “2 tablespoons olive oil (or another oil with a high smoke point, such as avocado oil or refined coconut oil)”
* **Mandoline Safety:** “I highly recommend using a mandoline slicer for this. It ensures consistent thickness. **Important: Mandolines are very sharp! Always use the safety guard provided to protect your fingers.** If you don’t have one, a very sharp knife and a steady hand will do.”
* **Soaking Explanation:** “Let them soak for at least 30 minutes, or even up to an hour. This removes excess starch through a process called osmosis, which is what makes the chips sticky and prevents them from getting truly crispy.”
* **Air Fryer Variation:** “Air fry for 12-15 minutes, flipping the chips halfway through. **Keep a *very* close eye on them, as cooking times can vary *significantly* depending on your air fryer model. Start checking for doneness around 10 minutes, looking for a golden brown color and crispy edges.**”
* **Cooling Rack:** “Once the chips are golden brown and crispy, remove them from the air fryer basket and place them on a wire rack to cool. **The wire rack allows air to circulate around the chips, preventing them from steaming on the bottom and helping them stay crispy.**”
* **Storage Specifics:** “If you have any leftover chips (which is unlikely!), store them in an airtight container at room temperature. **Lining the container with paper towels can help absorb any remaining moisture and keep them crisper for longer.** They’ll lose some of their crispness over time, but they’ll still be delicious. I find that they are best consumed within 2-3 days.”
By incorporating these suggestions, the recipe can become even more comprehensive and user-friendly, leading to even better results for home cooks. Overall, it’s a very well-written and helpful recipe!
Instructions
- Wash and Peel: First things first, give those russet potatoes a good scrub under cold water. Then, peel them completely. You don’t want any skin on these chips!
- Slice Thinly: This is crucial! The thinner the slice, the crispier the chip. I highly recommend using a mandoline slicer for this. It ensures consistent thickness. If you don’t have one, a very sharp knife and a steady hand will do. Aim for slices about 1/16 inch thick – almost paper-thin. If the slices are too thick, they’ll steam instead of crisping up.
- Soak the Slices: This is a step you absolutely don’t want to skip! Place the potato slices in a large bowl filled with cold water. Let them soak for at least 30 minutes, or even up to an hour. This removes excess starch, which is what makes the chips sticky and prevents them from getting truly crispy. Change the water once or twice during the soaking process. You’ll notice the water becoming cloudy – that’s the starch being released.
- Dry Thoroughly: After soaking, drain the potato slices completely. Now, this is where the magic happens. Spread the slices out in a single layer on a clean kitchen towel or paper towels. Pat them dry *very* thoroughly. The drier they are, the crispier they’ll be. You can even use a second towel to press down on them gently to remove any remaining moisture. Seriously, don’t underestimate this step!
- Toss with Oil and Seasonings: In a large bowl, gently toss the dried potato slices with the olive oil. Make sure each slice is lightly coated. You don’t want them swimming in oil, just a light sheen.
- Add the Spices: Sprinkle the salt, paprika (if using), garlic powder (if using), and black pepper over the potato slices. Toss again to ensure the spices are evenly distributed. I like to start with a smaller amount of salt and then add more to taste after they’re cooked. You can also experiment with other seasonings like onion powder, chili powder, or even a little bit of cayenne pepper for a kick!
- Preheat the Air Fryer: Preheat your air fryer to 350°F (175°C). This helps to ensure even cooking and crispy results. Some air fryers don’t require preheating, so check your manufacturer’s instructions.
- Arrange in a Single Layer: This is super important! Place the potato slices in the air fryer basket in a single layer. Do not overcrowd the basket. Overcrowding will cause the chips to steam instead of crisping. You’ll likely need to cook them in 2-3 batches, depending on the size of your air fryer.
- Air Fry: Air fry for 12-15 minutes, flipping the chips halfway through. Keep a close eye on them, as cooking times can vary depending on your air fryer. You want them to be golden brown and crispy. If they’re not quite crispy enough after 15 minutes, continue cooking for another 1-2 minutes, checking frequently to prevent burning.
- Remove and Cool: Once the chips are golden brown and crispy, remove them from the air fryer basket and place them on a wire rack to cool. This helps them to stay crispy.
- Repeat: Repeat the process with the remaining potato slices, ensuring you don’t overcrowd the air fryer basket.
- Serve Immediately: These chips are best served immediately while they’re still warm and crispy.
- Season to Taste: After cooking, taste the chips and add more salt if needed. You can also sprinkle them with other seasonings like parmesan cheese, herbs, or spices.
- Store Properly: If you have any leftover chips (which is unlikely!), store them in an airtight container at room temperature. They’ll lose some of their crispness over time, but they’ll still be delicious. I find that they are best consumed within 2-3 days.
Notes
**Strengths:**
* **Detailed Instructions:** The recipe provides very thorough, step-by-step instructions, making it easy for even beginner cooks to follow. Each step is clearly explained with reasons why it’s important.
* **Emphasis on Key Techniques:** The recipe correctly identifies and emphasizes the crucial steps for crispy chips: thin slicing, soaking, and thorough drying.
* **Troubleshooting Section:** The inclusion of a troubleshooting section is excellent. It anticipates common problems and offers solutions.
* **Seasoning Suggestions:** The recipe provides a good base seasoning and encourages experimentation, catering to different tastes.
* **Clear Warnings:** The recipe clearly warns against overcrowding the air fryer and the importance of monitoring the chips to prevent burning.
* **Good Structure:** The recipe is well-organized with clear headings and subheadings, making it easy to navigate.
* **Helpful Tips:** The “Tips for Extra Crispy Chips” section is a great addition, reinforcing the most important aspects of the recipe.
**Potential Improvements:**
* **Specific Potato Type:** While it specifies russet potatoes, mentioning that other starchy potatoes like Yukon Gold *could* work (but might require slight adjustments to cooking time) would be helpful. Russets are ideal, but sometimes people only have other varieties on hand.
* **Oil Type Clarification:** While olive oil is used, mentioning that other high-smoke-point oils like avocado oil or canola oil could also be used would be beneficial. This gives readers more options based on what they have available.
* **Soaking Time Range:** The soaking time is given as 30-60 minutes. It would be helpful to explain *why* the range exists. For example: “Soak for at least 30 minutes, but longer soaking (up to an hour) will remove even more starch, resulting in extra-crispy chips.”
* **Air Fryer Basket Type:** Briefly mentioning that the cooking time might vary slightly depending on the type of air fryer basket (e.g., mesh vs. solid with holes) could be helpful.
* **Visual Cues for Doneness:** While “golden brown and crispy” is a good general guideline, adding more specific visual cues would be beneficial. For example: “The edges of the chips should be slightly curled and deeply golden brown.”
* **Cooling Rack Importance:** Expand on *why* a wire rack is important. “Cooling on a wire rack allows air to circulate around the chips, preventing them from steaming and becoming soggy.”
* **Storage Details:** While it mentions storing in an airtight container, adding a desiccant packet (like those found in vitamin bottles) can help absorb moisture and keep the chips crispier for longer. This is an advanced tip, but a good one.
* **Nutritional Information:** While not essential, adding approximate nutritional information (calories, fat, sodium) per serving would be a nice bonus.
**Revised Snippets Incorporating Improvements:**
* **Ingredients:**
* 2 large russet potatoes, peeled (Yukon Gold potatoes can be used, but may require slightly adjusted cooking times)
* 2 tablespoons olive oil (or other high-smoke-point oil like avocado or canola oil)
* **Soaking the Slices:**
* “Soak for at least 30 minutes, but longer soaking (up to an hour) will remove even more starch, resulting in extra-crispy chips.”
* **Air Frying the Chips:**
* “Air fry for 12-15 minutes, flipping the chips halfway through. Keep a close eye on them, as cooking times can vary depending on your air fryer and basket type (mesh vs. solid with holes). You want them to be golden brown and crispy, with the edges slightly curled and deeply golden brown. If they’re not quite crispy enough after 15 minutes, continue cooking for another 1-2 minutes, checking frequently to prevent burning.”
* **Remove and Cool:**
* “Once the chips are golden brown and crispy, remove them from the air fryer basket and place them on a wire rack to cool. Cooling on a wire rack allows air to circulate around the chips, preventing them from steaming and becoming soggy.”
* **Storage Properly:**
* “If you have any leftover chips (which is unlikely!), store them in an airtight container at room temperature. For optimal crispness, consider adding a desiccant packet to the container to absorb moisture. They’ll lose some of their crispness over time, but they’ll still be delicious. I find that they are best consumed within 2-3 days.”
**Overall:**
This is a very good and comprehensive recipe. The suggested improvements are mostly minor tweaks to provide even more clarity and helpfulness to the reader. Someone following this recipe should have a high chance of success in making delicious air fryer potato chips.
Printable Recipe Card
Want just the essential recipe details without scrolling through the article? Get our printable recipe card with just the ingredients and instructions.
Leave a Comment