
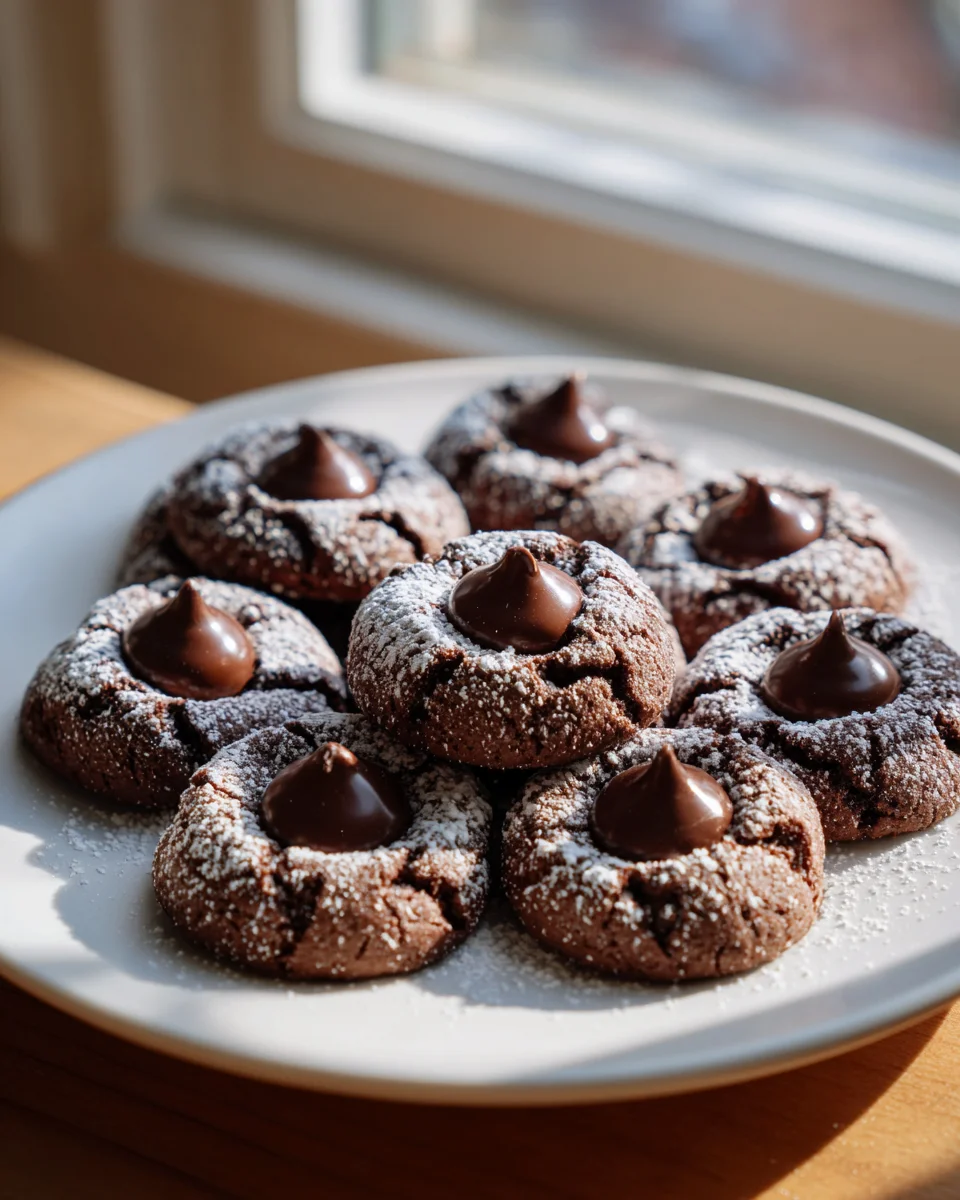
Chocolate Blossom Cookies are a delightful treat that, I believe, holds a special place in the hearts of cookie enthusiasts everywhere. I find there’s something undeniably magical about biting into a soft, chewy chocolate cookie, only to be met with the creamy, melty center of a chocolate kiss. These iconic cookies, a clever twist on the beloved peanut butter blossom, trace their inspiration back to the late 1950s, evolving into countless variations that celebrate different flavor profiles. While the original peanut butter version became famous through a Pillsbury Bake-Off, I’ve seen the chocolate rendition quickly captivate palates, proving that a classic can always be perfected with a touch of cocoa richness. People, myself included, adore these gems not just for their decadent flavor profile—a perfect harmony of deep chocolate and sweet, smooth candy—but also for their charming appearance, resembling a delicate flower blooming right in your palm. I know they are a staple for holiday cookie platters, potlucks, and everyday indulgences, bringing smiles with every single bite. Get ready to bake a batch of these irresistible Chocolate Blossom Cookies that I promise will become a new favorite in your recipe collection!
Ingredients:
For me, the magic of baking often starts with gathering high-quality ingredients. For these delightful Chocolate Blossom Cookies, every item plays a crucial role in creating that perfect balance of rich chocolate, tender texture, and sweet appeal. Here’s what we’ll need to make these beauties come to life in your kitchen:
- For the Chocolate Cookie Dough:
- 1 ½ cups (3 sticks or 340g) Unsalted Butter: Softened to room temperature. I always use unsalted butter because it gives me control over the salt content in my baking, ensuring the final flavor is just right.
- 2 cups (400g) Granulated Sugar: This provides the primary sweetness and contributes to the cookie’s tender crumb. It also helps with the spreading.
- 2 large Eggs: At room temperature. Room temperature eggs emulsify better with the butter and sugar, leading to a smoother, more uniform dough.
- 2 teaspoons Pure Vanilla Extract: A crucial flavor enhancer. I truly believe that good quality vanilla extract makes all the difference in chocolate cookies, bringing out the depth of the cocoa.
- 2 ¼ cups (270g) All-Purpose Flour: Sifted. Sifting is a step I never skip, as it ensures there are no lumps and helps aerate the flour, making for a lighter cookie.
- ¾ cup (75g) Unsweetened Cocoa Powder: I always reach for a good quality unsweetened natural cocoa powder for that deep, rich chocolate flavor that defines our Chocolate Blossom Cookies.
- 1 teaspoon Baking Soda: Our leavening agent, which helps the cookies rise slightly and achieve a nice chewy texture.
- ½ teaspoon Salt: Essential for balancing the sweetness and enhancing all the other flavors. Don’t underestimate the power of salt in sweet recipes!
- For Rolling and Topping:
- ½ cup (100g) Granulated Sugar: For rolling the cookie dough before baking, which gives them a lovely sparkling edge and a slight crunch.
- ½ cup (60g) Powdered Sugar (Confectioners’ Sugar): Also for rolling, creating a delightful crackled, snowy appearance once baked.
- 48 Milk Chocolate Kisses or Miniature Peanut Butter Cups: Unwrapped. These are the iconic “blossoms” that give these cookies their name and their irresistible charm. Make sure they’re ready to go!
Preparing the Dough for Your Chocolate Blossom Cookies
Making the dough is the first exciting step in creating these wonderful Chocolate Blossom Cookies. It’s a straightforward process, but paying attention to each detail will ensure your cookies are perfect every time. I find it incredibly satisfying to watch the ingredients transform into a cohesive, fragrant dough.
-
Creaming Butter and Sugar:
First, in a large mixing bowl, I like to combine my softened unsalted butter with the granulated sugar. Using an electric mixer on medium speed, I cream these two together until the mixture becomes wonderfully light and fluffy, almost pale yellow in color, and visually expands. This process, which usually takes about 3-5 minutes, is crucial because it incorporates air into the butter, creating tiny pockets that will give our Chocolate Blossom Cookies their delightful tenderness later on. I always make sure to scrape down the sides of the bowl occasionally with a rubber spatula to ensure everything is evenly combined.
-
Adding Eggs and Vanilla:
Once the butter and sugar are beautifully creamed, I reduce the mixer speed to low and add the eggs, one at a time. After each egg goes in, I mix just until it’s incorporated before adding the next. This prevents the mixture from curdling and ensures a smooth emulsion. Then, I stir in the pure vanilla extract. The aroma at this stage is always so inviting! Be careful not to overmix here; we just want everything to come together nicely.
-
Combining Dry Ingredients:
In a separate, medium-sized bowl, I whisk together all my dry ingredients: the sifted all-purpose flour, unsweetened cocoa powder, baking soda, and salt. Whisking them thoroughly ensures that the leavening agent and salt are evenly distributed throughout the flour and cocoa, which is vital for consistent texture and flavor in every bite of our Chocolate Blossom Cookies. This step also prevents any lumps from forming when we add them to the wet mixture.
-
Mixing Wet and Dry Ingredients:
Now, with the mixer on its lowest speed, I gradually add the dry ingredient mixture to the wet ingredients, a little at a time. I mix only until just combined, being careful not to overmix. Overmixing develops the gluten in the flour too much, which can lead to tough, dense cookies, and we definitely want soft, tender Chocolate Blossom Cookies. As soon as no streaks of flour are visible, I stop the mixer. At this point, I often give the dough a final gentle stir with a spatula to ensure everything at the bottom of the bowl is fully incorporated.
-
Chilling the Dough:
This step is often tempting to skip, but I promise you, it’s worth it! I cover the bowl with plastic wrap and chill the dough in the refrigerator for at least 1 hour, or even up to 2 hours. Chilling the dough helps firm up the butter, which prevents the cookies from spreading too much during baking, resulting in a thicker, chewier cookie. It also allows the flavors to meld beautifully, making our Chocolate Blossom Cookies even more delicious. If you find your dough is too firm after chilling, let it sit at room temperature for 10-15 minutes before proceeding.
Forming and Coating the Chocolate Blossom Cookies
This is where our cookies start to take their recognizable shape, preparing them for their moment in the oven. The combination of granulated and powdered sugar for rolling creates a beautiful contrasting finish that I simply adore on these Chocolate Blossom Cookies.
-
Preheating and Preparing Baking Sheets:
While the dough is chilling during its last 15-20 minutes, I go ahead and preheat my oven to 350°F (175°C). I also line my baking sheets with parchment paper or silicone baking mats. This ensures that the cookies don’t stick and cook evenly, and it makes cleanup a breeze – which is always a bonus in my kitchen!
-
Preparing the Sugar Coating:
In two separate shallow bowls, I place the ½ cup of granulated sugar in one and the ½ cup of powdered sugar in the other. This dual coating is what gives Chocolate Blossom Cookies their distinctive festive look and lovely textural contrast.
-
Scooping and Rolling the Dough:
Once the dough is adequately chilled, I use a small cookie scoop (about 1 ½ tablespoons or a generous tablespoon) to portion out the dough. I roll each portion between my palms to form a smooth, uniform ball. This consistency helps ensure even baking. The dough should be firm enough to handle easily without sticking excessively to your hands.
-
Coating the Cookie Dough Balls:
First, I roll each chocolate dough ball in the bowl of granulated sugar, making sure it’s fully coated. The granulated sugar provides that initial sparkle and a slight crunch. Then, I immediately transfer the sugar-coated ball to the bowl of powdered sugar and roll it generously until it’s completely covered. The powdered sugar creates a beautiful snowy, crackled effect that truly makes these Chocolate Blossom Cookies stand out. This double-dip method is key to their iconic appearance.
-
Arranging on Baking Sheets:
I place the coated cookie dough balls onto the prepared baking sheets, leaving about 2 inches of space between each one. This allows room for them to spread slightly during baking without touching each other. Typically, I can fit about 12 cookies on a standard baking sheet.
Baking the Chocolate Blossom Cookies
Baking is the moment of truth! Getting the timing right is crucial for achieving that perfect chewy-tender texture that we all love in Chocolate Blossom Cookies. I always keep a close eye on them during this stage.
-
Baking Time:
I bake the Chocolate Blossom Cookies in the preheated oven for about 9-11 minutes. The exact time can vary slightly depending on your oven, so it’s good to know what to look for. When they are done, the edges should be set, but the centers will still look a little soft and slightly puffy. This slight underbaking in the center is actually perfect, as it ensures a wonderfully soft and chewy cookie once cooled. If you bake them until they are completely firm, they might end up a bit dry or crumbly.
-
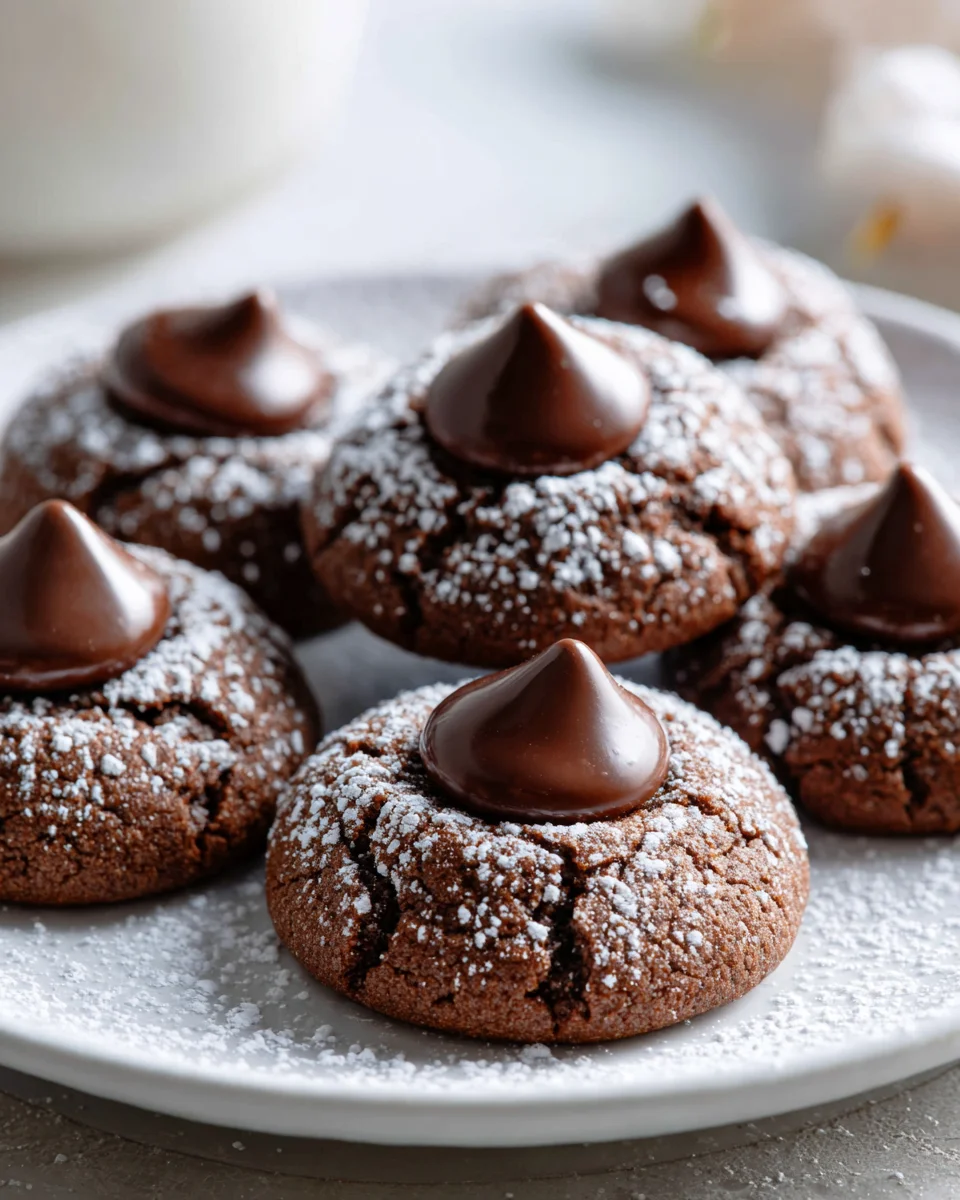
Adding the Chocolate Kisses:
As soon as I pull the baking sheet out of the oven, I immediately press one unwrapped chocolate kiss or miniature peanut butter cup into the center of each warm cookie. I press gently but firmly enough so that the chocolate starts to melt and adheres well to the cookie. It’s important to do this while the cookies are still hot from the oven; otherwise, the chocolate won’t melt properly and won’t stick as well. The warmth of the cookie will slowly melt the chocolate, creating that iconic blossom top.
Finishing Touches for Your Chocolate Blossom Cookies
The final steps are all about patience and ensuring these beauties set up perfectly, ready for enjoying. These Chocolate Blossom Cookies are so tempting fresh out of the oven, but letting them cool properly makes all the difference.
-
Cooling on the Baking Sheet:
After adding the chocolate kisses, I leave the cookies on the baking sheet for about 5-10 minutes. This initial cooling time allows the cookies to set up a bit more and prevents them from breaking when transferred. It also gives the chocolate a chance to begin firming up, though it will still be quite soft.
-
Transferring to a Wire Rack:
Carefully, using a thin spatula, I transfer the Chocolate Blossom Cookies to a wire cooling rack to cool completely. This is a vital step because cooling on a wire rack allows air to circulate all around the cookies, preventing them from becoming soggy on the bottom and ensuring they cool evenly. The chocolate kiss will continue to set as the cookies cool, becoming firm enough to handle without making a mess.
-
Serving and Storing:
Once fully cooled, these Chocolate Blossom Cookies are ready to be devoured! They are absolutely perfect with a glass of cold milk or a warm cup of coffee. To store any leftovers (if there are any!), I place them in an airtight container at room temperature for up to 3-4 days. While they are always best fresh, I find they retain their delightful chewiness and rich flavor quite well. If you live in a very warm climate, you might consider storing them in the refrigerator, but let them come to room temperature for the best texture before serving.
-
A Note on Perfection:
Don’t worry if some of your chocolate kisses don’t stay perfectly upright or if a few crack. That’s part of the homemade charm! Each cookie tells a story of a lovingly baked treat. The important thing is the delicious combination of rich chocolate cookie and melty, sweet chocolate on top. These Chocolate Blossom Cookies are a classic for a reason, bringing joy with every bite.
Conclusion:
So, there you have it – the delightful journey to creating what I genuinely believe are some of the most charming and satisfying cookies you’ll ever bake. This recipe isn’t just about mixing ingredients; it’s about crafting a moment of pure joy, a little burst of happiness in every bite. The simplicity of the process belies the profound flavor, the perfect balance of a rich, fudgy chocolate dough embracing that iconic, melting chocolate kiss center. It’s a testament to how classic flavors, when executed with a little love and precision, can truly sing. These aren’t just cookies; they’re an experience, a guaranteed crowd-pleaser that will leave everyone asking for the recipe. I promise you, the aroma alone as they bake is enough to make your heart happy, and the first bite? Utter bliss. They’re soft, chewy, intensely chocolatey, and that molten center is just divine.
Why These Are a Must-Try
What makes these cookies truly irresistible and a must-try for any baker, from novice to expert? It’s the delightful contrast in textures – the soft, tender cookie base providing the perfect cushion for the gloriously gooey chocolate kiss nestled within. Visually, they’re captivating, a simple yet elegant presentation that hints at the deliciousness to come. But beyond their beauty, it’s the sheer comfort they deliver. They evoke feelings of warmth, home, and celebration, making them perfect for any occasion, whether it’s a cozy night in, a bustling holiday party, or a thoughtful gift for a loved one. Each batch is a testament to the fact that sometimes, the simplest recipes yield the most profound culinary rewards. The satisfaction of pulling a tray of these perfectly formed, aromatic cookies from the oven is unmatched.
Get Creative: Serving Suggestions & Variations
Once your kitchen is filled with the irresistible scent and your cooling racks are laden with these beauties, the enjoyment truly begins. While these cookies are absolutely phenomenal on their own, perhaps with a tall glass of cold milk, a steaming mug of coffee, or a comforting cup of tea, don’t stop there! Imagine them slightly warm, alongside a scoop of vanilla bean ice cream, creating a dessert experience that rivals any fancy restaurant. For a special treat, try dipping them in a rich chocolate ganache or a simple powdered sugar glaze for an extra touch of sweetness and visual appeal. They also make an incredible gift, beautifully packaged for friends, neighbors, or as a thoughtful gesture to brighten someone’s day.
But the magic of these cookies doesn’t end with the basic recipe. This is where your creativity can truly shine! While the classic chocolate kiss is undeniably perfect, why not experiment? Try using different types of chocolate candies for the center – perhaps a caramel-filled chocolate for an unexpected gooey surprise, or even a mini peanut butter cup for a delightful sweet and salty combination. You could also play with the dough itself. A pinch of espresso powder in the dough would deepen the chocolate flavor beautifully, or a touch of peppermint extract would transform them into festive holiday treats. For a more sophisticated twist, drizzle melted white chocolate or a contrasting colored icing over the cooled cookies. Sprinkles, chopped nuts, or even a dusting of cocoa powder can also add visual flair. Remember, this recipe is a fantastic foundation, a canvas waiting for your personal touch. Each variation offers a new adventure for your taste buds, making the possibilities almost endless. These versatile Chocolate Blossom Cookies are truly a delight to customize and adapt to your unique preferences.
So, what are you waiting for? I wholeheartedly encourage you to roll up your sleeves, gather your ingredients, and dive into making a batch of these incredible cookies. Trust me, you won’t regret it. And once you’ve experienced the pure joy of baking and tasting them, please, please share your creations! I would absolutely love to hear about your baking adventures, see your beautiful photos, and learn about any clever variations you come up with. Tag me, send a message, or simply tell your friends – let’s spread the cookie love far and wide! Happy baking, my friends, and enjoy every single bite!
Chocolate Blossom Cookies
Soft, chewy chocolate cookies with a creamy, melty chocolate kiss center. These iconic cookies offer a perfect harmony of deep chocolate and sweet candy, charmingly resembling a delicate flower.
Ingredients
Instructions
Important Information
Nutrition Facts (Per Serving)
It is important to consider this information as approximate and not to use it as definitive health advice.
Allergy Information
Please check ingredients for potential allergens and consult a health professional if in doubt.

Leave a Comment