
Classic Christmas Toffee is more than just a sweet treat; it’s a golden ticket to cherished holiday memories. I vividly recall the intoxicating aroma of butter and sugar caramelizing on the stove, a scent that immediately signifies the start of the festive season in my home. This beloved confection, with its rich history rooted in British candy-making traditions, has found its way into countless hearts and holiday tins across the globe. There’s an undeniable magic in preparing and sharing this crunchy, buttery delight, making it a truly essential part of our holiday celebrations.
What makes Classic Christmas Toffee so universally adored? Perhaps it’s the irresistible combination of its crisp snap, melt-in-your-mouth texture, and the intense, decadent flavor that perfectly balances sweet and buttery notes. It’s an ideal candidate for gifting, a show-stopping addition to any holiday dessert spread, and a comforting indulgence after a long day of festivities. Every piece promises a delightful crunch and a burst of rich flavor that transports you back to simpler, happier times. I am absolutely thrilled to guide you through creating your own batch of this timeless holiday candy, ensuring your kitchen is filled with that wonderful, festive fragrance.

Ingredients:
- Unsalted Butter: 2 cups (4 sticks or 450g), cut into 1-inch pieces. Using unsalted butter allows me to control the salt content precisely, ensuring the perfect balance in my Classic Christmas Toffee.
- Granulated Sugar: 2 cups (400g). This is the foundation of the toffee’s sweetness and structure.
- Water: 1/2 cup (120ml). Water helps dissolve the sugar initially, preventing crystallization and ensuring a smooth texture.
- Salt: 1 teaspoon. A touch of salt is crucial to balance the sweetness and enhance the rich buttery flavor of the Classic Christmas Toffee. I prefer fine sea salt for its even distribution.
- Semi-Sweet Chocolate Chips or Bar: 12 ounces (340g), finely chopped if using a bar. High-quality chocolate makes a huge difference in the final taste and appearance of your Classic Christmas Toffee.
- Chopped Nuts: 1 cup (about 120g). My personal favorites are toasted pecans or almonds, but walnuts work wonderfully too. Toasting them beforehand enhances their flavor and crunch, adding another layer to the texture of this festive treat.
Equipment You’ll Need:
- Heavy-Bottomed Saucepan: A 3 to 4-quart pan is ideal. The heavy bottom is essential for even heat distribution, which prevents scorching and ensures the sugar cooks uniformly, a critical factor for perfect Classic Christmas Toffee.
- Candy Thermometer: A reliable digital or analog candy thermometer that clips to the side of the pan is non-negotiable for toffee making. Accuracy is key to reaching the precise hard crack stage (300°F/149°C), which dictates the texture of your Classic Christmas Toffee.
- Large Baking Sheet: A standard half-sheet pan (13×18 inches) is perfect. You’ll need to line it generously.
- Parchment Paper or Silicone Baking Mat: Essential for preventing the sticky toffee from adhering to the pan. A silicone mat offers superior non-stick properties and is reusable, making cleanup much easier.
- Pastry Brush: Useful for brushing down the sides of the pan with water to prevent sugar crystal formation, a common pitfall in toffee making.
- Rubber Spatula or Wooden Spoon: For stirring the mixture. I find a heat-resistant rubber spatula works best for scraping the bottom and sides without scratching the pan.
- Offset Spatula or Butter Knife: For spreading the melted chocolate evenly over the toffee.
Preparing for the Best Classic Christmas Toffee:
- Line Your Baking Sheet: First things first, grab your large baking sheet and line it meticulously with parchment paper or a silicone baking mat. If using parchment, make sure it extends slightly over the edges, creating a small lip. This makes it easier to lift the cooled Classic Christmas Toffee later. I often lightly butter the pan underneath the parchment to ensure it stays put, preventing any shifting while pouring the hot toffee. This preparation step is crucial because once the toffee reaches its temperature, you’ll need to work quickly, and a properly prepared surface is key to success.
- Measure Everything Out: Toffee making is all about precision and speed at certain stages, so having all your ingredients measured and ready to go is non-negotiable. This is called “mise en place,” and it truly makes a difference. Cut your butter into 1-inch pieces; this helps it melt more evenly. Have your sugar, water, and salt pre-measured. Prepare your chocolate chips or finely chop your chocolate bar, and toast and chop your nuts if you haven’t already. Place the chopped nuts in a bowl near your prepared baking sheet. Once the toffee is cooked, you won’t have time to stop and measure, so this step ensures a smooth, stress-free process for making your Classic Christmas Toffee.
- Clear Your Workspace: Ensure your counter space around the stovetop and your prepared baking sheet is clear and clean. You’ll be dealing with very hot sugar, and you don’t want any clutter getting in your way. A clear path from the stove to the baking sheet is essential for a safe and efficient pour.
- Attach Your Candy Thermometer: Securely clip your candy thermometer to the side of your heavy-bottomed saucepan. Make sure the tip of the thermometer is submerged in the mixture but not touching the bottom of the pan. An accurate temperature reading is the single most important factor in achieving the perfect hard crack consistency for your Classic Christmas Toffee. If your thermometer touches the bottom, it might give you an inaccurate, higher reading, leading to undercooked toffee.
The Art of Cooking Classic Christmas Toffee:
- Combine Ingredients in the Saucepan: Place the cut butter, granulated sugar, water, and salt into your heavy-bottomed saucepan. Using a heavy-bottomed pan is absolutely critical here, as it distributes heat much more evenly than a thinner pan, significantly reducing the risk of scorching the sugar, which can ruin the flavor of your Classic Christmas Toffee.
- Begin Heating and Stirring: Set your stovetop to medium heat. Begin stirring the mixture constantly with your heat-resistant rubber spatula or wooden spoon. At this initial stage, constant stirring is essential. You want to gently melt the butter and dissolve the sugar completely into the water. If the sugar doesn’t fully dissolve, it can lead to crystallization later, resulting in grainy rather than smooth toffee. Keep stirring until you no longer feel sugar crystals on the bottom of the pan when you drag your spatula across it, and the mixture comes to a gentle boil. This process typically takes about 5-7 minutes.
- Boil and Clean the Sides: Once the mixture comes to a boil, stop stirring. Stirring after the sugar has dissolved can introduce air bubbles and encourage crystallization. At this point, I often take my pastry brush, dip it in a little plain water, and gently brush down any sugar crystals that may have splashed onto the sides of the pan above the liquid line. These rogue crystals can act as “seed crystals” and cause the entire batch of toffee to crystallize, creating a sugary, grainy texture instead of the smooth, snappy Classic Christmas Toffee we’re aiming for.
- Continue Cooking to Temperature: Allow the mixture to boil steadily without stirring. Watch your candy thermometer closely. The temperature will gradually climb. It will first pass through soft ball, firm ball, and soft crack stages. During this phase, the mixture will change appearance: it will start foamy and pale yellow, then gradually thicken and deepen in color. The most important thing here is patience and watchful waiting. Let the thermometer do its job.
- Reaching the Hard Crack Stage (300°F/149°C): As the temperature approaches 290°F (143°C), the color of the toffee will transform from a pale golden to a beautiful rich, amber hue, similar to dark honey or a copper penny. This is where you need to be extremely vigilant. The temperature can rise very quickly in these final degrees. The target temperature for Classic Christmas Toffee is precisely 300°F (149°C), which is the hard crack stage. If you cook it past this, it will taste burnt; if you stop too soon, your toffee will be too soft and chewy, more like caramel. The moment your thermometer hits 300°F, remove the saucepan from the heat IMMEDIATELY. There’s often residual heat in the pan that can cause the temperature to climb another degree or two, so quick action is vital.
- Pouring the Hot Toffee: Without delay, carefully and quickly pour the very hot Classic Christmas Toffee mixture onto your prepared baking sheet. Start pouring from one corner and let it spread naturally across the parchment or silicone mat. You can gently tilt the pan to encourage even spreading, but avoid using a spatula or spoon to spread it out too much, as this can incorporate air and affect the texture. Work swiftly but safely, as the toffee sets quickly.
Adding the Festive Toppings:
- Sprinkle the Chocolate: Immediately after pouring the hot toffee onto the baking sheet, generously sprinkle your pre-measured chocolate chips or chopped chocolate evenly over the entire surface of the hot toffee. The residual heat from the toffee will begin to melt the chocolate. This needs to be done while the toffee is still very hot to ensure adequate melting.
- Melt and Spread the Chocolate: Let the chocolate sit on the hot toffee for about 3-5 minutes. You’ll notice it starting to get glossy and soft. Then, using an offset spatula or the back of a spoon, gently and evenly spread the melted chocolate across the entire surface of the toffee. Work from the center outwards, ensuring every bit of the Classic Christmas Toffee is coated with a smooth layer of delicious chocolate. If the chocolate isn’t melting sufficiently, you can carefully place the baking sheet into a slightly warm oven (turned off, just residual heat) for a minute or two, but watch it very closely to prevent burning.
- Add the Chopped Nuts: While the chocolate is still warm and soft, liberally sprinkle your toasted chopped nuts over the melted chocolate layer. Gently press them down with your hand or the back of your spatula to ensure they adhere well to the chocolate. This step not only adds a wonderful crunch and flavor but also gives your Classic Christmas Toffee that signature festive look.
Cooling and Breaking Your Classic Christmas Toffee:
- Allow to Cool Completely: Now comes the hardest part: patience! Let the Classic Christmas Toffee cool completely and set. This can take anywhere from 1 to 2 hours at room temperature, or you can speed up the process by placing the baking sheet in the refrigerator for about 30-45 minutes. It is crucial that the toffee is fully cooled and hardened before attempting to break it. If it’s still warm, it will be chewy and difficult to break cleanly.
- Lift and Break: Once completely chilled and firm, carefully lift the parchment paper or silicone mat, along with the Classic Christmas Toffee, off the baking sheet. Place it on a sturdy cutting board. Using a heavy knife, the back of a large spoon, or even your hands, carefully break the toffee into irregular, bite-sized pieces. I often find a sharp whack with the handle of a sturdy knife yields the most satisfyingly jagged and traditional toffee shards. The aim is rustic charm!
- Store Properly: Your delightful Classic Christmas Toffee is now ready to be enjoyed! For best results and to maintain its crisp texture, store it in an airtight container at room temperature for up to 2 weeks, or in the refrigerator for even longer. If storing in layers, place parchment paper between them to prevent sticking.
Tips for Perfect Classic Christmas Toffee Every Time:
-
Humidity is the Enemy:
Making toffee on a dry day is ideal. High humidity can cause your toffee to absorb moisture from the air, making it sticky, grainy, or soft instead of perfectly crisp. If you live in a humid climate, consider using a dehumidifier in your kitchen or opting for a less humid day for your Classic Christmas Toffee adventure.
-
Calibrate Your Candy Thermometer:
Before you even start, test your candy thermometer! Place it in a pot of boiling water; it should read 212°F (100°C) at sea level. If it reads higher or lower, make a mental note of the difference and adjust your target temperature (300°F) accordingly. An accurate thermometer is your best friend for achieving perfect Classic Christmas Toffee.
-
Don’t Scrape the Sides (After Boiling):
Once the mixture is boiling and you’ve brushed down any initial sugar crystals, resist the urge to scrape down the sides of the pan with your spatula during the cooking process. Doing so can introduce undissolved sugar crystals back into the main mixture, leading to crystallization and a grainy texture. Let the Classic Christmas Toffee cook undisturbed.
-
Quality Ingredients Matter:
While toffee is simple in its ingredients, the quality truly shines through. Use good quality unsalted butter and a chocolate that you genuinely enjoy eating on its own. These small details elevate your Classic Christmas Toffee from good to absolutely spectacular.
-
Patience and Precision:
Toffee making is more about precision and patience than complicated techniques. Don’t rush the heating process, and watch that thermometer like a hawk, especially in the final few degrees. Overcooking by even a few degrees can result in burnt-tasting toffee, while undercooking yields soft, chewy instead of snappy Classic Christmas Toffee.
-
Cleaning Up:
Don’t despair over the hardened sugar left in your saucepan! The easiest way to clean it is to fill the pan with water and bring it to a boil. The boiling water will dissolve the hardened sugar, making cleanup effortless. You can even salvage a few sugary treats by carefully licking the spoon, but I didn’t say that.
-
Variations for Your Classic Christmas Toffee:
Feel free to experiment with different toppings! Instead of plain nuts, consider adding a sprinkle of flaky sea salt over the chocolate and nuts for a lovely sweet-and-salty contrast. You could also try white chocolate with crushed candy canes for an extra festive touch, or even a mix of dark and milk chocolate. The base Classic Christmas Toffee recipe is versatile and forgiving for creative toppings.
Conclusion:
So there you have it! This isn’t just any sweet treat; it’s the sweet treat that will elevate your holiday season and beyond. I truly believe that mastering this recipe for a truly exceptional Classic Christmas Toffee is an absolute game-changer for anyone who loves baking and bringing joy through food. The golden crunch, the buttery richness that melts in your mouth, the decadent chocolate layer, and that satisfying sprinkle of nuts – every single bite is an experience. It’s that perfect balance of sweetness and texture that makes it utterly irresistible. Imagine the aroma filling your kitchen, a scent that instantly brings warmth and nostalgia. This toffee isn’t just a dessert; it’s a moment, a memory waiting to happen. It’s surprisingly simple to achieve professional results right in your own home, and the pure delight it brings to everyone who tastes it makes every minute spent crafting it more than worthwhile. If you’ve ever wanted to create something truly special, something that will have friends and family asking for the recipe year after year, then this is the one you need to conquer. Trust me, your taste buds, and those of your loved ones, will thank you profusely.
Elevate Your Dessert Game with These Serving Suggestions:
Once your magnificent toffee has cooled and shattered into beautiful shards, the possibilities for enjoying it are endless. Of course, the simplest and most satisfying way is to just grab a piece (or two!) and savor it with a cup of hot coffee or a soothing herbal tea – it’s the ultimate afternoon pick-me-up. But don’t stop there! Think about how this versatile confection can enhance other moments. For instance, arrange a generous pile of these gleaming pieces on a beautiful serving platter as part of your dessert spread at your next gathering. They add a touch of elegance and undeniable deliciousness that will surely be a talking point. Consider crushing a few pieces to sprinkle over a scoop of vanilla bean ice cream or a rich chocolate mousse for an incredible textural contrast and an explosion of flavor. It also makes for an absolutely stellar homemade gift. Package the toffee in a decorative tin or a cellophane bag tied with a festive ribbon, and you have a thoughtful, handcrafted present that speaks volumes about your care. I often use smaller, irregular pieces to mix into a batch of brownie batter just before baking – the pockets of melted toffee create an unforgettable chewy, crunchy surprise! Or, how about crumbling some over a bowl of Greek yogurt and berries for an indulgent breakfast treat? It really is much more than just a standalone candy; it’s a culinary enhancement waiting to happen.
Unleash Your Creativity with Exciting Toffee Variations:
Now, while the classic version is undeniably perfect, part of the fun of baking is making a recipe your own. Don’t be afraid to experiment with exciting variations to suit different tastes or occasions. For the nut lovers out there, while pecans are traditional and glorious, consider swapping them for crunchy almonds, rich walnuts, or even a mix of your favorite toasted nuts. Toasting them beforehand truly brings out their flavor, adding another layer of depth to your toffee. When it comes to the chocolate, milk chocolate offers a creamy sweetness, but a dark chocolate will lend a more sophisticated, slightly bitter counterpoint that balances the sweetness of the toffee beautifully. You could even use a marbled effect by swirling melted white chocolate into the dark chocolate layer before it sets. For an extra touch of gourmet flair, a sprinkle of flaky sea salt over the still-wet chocolate layer is always a winner, enhancing all the flavors. Spices can also play a wonderful role; a tiny pinch of cinnamon or a whisper of nutmeg mixed into the melted butter before adding the sugar can give your toffee a subtle warmth, making it even more festive. Imagine orange zest or a hint of espresso powder in the chocolate layer – the possibilities are truly limited only by your imagination! Each small tweak can transform this beloved treat into something uniquely yours, making every batch a new adventure.
Your Turn: Bake, Share, and Enjoy!
So, what are you waiting for? I wholeheartedly encourage you to roll up your sleeves, gather your ingredients, and dive into the delightful process of making this phenomenal toffee. You’ll find immense satisfaction in creating something so incredibly delicious from scratch. Once you’ve tasted the glorious results, I’d absolutely love to hear about your experience! Did you stick to the classic? Or did you venture into exciting new variations? Please share your stories, your tips, and even photos of your beautiful creations in the comments below. Let’s build a community of toffee enthusiasts! Happy baking, and enjoy every single buttery, crunchy, chocolatey bite!
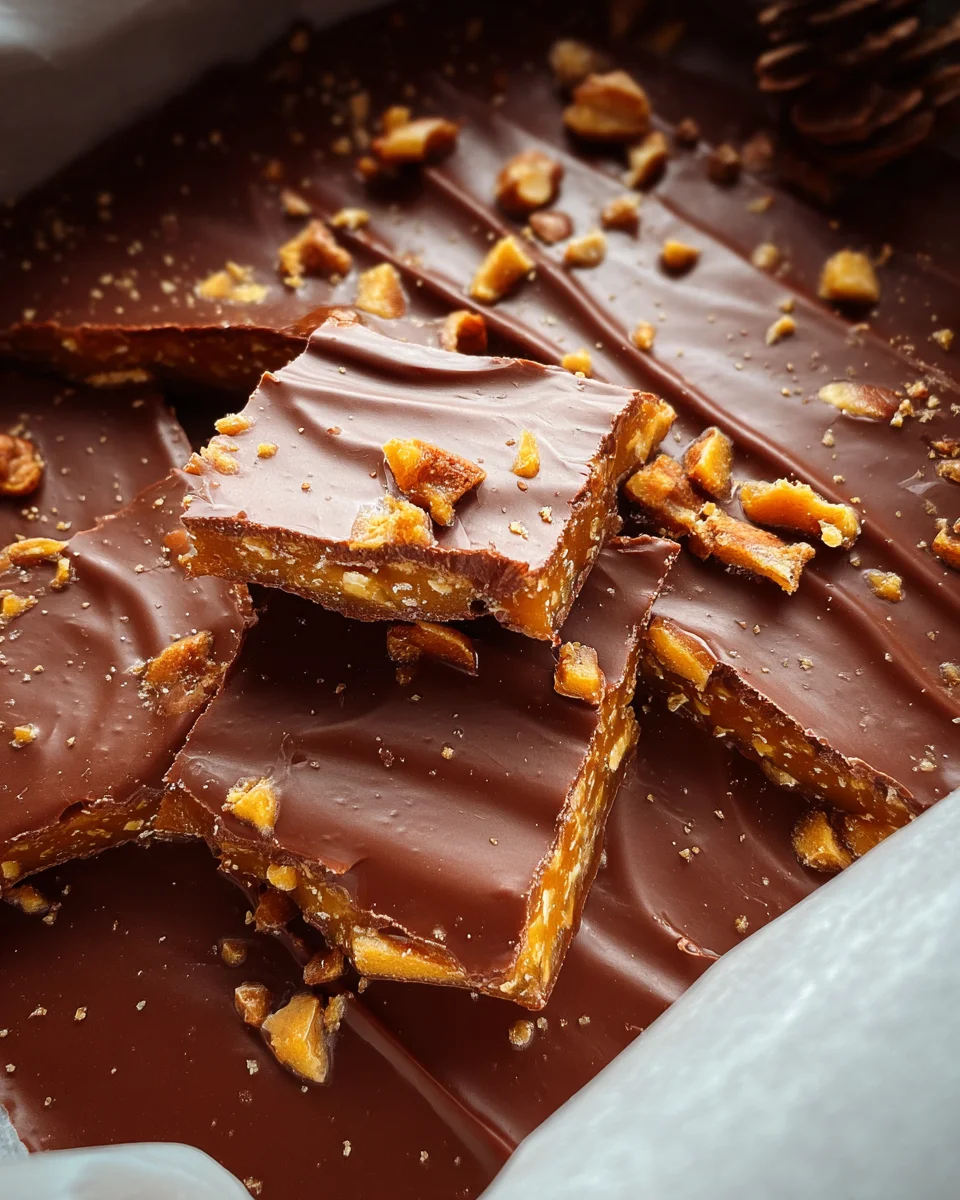
Classic Christmas Toffee
A beloved crunchy, buttery confection rooted in British traditions, Classic Christmas Toffee is an irresistible treat for the holidays. Perfect for gifting, dessert spreads, or a comforting indulgence, its crisp snap and rich flavor evoke cherished festive memories.
Ingredients
Instructions
Important Information
Nutrition Facts (Per Serving)
It is important to consider this information as approximate and not to use it as definitive health advice.
Allergy Information
Please check ingredients for potential allergens and consult a health professional if in doubt.


Leave a Comment