
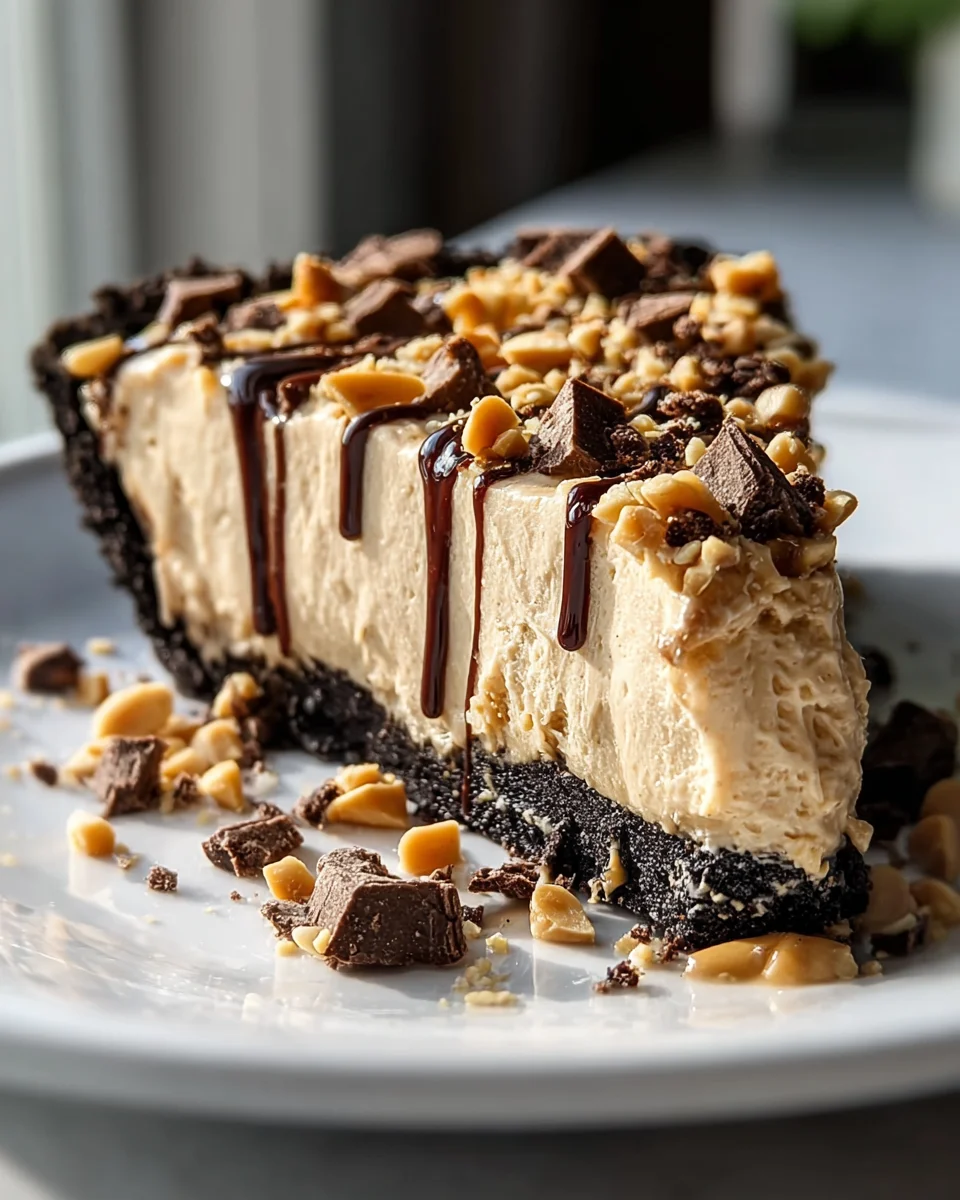
Easy Peanut Butter Pie Recipe is a phrase that immediately conjures images of creamy, dreamy dessert perfection that requires little fuss. Imagine a dessert that delivers all the rich, nutty indulgence of peanut butter in a velvety smooth, chilled slice, all without ever turning on your oven. That’s the delightful magic we’re about to explore today!
Peanut butter has been a beloved staple in American pantries for over a century, evolving from a simple health food into a quintessential comfort ingredient. It’s no surprise that its unique, comforting flavor found its way into one of America’s most cherished desserts – pie. This particular no-bake variation quickly became a cherished classic at potlucks, family gatherings, and holiday tables, especially in regions known for their love of hearty, comforting fare, cementing its place as a true crowd-pleaser.
I’ve always found that there’s something utterly irresistible about the salty-sweet harmony of a well-made peanut butter dessert. This pie offers a luxurious, velvety smooth texture that practically melts in your mouth, often perfectly balanced by a delightful, crumbly crust. But beyond its incredible taste and delightful mouthfeel, what truly makes this dish a standout is its incredible simplicity. I am thrilled to share with you an Easy Peanut Butter Pie Recipe that promises maximum flavor with minimal effort, making it the perfect showstopper for any occasion, even when time is short.
Ingredients:
- For the Crust:
- 1 ½ cups (about 18-20 whole) graham cracker crumbs (or chocolate cookie crumbs for a twist!)
- ½ cup (1 stick) unsalted butter, melted
- ¼ cup granulated sugar
- For the Peanut Butter Filling:
- 1 (8-ounce) package cream cheese, softened to room temperature
- 1 cup creamy peanut butter (I always opt for a good quality, well-stirred, shelf-stable variety for consistency – avoid natural peanut butter that separates unless you want a different texture!)
- 1 ½ cups powdered sugar (confectioners’ sugar), sifted if clumpy
- ½ cup whole milk (or heavy cream for an even richer, thicker filling)
- 1 teaspoon pure vanilla extract
- 1 (8-ounce) container frozen whipped topping (like Cool Whip), thawed in the refrigerator
- For Garnish (Optional, but highly recommended!):
- Extra whipped topping or homemade whipped cream
- Chocolate shavings or mini chocolate chips
- A drizzle of melted peanut butter or chocolate syrup
- Chopped roasted peanuts
Preparing Your No-Bake Crust
Creating the perfect foundation for your Easy Peanut Butter Pie Recipe is surprisingly simple and requires no oven, which is always a win in my book! This step is all about getting that delightful crunchy texture to complement the creamy filling.
-
Getting Started with Crumb Creation:
First things first, let’s tackle those graham cracker crumbs. You’ll need about 1 ½ cups, which typically translates to around 18-20 full graham cracker sheets. My preferred method is to place the graham crackers in a large zip-top bag and crush them using a rolling pin. This gives you a bit of a stress-relieving workout and allows you to control the fineness of the crumbs. You want them to be fine enough that they hold together, but not so fine that they turn into a paste. Alternatively, a food processor makes quick work of this task; just pulse until you achieve consistent crumbs. If you’re feeling adventurous and want a chocolatey contrast, feel free to substitute chocolate sandwich cookie crumbs (Oreos with the cream removed, or similar) for the graham crackers – it’s a fantastic pairing with peanut butter!
-
Melting the Butter & Mixing:
Next, melt your ½ cup (one stick) of unsalted butter. You can do this in a microwave-safe bowl in 20-30 second intervals until fully liquid, or gently in a small saucepan on the stovetop. Be careful not to brown it unless you’re intentionally going for a browned butter flavor, which, while delicious, isn’t traditional for this recipe. Once melted, pour this golden liquid over your graham cracker crumbs in a medium-sized mixing bowl. Add the ¼ cup of granulated sugar to the mixture. The sugar not only adds a touch of sweetness but also helps bind the crust together. Mix everything thoroughly with a spoon or your hands until all the crumbs are evenly moistened. It should look like wet sand, holding together when you squeeze a handful.
-
Pressing into the Pie Plate:
Now, transfer this delightful mixture into a standard 9-inch pie plate. This is where your pressing technique comes in! Using the bottom of a flat-bottomed measuring cup, a clean glass, or even your knuckles, firmly press the crumb mixture into the bottom and up the sides of the pie plate. It’s crucial to press firmly and evenly to create a solid crust that won’t crumble when you slice your pie. Pay extra attention to the edges to ensure they are well-formed and sturdy. A perfectly pressed crust is key to a beautiful slice of pie. Don’t rush this step; take your time to get it just right.
-
Chilling for Firmness:
Once your crust is perfectly formed, it needs a little “me time” in the refrigerator. Pop the pie plate into the fridge and let it chill for at least 30 minutes, or even better, an hour. This chilling period is essential for the butter to solidify, binding the crumbs together and making the crust firm and stable. A well-chilled crust will prevent any sogginess once the filling is added and will make for much cleaner slices later on. While the crust is chilling, you can gather your ingredients and start preparing for the glorious peanut butter filling!
Crafting the Silky Peanut Butter Filling
This is where the magic truly happens, transforming simple ingredients into a rich, creamy, and utterly irresistible peanut butter cloud. The key here is achieving a smooth, lump-free consistency, so patience and proper technique will serve you well.
-
Softening the Cream Cheese:
Before you even think about mixing, make sure your 8-ounce package of cream cheese is truly at room temperature. This is a non-negotiable step for a smooth filling! If it’s cold, it will be lumpy and difficult to incorporate, leading to a less-than-silky texture. I usually take it out of the fridge at least an hour before I plan to use it. If you’re short on time, you can carefully microwave it for 10-15 seconds at a time until softened, but be careful not to melt it. In a large mixing bowl, beat the softened cream cheese with an electric mixer (handheld or stand mixer with a paddle attachment works best) on medium speed until it’s light, fluffy, and completely smooth. Scrape down the sides of the bowl often to ensure everything is evenly beaten. This initial step creates the creamy foundation for our pie.
-
Incorporating the Peanut Butter:
Now for the star of the show: the peanut butter! Add the 1 cup of creamy peanut butter to the bowl with the beaten cream cheese. Again, using your electric mixer, beat on medium speed until the peanut butter and cream cheese are fully combined and the mixture is incredibly smooth. This might take a couple of minutes. Make sure there are no streaks of unmixed cream cheese or peanut butter. For this recipe, I always recommend using a traditional creamy, shelf-stable peanut butter (like Jif or Skippy) rather than natural peanut butter that separates. The oils in natural peanut butter can sometimes affect the set and texture of no-bake pies, making them less firm. If you only have natural, ensure it’s very well-stirred to integrate the oils before adding.
-
Sweetening with Powdered Sugar:
Next, gradually add the 1 ½ cups of powdered sugar (confectioners’ sugar) to the peanut butter and cream cheese mixture. I like to add it in two or three additions, beating well after each addition until fully incorporated. Powdered sugar is fantastic here because it dissolves easily, contributing to the smooth texture without any grittiness. If your powdered sugar tends to be clumpy, I highly recommend sifting it before adding it to prevent lumps in your final filling. Start the mixer on a low speed to avoid a “sugar cloud” explosion in your kitchen, then increase to medium until the sugar is fully blended in and the mixture is nice and thick.
-
Adding the Liquid & Flavor Boost:
With the sugar incorporated, it’s time to add the ½ cup of whole milk and 1 teaspoon of pure vanilla extract. The milk helps to thin the mixture slightly and makes it wonderfully creamy, while the vanilla extract enhances all the other flavors, adding a comforting depth. Beat these in on medium speed until everything is just combined and the filling is smooth and uniform. Be careful not to overmix at this stage; we just want to achieve a harmonious blend. The mixture should be thick but pourable.
-
Folding in the Whipped Topping for Lightness:
Finally, the secret to the pie’s airy, cloud-like texture! Gently fold in the thawed 8-ounce container of frozen whipped topping. Use a rubber spatula for this step, working carefully in a lifting and folding motion. The goal is to incorporate the whipped topping without deflating it too much, as its airiness is crucial for the light texture of the pie. Do this in two additions if it’s a large amount, ensuring no streaks of whipped topping remain visible. This step makes the filling incredibly light and fluffy, rather than dense. You’ll notice the volume of your filling increasing beautifully. Don’t use an electric mixer for this part; manual folding is key!
Assembling Your Masterpiece
You’ve done the hard work; now comes the satisfying part of bringing it all together and watching your Easy Peanut Butter Pie Recipe take shape. This stage is quick and easy, leading you closer to that first delightful bite.
-
Filling the Chilled Crust:
Retrieve your well-chilled graham cracker crust from the refrigerator. Its firmness will now provide a perfect vessel for your luscious filling. Carefully spoon or pour the entire peanut butter filling mixture into the prepared crust. Use your rubber spatula to gently spread the filling evenly across the crust, smoothing the top. You want a nice, even surface for a beautiful presentation. Take a moment to admire your handiwork – it’s already looking delicious!
-
The Crucial Chilling Period:
This is arguably the most important step for a successful no-bake pie. Cover the pie loosely with plastic wrap (try to avoid letting the plastic wrap touch the surface of the filling if possible, or very gently lay it on top) and place it back in the refrigerator. It needs to chill for a minimum of 4 hours to properly set. For the best results and the cleanest slices, I highly recommend chilling it overnight. During this time, the filling will firm up beautifully, allowing for neat, impressive slices that hold their shape. Rushing this step will result in a messy, unset pie, and nobody wants that! Trust me, the wait is absolutely worth it for a perfectly firm and delectable pie.
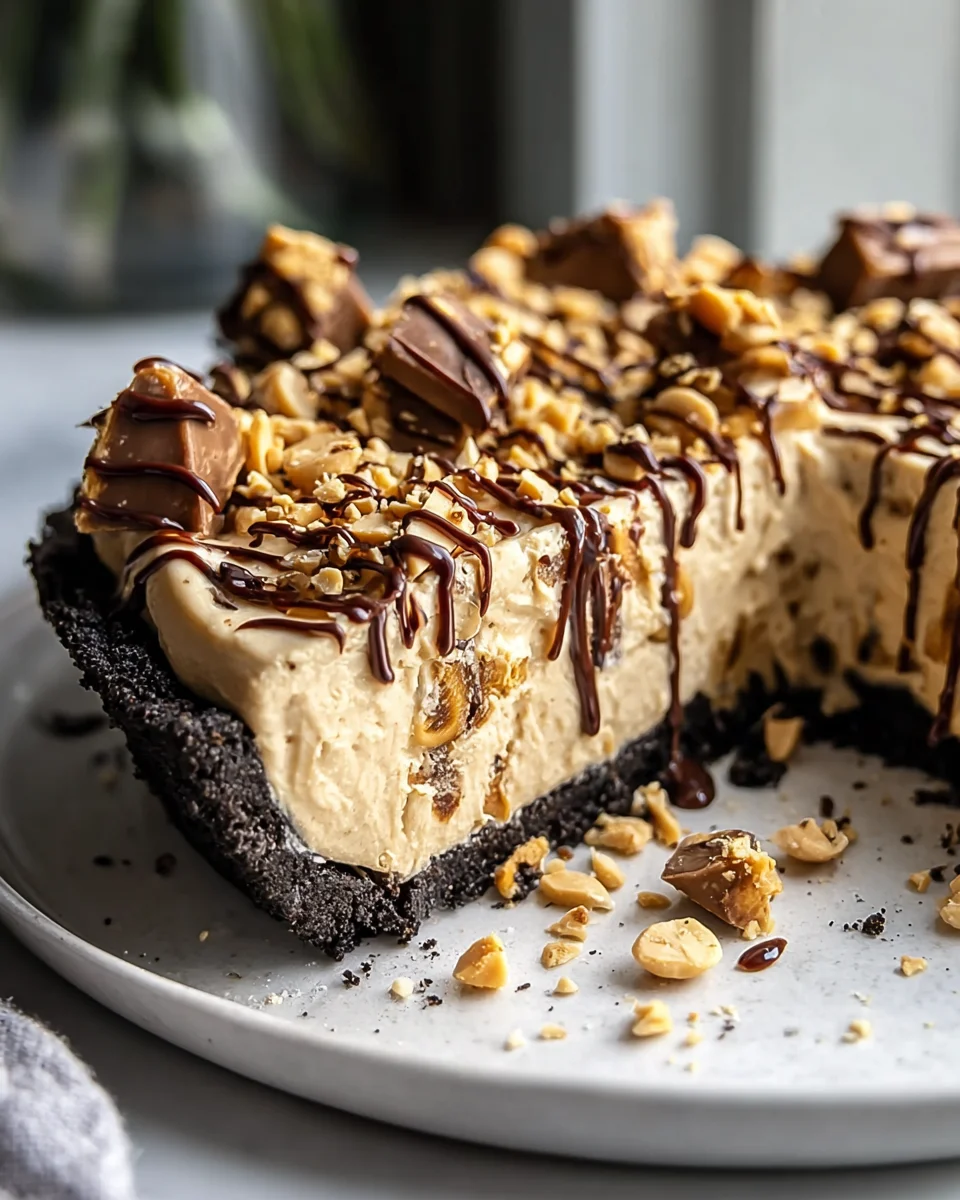
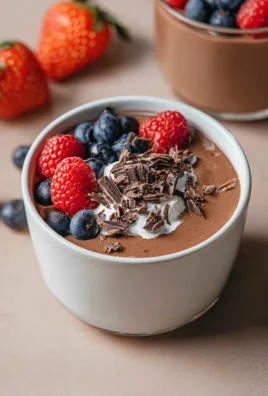
Garnishing for Perfection and Serving
Once your pie is perfectly chilled and set, it’s time to add those finishing touches that elevate it from simply delicious to truly spectacular. Garnishes add visual appeal and extra layers of flavor and texture, making your Easy Peanut Butter Pie Recipe an unforgettable dessert.
-
Adding the Finishing Touches:
Just before serving, remove the pie from the refrigerator. This is your chance to get creative with garnishes! My go-to is a generous dollop of extra whipped topping or, if I’m feeling fancy, freshly whipped cream. You can pipe it on for an elegant look or simply spoon it around the edges or in the center. For an extra layer of chocolatey goodness, sprinkle some mini chocolate chips or delicate chocolate shavings over the top. A simple vegetable peeler works wonders for creating beautiful chocolate curls from a bar of chocolate. For an even more intense peanut butter experience, you can gently melt a tablespoon or two of creamy peanut butter in the microwave and drizzle it artistically over the whipped cream. Chopped roasted peanuts also add a lovely crunch and visual appeal. Choose one, choose all, or invent your own perfect garnish!
-
Slicing and Serving:
Once garnished, your pie is ready to be served! For the cleanest slices, especially after a good long chill, I find it helpful to run a sharp knife under hot water, wipe it dry, and then slice. Repeat this process for each slice. This warms the knife just enough to glide through the creamy filling without sticking. Serve individual slices immediately. This pie is best enjoyed cold, straight from the fridge. It pairs wonderfully with a cup of coffee or a glass of milk. Any leftover pie should be stored covered in the refrigerator. It will keep well for 3-4 days, though I doubt it will last that long!
And there you have it! A wonderfully creamy, perfectly balanced, and incredibly easy peanut butter pie that’s sure to impress everyone. This recipe is a true crowd-pleaser and a staple in my dessert repertoire. Enjoy every single rich, peanut buttery bite!
Conclusion:
If you’ve followed along with me through the simple steps of crafting this incredible dessert, then you already know the magic that awaits. This isn’t just any sweet treat; this is the Easy Peanut Butter Pie Recipe that will undoubtedly become a treasured staple in your culinary repertoire. We’ve journeyed through the creation of a dessert that defies expectations with its incredible flavor while demanding so little of your time and effort. The allure of this pie lies in its perfect marriage of rich, creamy peanut butter goodness with a delightful, often crunchy crust that provides the ideal textural contrast. It’s a truly satisfying indulgence, offering that beloved sweet-and-salty dynamic that makes peanut butter so universally adored. Imagine a slice of pure, velvety bliss, chilled to perfection, ready to melt in your mouth and leave you utterly content.
What makes this particular recipe a must-try isn’t just its simplicity, though that’s a huge bonus for busy schedules or those new to baking. It’s the sheer quality of the outcome – a pie that tastes like it came from a gourmet bakery, yet was whipped up in your own kitchen with minimal fuss. It’s the kind of dessert that elicits gasps of delight and requests for “just one more slice.” Whether you’re looking to impress guests at a dinner party, bring a show-stopping dish to a potluck, or simply treat your family to something extraordinary on a regular Tuesday, this pie fits every bill. It’s comforting, nostalgic, and utterly delicious all at once, proving that truly fantastic food doesn’t need to be complicated.
Enhance Your Experience: Serving Suggestions
To truly elevate this already magnificent pie, a few simple serving suggestions can take it to the next level. My absolute favorite way to serve this indulgent creation is with a generous dollop of freshly whipped cream. The light, airy cream provides a beautiful counterpoint to the pie’s rich density. For chocolate lovers, a drizzle of warm chocolate syrup or a sprinkling of chocolate shavings across the top is non-negotiable – the peanut butter and chocolate combination is a classic for a reason! If you enjoy a little extra crunch, scatter some finely chopped roasted peanuts over each slice. And for those who appreciate a more complex flavor profile, a tiny pinch of flaky sea salt on top before serving really brightens and enhances the peanut butter’s natural taste. Always serve it thoroughly chilled; the cold temperature is key to achieving that perfect firm, yet creamy texture.
Get Creative: Delightful Variations to Explore
The beauty of a fantastic base recipe is its potential for customization, and this peanut butter pie is no exception.
Chocolate Swirl Peanut Butter Pie:
For an easy variation, melt about half a cup of your favorite chocolate chips, let it cool slightly, and then swirl it into about a third of your prepared peanut butter filling before pouring it into the crust. You’ll get beautiful marbling and an extra layer of flavor.
Pretzel Crust Perfection:
While a graham cracker or cookie crust is wonderful, consider a crushed pretzel crust for an incredible salty-sweet dynamic that adds an extra layer of complexity and crunch.
Mini Peanut Butter Pies:
Instead of one large pie, press your crust mixture into cupcake liners in a muffin tin, then fill them with the peanut butter mixture. These individual portions are perfect for parties and portion control, or just for adorable presentation.
Loaded Peanut Butter Pie:
Fold in a cup of mini chocolate chips, chopped peanut butter cups, or even some chopped snickers bars directly into your filling before chilling for an ultimate decadent experience.
So now, dear reader, the stage is set. You have the recipe, you have the inspiration for serving and variations, and you know the incredible reward that awaits. I genuinely hope you feel empowered and excited to try this remarkable dessert for yourself. It’s an incredibly rewarding experience to create something so delicious with such little effort. Don’t hesitate, just dive in! And once you’ve experienced the sheer delight of this pie, please come back and share your thoughts. I love hearing about your kitchen adventures – your triumphs, your clever tweaks, and especially seeing photos of your finished masterpieces. Happy baking, and enjoy every single incredible bite!
Easy Peanut Butter Pie Recipe – Quick & Creamy!
A delightful no-bake dessert featuring a rich, velvety smooth peanut butter filling and a crisp crust. This easy recipe offers maximum flavor with minimal effort, perfect for any occasion.
Ingredients
Instructions
Important Information
Nutrition Facts (Per Serving)
It is important to consider this information as approximate and not to use it as definitive health advice.
Allergy Information
Please check ingredients for potential allergens and consult a health professional if in doubt.
Leave a Comment