
Honey Sesame Chicken is a dish that immediately conjures images of glossy, perfectly glazed chicken pieces, tantalizingly aromatic and utterly irresistible. Have you ever craved that perfect balance of sweet and savory, with a hint of nutty sesame, but wished you could achieve that restaurant-quality flavor right in your own kitchen? I know I have! This beloved takeout classic, a staple in many Western interpretations of Asian cuisine, has captured hearts and palates worldwide for excellent reason. While its exact historical roots might be intertwined with the fascinating evolution of Chinese-American dishes designed to appeal to a broader audience, its modern-day popularity is undeniably immense.
People absolutely adore this dish not only for its incredible taste—the luscious, sticky sauce clinging to tender, often crispy chicken pieces is simply divine—but also for its remarkable versatility and comforting familiarity. There’s something profoundly satisfying about creating a restaurant-quality meal like Honey Sesame Chicken with your own hands, knowing exactly what fresh ingredients went into it. It’s the kind of meal that consistently brings smiles to dinner tables, often becoming an instant family favorite due to its universally appealing flavors and delightful textures. Get ready to transform your weeknight dinners with this spectacular recipe that truly delivers on flavor and satisfaction!

Ingredients:
- For the Chicken:
- 1 ½ pounds boneless, skinless chicken thighs or breasts, cut into 1-inch pieces. I personally find that chicken thighs stay juicier and more tender, providing a fantastic contrast to the crispy coating, but breasts work beautifully too if you prefer leaner meat.
- ½ cup all-purpose flour. This forms the base of our crispy coating.
- ¼ cup cornstarch. This is your secret weapon for extra crispiness! It helps create that irresistible crunchy crust we’re looking for.
- 1 teaspoon salt. Just enough to season the chicken pieces themselves before they even hit the oil.
- ½ teaspoon black pepper. For a little gentle spice.
- ½ teaspoon garlic powder. Adds an extra layer of savory flavor directly to the chicken.
- 2 large eggs, beaten. Acts as a binder for our coating, ensuring everything sticks perfectly.
- 4 cups neutral oil for frying, such as vegetable oil, canola oil, or peanut oil. You want something with a high smoke point that imparts no flavor.
- For the Honey Sesame Sauce:
- ½ cup honey. The star of our Honey Sesame Chicken! Use a good quality, runny honey for the best flavor and consistency.
- ¼ cup low-sodium soy sauce. I always recommend low-sodium so you can control the saltiness yourself. If you only have regular, reduce the added salt elsewhere.
- 2 tablespoons rice vinegar. Adds a crucial tangy balance to the sweetness of the honey. Don’t skip this!
- 1 tablespoon toasted sesame oil. This delivers that deep, nutty aroma that defines so many Asian-inspired dishes. Make sure it’s “toasted” for the best flavor.
- 1 tablespoon freshly grated ginger. Use fresh ginger; the vibrant, zesty punch it provides is irreplaceable.
- 2 cloves garlic, minced. Again, fresh garlic makes a huge difference in flavor intensity.
- 1 tablespoon cornstarch. This will be whisked into a slurry to thicken our sauce to that perfect glossy consistency.
- 2 tablespoons cold water or chicken broth (for the cornstarch slurry). Cold liquid prevents lumps!
- ½ teaspoon red pepper flakes (optional). For a subtle kick that complements the sweetness without overpowering it. Adjust to your heat preference.
- For Garnish and Serving:
- 2 tablespoons toasted sesame seeds, plus more for garnish. These add texture and reinforce that lovely sesame flavor.
- 2 green onions, thinly sliced. For a fresh, vibrant garnish and a mild oniony bite.
- Cooked Jasmine rice or steamed broccoli, for serving. These are my go-to sides to complete this delicious meal.
Preparing the Chicken for Crispy Perfection
- Prepare the Chicken: First things first, let’s get our chicken ready. Take your 1 ½ pounds of boneless, skinless chicken (thighs or breasts, whichever you chose) and cut them into uniform 1-inch pieces. Aim for consistency here, as this ensures they all cook at roughly the same rate. After cutting, it’s absolutely crucial to pat the chicken pieces very, very dry with paper towels. Any excess moisture will prevent that lovely crispy crust from forming, so don’t rush this step! This is a key step towards achieving truly crispy Honey Sesame Chicken.
- Season and Dredge – The Dry Mix: In a medium-sized shallow bowl or a pie plate, whisk together the ½ cup all-purpose flour, ¼ cup cornstarch, 1 teaspoon salt, ½ teaspoon black pepper, and ½ teaspoon garlic powder. The combination of flour and cornstarch is essential; the cornstarch contributes significantly to the ultimate crispiness of our chicken. Give it a good whisk to ensure all the seasonings are evenly distributed.
- Prepare the Wet Mix: In another shallow bowl, crack and whisk your 2 large eggs until they are well combined and slightly frothy. This egg wash acts as the perfect adhesive, helping the dry coating stick beautifully to the chicken.
- Coat the Chicken: Now for the fun part – coating! Working in small batches (to avoid overcrowding and ensure each piece gets properly coated), first dip a piece of dry chicken into the beaten egg, letting any excess drip off. Then, transfer the egg-dipped chicken into the dry flour/cornstarch mixture. Toss and press gently to ensure every surface of the chicken piece is thoroughly coated with the flour mixture. You want a nice, even layer. Place the coated chicken pieces onto a clean plate or a wire rack as you finish them. Repeat this process until all your chicken pieces are beautifully coated and ready for frying. Don’t be shy about really pressing that coating onto the chicken; it helps it adhere better.
Crafting the Irresistible Honey Sesame Sauce
- Combine Liquid Ingredients: In a medium saucepan or a small pot, combine the ½ cup honey, ¼ cup low-sodium soy sauce, 2 tablespoons rice vinegar, and 1 tablespoon toasted sesame oil. Whisk these ingredients together until they are well blended.
- Add Aromatics and Spice: Stir in the 1 tablespoon of freshly grated ginger and 2 cloves of minced garlic. If you’re using red pepper flakes for a little kick, add the ½ teaspoon now as well. Give it another good stir. The aroma of the ginger and garlic starting to meld with the other liquids is truly wonderful.
- Prepare the Cornstarch Slurry: In a separate small bowl, whisk together the 1 tablespoon cornstarch with 2 tablespoons of cold water or chicken broth until there are absolutely no lumps. This is your cornstarch slurry, which will thicken the sauce. Using cold liquid is key here to prevent clumping.
- Simmer and Thicken the Sauce: Place the saucepan with the sauce ingredients over medium heat. Bring the mixture to a gentle simmer, stirring occasionally. Once simmering, slowly pour in the cornstarch slurry while whisking continuously. Keep whisking gently as the sauce thickens. It should become glossy and coat the back of a spoon, typically within 1-2 minutes. Once it reaches your desired consistency (I like mine thick enough to cling well to the chicken but still pourable), remove the sauce from the heat. This is the heart of your amazing Honey Sesame Chicken!
- Add Toasted Sesame Seeds: Stir in 2 tablespoons of toasted sesame seeds into the finished sauce. These add a lovely texture and an extra layer of nutty flavor that perfectly complements the rest of the sauce. Set the sauce aside; it will be ready and waiting for your crispy chicken.
Frying the Chicken to Golden Crispiness
- Heat the Oil: Pour your 4 cups of neutral oil (vegetable, canola, or peanut) into a large, heavy-bottomed pot or a Dutch oven. You want at least 2-3 inches of oil depth. Heat the oil over medium-high heat until it reaches about 350-375°F (175-190°C). If you don’t have a thermometer, you can test the oil by dropping a tiny pinch of the flour mixture into it; if it sizzles vigorously and floats to the top immediately, it’s ready. Be patient as the oil heats; getting the temperature right is essential for crispy, not greasy, chicken.
- Fry the Chicken in Batches: Carefully add the coated chicken pieces to the hot oil, making sure not to overcrowd the pot. Frying in batches is crucial; if you add too much chicken at once, the oil temperature will drop significantly, resulting in soggy chicken. Fry for about 4-6 minutes per batch, turning occasionally with tongs, until the chicken is a beautiful golden brown and cooked through. It should feel firm to the touch and the coating will be wonderfully crispy. The internal temperature of the chicken should reach 165°F (74°C).
- Drain the Fried Chicken: As each batch of chicken finishes frying, carefully remove the pieces from the oil using a slotted spoon or spider, allowing excess oil to drip back into the pot. Transfer the crispy chicken to a wire rack set over a baking sheet lined with paper towels. This setup allows air to circulate around the chicken, helping to maintain its crispiness while any remaining excess oil drains off. Repeat this process until all your chicken is fried to golden perfection. This step is critical for ensuring your Honey Sesame Chicken remains perfectly crunchy.
Bringing Your Honey Sesame Chicken Together
- The Grand Toss: Once all the chicken is fried, it’s time to bring everything together. You have a couple of options here depending on your preference.
- Option 1 (For Maximum Crispiness): If you want the absolute crispiest chicken, you can simply pour the warm Honey Sesame Sauce over the fried chicken just before serving. Gently toss to coat. This method keeps the chicken at its peak crispiness for the longest time.
- Option 2 (For Fuller Flavor Infusion): For a more fully coated and slightly softer (but still deliciously sticky) crust, you can return the fried chicken to a large, clean skillet over medium-low heat. Pour the warm Honey Sesame Sauce over the chicken and gently toss for about 1-2 minutes until all the pieces are beautifully coated and the sauce has had a chance to meld with the chicken. Be careful not to overmix, as this can break down the crispy coating. I often lean towards this method for a truly integrated flavor experience, as the sauce slightly caramelizes on the chicken.
Serving Your Delicious Honey Sesame Chicken Meal
- Garnish and Serve: Once your chicken is perfectly coated in that luscious Honey Sesame Chicken sauce, it’s time to plate up! Transfer the chicken to a serving platter or individual plates.
- The Final Flourish: Generously sprinkle with additional toasted sesame seeds and thinly sliced green onions. The green onions not only add a pop of color but also a fresh, bright counterpoint to the rich sauce.
- Pair with Sides: Serve immediately alongside your preferred sides. My go-to is fluffy Jasmine rice, which soaks up the extra sauce beautifully, and some simply steamed broccoli for a healthy, vibrant crunch. The combination is absolutely divine and makes for a complete and satisfying meal that everyone will love.
Tips and Tricks for the Best Honey Sesame Chicken
- Achieving Ultimate Crispiness: The key to truly crispy chicken lies in several steps. First, ensure your chicken is patted very dry before coating. Second, the cornstarch in the coating mixture is non-negotiable for that extra crunch. Third, don’t overcrowd your frying pan – fry in batches to maintain a consistent oil temperature. Lastly, always drain your fried chicken on a wire rack to allow air circulation and prevent sogginess. For an even crispier experience, you can double-fry the chicken: fry once until lightly golden, remove and let cool slightly, then fry again for 1-2 minutes until deeply golden and extra crunchy.
- Adjusting the Flavor Profile: The beauty of homemade Honey Sesame Chicken is that you can tailor it to your exact preferences.
- For More Heat: Feel free to increase the red pepper flakes in the sauce, or even add a dash of sriracha or a few drops of chili oil at the end.
- For Less Sweetness: If you prefer a less sweet sauce, you can slightly reduce the amount of honey. Conversely, if you have a sweet tooth, a little extra honey won’t hurt!
- For More Tang: A splash more rice vinegar can brighten up the sauce significantly.
- Making Ahead and Storage:
- Sauce: The Honey Sesame Sauce can be made 2-3 days in advance and stored in an airtight container in the refrigerator. Reheat gently on the stovetop, adding a splash of water or broth if it’s too thick.
- Fried Chicken: For the best results, I highly recommend frying the chicken just before serving to maximize crispiness. However, if you must prepare it in advance, fry the chicken, let it cool completely, and store it in an airtight container in the fridge for up to 2 days. To reheat, spread the chicken on a baking sheet and bake at 375°F (190°C) for 10-15 minutes until heated through and re-crisped, then toss with freshly warmed sauce.
- Leftovers: Any leftover Honey Sesame Chicken can be stored in an airtight container in the refrigerator for up to 3 days. Reheat gently in a skillet or oven for best texture.
- Variations for Your Honey Sesame Chicken:
- Vegetables: Feel free to add some blanched broccoli florets, snap peas, sliced carrots, or bell peppers directly into the sauce along with the chicken for a more complete stir-fry feel. Cook them separately first to your desired tenderness, then toss them in the sauce with the chicken at the end.
- Different Proteins: This coating and sauce combo isn’t just for chicken! You could try it with crispy tofu cubes, shrimp, or even pork tenderloin for a different take on the dish. Adjust cooking times accordingly.
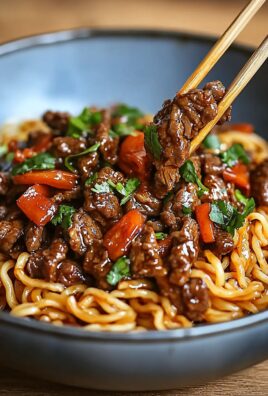
- Noodle Dish: Instead of rice, toss your finished Honey Sesame Chicken with some cooked lo mein or ramen noodles for a fantastic noodle bowl.
- Quality of Ingredients: Using fresh ginger and garlic makes a noticeable difference in the vibrance of the sauce. Also, invest in a good quality honey and toasted sesame oil; these two ingredients are central to the flavor of this amazing Honey Sesame Chicken.

Conclusion:
And there you have it, folks! We’ve journeyed together through the simple yet incredibly rewarding process of creating a dish that I genuinely believe will become a staple in your culinary repertoire. This isn’t just another weeknight meal; it’s a vibrant explosion of flavors and textures that manages to feel both comforting and excitingly exotic all at once. I’m absolutely convinced that once you taste the delightful sticky-sweet glaze coating tender, perfectly cooked chicken, you’ll understand why I’m so passionate about this recipe. It truly hits all the right notes: it’s surprisingly quick to prepare, uses ingredients you likely already have on hand or can easily find, and delivers a gourmet-level experience without any of the fuss. Forget about those expensive takeout menus; you’re about to discover how effortlessly you can recreate and even surpass your favorite restaurant versions right in your own kitchen.
What makes this particular rendition a must-try, you ask? Well, it’s the perfect balance, for starters. The natural sweetness of honey perfectly complements the rich umami of soy, while a hint of garlic and ginger adds that essential aromatic warmth. And let’s not forget the sesame – both oil and seeds – which provide that signature nutty depth and a delightful textural crunch. It’s a symphony of tastes that dances on your palate, making every bite an absolute pleasure. This recipe isn’t just about feeding yourself; it’s about treating yourself to a truly satisfying and memorable meal that you’ll be proud to serve to family and friends. I promise you, the aroma alone as it simmers on your stove will be enough to get everyone eagerly gathered around the kitchen.
Now, let’s talk about making this dish truly your own. While the base recipe for this incredible Honey Sesame Chicken is fantastic as is, it’s also wonderfully versatile. For serving suggestions, my personal go-to is always a fluffy bed of jasmine rice, which beautifully soaks up all that glorious extra sauce. However, don’t limit yourself! It’s equally delicious with nutty brown rice, a vibrant quinoa salad, or even some simple stir-fried noodles. If you’re looking to boost your veggie intake (which I always encourage!), consider adding a colorful array of steamed or stir-fried broccoli, snap peas, carrots, or bell peppers to your plate. A sprinkle of fresh green onions or a dash of extra sesame seeds right before serving also adds a lovely pop of color and freshness.
Feeling adventurous with variations? Oh, there are so many possibilities! If you like a bit of heat, a pinch of red pepper flakes or a drizzle of sriracha in the sauce will give it a fantastic kick. For those who prefer a deeper, more robust flavor, try adding a splash of rice vinegar or a teaspoon of mirin to the sauce mixture. You can also experiment with different proteins: shrimp, tofu, or even beef slices would be incredibly delicious with this sticky-sweet glaze. Just adjust cooking times accordingly. For a thicker sauce, you can increase the cornstarch slurry slightly, or for a thinner, lighter glaze, use a bit less. The beauty of home cooking is that you are the chef, and every adjustment makes the dish uniquely yours.
So, my friend, what are you waiting for? I’ve given you all the tools and encouragement you need. Take the plunge, gather your ingredients, and whip up this sensational Honey Sesame Chicken tonight. I have no doubt that you’ll be absolutely thrilled with the results. And when you do, please don’t keep it to yourself! I would absolutely love to hear about your experience. Did you add a secret ingredient? Did you serve it with a unique side? Share your culinary triumphs, your serving suggestions, and any fun variations you came up with in the comments below. Your insights and creativity inspire me and our entire cooking community. Let’s make delicious food together!
People Also Ask (FAQs)
Q1: Can I make Honey Sesame Chicken ahead of time?
Absolutely! You can prepare the sauce ahead of time and store it in an airtight container in the refrigerator for up to 3-4 days. For the chicken, you can pre-chop it and even dredge it in cornstarch a few hours beforehand. The cooked Honey Sesame Chicken itself can be stored in the fridge, but for the best texture, I recommend cooking it fresh. If you do make it ahead, store it in an airtight container for up to 3 days and reheat gently in a pan or microwave.
Q2: How do I store leftovers and how long do they last?
Leftovers should be stored in an airtight container in the refrigerator as soon as they’ve cooled down to room temperature. They will last for up to 3-4 days. To reheat, you can either warm them gently in a microwave or, for a crispier texture, reheat in a lightly oiled pan over medium heat until warmed through.
Q3: Can I use a different type of chicken or even another protein?
Yes, absolutely! While boneless, skinless chicken thighs or breasts are my go-to, this sauce is incredibly versatile. You could use chicken wings or drumsticks (though you’ll need to adjust cooking times). For other proteins, shrimp, firm tofu (pressed and cubed), or even thin slices of beef would be delicious with this sticky glaze. Just be mindful of their respective cooking times.
Q4: How can I make this recipe spicier?
If you love a kick, it’s easy to dial up the heat! You can add a pinch or two of red pepper flakes to the sauce while it’s simmering, or even stir in a teaspoon of sriracha or your favorite chili garlic sauce. For a more subtle heat, a dash of ground white pepper can also do the trick.
Q5: Is this recipe gluten-free?
This recipe can easily be made gluten-free! The main ingredient you’ll need to swap is soy sauce. Simply use a gluten-free tamari or a gluten-free soy sauce alternative. Ensure your cornstarch is pure and not mixed with any gluten-containing ingredients (which it usually isn’t, but it’s always good to check). With these simple substitutions, you can enjoy this delicious dish safely!
Q6: What are good side dishes to serve with Honey Sesame Chicken?
The possibilities are endless! My favorite is plain steamed jasmine rice to soak up all that wonderful sauce. Other great options include brown rice, quinoa, cauliflower rice (for a low-carb alternative), or even rice noodles. For vegetables, steamed or stir-fried broccoli, snap peas, bell peppers, or a simple green salad with a light vinaigrette would be perfect additions to complete your meal.
Honey Sesame Chicken
A beloved takeout classic, this recipe delivers restaurant-quality sweet, savory, and irresistible Honey Sesame Chicken right in your kitchen, featuring tender, crispy chicken coated in a luscious, sticky sauce.
Ingredients
-
1 ½ lb chicken breast or thighs, cut into 1-inch pieces
-
1 tsp chicken bouillon powder
-
½ tsp white pepper
-
1 tbsp water
-
2 large eggs
-
½ cup all-purpose flour
-
½ cup cornstarch
-
2 tsp baking powder
-
½ tsp salt
-
¼ cup water
-
2 tsp vegetable oil
-
3 tbsp light soy sauce
-
1 tbsp oyster sauce
-
2 tbsp rice vinegar
-
2 tbsp ketchup
Instructions
-
Step 1
Cut chicken into 1-inch pieces; pat very dry. In a bowl, whisk ½ cup all-purpose flour, ¼ cup cornstarch, 1 tsp salt, ½ tsp black pepper, and ½ tsp garlic powder for the dry coating. In another bowl, whisk 2 large eggs. Dip chicken in egg, then dredge thoroughly in the dry coating, ensuring every piece is evenly covered. Set aside on a clean plate or wire rack. -
Step 2
In a medium saucepan, combine ½ cup honey, ¼ cup low-sodium soy sauce, 2 tbsp rice vinegar, and 1 tbsp toasted sesame oil. Stir in 1 tbsp freshly grated ginger, 2 cloves minced garlic, and ½ tsp red pepper flakes (optional). In a separate small bowl, whisk 1 tbsp cornstarch with 2 tbsp cold water or chicken broth to create a lump-free slurry. Place the saucepan over medium heat and bring to a gentle simmer. Slowly pour in the cornstarch slurry while whisking continuously until the sauce becomes glossy and thick (1-2 minutes). Remove from heat and stir in 2 tbsp toasted sesame seeds. Set aside. -
Step 3
Pour 4 cups neutral oil (vegetable, canola, or peanut) into a large, heavy-bottomed pot or Dutch oven, ensuring at least 2-3 inches of depth. Heat the oil to 350-375°F (175-190°C). Carefully add the coated chicken pieces to the hot oil in batches, avoiding overcrowding, which can lower oil temperature and lead to soggy chicken. Fry for 4-6 minutes per batch, turning occasionally, until the chicken is golden brown and cooked through (internal temperature 165°F/74°C). Using a slotted spoon or spider, remove fried chicken and drain on a wire rack set over a baking sheet lined with paper towels to maintain crispiness. -
Step 4
Once all chicken is fried, choose your preferred method for combining: For maximum crispiness, simply pour the warm Honey Sesame Sauce over the fried chicken just before serving and gently toss. For a fuller flavor infusion, return the fried chicken to a large, clean skillet over medium-low heat, pour the warm sauce over, and gently toss for 1-2 minutes until beautifully coated. Transfer the chicken to a serving platter. Generously sprinkle with additional toasted sesame seeds and thinly sliced green onions. Serve immediately with fluffy Jasmine rice or steamed broccoli for a complete meal.
Important Information
Nutrition Facts (Per Serving)
It is important to consider this information as approximate and not to use it as definitive health advice.
Allergy Information
Please check ingredients for potential allergens and consult a health professional if in doubt.
Printable Recipe Card
Want just the essential recipe details without scrolling through the article? Get our printable recipe card with just the ingredients and instructions.


Leave a Comment