
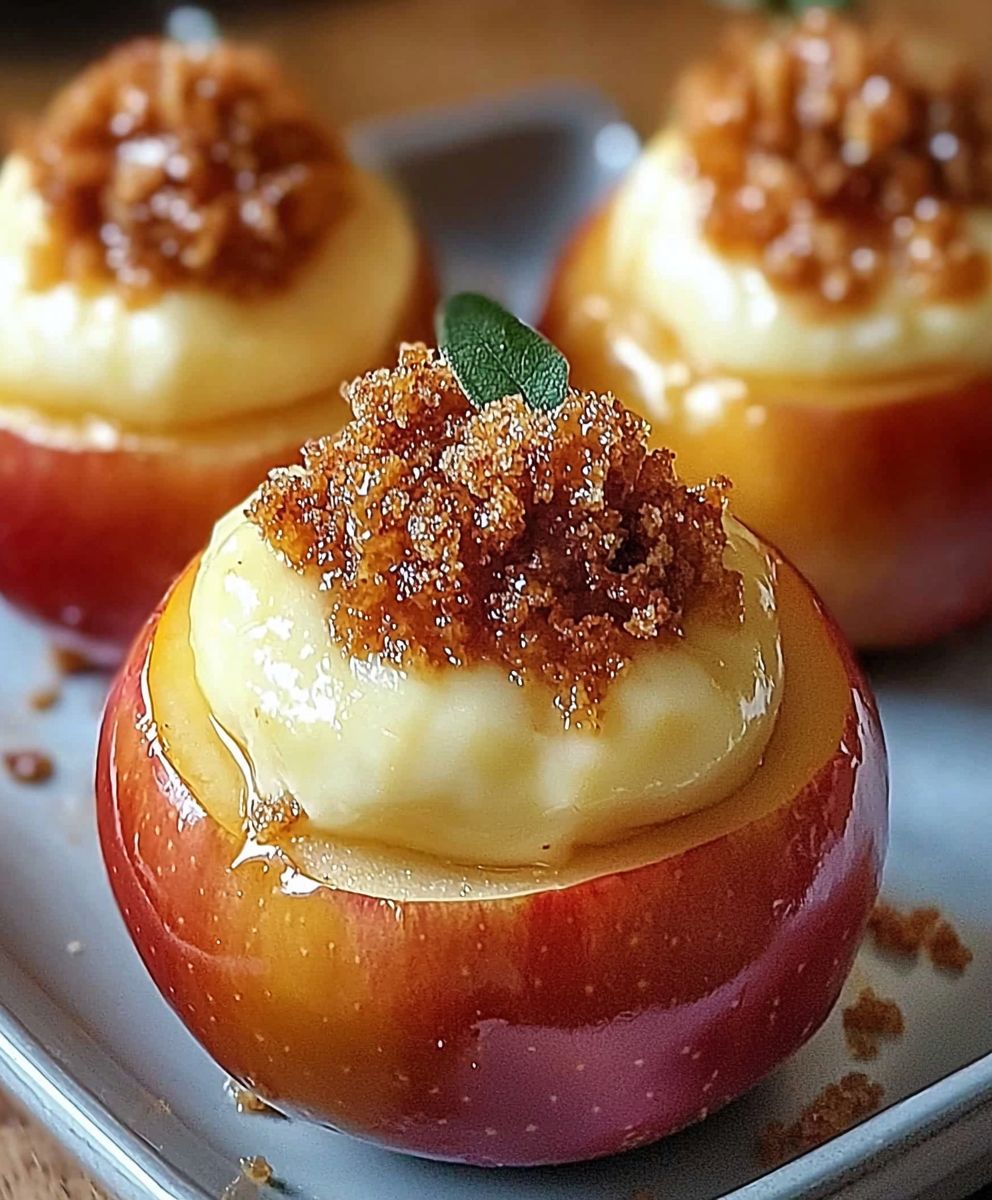
Cheesecake Stuffed Apples are a delightful twist on two beloved desserts, combining the creamy richness of cheesecake with the natural sweetness of baked apples. This recipe not only satisfies your sweet tooth but also brings a touch of nostalgia, reminding many of cozy family gatherings and autumn celebrations. The origins of stuffed apples can be traced back to various cultures, where fruits were often filled with sweet or savory mixtures, showcasing the versatility of seasonal produce.
What I love most about Cheesecake Stuffed Apples is their incredible taste and texture. The warm, tender apple contrasts beautifully with the smooth, creamy cheesecake filling, creating a harmonious blend that is both comforting and indulgent. Plus, they are surprisingly easy to make, making them a perfect dessert for both special occasions and casual weeknight treats. Once you try this recipe, you’ll understand why Cheesecake Stuffed Apples have become a favorite in my kitchen!
Ingredients:
- 4 medium-sized apples (Granny Smith or Honeycrisp work well)
- 8 oz cream cheese, softened
- 1/2 cup granulated sugar
- 1/4 cup brown sugar
- 1 tsp vanilla extract
- 1/2 tsp ground cinnamon
- 1/4 tsp salt
- 1/2 cup sour cream
- 1/2 cup crushed graham crackers
- 1/4 cup chopped nuts (optional, walnuts or pecans are great)
- 1/4 cup caramel sauce (for drizzling)
- 1 tbsp lemon juice (to prevent browning of apples)
Preparing the Apples
- Start by preheating your oven to 350°F (175°C). This will ensure that your oven is hot and ready for the apples once we finish preparing them.
- Next, wash the apples thoroughly under cold water to remove any dirt or wax. Pat them dry with a clean towel.
- Using a sharp knife or an apple corer, carefully remove the core from each apple, making sure to leave the bottom intact. This will create a cavity for the cheesecake filling.
- Once the cores are removed, drizzle a little lemon juice inside each apple to prevent them from browning. This step is crucial for keeping the apples looking fresh and appetizing.
Making the Cheesecake Filling
- In a large mixing bowl, combine the softened cream cheese and granulated sugar. Using an electric mixer, beat them together on medium speed until the mixture is smooth and creamy. This should take about 2-3 minutes.
- Add in the brown sugar, vanilla extract, ground cinnamon, and salt. Continue to mix until everything is well incorporated.
- Next, add the sour cream to the mixture. This will give the filling a rich and creamy texture. Mix until fully combined.
- Finally, fold in the crushed graham crackers and chopped nuts (if using) with a spatula. This will add a delightful crunch to the filling.
Stuffing the Apples
- Now that your filling is ready, it’s time to stuff the apples! Using a spoon or a piping bag, carefully fill each apple with the cheesecake mixture. Make sure to pack it in gently but firmly, as you want to fill them to the top without overflowing.
- Once all the apples are filled, place them upright in a baking dish. If you have any leftover filling, you can spoon it around the apples in the dish for extra cheesecake goodness.
Baking the Stuffed Apples
- Cover the baking dish with aluminum foil. This will help the apples steam and cook evenly without drying out.
- Place the baking dish in the preheated oven and bake for 25-30 minutes. The apples should be tender but not mushy. You can check for doneness by inserting a fork into the side of an apple; it should slide in easily.
- After 25-30 minutes, remove the foil and bake for an additional 10-15 minutes. This will allow the tops to brown slightly and create a delicious crust on the cheesecake filling.
Serving the Cheesecake Stuffed Apples
- Once the apples are done baking, remove them from the oven and let them cool for about 10 minutes. This will make them easier to handle and allow the filling to set a bit.
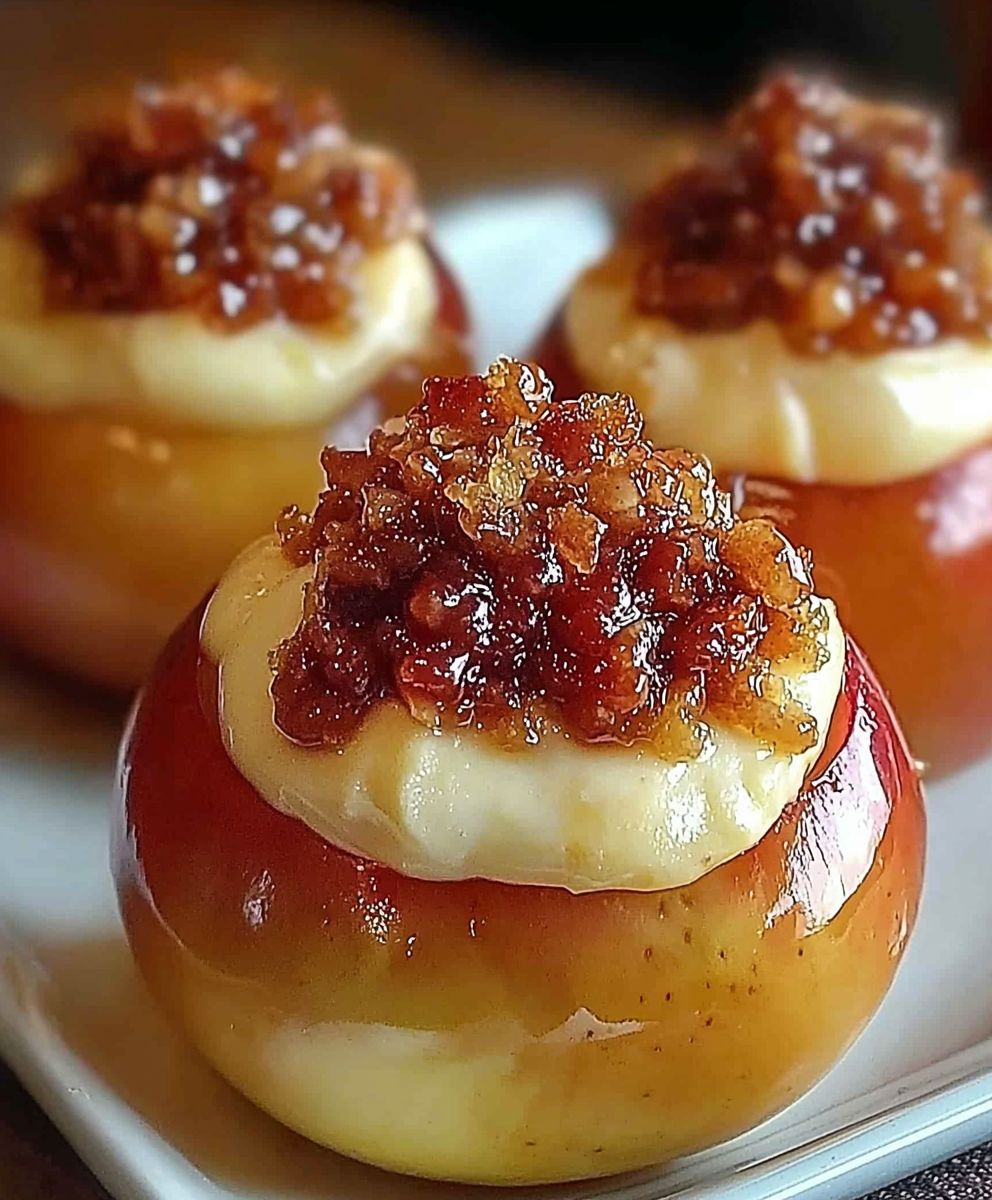
- To serve, place each stuffed apple on a plate. Drizzle with caramel sauce for an extra touch of sweetness. You can also sprinkle a little extra cinnamon on top if you like.
- For a delightful contrast, consider serving the apples with a scoop of vanilla ice cream or a dollop of whipped cream on the side. The warm apples paired with cold ice cream create a heavenly combination!
Storing Leftovers
- If you have any leftovers (which is rare, but it happens!), allow the stuffed apples to cool completely before storing them. Place them in an airtight container in
Conclusion:
In summary, these Cheesecake Stuffed Apples are an absolute must-try for anyone looking to impress their family and friends with a delightful dessert that combines the best of both worlds: the comforting sweetness of baked apples and the creamy indulgence of cheesecake. The simplicity of the recipe allows for endless variations—consider adding a sprinkle of cinnamon, a drizzle of caramel sauce, or even a handful of nuts for added texture. You can also swap out the cream cheese for a flavored variety, like strawberry or chocolate, to create a unique twist that suits your taste buds. I encourage you to give this recipe a go and experience the joy of creating something truly special in your kitchen. Whether you serve them warm with a scoop of vanilla ice cream or chilled as a refreshing treat, these Cheesecake Stuffed Apples are sure to become a favorite in your household. Don’t forget to share your experience with me! I’d love to hear how your version turned out and any creative variations you tried. Happy baking! Print
Cheesecake Stuffed Apples: A Delicious Twist on a Classic Dessert
- Total Time: 60 minutes
- Yield: 4 servings 1x
Description
Enjoy a cozy dessert with these Cheesecake Stuffed Apples, featuring tender baked apples filled with a creamy cheesecake mixture, drizzled with caramel sauce and sprinkled with cinnamon. Perfect for a sweet treat!
Ingredients
Scale- 4 medium-sized apples (Granny Smith or Honeycrisp)
- 8 oz cream cheese, softened
- 1/2 cup granulated sugar
- 1/4 cup brown sugar
- 1 tsp vanilla extract
- 1/2 tsp ground cinnamon
- 1/4 tsp salt
- 1/2 cup sour cream
- 1/2 cup crushed graham crackers
- 1/4 cup chopped nuts (optional, walnuts or pecans)
- 1/4 cup caramel sauce (for drizzling)
- 1 tbsp lemon juice (to prevent browning of apples)
Instructions
- Preheat your oven to 350°F (175°C).
- Wash the apples thoroughly under cold water and pat them dry.
- Carefully remove the core from each apple, leaving the bottom intact.
- Drizzle a little lemon juice inside each apple to prevent browning.
- In a large mixing bowl, combine the softened cream cheese and granulated sugar. Beat until smooth and creamy (2-3 minutes).
- Add brown sugar, vanilla extract, ground cinnamon, and salt. Mix until well incorporated.
- Add sour cream and mix until fully combined.
- Fold in crushed graham crackers and chopped nuts (if using).
- Stuff each apple with the cheesecake mixture, packing it gently but firmly.
- Place the stuffed apples upright in a baking dish, spooning any leftover filling around them.
- Cover the baking dish with aluminum foil and bake for 25-30 minutes until apples are tender.
- Remove the foil and bake for an additional 10-15 minutes to brown the tops.
- Let the apples cool for about 10 minutes before serving.
- Drizzle with caramel sauce and serve with vanilla ice cream or whipped cream if desired.
Notes
- For a healthier option, you can reduce the amount of sugar or use a sugar substitute.
- Feel free to experiment with different types of nuts or add chocolate chips to the filling for extra flavor.
- These stuffed apples are best enjoyed warm but can be stored in the refrigerator for up to 3 days.
- Prep Time: 15 minutes
- Cook Time: 40-45 minutes

Leave a Comment