
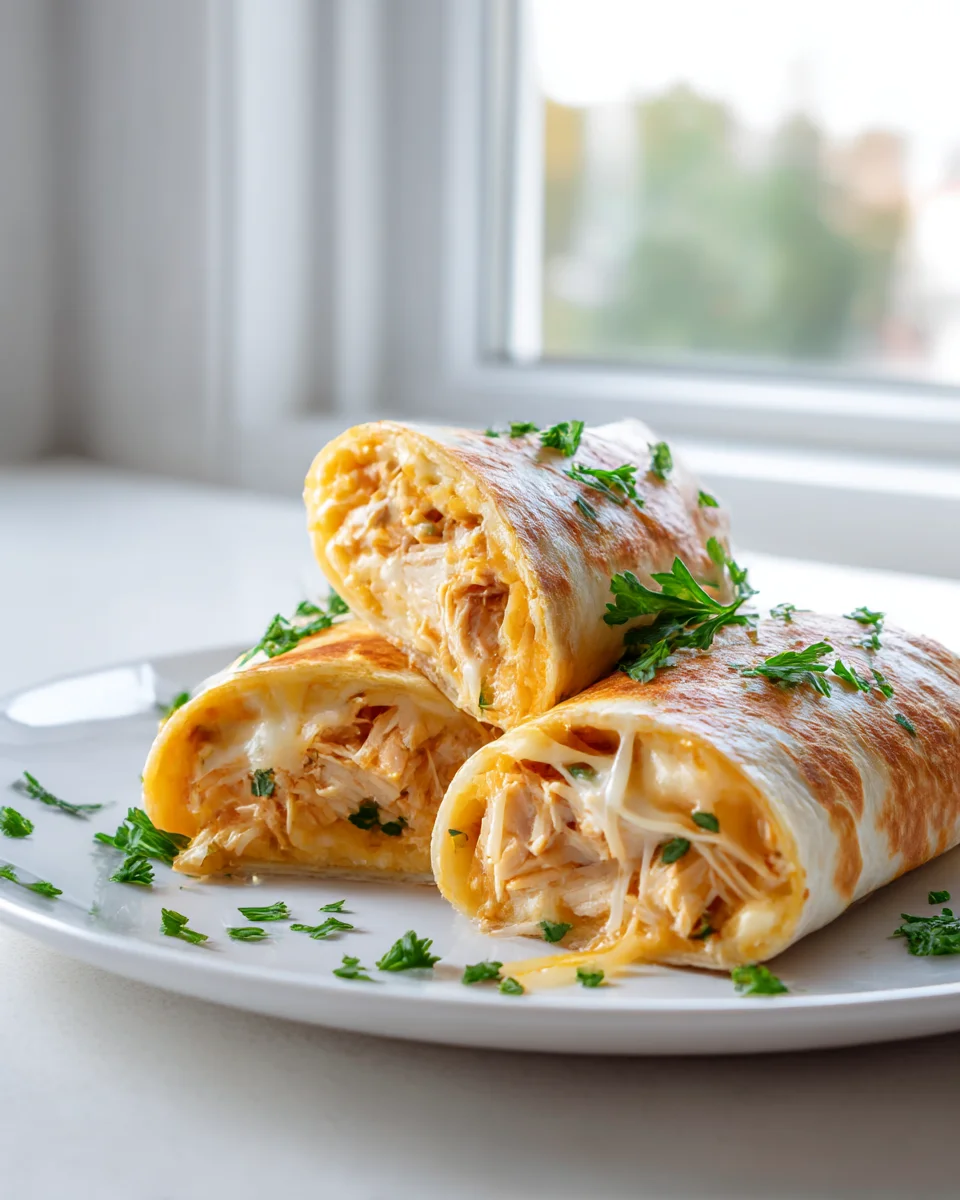
<h2>Cheesy Garlic Chicken Wraps</h2>
<p>Oh my goodness, get ready to add a new favorite to your dinner rotation! I am so excited to share these <strong>Cheesy Garlic Chicken Wraps</strong> with you. What makes them so special, you ask? Well, it’s the magical combination of juicy, perfectly seasoned chicken, generously coated in a rich, garlicky sauce, and then absolutely loaded with melty, gooey cheese, all nestled into a soft, warm tortilla. It’s a symphony of flavor and texture that hits all the right notes, making it so much more than just a simple wrap!</p>
<p>You are absolutely going to love these wraps because they are incredibly quick to whip up, making them a lifesaver on those busy weeknights when you still crave something homemade and utterly delicious. They’re hearty enough to satisfy everyone at the table, comforting, and packed with so much flavor that every single bite is pure joy. Imagine tender chunks of succulent chicken mingling with pungent garlic and a generous blanket of irresistible, delicious cheese, all wrapped up into a handheld delight. It’s comfort food that’s easy, exciting, and oh-so-craveable. Trust me, these aren’t just wraps; they’re a flavor experience you’ll want to revisit again and again!</p>
Ingredient Notes
Hey there, fellow foodies! When it comes to whipping up truly amazing Cheesy Garlic Chicken Wraps, having the right ingredients and knowing a few clever substitutions can make all the difference. I’ve found that starting with quality components really elevates the flavor, making each bite utterly delicious and satisfying.
The Stars of Your Cheesy Garlic Chicken Wraps:
- Chicken: I typically go for boneless, skinless chicken breasts or thighs for my wraps. They’re easy to cut into bite-sized pieces and cook up quickly. Breasts are leaner, while thighs offer a bit more juiciness and flavor.
- Wraps/Tortillas: Large flour tortillas are my go-to for these Cheesy Garlic Chicken Wraps. They’re flexible and hold all that lovely filling without tearing. Whole wheat tortillas work beautifully too if you’re looking for a bit more fiber.
- Cheese: This is where the “cheesy” part truly shines! I love using a good melting cheese like shredded low-moisture mozzarella, Monterey Jack, or a sharp cheddar. A blend of two or three varieties adds fantastic depth. The key is to pick something that melts beautifully to create that gooey, irresistible texture.
- Garlic: Fresh garlic is non-negotiable for me in Cheesy Garlic Chicken Wraps. Minced finely, it provides an unparalleled aroma and flavor. I use it both in the chicken seasoning and in the garlic butter spread for the tortillas.
- Butter: Unsalted butter is perfect for making that glorious garlic butter to brush on your tortillas. It adds richness and helps crisp up the wraps beautifully.
- Oil: A good quality olive oil or avocado oil is essential for sautéing the chicken to golden perfection.
- Seasonings: Beyond salt and pepper, I like to use onion powder, paprika (smoked paprika if you want a little extra something!), and maybe a pinch of dried oregano or Italian seasoning to really round out the chicken’s flavor profile.
Smart Substitutions for Your Wraps:
- Chicken Alternatives: If you’re out of chicken or just fancy a change, thinly sliced beef (like sirloin or flank steak) or even ground beef can be seasoned and cooked similarly. Plant-based chicken strips also work wonderfully for a vegetarian option.
- Cheese Alternatives: For dairy-free diets, there are some excellent plant-based shredded cheeses available now that melt surprisingly well.
- Tortilla Alternatives: If you’re avoiding gluten, there are many great gluten-free tortillas on the market. For a lighter, carb-conscious option, large lettuce leaves (like butter lettuce or romaine hearts) can be used as a wrap, though they won’t crisp up the same way.
- Garlic Alternatives: If fresh garlic isn’t handy, garlic powder or granulated garlic can be used. Remember that dried garlic is more potent, so use about 1/2 teaspoon of powder for every clove of fresh garlic.
- Butter Alternatives: Dairy-free butter substitutes or even olive oil can be used for brushing the tortillas if needed, though butter really gives it that classic flavor.
- Spice It Up: Don’t be shy about adding a pinch of red pepper flakes to your chicken or a dash of hot sauce to your garlic butter if you like a little heat!
Step-by-Step Instructions
Ready to create some seriously scrumptious Cheesy Garlic Chicken Wraps? Follow my tried-and-true method, and you’ll have a delightful meal on the table in no time. I promise, it’s easier than it looks, and the payoff in flavor is absolutely worth it!
Let’s Get Cooking!
- Prep Your Chicken: I always start by patting my boneless, skinless chicken breasts or thighs dry with paper towels. This helps them brown better. Then, I cut them into bite-sized pieces, about 1/2 to 3/4 inch cubes. In a medium bowl, I toss the chicken with about 1 tablespoon of olive oil, 1 teaspoon of garlic powder, 1/2 teaspoon of onion powder, 1/2 teaspoon of paprika, and a generous pinch of salt and black pepper. Make sure every piece is nicely coated.
- Cook the Chicken: Heat a large skillet or frying pan over medium-high heat. Once hot, add the seasoned chicken in a single layer, making sure not to overcrowd the pan (cook in batches if necessary). Cook for about 4-6 minutes, stirring occasionally, until the chicken is golden brown on the outside and cooked through. It should reach an internal temperature of 165°F (74°C). If I’m feeling extra garlicky, I’ll add 1-2 cloves of minced fresh garlic to the pan during the last minute of cooking the chicken. Remove the cooked chicken from the skillet and set aside.
- Whip Up the Garlic Butter: While the chicken is resting, it’s time for the secret weapon! In a small microwave-safe bowl or a very small saucepan, melt 3-4 tablespoons of unsalted butter. Once melted, stir in 2-3 cloves of finely minced fresh garlic (yes, more garlic!), a pinch of dried parsley or oregano, and another tiny pinch of salt. This fragrant butter is what makes our Cheesy Garlic Chicken Wraps extra special.
- Prepare Your Wraps: Lay your large flour tortillas flat on a clean surface. Using a pastry brush, generously spread the garlic butter mixture evenly over one side of each tortilla. Don’t be shy here; this is where a lot of the ‘garlic’ and ‘crispy’ magic happens for our Cheesy Garlic Chicken Wraps.
- Assemble the Wraps: Now for the fun part! On the unbuttered side of each tortilla (the inside), spoon a portion of the cooked chicken filling, leaving about an inch clear around the edges. Sprinkle a generous amount of your shredded cheese over the chicken. If I’m adding any extras like fresh spinach or finely diced bell peppers, I’ll layer those in now too.
- Fold and Grill: To form the wraps, fold in the sides of the tortilla first, then tightly roll it up from the bottom, creating a neat, compact wrap. Heat the same skillet you used for the chicken (or a separate clean one) over medium heat. Place the assembled Cheesy Garlic Chicken Wraps seam-side down in the skillet. Cook for about 3-4 minutes per side, or until the tortilla is golden brown and crispy, and the cheese inside is gloriously melted and bubbly. You might need to gently press down on the wraps with a spatula to ensure even browning.
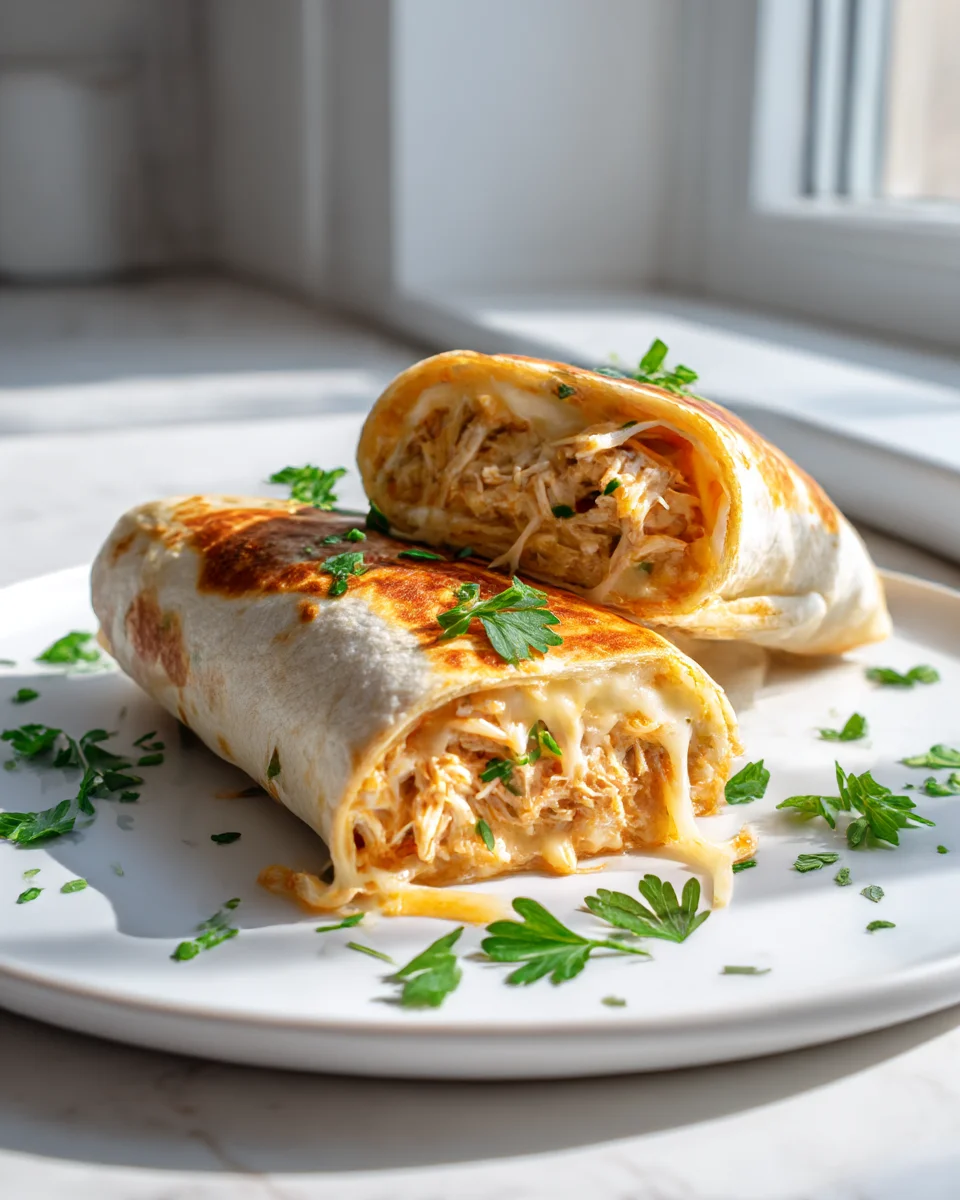
- Serve and Enjoy: Once perfectly golden and cheesy, carefully remove the wraps from the skillet. I like to let them cool for just a minute or two before slicing them in half diagonally. This makes them easier to handle and shows off that beautiful cheesy interior. Serve your Cheesy Garlic Chicken Wraps immediately with your favorite dipping sauce – ranch, sriracha mayo, or a simple sour cream and chive dip are fantastic choices!
Tips & Suggestions
Making delicious Cheesy Garlic Chicken Wraps is an art, and over time, I’ve picked up a few tricks that really elevate this dish from good to absolutely unforgettable. Here are some of my favorite tips and suggestions to help you make your wraps the best they can be!
My Top Tips for Perfect Cheesy Garlic Chicken Wraps:
- Don’t Overfill: This is a crucial one! While it’s tempting to load up your Cheesy Garlic Chicken Wraps with tons of filling, overfilling them can make them difficult to roll and prone to bursting when grilling. A good rule of thumb is to leave at least an inch of space around the edges.
- Choose Your Cheese Wisely: For that perfect gooey texture, stick to cheeses known for their melting capabilities. Mozzarella, Monterey Jack, Colby, or even a good quality blend will give you that irresistible pull. Harder cheeses might not melt as smoothly.
- Crispy Edges are Key: When grilling your Cheesy Garlic Chicken Wraps, don’t rush the process. Medium heat allows the tortilla to crisp up and turn golden without burning, while giving the cheese inside ample time to melt into a luscious, gooey dream. Pressing down gently with a spatula helps ensure good contact with the pan and even browning.
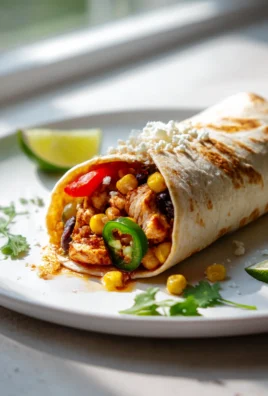
- Vary Your Veggies: While the core is chicken, cheese, and garlic, don’t hesitate to add finely diced vegetables to your filling. Sautéed bell peppers, onions, mushrooms, or fresh spinach are wonderful additions that boost both flavor and nutrition. Just make sure they’re not too watery, or they could make your wraps soggy.
- Spice It Up: If you love a kick, add a pinch of red pepper flakes to your chicken seasoning or a dash of your favorite hot sauce to the garlic butter. A few slices of pickled jalapeños inside the wrap can also add a fantastic tangy heat.
- Make It a Meal: Cheesy Garlic Chicken Wraps are hearty enough on their own, but they pair beautifully with a simple side salad, a bowl of tomato soup, or even some crispy sweet potato fries.
- Batch Cooking the Chicken: If you’re planning ahead or meal prepping, cook a larger batch of the seasoned chicken. It stores well in the fridge for a few days, making quick wrap assembly a breeze on busy weeknights.
Serving Suggestions:
- Dipping Sauces: My absolute favorite way to enjoy Cheesy Garlic Chicken Wraps is with a creamy dipping sauce. Ranch dressing, a spicy sriracha mayo, a cool Greek yogurt-dill sauce, or even just plain sour cream are all excellent choices.
- Fresh Garnishes: A sprinkle of fresh chopped cilantro or parsley over the finished wraps adds a pop of color and freshness.
Storage
Knowing how to properly store and reheat your Cheesy Garlic Chicken Wraps means you can enjoy their deliciousness even after the initial meal. I always try to make an extra one or two because I know they make fantastic leftovers or a quick lunch the next day!
Storing Leftover Cheesy Garlic Chicken Wraps:
- Cool Completely: Before storing, it’s really important to let your cooked Cheesy Garlic Chicken Wraps cool down completely to room temperature. Storing them warm can create condensation, leading to soggy wraps.
- Airtight Container: Once cooled, place the wraps in an airtight container. You can layer them with parchment paper in between to prevent them from sticking together.
- Refrigeration: Stored in an airtight container, Cheesy Garlic Chicken Wraps will keep well in the refrigerator for up to 2-3 days.
Reheating Your Wraps:
The goal when reheating is to get them crispy again without drying out the filling or making the tortilla tough. Here are my preferred methods:
- Skillet/Frying Pan (My Top Choice!): This is hands down the best way to reheat your Cheesy Garlic Chicken Wraps to regain that lovely crispy exterior.
- Heat a dry skillet (no oil needed, unless you want extra crispiness with a tiny bit of butter) over medium-low heat.
- Place the wrap in the skillet and cook for about 3-5 minutes per side, or until heated through and the tortilla is crispy again.
- Gently press down with a spatula occasionally to ensure even heating and crisping.
- Air Fryer: If you have an air fryer, it’s another excellent option for crisping up leftovers.
- Preheat your air fryer to 350°F (175°C).
- Place the wrap(s) in the air fryer basket in a single layer.
- Cook for 5-7 minutes, flipping halfway through, until crispy and hot.
- Oven/Toaster Oven: A good option for heating multiple wraps at once.
- Preheat your oven or toaster oven to 375°F (190°C).
- Place the wraps directly on a baking sheet or on a wire rack set over a baking sheet.
- Bake for 8-12 minutes, or until the wraps are heated through and the tortilla has crisped up.
- Microwave (Use with Caution!): While convenient, the microwave will make your Cheesy Garlic Chicken Wraps soft and slightly chewy, not crispy. I only use this if I’m in a huge hurry and don’t mind the texture.
- Place the wrap on a microwave-safe plate.
- Heat on high for 30-60 seconds, or until warmed through.
Freezing (for components, not assembled wraps):
I generally don’t recommend freezing fully assembled Cheesy Garlic Chicken Wraps, as the tortilla can become gummy upon thawing and reheating. However, you can freeze the cooked chicken filling!
- Chicken Filling: Once cooked and cooled, place the seasoned chicken in an airtight freezer-safe bag or container. It can be frozen for up to 2-3 months. Thaw overnight in the refrigerator before using in fresh wraps.
Final Thoughts
And there you have it! My hope is that you’re now ready to whip up a batch of these incredible Cheesy Garlic Chicken Wraps. I truly believe this recipe is a must-try for so many reasons. The irresistible combination of tender, juicy chicken, pungent garlic, and ooey-gooey cheese, all nestled in a soft wrap, creates a flavor explosion that’s simply perfect for any meal.
Whether you’re looking for a quick and satisfying lunch, a fun weeknight dinner, or even a delightful snack, these Cheesy Garlic Chicken Wraps fit the bill perfectly. They’re incredibly easy to customize, making them a hit with everyone at the table. I’m confident that once you take that first bite, you’ll understand why I’m so excited about them. Go on, give them a try – I promise you won’t be disappointed!

Leave a Comment