
Christmas Kitchen Chocolate Cherry.html – a phrase that might seem like a technical descriptor at first glance, but for me, it instantly evokes the truly magical essence of holiday baking. I believe there’s an undeniable joy that fills our homes and hearts when we create something special during the festive season, and this particular chocolate and cherry combination perfectly encapsulates that spirit. It’s an invitation to step into a world of rich aromas and delightful flavors.
The pairing of chocolate and cherry is not merely a modern fancy; it boasts a rich history, deeply rooted in classic European confectionery. From the iconic Black Forest cake to various festive truffles and strudels, this duo has long been celebrated for its exquisite balance of deep, comforting cocoa and bright, tart fruit. It’s a flavor profile that speaks of indulgence and celebration, making it an ideal choice for the joyful, heartwarming atmosphere of Christmas gatherings and quiet, cozy evenings alike.
Why This Dish Becomes a Holiday Favorite
People absolutely adore the Christmas Kitchen Chocolate Cherry experience for countless reasons beyond its charming heritage. It’s a sensory delight, offering a stunning visual appeal with its contrast of dark chocolate and vibrant red cherries. But more importantly, it delivers an unparalleled taste experience: the velvety smoothness of premium chocolate, whether it’s intensely dark or mellow milk, provides a luxurious backdrop for the juicy, tangy burst of fresh or preserved cherries. This dish offers a sophisticated yet universally comforting flavor that resonates with warmth and nostalgia. It’s an accessible luxury that brings smiles to every table, quickly becoming a cherished part of our holiday traditions year after year.

Ingredients:
- For the Christmas Kitchen Chocolate Cherry Cake Base:
- 2 cups (240g) all-purpose flour
- 1 cup (90g) unsweetened cocoa powder, Dutch-processed for a richer color and flavor
- 2 teaspoons baking soda
- 1 teaspoon salt
- 2 cups (400g) granulated sugar
- 4 large eggs, at room temperature
- 1 cup (240ml) vegetable oil (or other neutral-flavored oil)
- 1 cup (240ml) buttermilk, at room temperature
- 2 teaspoons pure vanilla extract
- 1 teaspoon instant espresso powder (optional, but highly recommended to deepen chocolate flavor)
- 1 cup (170g) semi-sweet chocolate chips (or chopped chocolate)
- 1 ½ cups (250g) fresh or frozen pitted cherries, roughly chopped if large (do not thaw if frozen)
- For the Sweet Cherry Filling:
- 1 (15-ounce / 425g) can pitted sour cherries in water or light syrup, drained (reserve 1/4 cup liquid) or 1 ½ cups fresh/frozen pitted sour cherries
- ½ cup (100g) granulated sugar
- 2 tablespoons cornstarch
- ¼ cup (60ml) reserved cherry liquid (or water if using fresh/frozen cherries)
- ½ teaspoon almond extract (optional, but pairs beautifully with cherries)
- For the Silky Chocolate Ganache:
- 1 cup (240ml) heavy cream (minimum 36% fat)
- 8 ounces (225g) good quality dark chocolate (60-70% cacao), finely chopped or good quality chocolate chips
- 2 tablespoons (28g) unsalted butter, cut into small pieces, at room temperature
- 1 teaspoon pure vanilla extract
- For Decoration (Optional):
- Fresh cherries with stems (for a festive look)
- Chocolate curls or shavings
- A light dusting of powdered sugar
Preparing for Your Christmas Kitchen Chocolate Cherry Baking Adventure
- Preheat and Prepare Your Pans: My first step, and a crucial one, is always to preheat the oven. Set it to a steady 350°F (175°C). While the oven warms up, take a moment to prepare your baking pans. For this magnificent Christmas Kitchen Chocolate Cherry cake, I typically use two 8-inch round cake pans. Grease them thoroughly with butter or non-stick spray, then dust them with a little cocoa powder instead of flour – this prevents those tell-tale white streaks on your rich chocolate cake. Tap out any excess cocoa powder. If you prefer, line the bottoms with parchment paper for extra insurance against sticking.
- Gather and Measure: Before diving into mixing, I like to have all my ingredients measured out and ready. This is what we bakers call “mise en place” – everything in its place. It makes the entire process so much smoother and reduces the chance of forgetting something or making a measurement error. Trust me, it’s worth the extra five minutes! Ensure your eggs, buttermilk, and butter for the ganache are all at room temperature; this helps them incorporate better into the batter and creates a smoother final product.
Baking the Rich Christmas Kitchen Chocolate Cherry Cake Base
- Sift Dry Ingredients: In a large mixing bowl, I start by whisking together the dry ingredients for the cake: the all-purpose flour, unsweetened cocoa powder, baking soda, and salt. Sifting them together isn’t strictly necessary if your cocoa powder isn’t clumpy, but I find it ensures everything is evenly distributed and helps create a lighter crumb. Once combined, set this bowl aside.
- Cream Wet Ingredients (Except Buttermilk): In a separate, even larger mixing bowl (or the bowl of a stand mixer fitted with the paddle attachment), I combine the granulated sugar and the vegetable oil. Beat them together on medium speed for about 2-3 minutes until they are well combined and slightly lighter in color.
- Add Eggs and Vanilla: Next, I crack in the eggs, one at a time, beating well after each addition. Make sure each egg is fully incorporated before adding the next. This creates a strong emulsion, which is key to a moist cake. Once all the eggs are in, I stir in the vanilla extract and the optional instant espresso powder. The espresso powder won’t make your cake taste like coffee, but it will magically intensify the chocolate flavor, making this Christmas Kitchen Chocolate Cherry cake truly exceptional.
- Alternate Dry and Wet: Now it’s time to bring the two main parts of the batter together. With the mixer on low speed, I gradually add about one-third of the dry ingredient mixture to the wet mixture, mixing just until streaks of flour disappear. Then, I pour in half of the buttermilk, mixing gently. I repeat this process, adding another third of the dry ingredients, followed by the remaining buttermilk, and finally the last of the dry ingredients. Be careful not to overmix at this stage! Overmixing develops gluten, which can lead to a tough cake. We want a tender, melt-in-your-mouth texture for our Christmas Kitchen Chocolate Cherry cake.
- Fold in Chocolate and Cherries: Once the batter is just combined, remove the bowl from the mixer. Using a spatula, gently fold in the semi-sweet chocolate chips and the chopped fresh or frozen pitted cherries. If using frozen cherries, there’s no need to thaw them; they’ll bake beautifully right in the batter. The goal here is to distribute them evenly without mashing the cherries. This step adds wonderful bursts of flavor and texture to every bite of your Christmas Kitchen Chocolate Cherry creation.
- Divide and Bake: Divide the luscious batter evenly between your two prepared 8-inch cake pans. I often use a kitchen scale for this to ensure even layers, but eyeballing it works just fine too. Place the pans in the preheated oven and bake for 30-35 minutes, or until a wooden skewer or toothpick inserted into the center of the cakes comes out with moist crumbs attached, but not wet batter. The cakes should spring back lightly when touched.
- Cool the Cakes: Once baked, remove the cakes from the oven and let them cool in their pans on a wire rack for about 10-15 minutes. This allows the cakes to firm up slightly. After this initial cooling, carefully invert the cakes onto the wire rack to cool completely. It is absolutely vital that the cake layers are completely cool before you attempt to fill or frost them, otherwise, your filling and ganache will melt and slide right off, creating a messy situation instead of a beautiful Christmas Kitchen Chocolate Cherry masterpiece. This can take 1-2 hours.
Crafting the Sweet Cherry Filling
- Prepare Cherries: If you’re using canned sour cherries, drain them well, making sure to reserve about ¼ cup of the liquid. If you’re using fresh or frozen sour cherries, you’ll use ¼ cup of water or apple juice for the liquid component.
- Combine and Cook: In a medium saucepan, combine the granulated sugar and cornstarch. Whisk them together thoroughly until there are no lumps. This is key to a smooth filling. Gradually whisk in the reserved cherry liquid (or water/juice) until smooth. Add the drained cherries to the saucepan.
- Thicken the Filling: Place the saucepan over medium heat, stirring constantly. The mixture will start to thicken as it comes to a simmer. Continue to cook and stir for 1-2 minutes after it begins to thicken, ensuring the cornstarch is fully cooked out. You’ll know it’s ready when it forms a thick, glossy sauce that coats the back of a spoon.
- Add Flavor and Cool: Remove the saucepan from the heat. Stir in the almond extract, if using. The almond note truly elevates the cherry flavor in this Christmas Kitchen Chocolate Cherry cake! Transfer the cherry filling to a bowl and cover it directly with plastic wrap to prevent a skin from forming. Let it cool completely to room temperature, then chill it in the refrigerator until it’s cold and firm, which usually takes at least an hour. This cold filling will be much easier to spread.
Making the Silky Chocolate Ganache
- Prepare Chocolate: Place the finely chopped dark chocolate or chocolate chips in a heatproof medium bowl. Ensure your chocolate is good quality; it makes a huge difference in the final taste and texture of your ganache for this special Christmas Kitchen Chocolate Cherry dessert.
- Heat Cream: In a small saucepan, heat the heavy cream over medium heat until it just begins to simmer around the edges, or small bubbles form. Be careful not to boil it vigorously, as this can scorch the cream.
- Pour and Rest: Immediately pour the hot cream over the chopped chocolate in the bowl. Let it sit undisturbed for 5 minutes. This allows the hot cream to melt the chocolate thoroughly. Do not stir immediately! This resting period is crucial for achieving a smooth, lump-free ganache.
- Whisk to Smoothness: After 5 minutes, gently whisk the mixture starting from the center and working your way outwards. Continue whisking until the ganache is completely smooth, glossy, and emulsified. It should be a beautiful, rich liquid chocolate.
- Add Butter and Vanilla: Stir in the small pieces of room temperature unsalted butter and the vanilla extract. The butter will give the ganache a luxurious sheen and an even silkier texture. Continue stirring until the butter is fully melted and incorporated.
- Cool to Spreading Consistency: Allow the ganache to cool at room temperature, stirring occasionally, until it reaches a thick, spreadable consistency, similar to a very thick frosting. This can take anywhere from 1 to 2 hours, depending on your room temperature. If you’re in a hurry, you can pop it into the refrigerator for 15-20 minute intervals, stirring frequently, but be careful not to let it get too firm. You want it to be thick enough to hold its shape but still easy to spread smoothly over your Christmas Kitchen Chocolate Cherry cake layers.
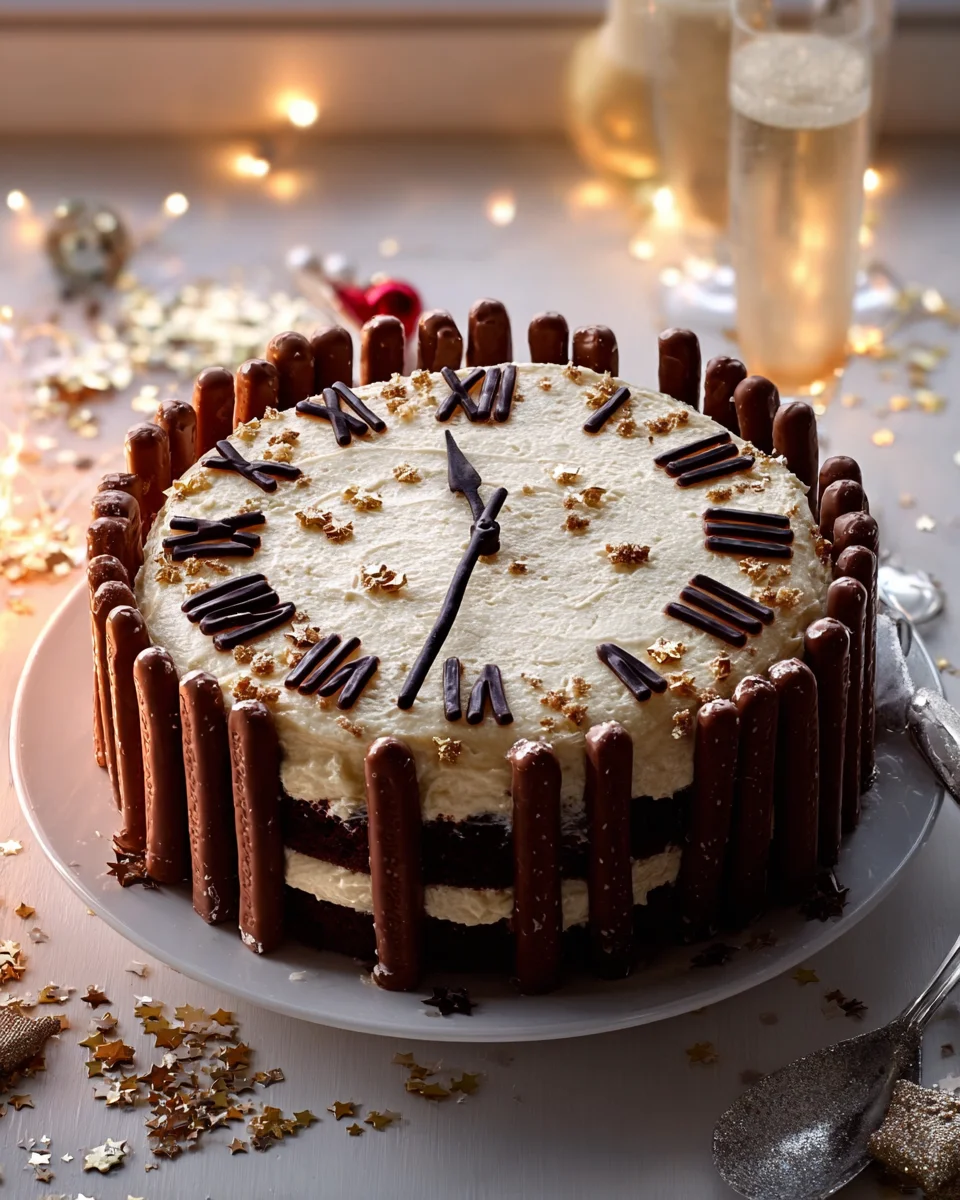
Assembling and Decorating Your Christmas Kitchen Chocolate Cherry Masterpiece
- Level the Cakes (Optional but Recommended): If your cake layers have domed tops, I highly recommend using a serrated knife or a cake leveler to carefully level them. This ensures you’ll have even, stable layers for a professional-looking Christmas Kitchen Chocolate Cherry cake.
- First Layer of Ganache: Place one cooled, leveled cake layer onto your serving platter or cake stand. Spread a thin, even layer of the chocolate ganache over the top of this cake layer. This “crumb coat” helps to seal in any loose crumbs and creates a smooth base for the next layers.
- Add Cherry Filling: Carefully spoon the chilled cherry filling onto the ganache layer, spreading it out evenly, leaving about a half-inch border around the edge of the cake. This border will prevent the filling from oozing out when you place the next cake layer on top. The vibrant red of the cherries against the dark chocolate is already making this Christmas Kitchen Chocolate Cherry cake look incredibly festive!
- Second Cake Layer: Gently place the second cooled cake layer on top of the cherry filling. Press down very lightly to ensure it’s level and stable.
- Apply Final Ganache Coat: Now, spoon the remaining chocolate ganache over the top of the second cake layer. Use an offset spatula or the back of a spoon to spread it evenly over the top and down the sides of the cake. Take your time to create a smooth, beautiful finish. If the ganache starts to get too firm, you can warm it gently over a double boiler or in the microwave for a few seconds, stirring well.
- Chill for Setting: For the neatest slices and to allow the ganache to fully set, I always recommend chilling the assembled Christmas Kitchen Chocolate Cherry cake in the refrigerator for at least 30 minutes, or even an hour. This firming up makes it much easier to decorate and serve.
- Decorate with Flair: This is where you can truly make your Christmas Kitchen Chocolate Cherry cake shine! Once the ganache is set, arrange fresh cherries with stems on top for an elegant, festive touch. You can also sprinkle chocolate curls or shavings over the top and around the base. For a final, delicate touch, a light dusting of powdered sugar just before serving mimics freshly fallen snow, perfect for your Christmas Kitchen setting.
- Serve and Enjoy: Slice your beautiful Christmas Kitchen Chocolate Cherry cake with a sharp, warm knife (wiping it clean between slices for the cleanest cuts) and serve. This cake is truly a showstopper and a delicious highlight of any festive celebration.
Tips for Christmas Kitchen Chocolate Cherry Success
- Quality Ingredients Matter: Especially for the chocolate and cherries, investing in good quality ingredients will elevate the flavor of your Christmas Kitchen Chocolate Cherry cake from good to extraordinary. A good cocoa powder and delicious chocolate make all the difference.
- Don’t Rush Cooling: I cannot stress this enough – patience is a virtue in baking! Allowing your cake layers and especially your cherry filling and ganache to cool completely is critical for the success of the assembly. Warm components will lead to a melty, sliding mess.
- Room Temperature Ingredients: For the cake batter, ensuring your eggs, buttermilk, and even oil are at room temperature helps them emulsify properly, creating a smoother batter and a more tender crumb.
- Handling Cherries: If using fresh cherries, make sure they are well pitted. If using frozen, don’t thaw them for the cake batter; they go in frozen. For the filling, if using frozen, you may need to cook it slightly longer to achieve the right thickness.
- Adjusting Ganache Consistency: If your ganache becomes too firm to spread, you can gently rewarm it over a double boiler or in the microwave for very short bursts (5-10 seconds), stirring well after each. If it’s too thin, a quick chill in the fridge for 10-15 minutes, with stirring, should firm it up.
- Storage: This magnificent Christmas Kitchen Chocolate Cherry cake can be stored, covered, at room temperature for up to 2 days, or in the refrigerator for up to 5 days. Bring it to room temperature for about 30 minutes before serving for the best flavor and texture.
Conclusion:
And there you have it, my friends! We’ve journeyed through the simple steps of creating what I truly believe is one of the most delightful and undeniably essential treats for any festive gathering or cozy winter evening. This isn’t just another dessert; it’s a sensory experience, a warm hug for your taste buds, and a sure-fire way to spread some serious culinary joy. What makes this recipe an absolute must-try, you ask? Well, for starters, its elegance belies its incredible ease of preparation. You don’t need to be a seasoned pastry chef to whip up something truly spectacular that will garner rave reviews from everyone lucky enough to try a piece. The rich, deep notes of high-quality chocolate, perfectly balanced by the sweet-tart burst of plump cherries, create a symphony of flavors that is both sophisticated and comforting. It’s that perfect blend of nostalgic warmth and gourmet indulgence that we all crave, especially during the colder months when a little extra sweetness goes a long way. This recipe, in particular, offers a fantastic escape from the overly complicated holiday baking that often stresses us out; instead, it delivers maximum impact with minimal fuss, leaving you more time to actually enjoy the moments that matter.
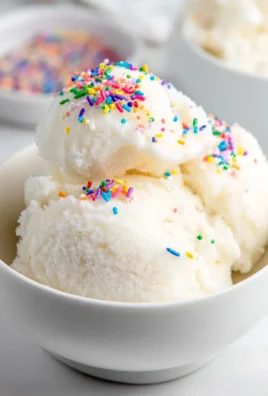
But the beauty of this treat extends far beyond its exquisite taste and straightforward process. It’s also incredibly versatile, allowing you to tailor it to your specific preferences or the occasion at hand. For a truly decadent experience, I highly recommend serving warm slices with a generous dollop of freshly whipped cream, perhaps infused with a hint of vanilla or almond extract. Alternatively, a scoop of good quality vanilla bean ice cream melting over the warm chocolate and cherries is pure bliss – the contrast in temperatures and textures is simply divine. If you’re feeling adventurous, consider a sprinkling of toasted chopped pistachios or hazelnuts for an added layer of crunch and nutty flavor. For those chilly evenings by the fire, a robust espresso or a steaming mug of spiced chai makes for the perfect accompaniment, cutting through the richness beautifully. This recipe isn’t just for dessert, though! Imagine tiny squares served alongside your morning coffee as a special holiday breakfast treat, or packaged beautifully as heartfelt homemade gifts for friends, neighbors, or teachers. Trust me, a beautifully wrapped box of this deliciousness will be far more appreciated than another generic gift.
Furthermore, don’t be afraid to experiment with variations to truly make it your own. While the classic chocolate and cherry combination is undeniably magical, consider trying other dried fruits like cranberries or even a mix of dried berries for a different twist. Orange zest grated into the batter can elevate the chocolate flavor and add a bright, zesty note that’s absolutely intoxicating. For an adult-friendly version, a splash of cherry liqueur or brandy can be incorporated into the batter or brushed over the warm dessert right after baking, adding a sophisticated depth. If you have dietary restrictions, many ingredients can be substituted: dairy-free chocolate and butter alternatives work wonderfully, and gluten-free flour blends can often be used successfully with minor adjustments, ensuring everyone can partake in this delightful creation. The point is, this recipe is a canvas for your creativity, offering endless possibilities for customization.
So, my dear readers, I implore you: don’t just read about this incredible confection; go forth and create it! Take the plunge into your kitchen, gather these simple ingredients, and experience the pure joy of bringing this recipe to life. I promise you, once you taste this very Christmas Kitchen Chocolate Cherry.html creation, your holiday season will never be the same. The aroma alone will fill your home with an inviting warmth that screams comfort and festivity. It’s more than just food; it’s a memory in the making, a tradition waiting to be started. And once you’ve made it, once you’ve savored every delectable bite, I would absolutely love to hear all about your experience! Did you stick to the original? Did you add your own unique twist? What did your family and friends think? Please, share your stories, your photos, and your delicious insights. Your culinary adventures inspire me, and I can’t wait to see how this wonderful recipe becomes a cherished part of your own kitchen repertoire. Happy baking, everyone!
Christmas Chocolate Cherry Dessert Recipe
This festive Christmas Chocolate Cherry Dessert combines the magical essence of holiday baking with rich aromas and delightful flavors, offering an exquisite balance of deep cocoa and bright, tart fruit.
Ingredients
Instructions
Important Information
Nutrition Facts (Per Serving)
It is important to consider this information as approximate and not to use it as definitive health advice.
Allergy Information
Please check ingredients for potential allergens and consult a health professional if in doubt.
Leave a Comment