
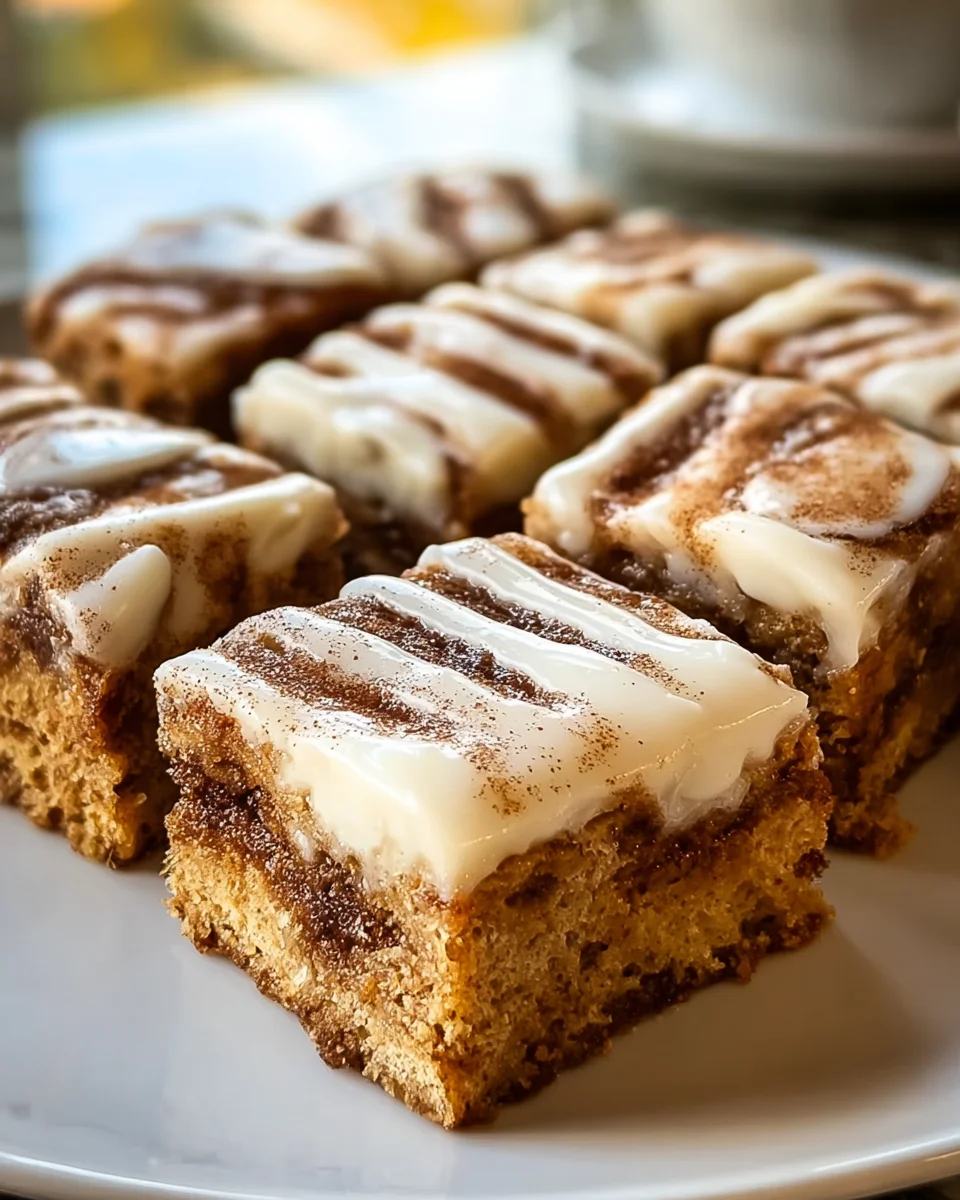
Cinnamon Roll Bliss Bars Recipe Delicious Dessert – imagine the aroma filling your kitchen, the soft, sweet dough, and the irresistible swirl of cinnamon sugar. Who can truly resist the warm embrace of a freshly baked cinnamon roll? That iconic breakfast treat, usually reserved for leisurely mornings, has now been transformed into an incredibly convenient and utterly decadent bar. These bars capture everything you adore about the classic cinnamon roll – the gooey center, the sweet spice, and that dreamy cream cheese frosting – but in a handheld, easy-to-share format.
While the concept of a “bliss bar” is a delightful modern take, the cinnamon roll itself boasts a rich history, tracing its origins back to Sweden in the 17th century, evolving into the beloved pastry we know today across the globe. Our Cinnamon Roll Bliss Bars pay homage to that timeless indulgence, making it accessible anytime and anywhere you crave that signature comfort.
Why You’ll Adore This Delicious Dessert
The sheer ease of preparation, combined with the utterly satisfying flavor profile and delightful texture, makes this Cinnamon Roll Bliss Bars Recipe Delicious Dessert an absolute must-try for any baking enthusiast or dessert lover. Get ready to experience pure bliss in every delightful bite!
Ingredients:
- For the Cinnamon Roll Bliss Bar Base:
- 1 cup (2 sticks) unsalted butter, softened to room temperature or melted for ease
- 1 cup granulated sugar
- ½ cup packed light brown sugar
- 2 large eggs, at room temperature
- 1 teaspoon pure vanilla extract
- 2 ½ cups all-purpose flour, spooned and leveled
- 2 teaspoons baking powder
- ½ teaspoon salt
- For the Irresistible Cinnamon Swirl Filling:
- ½ cup (1 stick) unsalted butter, melted
- 1 cup packed light brown sugar
- 2 tablespoons ground cinnamon
- For the Dreamy Cream Cheese Frosting:
- 8 ounces (1 block) full-fat cream cheese, softened to room temperature
- ½ cup (1 stick) unsalted butter, softened to room temperature
- 4 cups powdered sugar (confectioners’ sugar), sifted to avoid lumps
- 1 teaspoon pure vanilla extract
- 2-4 tablespoons milk or heavy cream, as needed for desired consistency
Preparing the Cinnamon Roll Bliss Bar Base
Let’s kick things off by creating the glorious foundation for our Cinnamon Roll Bliss Bars Recipe Delicious Dessert. Trust me, getting this base just right sets the stage for pure bliss!
- Preheat and Prepare Your Pan: Before we mix a thing, please take a moment to preheat your oven to a comfortable 350°F (175°C). While it’s warming up, grab a 9×13 inch baking pan. I like to line mine with parchment paper, leaving an overhang on the sides. This little trick makes lifting the finished bars out an absolute breeze, ensuring a perfect, clean cut every time. You can also lightly grease and flour the pan if you prefer, but the parchment truly is a game-changer.
- Cream the Butter and Sugars: In a large mixing bowl, either by hand with a sturdy whisk or with an electric mixer (my personal preference for ease!), combine your softened or melted 1 cup of unsalted butter with the 1 cup of granulated sugar and the ½ cup of packed light brown sugar. Beat these together until the mixture is beautifully light, fluffy, and a pale golden color. This creaming process incorporates air, which contributes to the bars’ tender texture. It usually takes about 2-3 minutes with an electric mixer. Make sure to scrape down the sides of the bowl periodically to ensure everything is thoroughly combined.
- Introduce Eggs and Vanilla: Now, let’s add the heart of our binding agents. Crack in your two large room-temperature eggs, one at a time, beating well after each addition. Room temperature eggs emulsify better with the butter and sugar, resulting in a smoother, more cohesive batter. After the eggs are incorporated, stir in the 1 teaspoon of pure vanilla extract. Vanilla is non-negotiable in desserts like this; it truly enhances all the other flavors. Beat for another minute until everything is well blended and looks wonderfully creamy.
- Whisk Dry Ingredients Separately: In a separate, medium-sized bowl, whisk together your 2 ½ cups of all-purpose flour, 2 teaspoons of baking powder, and ½ teaspoon of salt. It’s crucial to whisk these dry ingredients thoroughly to ensure the leavening and salt are evenly distributed throughout the flour. This prevents any pockets of unmixed baking powder or salt in your finished bars, which can affect their rise and flavor.
- Combine Wet and Dry: Gradually add the dry ingredients to the wet ingredients, mixing on low speed if using an electric mixer, or stirring gently by hand, just until everything is combined. The key here is not to overmix! Overmixing develops the gluten in the flour too much, which can lead to tough, dense bars instead of the soft, tender ones we’re aiming for. A few streaks of flour are perfectly fine; they’ll disappear during the next step or during baking.
- Press into Pan: Once your dough is ready, it will be quite thick and somewhat sticky. Transfer about two-thirds of this delicious dough mixture into your prepared 9×13 inch baking pan. Using your fingers, or a clean, lightly floured offset spatula, gently press the dough evenly into the bottom of the pan. It’s okay if it doesn’t look perfectly smooth; we’re just creating a nice, consistent base. Don’t worry about the remaining one-third of the dough; we’ll use that soon!
Crafting the Irresistible Cinnamon Swirl Filling
This is where the “Cinnamon Roll” magic truly comes to life! The filling is what transforms these delicious bars into a taste sensation reminiscent of your favorite morning pastry.
- Prepare the Cinnamon Filling Mixture: In a small bowl, combine your ½ cup of melted unsalted butter, 1 cup of packed light brown sugar, and 2 tablespoons of ground cinnamon. Stir these ingredients together until they form a thick, paste-like consistency. The aroma alone at this stage is absolutely heavenly and will have your kitchen smelling like a bakery! Make sure there are no dry lumps of brown sugar or cinnamon.
- Spread the Swirl: Now, take this fragrant cinnamon mixture and spoon it evenly over the pressed dough in your baking pan. You might find it easiest to dollop spoonfuls across the surface and then gently spread it out with the back of a spoon or a small offset spatula. Try to get it as evenly distributed as possible, reaching close to the edges of the pan, but don’t worry about perfection. This is meant to be rustic and beautiful!
- Dollop Remaining Dough: Remember that remaining one-third of the bar dough? It’s time for it to make its appearance! Gently dollop spoonfuls of the remaining dough over the cinnamon swirl layer. You won’t be able to spread it entirely to cover the cinnamon layer; that’s by design. These dollops will create a beautiful, marbled effect as they bake, allowing glimpses of that dark, luscious cinnamon swirl to peek through. This technique is what gives these Cinnamon Roll Bliss Bars their signature swirled appearance and incredible texture.
Baking Our Cinnamon Roll Bliss Bars
The moment of truth! Baking these bars to perfection ensures they’re tender, fragrant, and ready to be crowned with our dreamy frosting. Patience is a virtue here, but the wait is so worth it for this Delicious Dessert.
- Time to Bake: Carefully place your baking pan into your preheated 350°F (175°C) oven. Let the magic happen for approximately 28-35 minutes. Baking times can vary slightly depending on your oven, so keep an eye on them.
- Check for Doneness: You’ll know your Cinnamon Roll Bliss Bars are perfectly baked when the edges are lightly golden brown, and a wooden skewer or toothpick inserted into the center of the bar layer (avoiding the cinnamon swirl part for an accurate reading) comes out with moist crumbs attached, but not wet batter. If it comes out completely clean, they might be slightly overbaked, but still delicious! We want them tender and soft. The center should feel set and lightly spring back when gently pressed. Don’t be tempted to overbake, as this can lead to dry bars.
- Cool Completely: Once baked to perfection, remove the pan from the oven and place it on a wire rack. This allows air to circulate around the pan, helping the bars cool more evenly. It is absolutely crucial that the bars cool completely before you even think about adding the frosting. Seriously, resist the urge! If you frost warm bars, the cream cheese frosting will melt, creating a soupy mess rather than a thick, luscious layer. This cooling process can take anywhere from 1.5 to 2 hours, or even longer. You can speed it up by placing the cooled-down pan (after about 30 minutes on the rack) into the refrigerator for another hour. A fully cooled bar ensures a pristine frosting experience!
Whipping Up the Dreamy Cream Cheese Frosting
No Cinnamon Roll Bliss Bars Recipe Delicious Dessert would be complete without a generous slathering of rich, tangy, and utterly dreamy cream cheese frosting. This frosting is the crowning glory!
- Softening the Stars: In a large mixing bowl, combine your 8 ounces of softened full-fat cream cheese and ½ cup of softened unsalted butter. It’s essential that both of these ingredients are at true room temperature. If they’re too cold, your frosting will be lumpy and difficult to work with. I usually take them out of the fridge at least an hour before I plan to make the frosting.
- Beat Until Creamy: Using an electric mixer (handheld or stand mixer), beat the cream cheese and butter together on medium speed until the mixture is incredibly smooth and creamy, with no lumps whatsoever. This usually takes about 2-3 minutes. Make sure to scrape down the sides of the bowl several times during this process to ensure everything is thoroughly incorporated.
- Gradually Add Powdered Sugar: With the mixer on low speed, gradually add your 4 cups of sifted powdered sugar, one cup at a time. Sifting the sugar beforehand is a small but mighty step that prevents lumps, giving you the smoothest frosting possible. Once each addition is mostly incorporated, increase the speed to medium and beat until fully combined.
- Introduce Vanilla and Liquid: Stir in the 1 teaspoon of pure vanilla extract. Then, add 2 tablespoons of milk or heavy cream. Start with this amount. Beat the frosting on medium-high speed for another 1-2 minutes until it’s light, fluffy, and absolutely perfect. If the frosting seems too thick for your liking, you can add an additional tablespoon or two of milk or heavy cream, one teaspoon at a time, until you reach your desired spreading consistency. You want it thick enough to hold its shape but soft enough to spread easily. This velvety frosting truly elevates our Cinnamon Roll Bliss Bars to another level!
Assembling and Serving Your Cinnamon Roll Bliss Bars
The final, exciting steps to bring your Cinnamon Roll Bliss Bars Recipe Delicious Dessert to life! Get ready for some serious deliciousness.
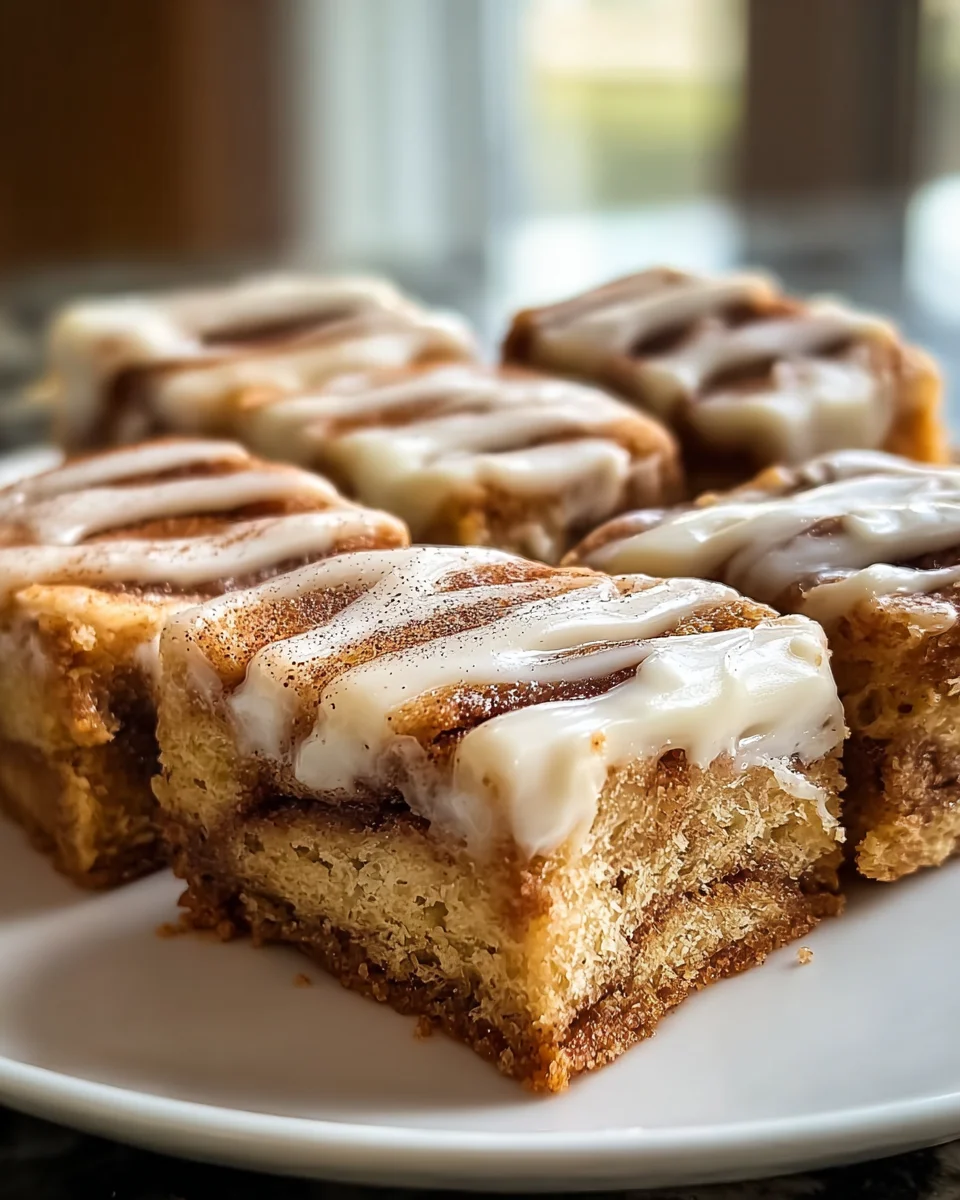
- Frosting Time!: Once your cinnamon roll bars are completely, utterly cool (I can’t stress this enough!), generously spread the dreamy cream cheese frosting over the top. Use an offset spatula or the back of a spoon to create an even, thick layer of frosting. You can go for a perfectly smooth surface or create beautiful swirls with your spatula – it’s all about personal preference and making it look as inviting as possible!
- Chill (Optional but Recommended): For the cleanest cuts and for the frosting to set slightly, I highly recommend placing the frosted bars in the refrigerator for at least 30 minutes. This chilling period makes slicing them incredibly neat and tidy, preventing the frosting from squishing out too much.
- Slice and Serve: Once chilled (or if you can’t wait!), carefully lift the bars out of the pan using the parchment paper overhangs. Place them on a cutting board. Using a sharp knife, slice the bars into your desired size. I usually go for 24 squares (6×4 grid) for a good, portion-controlled treat, but you can make them larger or smaller depending on your craving. Wipe your knife clean between cuts for the absolute neatest slices.
- Enjoy the Bliss!: Arrange your beautiful Cinnamon Roll Bliss Bars on a serving platter and get ready for rave reviews! These bars are perfect for breakfast, brunch, an afternoon treat, or any time you need a little piece of dessert heaven. They are incredibly moist, perfectly spiced, and undeniably delicious.
- Storage Instructions: If by some miracle you have any leftovers (it rarely happens in my house!), store these delightful bars in an airtight container in the refrigerator. They will stay fresh and utterly delicious for up to 3-4 days. For optimal enjoyment, I often let them come to room temperature for about 15-20 minutes before serving again, as the frosting softens beautifully.
Conclusion:
And there you have it, my dear fellow bakers and dessert enthusiasts! We’ve journeyed through the steps of creating what I genuinely believe is one of the most heartwarming, utterly irresistible treats you’ll ever pull from your oven. If you’ve been searching for that perfect confluence of comforting aroma, tender texture, and incredible flavor, look no further. This recipe isn’t just about baking; it’s about crafting an experience, a moment of pure bliss that can brighten any day. The magic of these bars lies in their ability to capture the very essence of a homemade cinnamon roll – that swirl of cinnamon-sugar warmth, that soft, doughy chew, and that luscious, sweet glaze – all without the fuss of individual rolling and rising. It’s a testament to how simple ingredients, combined with a little love, can create something truly extraordinary.
I cannot stress enough why this particular recipe is an absolute must-try. Think about the convenience: you get all the beloved characteristics of a classic cinnamon roll in a delightful, easy-to-slice bar form. It’s perfect for feeding a crowd, for a casual family breakfast, or for a sophisticated dessert table. The aroma that will fill your kitchen as these bake is, quite frankly, intoxicating – a sweet, spicy embrace that promises deliciousness. Then there’s the taste: each bite delivers that perfect balance of sweet cinnamon, rich butter, and a tender crumb, all crowned with a velvety icing that melts in your mouth. It’s truly a symphony of flavors and textures, making it an instant favorite for anyone who tries it. This isn’t just another dessert; it’s a memory in the making, a comforting hug from your kitchen.
Now, let’s talk about how to truly elevate your experience and make these bars your own. While they are phenomenal on their own, served warm or at room temperature, I have a few suggestions for you. Imagine a warm square, fresh from the oven, served with a scoop of premium vanilla bean ice cream; the contrast between the warm, soft bar and the cold, creamy ice cream is simply divine. Or, for a truly decadent breakfast or brunch, pair them with a robust cup of coffee or a frothy latte. They also make an excellent companion to a glass of cold milk, especially for the younger crowd. For a cozy evening in, a mug of hot cocoa or spiced tea alongside these bars creates an unparalleled comfort experience.
Feeling adventurous? This recipe is wonderfully adaptable! Here are a few variations I encourage you to explore. For an added layer of texture and nuttiness, try folding in half a cup of finely chopped pecans or walnuts into the dough before baking. If you love a hint of citrus, a teaspoon of orange or lemon zest can be added to the glaze for a bright, refreshing zing. Chocolate lovers, don’t shy away from sprinkling some mini chocolate chips over the cinnamon swirl before baking – the melting chocolate adds another dimension of richness. You could even experiment with different spices in the swirl, perhaps a touch of cardamom or nutmeg, to create your unique flavor profile. For a richer, tangier frosting, a classic cream cheese frosting would also be an incredible addition, making them even more reminiscent of traditional cinnamon rolls. Don’t be afraid to experiment; baking is all about personal expression!
This Cinnamon Roll Bliss Bars Recipe Delicious Dessert is truly a game-changer.
I sincerely hope you feel inspired to give this wonderful recipe a try. There’s an immense joy in baking something from scratch, especially when the results are as spectacular as these bars. Imagine the smiles on the faces of your family and friends when you present them with this homemade delight. It’s more than just a treat; it’s an act of love. So, preheat your oven, gather your ingredients, and embark on this delicious baking adventure. I am absolutely confident that these bars will quickly become a cherished staple in your home. Once you’ve baked them, I would absolutely love to hear about your experience! Did you stick to the original recipe, or did you put your own unique twist on it? What were your favorite serving suggestions? Please feel free to share your thoughts, your successes, and perhaps even photos of your beautiful creations in the comments section below or on your favorite social media platforms. Your feedback and creativity inspire me and our entire baking community. Happy baking, everyone!
Cinnamon Roll Bliss Bars: Delicious Dessert Recipe!
These bars capture everything you adore about the classic cinnamon roll – the gooey center, the sweet spice, and that dreamy frosting – but in a handheld, easy-to-share format. This recipe uses a simple vanilla glaze for a delightful finish, perfectly complementing the moist, spiced bars.
Ingredients
Instructions
Important Information
Nutrition Facts (Per Serving)
It is important to consider this information as approximate and not to use it as definitive health advice.
Allergy Information
Please check ingredients for potential allergens and consult a health professional if in doubt.

Leave a Comment