
Oven Baked Cheesy Tacos Crispy Loaded Recipe is about to revolutionize your weeknight dinners and redefine your expectations for taco night! Have you ever dreamt of a taco experience that combines incredible crunch, abundant cheesy goodness, and effortless preparation, all without the usual mess and fuss of frying? Well, prepare to have your culinary dreams come true with a dish designed for ultimate satisfaction and simplicity.
Tacos themselves boast a vibrant history, evolving from ancient Mexican staples into the versatile, beloved dish we know today. While traditional street tacos hold a special place in our hearts, our modern twist embraces convenience without sacrificing an ounce of flavor or that satisfying texture. People absolutely adore this dish because it delivers perfectly crispy taco shells every single time, generously loaded with savory fillings and an irresistible blanket of melted cheese, all baked together in one pan.
It’s a game-changer for busy families, casual gatherings, or anyone craving maximum flavor with minimal effort. Say goodbye to soggy shells and hello to a culinary triumph that’s simple, delicious, and incredibly satisfying. This Oven Baked Cheesy Tacos Crispy Loaded Recipe promises a memorable meal that will have everyone asking for seconds and wondering how something so easy could be so incredibly tasty.
Ingredients:
Gathering your ingredients is the first exciting step on our culinary journey to creating the most incredible Oven Baked Cheesy Tacos Crispy Loaded Recipe. Think of this list as your treasure map to flavor! I’ve broken it down to make sure you have everything you need for a truly epic taco night.
- For the Seasoned Ground Meat:
- 1.5 lbs (about 680g) lean ground beef (I usually go for 85/15 or 90/10 for a good balance of flavor without too much grease, but feel free to use ground turkey or chicken if you prefer!)
- 1 large yellow onion, finely diced (Trust me, dicing it fine ensures it melts into the meat beautifully.)
- 2 cloves garlic, minced (Fresh garlic makes all the difference!)
- 1 (14.5-ounce / 411g) can crushed tomatoes or tomato sauce (This adds a lovely depth and moisture to the filling.)
- 1/2 cup (120ml) beef broth or water (Helps simmer the flavors together perfectly.)
- 2 tablespoons chili powder (The cornerstone of our taco seasoning!)
- 1 tablespoon ground cumin (Earthy and warm, absolutely essential.)
- 1 teaspoon smoked paprika (Adds a beautiful smoky note that elevates the whole dish.)
- 1/2 teaspoon onion powder (Even though we have fresh onion, this boosts that savory allium flavor.)
- 1/2 teaspoon garlic powder (Same goes for garlic, it’s about layering flavors!)
- 1/4 teaspoon cayenne pepper (Optional, but gives a lovely little kick! Adjust to your spice preference.)
- Salt and freshly ground black pepper to taste (Always season as you go!)
- 1 tablespoon olive oil (For sautéing our aromatics.)
- For the Crispy Taco Shells & Cheese:
- 18-24 soft corn or flour tortillas (I usually prefer flour for this recipe as they get wonderfully crispy yet still pliable, but corn works too if you love that authentic flavor! Choose 6-inch tortillas.)
- 2 cups (about 226g) shredded cheddar cheese, Monterey Jack, or a Mexican blend (A good amount of cheese is key for our Oven Baked Cheesy Tacos Crispy Loaded Recipe!)
- Cooking spray or a little extra olive oil (For getting those tortillas perfectly crispy.)
- For the Loaded Toppings (This is where the “Loaded” part comes in!):
- 1 head of crisp iceberg or romaine lettuce, thinly shredded (That refreshing crunch is non-negotiable!)
- 2-3 Roma tomatoes, diced (Sweet and juicy.)
- 1/2 red onion, finely diced or thinly sliced (Adds a sharp, fresh bite.)
- 1/2 cup (120g) sour cream or plain Greek yogurt (For a cool, creamy contrast.)
- Your favorite salsa (Mild, medium, or hot – whatever makes your heart sing!)
- 1-2 avocados, diced or mashed into guacamole (Creamy goodness that takes these tacos over the top.)
- Fresh cilantro, chopped (For a burst of herbaceous freshness.)
- Lime wedges (A squeeze of fresh lime brightens everything!)
- Sliced jalapeños (Fresh or pickled, for an extra zing and heat!)
- Hot sauce, if desired (For those who like to really turn up the heat.)
Having all these wonderful ingredients laid out makes the cooking process so much smoother and more enjoyable. It also ensures that every single taco we bake will be bursting with flavor, from the seasoned meat to the melty cheese and the fresh, vibrant toppings. Now, let’s get cooking and bring this Oven Baked Cheesy Tacos Crispy Loaded Recipe to life!
1. Preparing the Irresistibly Seasoned Ground Meat
This is where the magic begins for our taco filling. A flavorful, well-seasoned meat is the backbone of any great taco, and for this Oven Baked Cheesy Tacos Crispy Loaded Recipe, we’re going all out!
-
Sauté the Aromatics: Grab a large skillet or a Dutch oven – something with high sides that can handle all that deliciousness. Place it over medium-high heat and add 1 tablespoon of olive oil. Once the oil is shimmering, toss in your finely diced yellow onion. Sauté the onion for about 5-7 minutes, stirring occasionally, until it becomes soft and translucent. We’re looking for that lovely sweetness to develop here, so don’t rush this step. It lays a crucial foundation of flavor.
-
Add the Garlic: Now, push the onions to one side of the pan and add your minced garlic to the cleared space. Let it cook for just about 30-60 seconds, until it becomes fragrant. Be careful not to burn it, as burnt garlic can taste bitter. Stir the garlic into the onions once it’s aromatic.
-
Brown the Ground Beef: Add your lean ground beef to the skillet. Break it up with a wooden spoon or spatula as it cooks. You want to crumble it into small, even pieces. Cook the beef for about 8-10 minutes, stirring frequently, until it’s fully browned and no pink remains. It’s important to drain any excess grease at this stage. If you leave too much fat, your tacos can become greasy, and we’re aiming for crispy perfection, not a soggy mess!
-
Season Like a Pro: Once the beef is browned and drained, it’s time for our incredible spice blend! Sprinkle in the chili powder, ground cumin, smoked paprika, onion powder, garlic powder, and cayenne pepper (if using). Stir these spices thoroughly into the meat and onion mixture. Let the spices toast with the meat for about 1-2 minutes, stirring constantly. This brief toasting period really wakes up the flavors in the spices and infuses them deeply into the meat. You’ll notice an amazing aroma filling your kitchen – that’s how you know you’re doing it right!
-
Simmer for Maximum Flavor: Pour in the crushed tomatoes (or tomato sauce) and the beef broth (or water). Give everything a good stir to combine. Bring the mixture to a gentle simmer, then reduce the heat to low, cover the skillet, and let it cook for at least 15-20 minutes. This simmering step is crucial for developing deep, rich flavors. It allows all the spices to meld with the meat and tomatoes, creating a wonderfully cohesive and flavorful filling. If you have more time, you can even let it simmer for 30-40 minutes; the longer it simmers, the more tender and flavorful your meat will be. Stir occasionally to prevent sticking.
-
Final Seasoning Check: After simmering, remove the lid and taste the meat mixture. This is your chance to adjust the seasoning. Add salt and freshly ground black pepper to your preference. If you like it spicier, a dash more cayenne or a pinch of red pepper flakes can be added. If it seems a little too thick, a splash more broth can help. We want a moist, but not watery, filling.
Set this wonderfully seasoned meat filling aside while we prepare our tortillas and get ready for the baking phase. It will stay warm and flavorful, ready to be spooned into our crispy shells.
2. Crafting the Crispy Tortilla Shells and Assembling Your Tacos
This is where our Oven Baked Cheesy Tacos Crispy Loaded Recipe really takes shape. We’re transforming soft tortillas into perfectly crispy, cheese-laden taco vessels! This method is a game-changer for homemade tacos.
-
Preheat Your Oven and Prepare Baking Sheets: First things first, preheat your oven to 400°F (200°C). This temperature is ideal for getting those tortillas wonderfully crisp without burning. Line one or two large baking sheets with parchment paper. This prevents sticking and makes for easy cleanup, which is always a win in my book!
-
Warm the Tortillas (The Secret to No-Break Folds!): Soft tortillas are much easier to work with and less likely to crack when you fold them. We want pliable tortillas for easy filling and shaping. You have a couple of options here:
- Microwave Method: Stack 5-6 tortillas on a microwave-safe plate, cover them with a damp paper towel, and microwave for 30-45 seconds until warm and flexible. Repeat with the remaining tortillas as you work.
- Stovetop Method: Heat a dry skillet over medium-high heat. Place one tortilla in the skillet for about 15-20 seconds per side, just until it’s warm and soft. Stack them and cover with a clean kitchen towel to keep them warm.
- Oven Method (My favorite for efficiency): Wrap a stack of tortillas in aluminum foil and place them in the preheated oven for 5-10 minutes. They’ll be perfectly warm and flexible when you’re ready to use them.
Choose the method that works best for you. The goal is soft, bendable tortillas.
-
Lightly Oil the Tortillas for Crispiness: Lay a warmed tortilla flat on a clean surface. Lightly spray or brush one side with cooking spray or a tiny bit of olive oil. This subtle layer of fat is key to achieving that beautiful, golden crispness in the oven. Flip the tortilla over and repeat on the other side. This ensures an even crisp throughout.
-
The Assembly Line – Fill and Fold: Now for the fun part! This step requires a little speed to keep the tortillas warm and pliable.
- Take one lightly oiled tortilla. Place about 2-3 tablespoons of the warm, seasoned ground meat filling down the center of one half of the tortilla. Don’t overfill it, or it will be hard to fold and might burst during baking.
- Sprinkle a generous tablespoon of shredded cheese over the meat filling. The cheese acts as a delicious glue and adds incredible flavor and texture.
- Carefully fold the tortilla in half, gently pressing down to seal the edges and flatten it slightly. You want it to resemble a half-moon shape.
- Arrange the folded taco in a single layer on your prepared baking sheet. It’s okay if they touch slightly, but don’t overcrowd the pan, as air circulation is important for crisping. You may need two baking sheets depending on the size and how many tacos you’re making.
Repeat this process with the remaining tortillas, meat, and cheese. It becomes quite rhythmic once you get going! The warmth of the meat and the pliability of the tortillas make this assembly a breeze.
Once all your tacos are filled, folded, and neatly arranged on the baking sheets, they are ready for their golden, crispy transformation in the oven. This careful preparation ensures every single taco in our Oven Baked Cheesy Tacos Crispy Loaded Recipe will be a delightful bite!
3. Baking to Golden, Cheesy Perfection
This is the moment our Oven Baked Cheesy Tacos Crispy Loaded Recipe comes to life! The oven will work its magic, transforming those humble folded tortillas into glorious, crispy, cheesy masterpieces.
-
The Initial Bake: Carefully transfer your baking sheets with the assembled tacos into the preheated 400°F (200°C) oven. Bake for 10-12 minutes on one side. During this initial bake, the tortillas will start to dry out and firm up, beginning their journey to crispiness. The meat filling will heat through even more, and the cheese inside will start to melt beautifully. You might even hear a gentle sizzle, which is a good sign!
-
Flip and Continue Baking: After 10-12 minutes, carefully remove the baking sheets from the oven. Using a spatula, gently flip each taco over. This ensures even crisping on both sides. Return the baking sheets to the oven and continue to bake for another 8-10 minutes. During this second phase, the other side will crisp up, and the edges of the tortillas should start to turn a lovely golden brown. Keep a watchful eye on them, as oven temperatures can vary, and you want them perfectly golden, not burnt.
-
The Cheesy Crown (The “Cheesy” in Our Recipe Title!): This is the grand finale for the baking! Once your tacos are looking delightfully crispy and golden, remove them from the oven one last time. Now, for the extra cheesy goodness: open up each taco just slightly and sprinkle an additional tablespoon (or more, I won’t judge!) of shredded cheese right on top of the filling, allowing some to spill onto the top of the tortilla. You can also sprinkle some cheese directly on the top of the folded taco if you want a fully cheese-crusted top.
-
Final Melt: Return the baking sheets to the oven for an additional 3-5 minutes, or until the cheese on top is gloriously melted, bubbly, and slightly golden in spots. For an extra touch of crispiness and a beautiful golden-brown finish, you can switch your oven to the broiler setting for the last 1-2 minutes, but watch them like a hawk! Broilers work very quickly, and cheese can go from perfect to burnt in seconds.
Once the cheese is perfectly melted and bubbly, carefully remove the baking sheets from the oven. Your kitchen will smell absolutely divine! These Oven Baked Cheesy Tacos Crispy Loaded Recipe creations are hot and ready for their final transformation with all those amazing toppings.
4. Preparing Your Loaded Toppings (The “Loaded” Factor!)
While your tacos are baking, this is the perfect time to get all your delicious toppings ready. The “Loaded” in Oven Baked Cheesy Tacos Crispy Loaded Recipe isn’t just a suggestion; it’s a promise! Fresh, vibrant toppings are essential for balancing the richness of the meat and cheese and adding incredible texture and flavor. Think of it as building your personal taco bar.
-
The Fresh Greens: Take your head of iceberg or romaine lettuce. Remove any outer bruised leaves, rinse it thoroughly under cold water, and pat it dry. Then, using a sharp knife, thinly slice or shred the lettuce. I like a really fine shred for tacos, as it distributes better and adds that perfect crisp crunch without being overwhelming. Place the shredded lettuce in a serving bowl.
-
Diced Tomatoes: Rinse your Roma tomatoes. Slice them in half, then into quarters, and dice them into small, bite-sized pieces. Tomatoes add a lovely burst of juicy freshness and a hint of sweetness. Put them in a separate bowl.
-
Red Onion Prep: Peel and halve your red onion. You can either finely dice it for a more subtle onion flavor or thinly slice it into delicate crescents for a more prominent, sharper bite. The red onion offers a beautiful color contrast and a pungent kick that cuts through the richness of the taco. Place in a bowl.
-
Creamy Avocado or Guacamole: This is a must for me! If you’re using fresh avocado, carefully cut it in half, remove the pit, and scoop out the flesh. Dice it into small cubes, or if you prefer, mash it roughly with a fork, perhaps with a squeeze of lime juice and a pinch of salt to make a quick guacamole. The creamy texture of avocado is a fantastic counterpoint to the crispy taco shell. Serve in a small dish.
-
The Creamy Elements: Spoon your sour cream or plain Greek yogurt into a small serving bowl. Both add a wonderful cooling, tangy element that’s perfect for tacos. Greek yogurt is a fantastic healthier alternative that still provides that rich creaminess.
-
Salsa Selection: Pour your favorite salsa into a serving dish. Whether you prefer a mild pico de gallo, a smoky chipotle salsa, or a fiery habanero one, make sure it’s ready for drizzling!
-
Fresh Herbs & Citrus: Roughly chop your fresh cilantro leaves. The bright, herbaceous flavor of cilantro is a classic pairing with tacos. Slice your lime into wedges; a squeeze of fresh lime juice over the finished taco is transformative, adding a zingy finish. Place these alongside your other toppings.
-
Optional Heat: If you love a bit more heat, have some sliced fresh or pickled jalapeños ready, and maybe a bottle of your favorite hot sauce for those who dare!
Arrange all your colorful toppings beautifully on your counter or table. This makes for a stunning presentation and allows everyone to customize their Oven Baked Cheesy Tacos Crispy Loaded Recipe exactly how they like it. The vibrant colors and textures of these toppings are just as important as the baked taco itself!
5. Serving and Enjoying Your Crispy, Cheesy Tacos
The moment has finally arrived! Your kitchen is filled with the tantalizing aroma of perfectly seasoned meat, melted cheese, and crispy tortillas. It’s time to bring everything together and savor the fruits of your labor for this truly delicious Oven Baked Cheesy Tacos Crispy Loaded Recipe.
-
Presenting Your Masterpiece: Carefully transfer the hot, crispy, cheesy tacos from the baking sheets to a large serving platter. Seeing them all lined up, golden and glistening with melted cheese, is incredibly satisfying. The presentation is almost as good as the first bite!
-
The Taco Bar Experience: Bring your platter of hot tacos to the table alongside all the beautifully prepared bowls of loaded toppings. This creates a wonderful interactive experience for everyone. Encourage your family and friends to dive in and customize their tacos to their heart’s content. This is where the “Loaded” aspect truly shines!
-
Building Your Perfect Taco: Pick up one of those glorious oven-baked crispy tacos. The crunch will be incredibly satisfying! Spoon in some cool sour cream or Greek yogurt first, as this often helps hold the other toppings in place. Then, pile on the shredded lettuce, diced tomatoes, red onion, and creamy avocado or guacamole. Don’t forget a generous dollop of your favorite salsa. Finally, sprinkle with fresh cilantro and give it a squeeze of fresh lime juice for that perfect burst of brightness. If you’re feeling adventurous, add a few slices of jalapeño or a dash of hot sauce.
-
Enjoy Every Bite: These tacos are best enjoyed immediately while they are still warm and at their crispiest. The combination of the hot, savory meat, the gooey melted cheese, the crunchy tortilla, and the cool, fresh toppings creates an explosion of flavors and textures in every single bite. It’s a truly satisfying meal that’s perfect for a weeknight dinner or a fun gathering.
-
Serving Suggestions: While these Oven Baked Cheesy Tacos Crispy Loaded Recipe are a complete meal in themselves, they pair wonderfully with a side of refried beans, Mexican rice, or even a simple fresh corn salad. A refreshing beverage, like an agua fresca or a cold cerveza, would also be a fantastic accompaniment.
I genuinely hope you love making and devouring these amazing tacos as much as I do. It’s a recipe that delivers on flavor, texture, and pure comfort, making it a staple in my kitchen. Enjoy the deliciousness!
Conclusion:
And there you have it, my friends! We’ve reached the delicious culmination of our culinary journey with what I genuinely believe is one of the most satisfying and effortlessly crowd-pleasing meals you can whip up in your kitchen. This isn’t just another dinner idea; it’s a vibrant experience, a delightful fusion of textures and flavors that will undoubtedly become a staple in your home. I really hope you’ve enjoyed exploring every step of this wonderful creation, and I’m so excited for you to bring it to life.
To recap, what makes this particular recipe an absolute must-try? It’s the sheer genius of combining the comforting crunch of a perfectly baked tortilla with a generous, gooey blanket of melted cheese and all the savory fillings you could ever dream of. Forget flimsy, messy, traditional tacos that fall apart after the first bite. Our method ensures every single taco is sturdy, bursting with flavor, and delivers that incredibly satisfying crispness without any deep-frying hassle. It’s the kind of meal that makes weeknights feel like weekend celebrations and is robust enough to impress guests without requiring hours of slaving over a hot stove. The convenience of baking a whole tray at once means less mess, more consistent results, and more time for you to actually enjoy the company of your loved ones or simply relax after a long day.
Elevate Your Taco Experience with These Serving Suggestions:
While this dish is undeniably fantastic on its own, a few thoughtful additions can truly elevate your dining experience. For that essential fresh counterpoint, a dollop of vibrant homemade salsa, whether mild pico de gallo or a fiery habanero blend, is non-negotiable. Don’t forget a generous scoop of creamy guacamole, rich with ripe avocados, lime, and cilantro – it adds a lusciousness that perfectly balances the crispness of the tacos. A swirl of cool sour cream or a lighter Greek yogurt alternative can provide a wonderful tangy contrast. For a textural crunch, thinly sliced radishes or pickled red onions are phenomenal additions, cutting through the richness beautifully. And, of course, a sprinkle of fresh cilantro brightens everything up with its herbaceous notes. On the side, consider serving a simple pot of fluffy cilantro-lime rice, a bowl of hearty black beans, or a refreshing corn salad to complete your Mexican-inspired feast.
Endless Possibilities for Variations:
One of the aspects I adore most about this particular style of taco is its incredible versatility. Don’t hesitate to make this recipe your own! If you’re looking to switch up the protein, shredded rotisserie chicken works wonderfully, or you could opt for ground turkey for a leaner option. For my vegetarian friends, a hearty filling of seasoned black beans, corn, and sautéed bell peppers is absolutely divine. You can even experiment with different cheese blends – a Monterey Jack and cheddar mix is classic, but a touch of Oaxaca cheese for extra stringiness or cotija for a salty bite would be incredible. Feeling adventurous? Add a pinch of smoked paprika to your seasoning for a deeper flavor, or finely chopped chipotle peppers in adobo sauce for a smoky heat. The beauty of this Oven Baked Cheesy Tacos Crispy Loaded Recipe lies in its adaptability; it’s a canvas for your culinary creativity.
So, what are you waiting for? I wholeheartedly encourage you to roll up your sleeves, gather your ingredients, and give this incredible recipe a try this week. I promise you won’t be disappointed. It’s more than just a meal; it’s a guaranteed smile-inducer, a new family favorite just waiting to be discovered. Once you’ve experienced the joy of biting into one of these perfectly crispy, loaded, cheesy creations, I would absolutely love to hear about it! Please, share your photos, your triumphs, your unique twists, and any feedback in the comments section below. Let’s build a community of taco enthusiasts who appreciate the simple yet profound pleasure of a perfectly made taco. Happy cooking, and bon appétit!
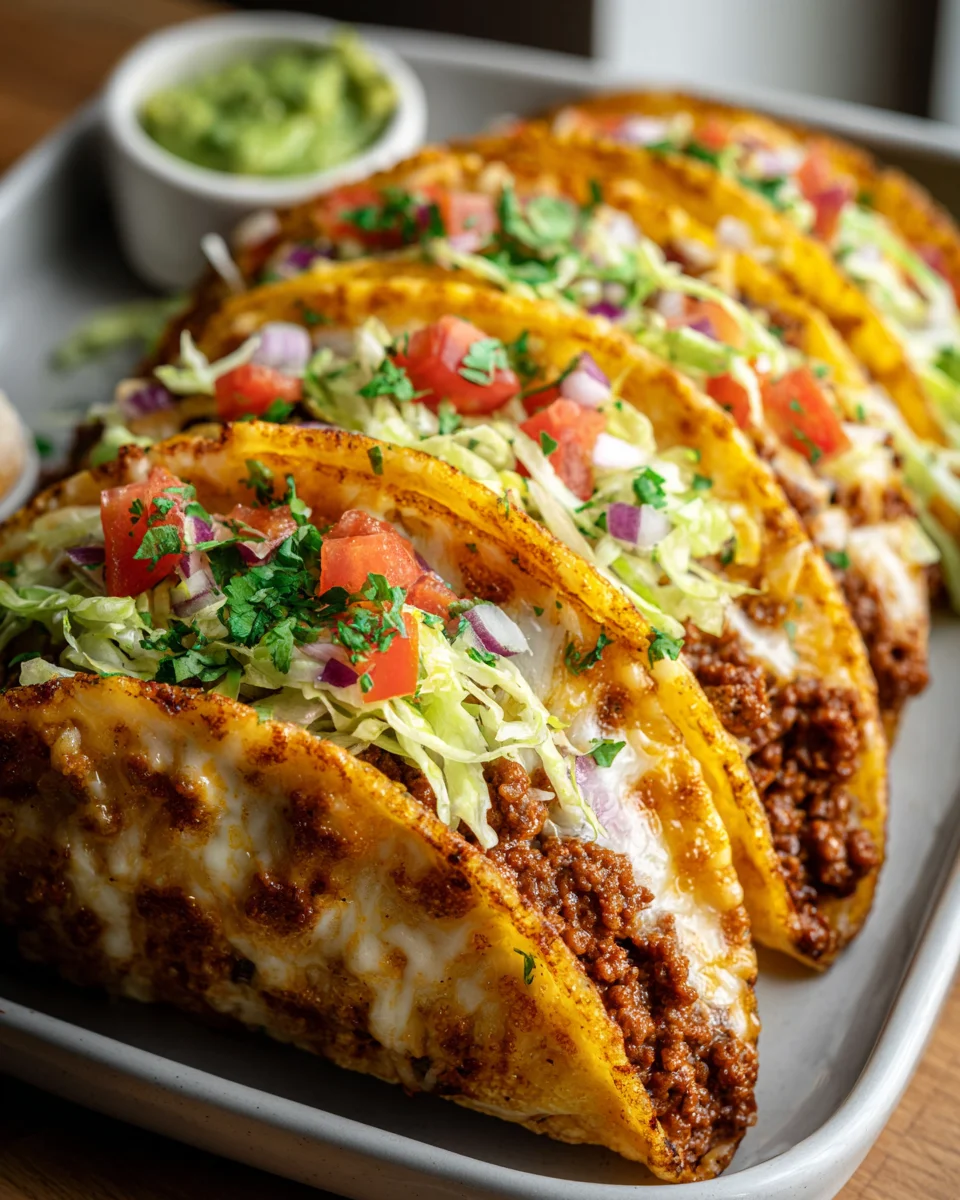
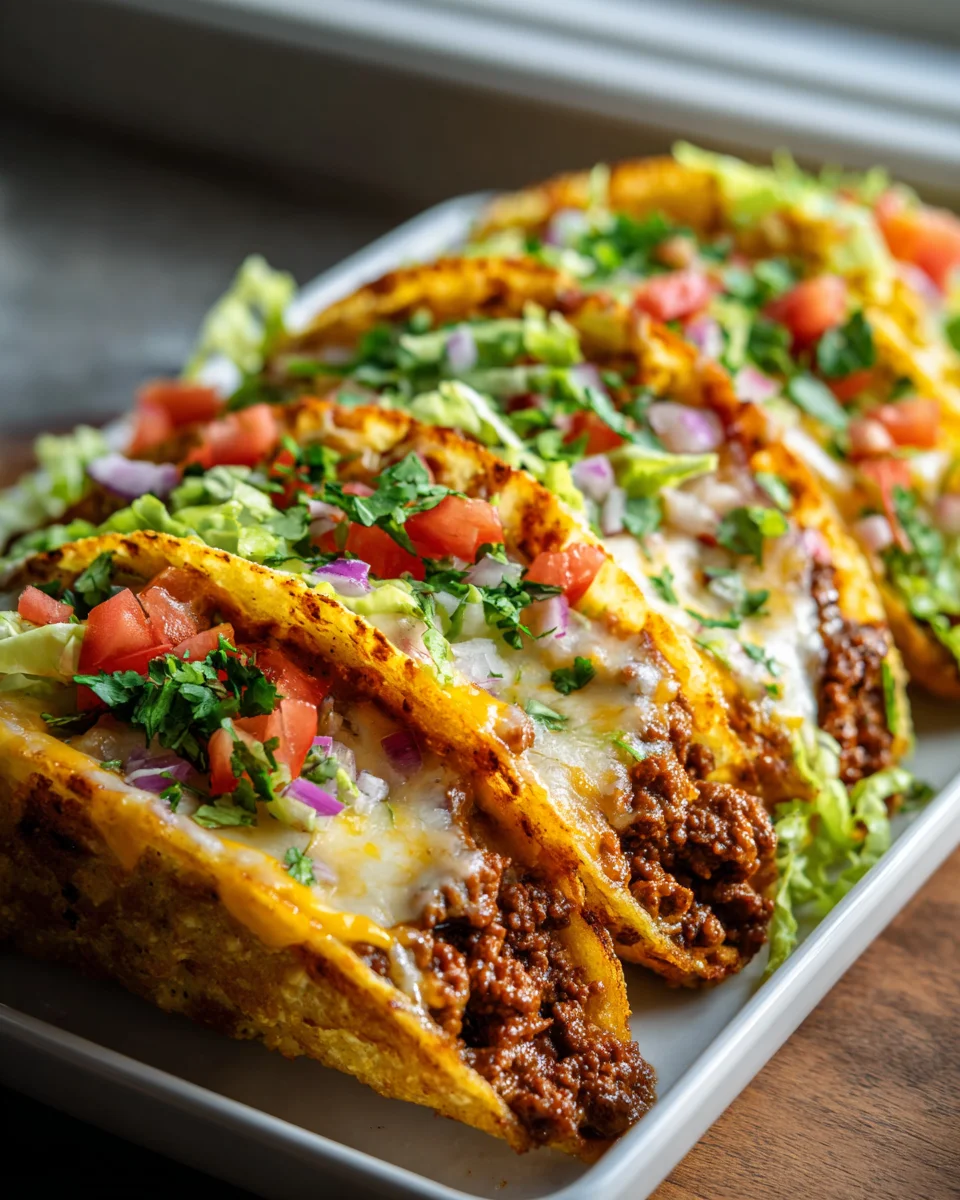
Delicious Crispy Oven Baked Cheesy Beef Tacos
Revolutionize taco night with these Oven Baked Cheesy Tacos, delivering incredible crunch, abundant cheesy goodness, and effortless preparation. Say goodbye to soggy shells and hello to a culinary triumph that’s simple, delicious, and incredibly satisfying, all baked in one pan.
Ingredients
Instructions
Important Information
Nutrition Facts (Per Serving)
It is important to consider this information as approximate and not to use it as definitive health advice.
Allergy Information
Please check ingredients for potential allergens and consult a health professional if in doubt.


Leave a Comment