
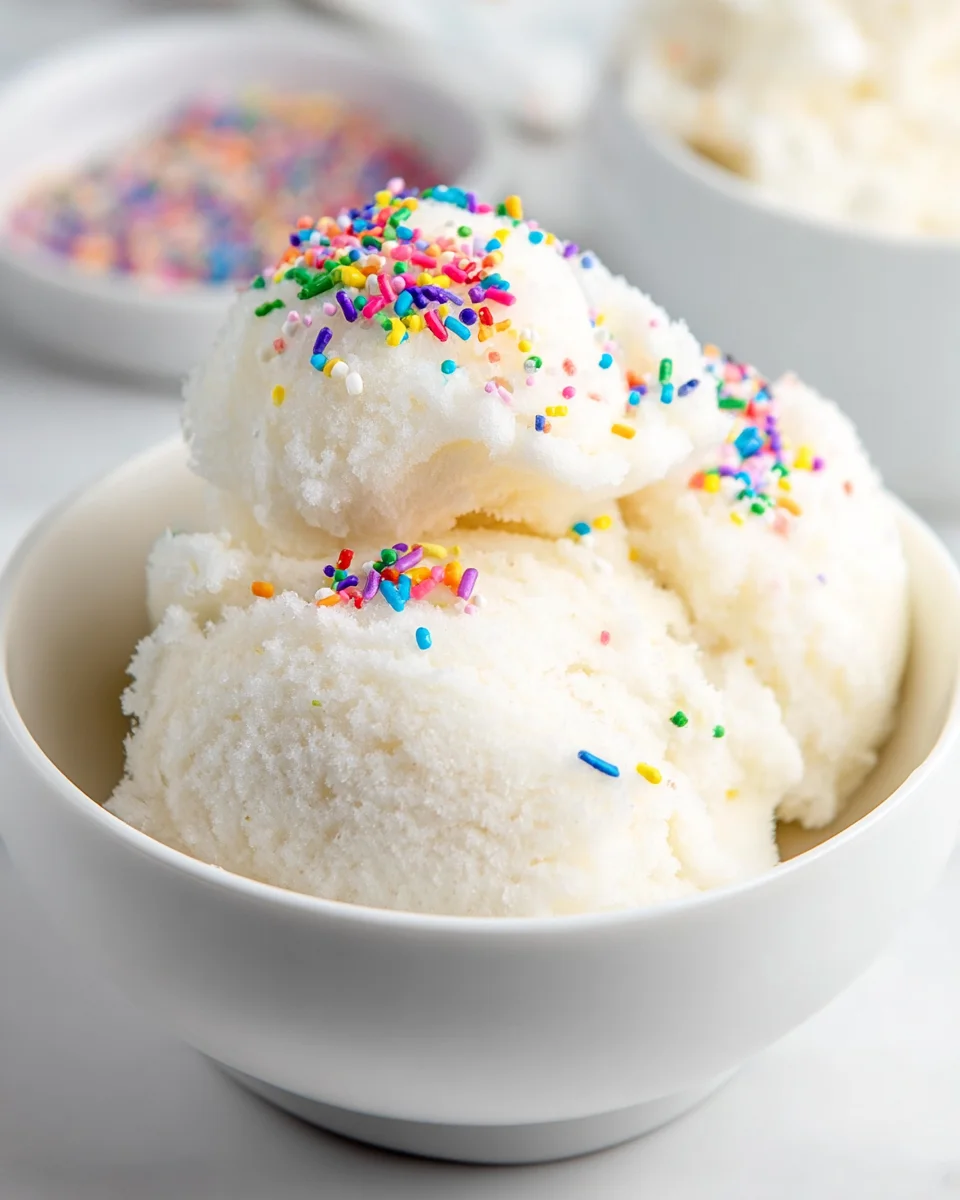
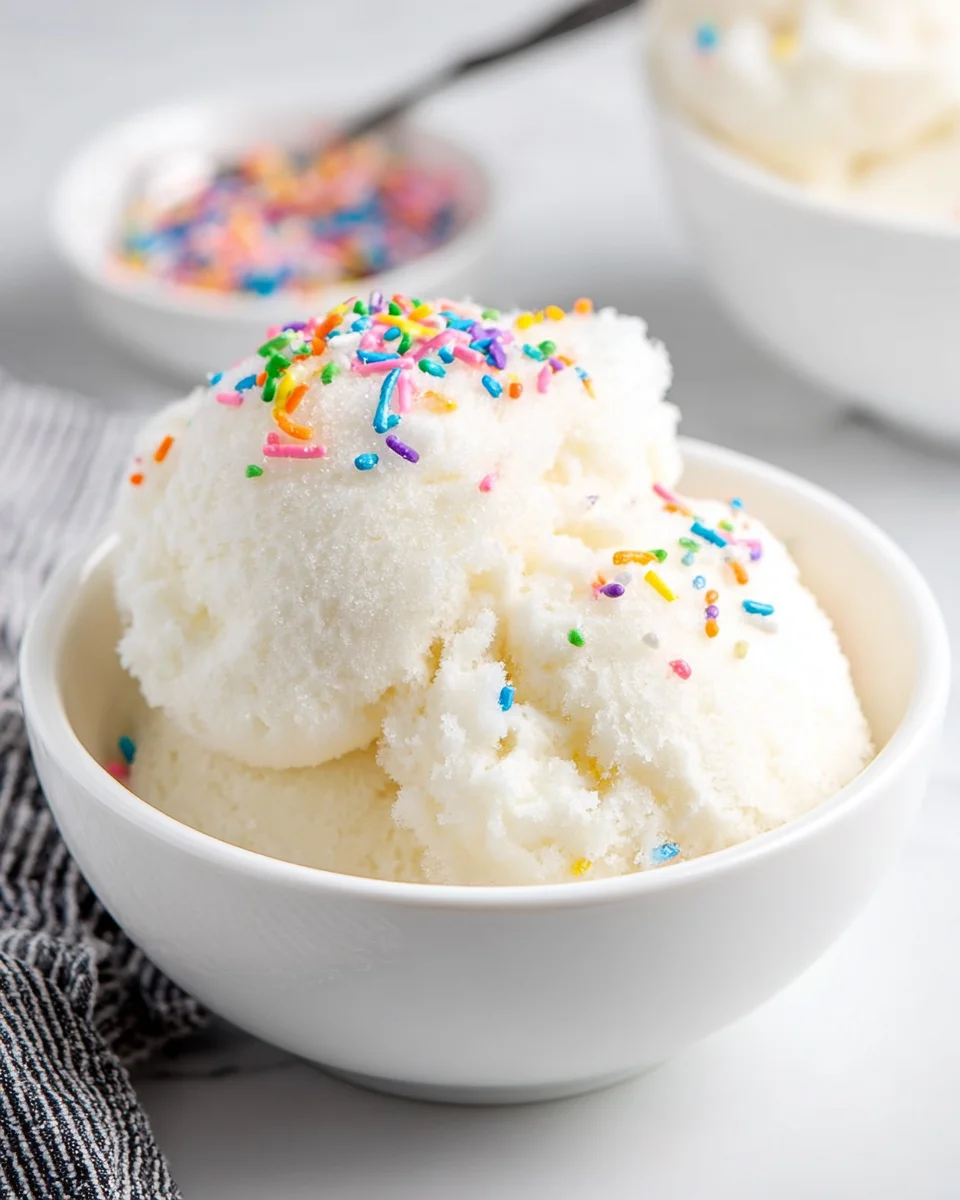
Snow Ice Cream
Ah, Snow Ice Cream! Just the name brings back memories of childhood winters filled with laughter and excitement. This delightful treat is not just an ordinary dessert; it’s a magical way to capture the essence of a snowy day. When the snowflakes start to fall, there’s nothing quite like stepping outside, scooping up fresh, clean snow, and transforming it into a creamy, sweet indulgence that tastes like a winter wonderland.
What makes Snow Ice Cream truly special is its simplicity and the sheer joy it brings. All you need are a few basic ingredients—snow, milk, sugar, and a splash of vanilla—and in just a matter of minutes, you can create a dessert that is both refreshing and nostalgic. It’s the perfect way to get the whole family involved, allowing everyone to join in on the fun of gathering snow and mixing up this frosty delight. I can almost hear the giggles and see the smiles as we savor this unique treat, reminding us to embrace the beauty of nature and make the most of every snowy day.
So, grab your mittens and get ready to whip up some Snow Ice Cream! Trust me, once you’ve tasted this fluffy, sweet concoction, you’ll find yourself looking forward to the next snowfall just to make it again.
Ingredient Notes
Making Snow Ice Cream is a delightful and simple way to enjoy winter’s bounty. The beauty of this recipe lies in its flexibility, allowing you to customize it to your taste. Here are the key ingredients you’ll need:
- Fresh Snow: The star of the show! Make sure to collect clean, white snow. Avoid yellow snow at all costs, as it can be contaminated.
- Milk: You can use any kind of milk—whole, skim, or even non-dairy alternatives like almond or coconut milk. Each will give a slightly different flavor and creaminess.
- Sugar: Granulated sugar is the most common choice, but you can also use brown sugar for a deeper flavor or a sugar substitute if you’re watching your sugar intake.
- Vanilla Extract: This adds a wonderful aroma and flavor. If you want to switch it up, try almond extract or a splash of your favorite flavored syrup.
Feel free to get creative with mix-ins like chocolate chips, sprinkles, or crushed cookies to personalize your Snow Ice Cream!
Step-by-Step Instructions
Now, let’s get started on making your own Snow Ice Cream. It’s a fun process that the whole family can enjoy!
- Collect the Snow: First, head outside and gather about 8 cups of fresh, clean snow. Use a large bowl or container to make it easy to transport.
- Prepare the Mixture: In another bowl, mix together 1 cup of milk, ½ cup of sugar, and 1 teaspoon of vanilla extract. Stir until the sugar is mostly dissolved. If you’re using brown sugar, it may take a bit longer to dissolve completely.
- Combine: Once your snow is gathered and your milk mixture is ready, pour the milk mixture over the snow. Start with about half and gently fold it in using a spatula or spoon. Be careful not to pack the snow down too much; you want to keep it fluffy!
- Adjust Consistency: After folding in half of the mixture, assess the consistency. If it’s too dry, add a little more of the milk mixture until you reach your desired creamy texture. Aim for a soft-serve ice cream consistency.
- Flavor and Mix-ins: Now is the time to get creative! Add any mix-ins you like, such as chocolate chips, shredded coconut, or crushed candies. Stir gently to incorporate.
- Serve Immediately: Snow Ice Cream is best enjoyed right away while it’s fresh and fluffy. Scoop it into bowls and add toppings if desired.
Tips & Suggestions
Here are some tips to ensure your Snow Ice Cream turns out perfectly:
- Gather Snow Quickly: Try to collect snow shortly after a snowfall to ensure it’s fresh. The fluffier the snow, the better the ice cream.
- Experiment with Flavors: You can infuse your milk mixture with cocoa powder for chocolate flavor, or add fruit puree if you want a fruity twist.
- Keep It Cold: If you live in a warmer climate or if the snow starts to melt, work quickly to make your ice cream. If necessary, you can place the snow in the freezer while you prepare the mixture.
- Check for Cleanliness: Ensure the snow is free from any debris or animal tracks. If in doubt, you can sift the snow through a fine mesh strainer.
Storage
Snow Ice Cream is best enjoyed fresh, but if you have leftovers, you can store it in an airtight container in the freezer for a short time. Here are some storage tips:
- Short-Term Storage: Keep your Snow Ice Cream in the freezer for up to 1-2 days. After that, the texture may change and become icy rather than creamy.
- Re-mix Before Serving: If the ice cream hardens too much in the freezer, let it sit out for a few minutes to soften, then stir it to restore some creaminess before serving.
- Avoid Long-Term Storage: This treat is meant to be enjoyed fresh, so I recommend making just enough for your needs to avoid wasting any deliciousness!
Enjoy your homemade Snow Ice Cream, a sweet reminder of winter’s magic!
Final Thoughts
If you’re looking for a delightful way to embrace winter’s magic, then Snow Ice Cream is a must-try! This simple yet enchanting treat allows you to harness the beauty of freshly fallen snow and turn it into a creamy dessert that’s perfect for all ages. I love how Snow Ice Cream is not only easy to make but also a fun activity to share with family and friends. It’s a wonderful opportunity to get outside, enjoy the winter wonderland, and create lasting memories. So, the next time it snows, gather your ingredients, grab a bowl full of soft, fluffy snow, and indulge in this whimsical, homemade treat. Trust me, you’ll be glad you did!

Leave a Comment