
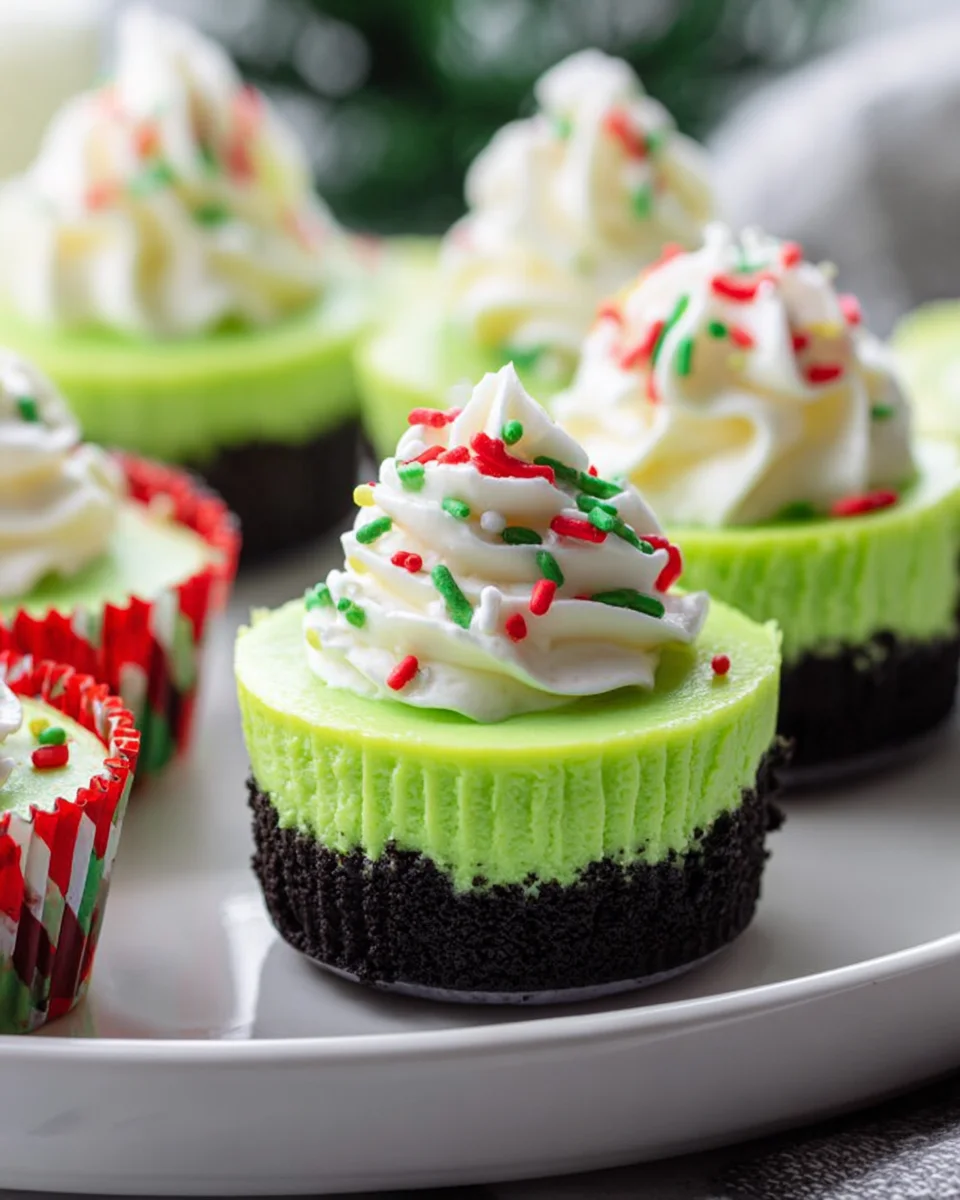
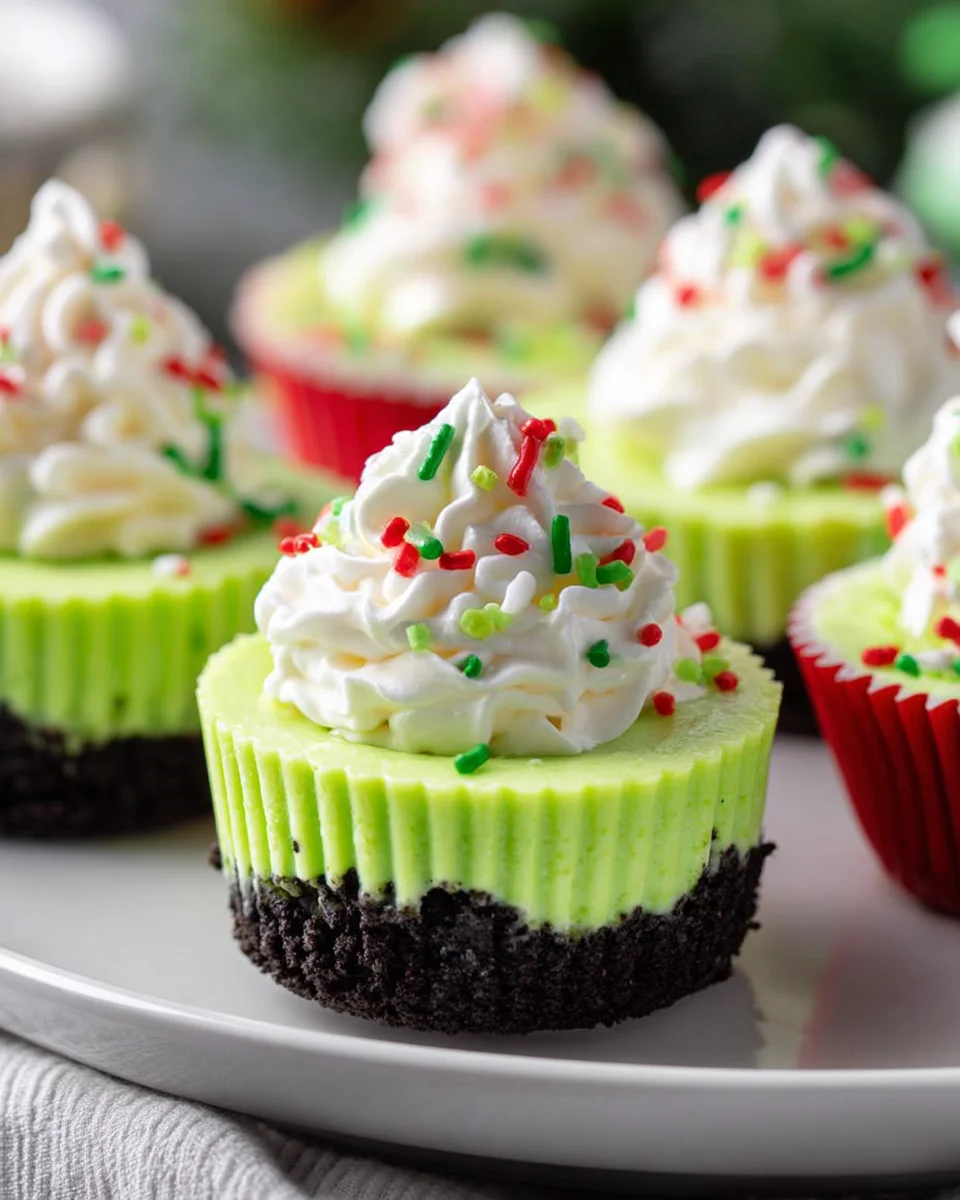
Grinch Mini Cheesecakes
Are you ready to add a little holiday cheer to your dessert table? Let me introduce you to my delightful Grinch Mini Cheesecakes! These adorable little treats are not just a feast for the eyes but also a burst of flavors that will leave everyone wanting more. Inspired by the beloved character from Dr. Seuss’s classic tale, these mini cheesecakes are a fun and festive way to celebrate the season.
What makes these Grinch Mini Cheesecakes so special is their vibrant green hue and whimsical presentation, capturing the spirit of the Grinch while delivering a creamy, dreamy cheesecake experience. The buttery graham cracker crust perfectly complements the luscious filling, and each bite is a delightful blend of sweetness and tanginess. Plus, they’re the perfect portion size for sharing (or not sharing, if you decide to keep them all to yourself!).
Whether you’re hosting a holiday gathering, looking for a unique dessert for a festive potluck, or simply wanting to spread some cheer, these mini cheesecakes are sure to steal the show. So, roll up your sleeves, and let’s get baking—it’s time to make some Grinchy magic in the kitchen!
Ingredient Notes
For a delightful batch of Grinch Mini Cheesecakes, I’ve gathered some key ingredients that give these treats their festive flavor and vibrant color. Here’s what you’ll need:
- Cream Cheese: The base of your cheesecake. I recommend using full-fat cream cheese for a rich and creamy texture. If you’re looking for a lighter option, you can substitute with low-fat cream cheese or a dairy-free cream cheese alternative.
- Sugar: Granulated sugar adds sweetness. For a healthier alternative, you can use coconut sugar or a sugar substitute like Stevia.
- Sour Cream: This adds a nice tang to the cheesecake. If you don’t have sour cream on hand, plain Greek yogurt is a great substitute.
- Vanilla Extract: Enhances the flavor of the cheesecake. You can use a non-alcoholic vanilla extract if you prefer.
- Green Food Coloring: Essential for achieving that Grinch-like hue. You can use natural food coloring for a more organic option.
- Graham Cracker Crust: Classic base for cheesecakes. If gluten-free, use gluten-free graham crackers or crushed almonds mixed with melted butter.
- Red and Green Sprinkles: For decoration! Feel free to use festive edible glitter or themed candies to top off your mini cheesecakes.
Step-by-Step Instructions
Making Grinch Mini Cheesecakes is a fun and straightforward process. Here’s how to create these charming desserts:
- Prepare the crust: Preheat your oven to 325°F (160°C). In a mixing bowl, combine 1 cup of crushed graham crackers, 1/4 cup of melted butter, and 2 tablespoons of sugar. Mix until well combined. Line a muffin tin with paper liners and press about a tablespoon of the mixture into the bottom of each cup. Bake for 5-7 minutes or until slightly golden, then remove and let cool.
- Make the cheesecake filling: In a large bowl, beat 16 ounces of cream cheese until smooth. Gradually add in 1/2 cup of sugar and mix until combined. Stir in 1/2 cup of sour cream, 1 teaspoon of vanilla extract, and a few drops of green food coloring until you reach your desired shade of green. Make sure everything is well blended.
- Fill the crusts: Spoon or pipe the cheesecake filling into each cooled crust, filling just below the top. Tap the muffin tin gently on the counter to remove any air bubbles.
- Bake the cheesecakes: Place the muffin tin in the oven and bake for 15-20 minutes, or until the centers are set but still slightly jiggly. Turn off the oven and leave the cheesecakes inside for an additional 10 minutes to cool gradually.
- Cool and chill: Remove the cheesecakes from the oven and allow them to cool at room temperature for about 30 minutes. Then, transfer them to the fridge and chill for at least 4 hours or overnight for the best results.
- Decorate: Once chilled, remove the cheesecakes from the muffin tin. Decorate the tops with red and green sprinkles or any festive toppings you like. Serve and enjoy your Grinch Mini Cheesecakes!
Tips & Suggestions
To ensure your Grinch Mini Cheesecakes turn out perfectly, here are some tips I’ve found helpful:
- Room Temperature Ingredients: Make sure your cream cheese and eggs are at room temperature before mixing. This helps achieve a smoother filling.
- Avoid Overmixing: When adding your eggs, mix just until combined to prevent incorporating too much air, which can cause cracks.
- Experiment with Flavors: Feel free to add other flavors like peppermint extract for a minty twist or lemon zest for a citrusy note.
- Presentation Matters: Use festive cupcake liners and consider drizzling some chocolate or caramel sauce on top for extra flair.
- Serving Size: These mini cheesecakes are rich, so I recommend serving them in small portions, about 2-3 bites each.
Storage
Storing your Grinch Mini Cheesecakes properly will keep them fresh and delicious:
- Refrigeration: Store your cheesecakes in an airtight container in the refrigerator for up to 5 days.
- Freezing: If you want to make them in advance, you can freeze the cheesecakes. Wrap each one tightly in plastic wrap and place them in a freezer-safe container. They can be frozen for up to 2 months. To thaw, simply place them in the refrigerator overnight.
- Decorate Before Serving: If you plan to freeze them, wait to decorate with sprinkles or toppings until just before serving for the best presentation.
Enjoy these festive Grinch Mini Cheesecakes at your holiday gatherings or as a delightful treat any time of the year!
Final Thoughts
If you’re looking to add a festive twist to your dessert table, the Grinch Mini Cheesecakes are an absolute must-try! These delightful little treats not only capture the spirit of the season with their vibrant green color and charming presentation, but they also deliver a creamy and decadent flavor that everyone will love. Perfect for holiday gatherings or cozy nights in, these mini cheesecakes are a fun and easy way to spread some cheer. So gather your ingredients, channel your inner Grinch, and whip up a batch of Grinch Mini Cheesecakes that will leave your friends and family smiling. Trust me, they’ll be a hit!
Leave a Comment