
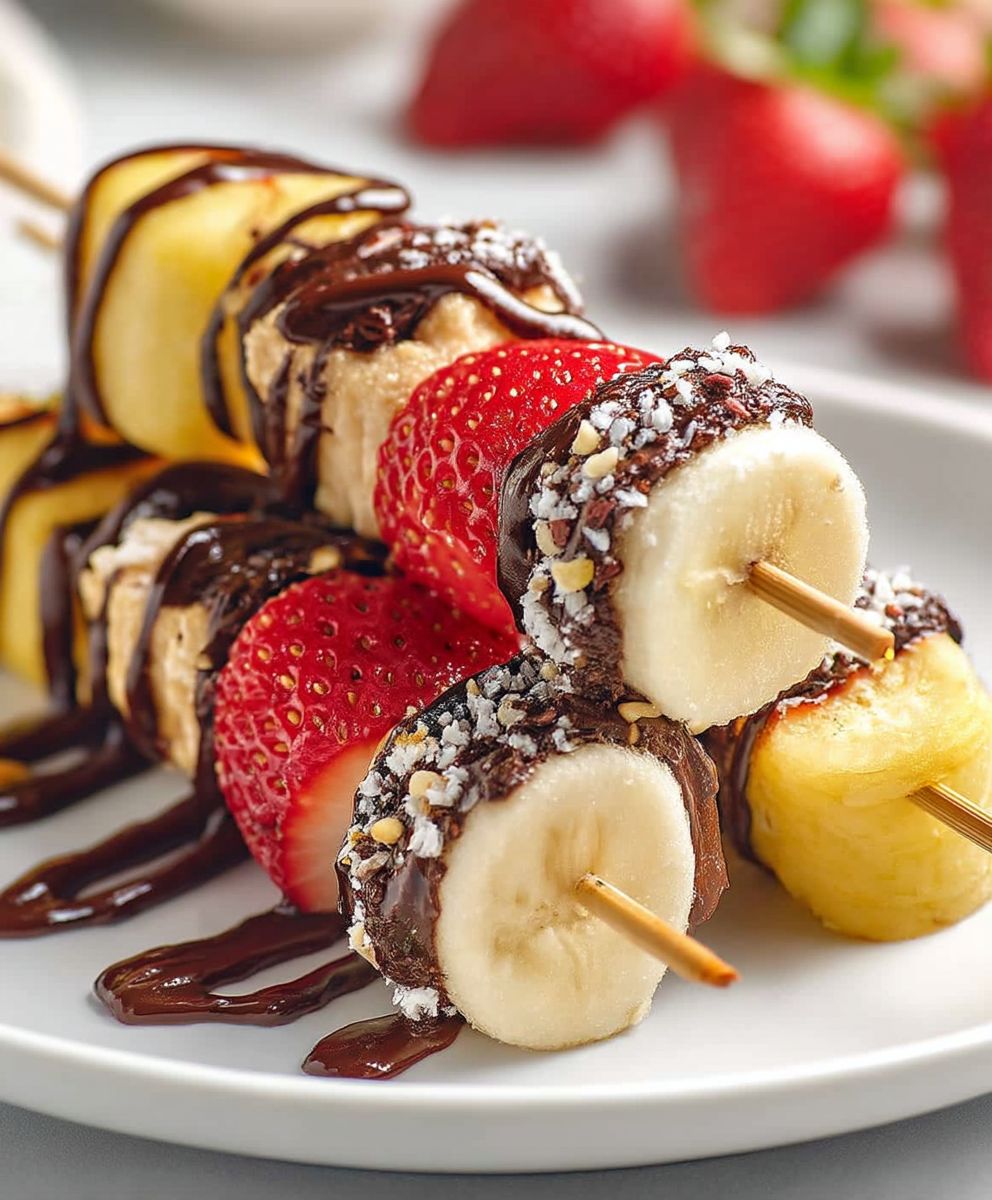
Fruit kabobs dessert: the perfect way to brighten any occasion! Imagine biting into a juicy strawberry, followed by a tangy pineapple chunk, all perfectly skewered and ready to enjoy. This isn’t just a dessert; it’s a vibrant explosion of flavor and color that’s guaranteed to be a crowd-pleaser.
While the concept of skewering food dates back centuries, with evidence found in ancient Greek and Roman cultures, the modern fruit kabobs dessert as we know it is a relatively recent invention. It’s a playful and accessible take on the traditional fruit platter, making it especially popular at parties, picnics, and casual gatherings. Think of it as a deconstructed fruit salad, elevated to a fun and interactive experience!
What makes fruit kabobs so irresistible? For starters, they’re incredibly versatile. You can customize them with your favorite fruits, from classic combinations like melon and grapes to more exotic choices like star fruit and dragon fruit. The visual appeal is undeniable, making them a stunning centerpiece for any dessert table. And let’s not forget the convenience factor! They’re easy to eat, require no utensils, and are naturally portion-controlled. Plus, they’re a healthy and refreshing alternative to heavier desserts, satisfying your sweet tooth without the guilt. So, get ready to create your own masterpiece of fruity goodness!
Ingredients:
- For the Fruit:
- 1 pint fresh strawberries, hulled and halved (or quartered if large)
- 1 ripe pineapple, peeled, cored, and cut into 1-inch chunks
- 2 ripe mangoes, peeled, pitted, and cut into 1-inch chunks
- 3 kiwi fruits, peeled and sliced into 1/2-inch thick rounds
- 1 pint blueberries, washed and dried
- 1 pint green grapes, washed and dried
- 1 pint red grapes, washed and dried
- 1 banana, peeled and sliced into 1/2-inch thick rounds (optional, but best if used immediately to prevent browning)
- 1 orange, peeled and segmented (optional)
- For the Chocolate Drizzle (Optional):
- 4 ounces semi-sweet chocolate chips
- 1 tablespoon coconut oil (or vegetable oil)
- For the Yogurt Dip (Optional):
- 1 cup plain Greek yogurt
- 2 tablespoons honey (or maple syrup)
- 1/2 teaspoon vanilla extract
- Pinch of cinnamon (optional)
- Equipment:
- Wooden skewers (6-8 inch length)
- Cutting board
- Sharp knife
- Small microwave-safe bowl (for melting chocolate)
- Spoon or spatula
- Serving platter
Preparing the Fruit:
- Wash and Prepare the Strawberries: Gently wash the strawberries under cool running water. Pat them dry with a paper towel. Hull the strawberries by removing the green leafy tops. If the strawberries are large, cut them in half or quarter them so they are roughly the same size as the other fruit pieces.
- Prepare the Pineapple: Peel the pineapple by slicing off the top and bottom, then carefully cutting away the outer skin, following the curve of the pineapple. Remove any remaining “eyes” with a small knife. Cut the pineapple into 1-inch chunks. I find it easiest to cut the pineapple into rings first, then cut the rings into smaller pieces.
- Prepare the Mangoes: Mangoes can be a bit tricky to peel and pit. The easiest way I’ve found is to stand the mango upright and slice down along either side of the large, flat pit. You’ll end up with two “cheeks” of mango. Score the flesh of each cheek in a grid pattern, being careful not to cut through the skin. Then, invert the cheek so the cubes pop out. Use a knife to slice the cubes away from the skin. Repeat with the other cheek. Cut the remaining mango flesh around the pit into smaller pieces.
- Prepare the Kiwi: Peel the kiwi fruit using a vegetable peeler or a small knife. Slice the kiwi into 1/2-inch thick rounds.
- Wash the Berries: Gently wash the blueberries, red grapes, and green grapes under cool running water. Pat them dry with a paper towel. Make sure they are thoroughly dry, as excess moisture can make the kabobs soggy.
- Prepare the Banana (Optional): If you’re using banana, peel it and slice it into 1/2-inch thick rounds just before assembling the kabobs. Banana tends to brown quickly, so it’s best to use it immediately. You can also brush the banana slices with a little lemon juice to help prevent browning.
- Prepare the Orange (Optional): If you’re using orange, peel it carefully, removing all the white pith. Segment the orange by slicing between the membranes to release the individual segments.
Assembling the Fruit Kabobs:
- Gather Your Ingredients: Arrange all the prepared fruit pieces in separate bowls or on a large cutting board. This will make it easier to grab the fruit as you assemble the kabobs.
- Thread the Fruit onto Skewers: Begin threading the fruit onto the wooden skewers. Alternate the colors and textures of the fruit to create visually appealing kabobs. I like to start and end with a strawberry or a grape, as they are easy to secure on the skewer. You can follow a specific pattern or simply create a random assortment of fruit. Be careful not to overcrowd the skewers, leaving a little space between each piece of fruit. This will make them easier to eat.
- Repeat: Continue threading the fruit onto the skewers until all the fruit is used. Aim for an even distribution of fruit on each kabob.
- Arrange on a Platter: Arrange the finished fruit kabobs on a serving platter. Cover loosely with plastic wrap and refrigerate for at least 30 minutes before serving. This will allow the fruit to chill and the flavors to meld together.
Preparing the Chocolate Drizzle (Optional):
- Combine Chocolate and Coconut Oil: Place the semi-sweet chocolate chips and coconut oil (or vegetable oil) in a small microwave-safe bowl. The coconut oil helps the chocolate melt smoothly and gives it a nice sheen.
- Microwave in Intervals: Microwave the chocolate in 30-second intervals, stirring after each interval, until the chocolate is completely melted and smooth. Be careful not to overheat the chocolate, as it can burn. If you don’t have a microwave, you can melt the chocolate in a double boiler over simmering water.
- Drizzle over Kabobs: Once the chocolate is melted, use a spoon or fork to drizzle it over the fruit kabobs. You can drizzle it lightly or generously, depending on your preference.
- Let Chocolate Set: Allow the chocolate to set completely before serving. This will take about 15-20 minutes at room temperature, or you can speed up the process by placing the kabobs in the refrigerator for a few minutes.
Preparing the Yogurt Dip (Optional):
- Combine Ingredients: In a small bowl, combine the plain Greek yogurt, honey (or maple syrup), vanilla extract, and cinnamon (if using).
- Whisk Until Smooth: Whisk the ingredients together until they are smooth and well combined.
- Adjust Sweetness: Taste the yogurt dip and adjust the sweetness to your liking. Add more honey or maple syrup if needed.
- Serve with Kabobs: Serve the yogurt dip alongside the fruit kabobs for dipping.
Tips and Variations:
- Fruit Variations: Feel free to use any of your favorite fruits in these kabobs. Other great options include cantaloupe, honeydew melon, raspberries, blackberries, and star fruit.
- Chocolate Options: You can use milk chocolate, dark chocolate, or white chocolate for the drizzle. You can also add a pinch of sea salt to the melted chocolate for a salty-sweet flavor.
- Yogurt Dip Variations: You can add other flavorings to the yogurt dip, such as lemon zest, orange zest, or almond extract. You can also use flavored yogurt instead of plain Greek yogurt.
- Make Ahead: The fruit kabobs can be assembled a few hours ahead of time. Store them in the refrigerator until ready to serve. However, it’s best to add the banana just before serving to prevent browning.
- Presentation: Get creative with the presentation of your fruit kabobs. You can arrange them on a tiered serving platter, or you can stand them upright in a glass or jar filled with sand or sugar.
- Kid-Friendly: These fruit kabobs are a great way to get kids to eat more fruit. Let them help with the assembly process to make it even more fun.
- Grilling: For a warm weather twist, try grilling your fruit kabobs! Lightly brush the fruit with honey or maple syrup before grilling over medium heat for just a few minutes per side. This caramelizes the fruit and adds a delicious smoky flavor. Be careful not to overcook the fruit, as it can become mushy.
- Freezing: While fresh is best, you can freeze the fruit kabobs for a refreshing treat on a hot day. Place the assembled kabobs on a baking sheet lined with parchment paper and freeze for at least 2 hours, or until solid. Then, transfer the frozen kabobs to a freezer-safe bag or container. They will keep in the freezer for up to 2 months. Let them thaw slightly before eating. Note that the texture of some fruits may change after freezing.
Enjoy your delicious and healthy fruit kabobs!
Conclusion:
So there you have it! This fruit kabobs dessert recipe is more than just a sweet treat; it’s a vibrant, healthy, and utterly customizable experience. I truly believe it’s a must-try for anyone looking to add a touch of fun and freshness to their dessert repertoire. The combination of juicy fruits, the playful arrangement on skewers, and the optional drizzle of chocolate or yogurt create a symphony of flavors and textures that will delight both kids and adults alike.
Why is this recipe a must-try? Well, beyond its deliciousness, it’s incredibly versatile. Need a quick and easy dessert for a summer barbecue? These fruit kabobs are your answer. Looking for a healthy snack that will satisfy your sweet cravings? Look no further. Want to get the kids involved in the kitchen? This recipe is perfect for little hands to help assemble. Plus, the visual appeal of these colorful skewers is undeniable – they’re guaranteed to be a hit at any gathering.
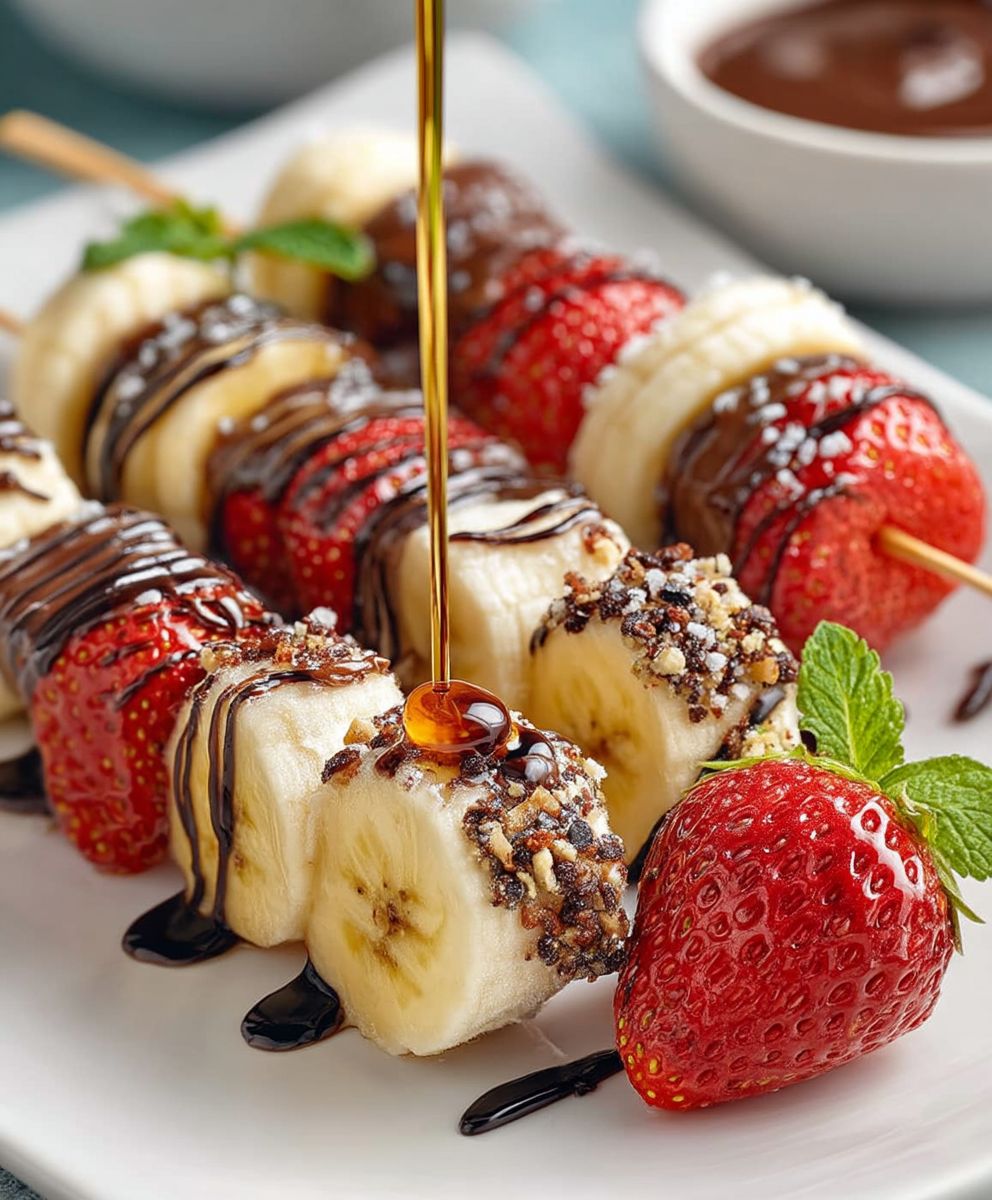
But the fun doesn’t stop there! The beauty of this recipe lies in its adaptability. Feel free to experiment with different fruits based on your preferences and what’s in season. Strawberries, blueberries, grapes, melon, pineapple, kiwi – the possibilities are endless! For a more decadent treat, try dipping the kabobs in melted dark chocolate and sprinkling them with chopped nuts or shredded coconut. Or, for a lighter option, drizzle them with Greek yogurt and a touch of honey.
Here are a few serving suggestions to get your creative juices flowing:
* Breakfast Kabobs: Start your day with a burst of energy by threading fruits like bananas, berries, and grapes onto skewers and serving them with a dollop of yogurt and a sprinkle of granola.
* Party Platters: Create a stunning fruit kabob platter with a variety of colorful fruits and dipping sauces like chocolate, caramel, and yogurt.
* Grilled Fruit Kabobs: For a warm and smoky twist, grill the fruit kabobs for a few minutes until slightly caramelized. This adds a delicious depth of flavor.
* Kid-Friendly Kabobs: Get the kids involved by letting them choose their favorite fruits and assemble their own kabobs. You can even use cookie cutters to create fun shapes.
* Elegant Dessert: For a more sophisticated presentation, arrange the fruit kabobs on a platter with a drizzle of white chocolate and a sprinkle of edible flowers.
I’m so excited for you to try this recipe and discover your own favorite variations. I’m confident that this fruit kabobs dessert will become a go-to treat for you and your loved ones. It’s a simple, healthy, and delicious way to enjoy the bounty of fresh fruits.
So, what are you waiting for? Gather your favorite fruits, grab some skewers, and get ready to create a masterpiece! And most importantly, don’t forget to share your creations with me! I’d love to see your photos and hear about your experiences. Tag me in your social media posts and let me know what fruits you used and what dipping sauces you tried. I can’t wait to see your delicious and creative takes on this classic treat. Happy skewer-ing!
Fruit Kabobs Dessert: A Delicious & Healthy Treat
Colorful and refreshing fruit kabobs, perfect for a healthy snack or dessert. Customize with your favorite fruits and optional chocolate drizzle or yogurt dip!
Ingredients
Instructions
Recipe Notes
- Fruit Variations: Use your favorite fruits like cantaloupe, honeydew, raspberries, blackberries, or star fruit.
- Chocolate Options: Use milk, dark, or white chocolate. Add a pinch of sea salt for a salty-sweet flavor.
- Yogurt Dip Variations: Add lemon zest, orange zest, or almond extract to the yogurt dip. Use flavored yogurt instead of plain.
- Make Ahead: Assemble kabobs a few hours ahead, but add banana just before serving.
- Presentation: Arrange on a tiered platter or stand upright in a glass filled with sand or sugar.
- Kid-Friendly: Let kids help with assembly.
- Grilling: Brush with honey and grill for a few minutes per side.
- Freezing: Freeze assembled kabobs on a baking sheet, then transfer to a freezer bag. Thaw slightly before eating.
Frequently Asked Questions
Printable Recipe Card
Want just the essential recipe details without scrolling through the article? Get our printable recipe card with just the ingredients and instructions.

Leave a Comment