
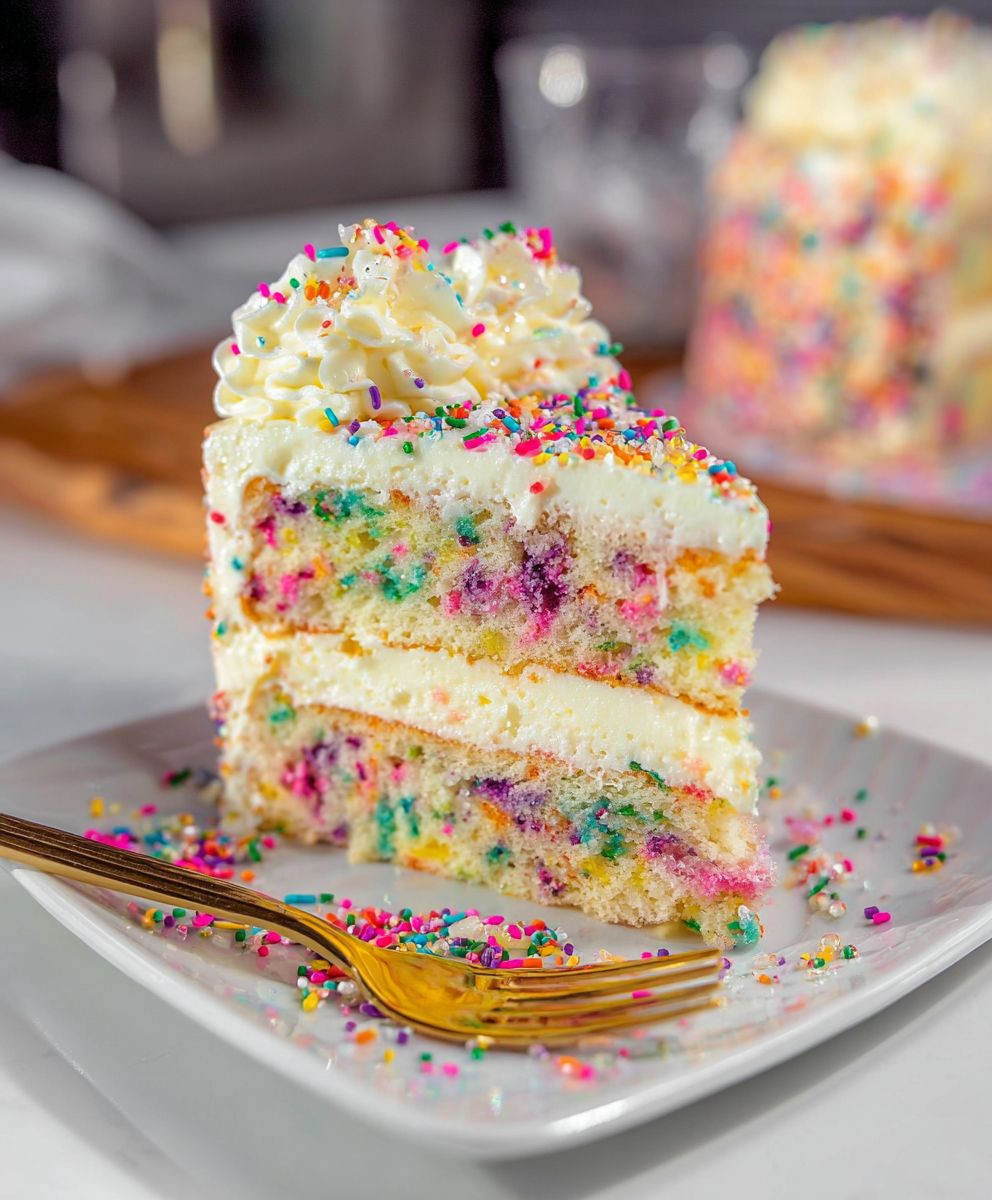
Funfetti Cheesecake Cake: Just the name alone conjures up images of pure, unadulterated joy, doesn’t it? Get ready to embark on a baking adventure that combines the creamy decadence of cheesecake with the playful, sprinkle-filled fun of a classic Funfetti cake. This isn’t just a dessert; it’s a celebration on a plate, perfect for birthdays, holidays, or simply brightening up a Tuesday!
While the exact origins of Funfetti are debated (Pillsbury trademarked the name in the late 1980s), the idea of adding colorful sprinkles to baked goods has been around for much longer. It taps into our innate love for color and whimsy, transforming ordinary cakes into something truly special. And cheesecake? Well, its rich and velvety texture has captivated dessert lovers for centuries, with roots tracing back to ancient Greece.
What makes this Funfetti Cheesecake Cake so irresistible? It’s the delightful contrast of textures: the moist, tender cake layers, the smooth, tangy cheesecake filling, and the satisfying crunch of sprinkles in every bite. Plus, it’s surprisingly easy to make! Forget complicated techniques and hours in the kitchen; this recipe is designed to be approachable and fun, even for novice bakers. Get ready to wow your friends and family with a dessert that’s as beautiful as it is delicious!
Ingredients:
- For the Funfetti Cake Layers:
- 2 ½ cups all-purpose flour
- 2 teaspoons baking powder
- ½ teaspoon baking soda
- ½ teaspoon salt
- 1 cup (2 sticks) unsalted butter, softened
- 1 ¾ cups granulated sugar
- 3 large eggs
- 1 tablespoon vanilla extract
- 1 ¼ cups buttermilk
- ½ cup rainbow sprinkles, plus more for decorating
- For the Cheesecake Layer:
- 32 ounces cream cheese, softened
- 1 cup granulated sugar
- 4 large eggs
- 1 teaspoon vanilla extract
- For the Vanilla Buttercream Frosting:
- 1 cup (2 sticks) unsalted butter, softened
- 4 cups powdered sugar
- ¼ cup milk
- 2 teaspoons vanilla extract
- Pinch of salt
Preparing the Funfetti Cake Layers
- Preheat and Prepare: First things first, preheat your oven to 350°F (175°C). Grease and flour three 8-inch round cake pans. I like to use baking spray with flour already in it for extra insurance against sticking.
- Combine Dry Ingredients: In a medium bowl, whisk together the flour, baking powder, baking soda, and salt. This ensures everything is evenly distributed.
- Cream Butter and Sugar: In a large bowl (or the bowl of your stand mixer), cream together the softened butter and sugar until light and fluffy. This usually takes about 3-5 minutes. Don’t rush this step; it’s crucial for a tender cake!
- Add Eggs and Vanilla: Beat in the eggs one at a time, mixing well after each addition. Then, stir in the vanilla extract.
- Alternate Wet and Dry Ingredients: Gradually add the dry ingredients to the wet ingredients, alternating with the buttermilk, beginning and ending with the dry ingredients. Mix until just combined. Be careful not to overmix! Overmixing can lead to a tough cake.
- Fold in Sprinkles: Gently fold in the rainbow sprinkles. This is where the fun begins!
- Divide Batter: Divide the batter evenly among the prepared cake pans. I like to use a kitchen scale to ensure each pan has the same amount of batter for even baking.
- Bake: Bake for 25-30 minutes, or until a wooden skewer inserted into the center comes out clean.
- Cool: Let the cakes cool in the pans for 10 minutes before inverting them onto a wire rack to cool completely. Make sure they are completely cool before frosting!
Making the Cheesecake Layer
- Preheat and Prepare: Preheat your oven to 325°F (160°C). Grease and line the bottom of an 8-inch springform pan with parchment paper. Wrapping the outside of the springform pan with foil is a good idea to prevent water from seeping in during the water bath.
- Cream Cheese and Sugar: In a large bowl (or the bowl of your stand mixer), beat the softened cream cheese and sugar until smooth and creamy. Make sure your cream cheese is really soft to avoid lumps.
- Add Eggs: Beat in the eggs one at a time, mixing well after each addition.
- Add Vanilla: Stir in the vanilla extract.
- Pour into Pan: Pour the cheesecake batter into the prepared springform pan.
- Water Bath: Place the springform pan inside a larger baking pan. Pour hot water into the larger pan until it reaches about halfway up the sides of the springform pan. This creates a water bath, which helps the cheesecake bake evenly and prevents cracking.
- Bake: Bake for 55-70 minutes, or until the edges are set but the center still has a slight jiggle.
- Cool: Turn off the oven and let the cheesecake cool in the oven with the door slightly ajar for 1 hour. This gradual cooling helps prevent cracking.
- Chill: Remove the cheesecake from the water bath and let it cool completely on a wire rack. Then, cover it with plastic wrap and chill in the refrigerator for at least 4 hours, or preferably overnight. This is crucial for the cheesecake to set properly.
Preparing the Vanilla Buttercream Frosting
- Cream Butter: In a large bowl (or the bowl of your stand mixer), beat the softened butter until light and fluffy. This usually takes about 3-5 minutes.
- Add Powdered Sugar: Gradually add the powdered sugar, one cup at a time, beating well after each addition. Start on low speed to prevent a powdered sugar cloud!
- Add Milk and Vanilla: Add the milk and vanilla extract and beat until smooth and creamy.
- Add Salt: Stir in a pinch of salt to balance the sweetness.
- Adjust Consistency: If the frosting is too thick, add a little more milk, one tablespoon at a time. If it’s too thin, add a little more powdered sugar.
Assembling the Funfetti Cheesecake Cake
- Level the Cake Layers: If your cake layers are uneven, use a serrated knife to level them. This will ensure a stable and beautiful cake.
- Place First Cake Layer: Place one cake layer on a serving plate or cake stand.
- Frost First Layer: Spread a generous layer of vanilla buttercream frosting over the first cake layer.
- Add Cheesecake Layer: Carefully remove the cheesecake from the springform pan and place it on top of the frosted cake layer.
- Frost Cheesecake Layer: Spread a thin layer of vanilla buttercream frosting over the cheesecake layer. This will help the next cake layer adhere.
- Place Second Cake Layer: Place the second cake layer on top of the cheesecake layer.
- Frost Second Layer: Spread a generous layer of vanilla buttercream frosting over the second cake layer.
- Place Third Cake Layer: Place the final cake layer on top.
- Crumb Coat: Apply a thin layer of frosting over the entire cake. This is called a crumb coat and it helps to seal in any loose crumbs. Chill the cake in the refrigerator for 30 minutes to allow the crumb coat to set.
- Final Frosting: Apply a final, thicker layer of vanilla buttercream frosting over the entire cake.
- Decorate: Decorate the cake with rainbow sprinkles. You can sprinkle them all over the cake or create a fun design. Get creative!
- Chill: Chill the cake in the refrigerator for at least 30 minutes before serving. This will help the frosting set and make the cake easier to slice.
- Serve: Slice and serve! Enjoy your delicious Funfetti Cheesecake Cake!
Conclusion:
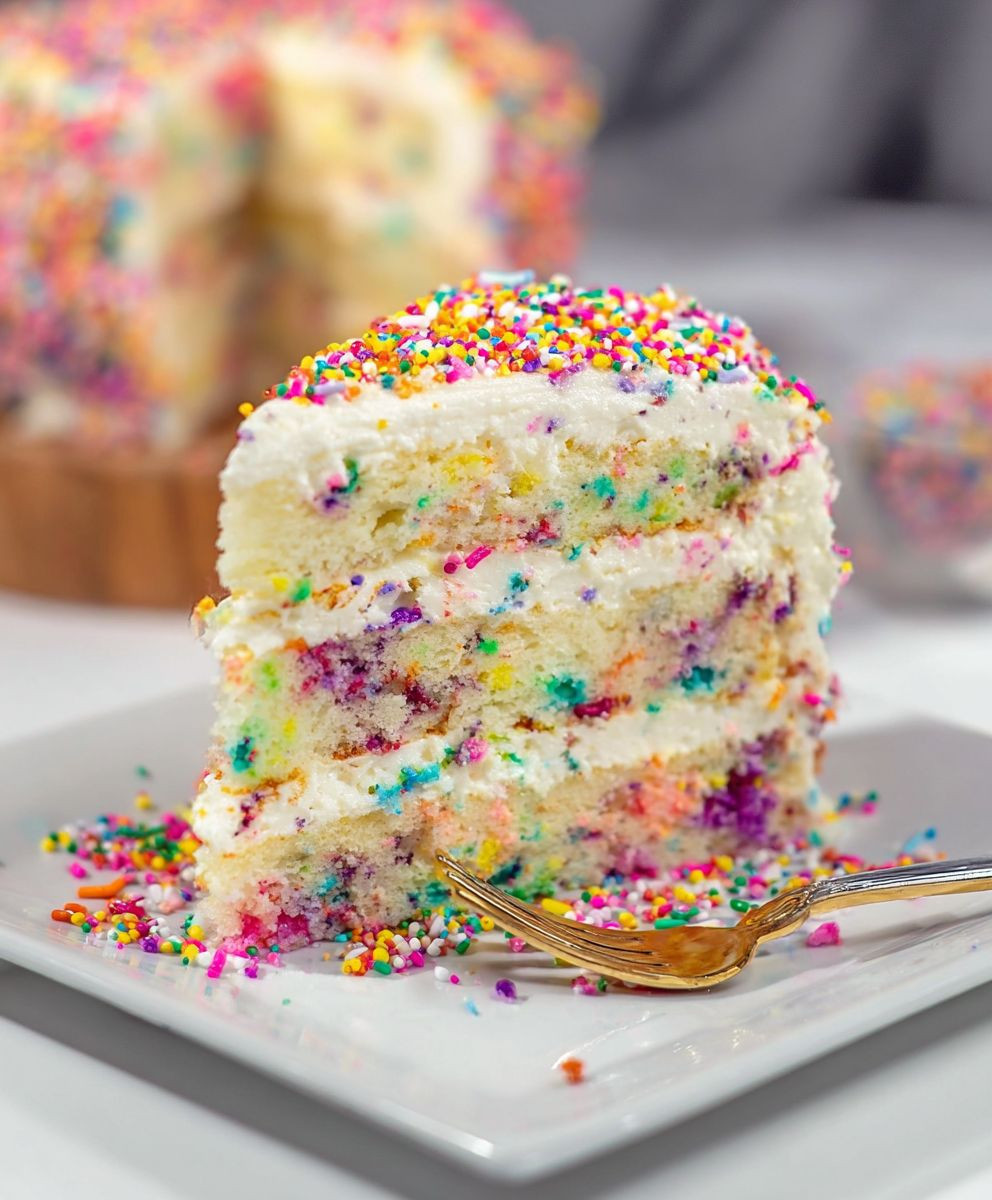
This Funfetti Cheesecake Cake isn’t just a dessert; it’s a celebration on a plate! From the moist, tender cake layers bursting with colorful sprinkles to the creamy, tangy cheesecake nestled in between, every bite is an explosion of flavor and texture that will leave you wanting more. I know, I know, it sounds almost too good to be true, but trust me, it’s even better than you imagine.
Why is this a must-try? Because it’s the perfect combination of two beloved desserts, creating a show-stopping centerpiece that’s guaranteed to impress. It’s also surprisingly easy to make, even for beginner bakers. The recipe is straightforward, and the results are simply phenomenal. Forget store-bought cakes; this homemade masterpiece will become your go-to for birthdays, holidays, or any occasion that calls for a little extra sweetness and joy.
But the fun doesn’t stop there! This Funfetti Cheesecake Cake is incredibly versatile. Feel free to experiment with different variations to suit your taste. For a richer, more decadent experience, try adding a layer of chocolate ganache on top. Or, if you’re a fruit lover, incorporate fresh berries into the cheesecake filling or use them as a garnish. A simple dusting of powdered sugar or a generous swirl of whipped cream also makes a beautiful and delicious finishing touch.
Here are a few serving suggestions to elevate your Funfetti Cheesecake Cake experience:
* For a casual gathering: Serve individual slices with a scoop of vanilla ice cream and a drizzle of hot fudge sauce.
* For a more elegant presentation: Garnish each slice with a sprig of mint and a few fresh raspberries.
* For a kid-friendly treat: Top with extra sprinkles, gummy bears, or other colorful candies.
* For a grown-up twist: Pair it with a glass of dessert wine or a cup of strong coffee.
Don’t be intimidated by the multiple layers; I promise, it’s easier than it looks! Just follow the recipe carefully, and you’ll be rewarded with a stunning and delicious cake that everyone will rave about. The key is to take your time and enjoy the process. Baking should be fun, so put on some music, gather your ingredients, and let your creativity flow.
I’m so excited for you to try this recipe and experience the magic of the Funfetti Cheesecake Cake for yourself. It’s a guaranteed crowd-pleaser that will bring smiles to everyone’s faces.
So, what are you waiting for? Head to your kitchen, gather your ingredients, and get baking! And most importantly, don’t forget to share your creations with me! I’d love to see your photos and hear about your experiences. Tag me on social media and let me know what you think. Happy baking! I can’t wait to see your amazing Funfetti Cheesecake Cake creations!
Funfetti Cheesecake Cake: The Ultimate Party Dessert
Funfetti cake layers, creamy cheesecake, and vanilla buttercream frosting create this show-stopping cake, topped with rainbow sprinkles.
Ingredients
Instructions
Recipe Notes
- Make sure your butter and cream cheese are properly softened for smooth mixing.
- Don’t overmix the cake batter, as this can result in a tough cake.
- A water bath is crucial for baking the cheesecake evenly and preventing cracks.
- Chilling the cheesecake and the assembled cake is essential for proper setting and easier slicing.
- Get creative with your sprinkle decorations!
Leave a Comment