
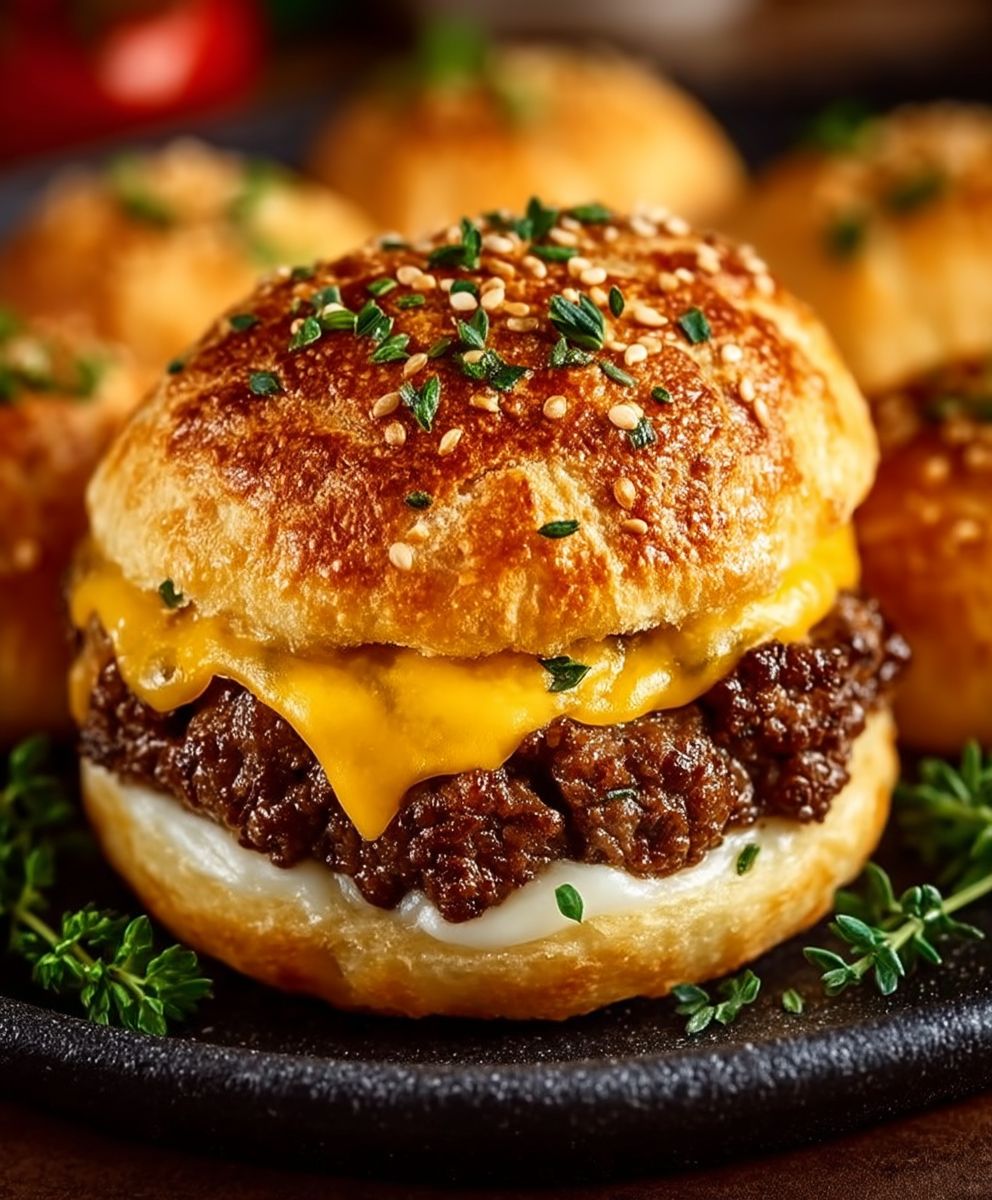
Garlic Parmesan Cheeseburger Bombs: Prepare to have your taste buds detonated with flavor! Imagine sinking your teeth into a golden, buttery crust, only to be greeted by a juicy, perfectly seasoned cheeseburger filling, infused with the irresistible aroma of garlic and Parmesan. These aren’t your average sliders; they’re a handheld explosion of comfort food that’s guaranteed to be a crowd-pleaser.
While the exact origins of these delightful bombs are shrouded in mystery (perhaps a stroke of genius from a late-night craving?), the concept draws inspiration from the classic Italian “calzone” – a folded pizza pocket packed with savory goodness. Think of it as a delicious fusion of American burger culture and Italian culinary tradition!
What makes these Garlic Parmesan Cheeseburger Bombs so incredibly popular? It’s the perfect combination of textures and tastes. The soft, pillowy dough gives way to a burst of savory, cheesy, garlicky burger bliss. They’re incredibly convenient for parties, potlucks, or even a fun weeknight dinner. Plus, who can resist the allure of a mini cheeseburger, especially when it’s elevated with the sophisticated flavors of garlic and Parmesan? Get ready to experience burger perfection in every single bite!

Ingredients:
- 1 pound ground beef (80/20 blend recommended for flavor)
- 1/2 cup grated Parmesan cheese, divided
- 2 cloves garlic, minced
- 1 teaspoon garlic powder
- 1/2 teaspoon onion powder
- 1/4 teaspoon red pepper flakes (optional, for a little kick)
- Salt and freshly ground black pepper to taste
- 1 (10 ounce) can refrigerated biscuit dough (such as Pillsbury Grands!)
- 4 ounces cream cheese, softened
- 1/4 cup mayonnaise
- 1/4 cup shredded mozzarella cheese
- 1 tablespoon chopped fresh parsley (optional, for garnish)
- 2 tablespoons butter, melted
- 1 teaspoon garlic salt
- Sesame seeds (optional, for topping)
Preparing the Cheeseburger Filling:
- In a large bowl, combine the ground beef, 1/4 cup of the grated Parmesan cheese, minced garlic, garlic powder, onion powder, and red pepper flakes (if using). Season generously with salt and pepper.
- Using your hands, gently mix all the ingredients together until just combined. Be careful not to overmix, as this can make the beef tough.
- Divide the ground beef mixture into 8 equal portions. I find it easiest to use a kitchen scale to ensure they are all the same size, but you can also eyeball it.
- Form each portion into a small patty. They don’t need to be perfectly round, just roughly the same size and shape.
- In a large skillet over medium-high heat, cook the beef patties until they are browned on all sides and cooked through. The internal temperature should reach 160°F (71°C). This usually takes about 5-7 minutes per side, depending on the thickness of your patties.
- Remove the cooked patties from the skillet and set them aside to cool slightly.
Making the Cream Cheese Mixture:
- While the beef patties are cooling, prepare the cream cheese mixture. In a medium bowl, combine the softened cream cheese and mayonnaise.
- Using a fork or electric mixer, beat the cream cheese and mayonnaise together until smooth and creamy.
- Stir in the shredded mozzarella cheese and the remaining 1/4 cup of grated Parmesan cheese.
- Mix well until all the ingredients are evenly distributed.
Assembling the Cheeseburger Bombs:
- Preheat your oven to 375°F (190°C). Line a baking sheet with parchment paper. This will prevent the cheeseburger bombs from sticking and make cleanup easier.
- Open the can of refrigerated biscuit dough. You should have 8 biscuits.
- On a lightly floured surface, gently flatten each biscuit into a 4-inch circle. You can use a rolling pin or just your fingers. Be careful not to tear the dough.
- Place a cooked beef patty in the center of each flattened biscuit.
- Top each patty with a generous spoonful of the cream cheese mixture. Don’t be shy!
- Carefully bring the edges of the biscuit dough up and around the filling, pinching them together at the top to seal. Make sure the filling is completely enclosed.
- Place the assembled cheeseburger bombs, seam-side down, on the prepared baking sheet.
Baking and Finishing Touches:
- In a small bowl, melt the butter.
- Brush the tops of the cheeseburger bombs with the melted butter.
- In a separate small bowl, combine the melted butter and garlic salt.
- Sprinkle the tops of the cheeseburger bombs with sesame seeds, if desired. This adds a nice texture and visual appeal.
- Bake in the preheated oven for 15-20 minutes, or until the biscuits are golden brown and the filling is heated through.
- Remove the cheeseburger bombs from the oven and let them cool slightly on the baking sheet before serving.
- Garnish with chopped fresh parsley, if desired.
Tips and Variations:
- Spice it up: Add a pinch of cayenne pepper to the ground beef mixture for extra heat.
- Cheese lovers: Experiment with different types of cheese in the cream cheese mixture, such as cheddar, pepper jack, or Gruyere.
- Add veggies: Sauté some chopped onions, peppers, or mushrooms and add them to the ground beef mixture for extra flavor and nutrients.
- Bacon bliss: Crumble some cooked bacon and add it to the cream cheese mixture or sprinkle it on top of the cheeseburger bombs before baking.
- Dipping sauces: Serve the cheeseburger bombs with your favorite dipping sauces, such as ranch dressing, barbecue sauce, or honey mustard.
- Air Fryer Option: You can also cook these in an air fryer! Preheat your air fryer to 350°F (175°C). Place the assembled cheeseburger bombs in the air fryer basket, making sure they are not overcrowded. Cook for 12-15 minutes, or until golden brown and cooked through.
- Make Ahead: You can assemble the cheeseburger bombs ahead of time and store them in the refrigerator for up to 24 hours before baking. Just add a few extra minutes to the baking time.
- Freezing: These can also be frozen! Assemble the cheeseburger bombs and place them on a baking sheet lined with parchment paper. Freeze for at least 2 hours, or until solid. Transfer the frozen cheeseburger bombs to a freezer bag or container. They can be stored in the freezer for up to 2 months. When ready to bake, thaw them in the refrigerator overnight and bake as directed. You may need to add a few extra minutes to the baking time.
- Biscuit Dough Alternatives: While I prefer using refrigerated biscuit dough for its convenience and taste, you can also use homemade biscuit dough or even pizza dough. If using pizza dough, be sure to adjust the baking time accordingly.
- Ground Meat Options: While ground beef is the classic choice, you can also use ground turkey, ground chicken, or even ground sausage. Just be sure to adjust the cooking time as needed.
Serving Suggestions:
These Garlic Parmesan Cheeseburger Bombs are perfect as an appetizer, snack, or even a light meal. They are great for parties, game days, or just a fun family dinner. Serve them with a side of fries, salad, or your favorite dipping sauces.
Enjoy!
Conclusion:
And there you have it! These Garlic Parmesan Cheeseburger Bombs are truly a game-changer. I know, I know, I might be biased, but trust me on this one. The combination of juicy, seasoned ground beef, that creamy, melty cheese, and the irresistible garlic parmesan crust is simply divine. It’s the kind of flavor explosion that will have everyone begging for more.
But why are these little bombs a must-try? Well, beyond the incredible taste, they’re surprisingly easy to make. Seriously! The recipe is straightforward, and you probably already have most of the ingredients in your pantry. Plus, they’re incredibly versatile. Need a crowd-pleasing appetizer for your next party? Garlic Parmesan Cheeseburger Bombs are your answer. Looking for a fun and satisfying weeknight dinner? Look no further! Want to impress your friends with your culinary skills? These bombs will do the trick.
Serving Suggestions and Variations:
The possibilities are endless when it comes to serving these delightful bombs. I personally love them served warm with a side of marinara sauce for dipping. The tangy tomato sauce complements the richness of the cheeseburger filling perfectly. You could also try serving them with a creamy garlic aioli or a spicy sriracha mayo for an extra kick.
For a complete meal, pair them with a simple side salad or some roasted vegetables. They also go great with crispy french fries or sweet potato fries. If you’re feeling adventurous, you could even serve them on slider buns for mini cheeseburger sliders!
And don’t be afraid to get creative with the filling! While I’m a huge fan of the classic cheeseburger combination, you can easily customize these bombs to suit your own taste preferences. Try adding some crispy bacon, sautéed mushrooms, or caramelized onions to the filling for extra flavor. You could even swap out the cheddar cheese for pepper jack or mozzarella for a different cheesy experience.
For those who are watching their carb intake, you can easily make these bombs keto-friendly by using almond flour instead of regular flour for the dough. You can also use a low-carb cheese and skip the dipping sauce.
A Few Extra Tips:
* Make sure to seal the dough tightly around the filling to prevent the cheese from leaking out during baking.
* Don’t overcrowd the baking sheet. Give the bombs enough space to bake evenly.
* Keep a close eye on them while they’re baking to prevent the crust from burning.
* Let them cool slightly before serving to avoid burning your mouth.
Now it’s your turn!
I’m so excited for you to try this recipe for Garlic Parmesan Cheeseburger Bombs. I truly believe that you’ll love them as much as I do. They’re the perfect combination of comfort food and gourmet flavor, and they’re sure to be a hit with everyone who tries them.
So, what are you waiting for? Gather your ingredients, preheat your oven, and get ready to create some culinary magic! And most importantly, don’t forget to share your experience with me. I’d love to hear what you think of the recipe and any variations you try. You can leave a comment below or tag me on social media. Happy baking! I can’t wait to see your amazing creations!
Garlic Parmesan Cheeseburger Bombs: The Ultimate Recipe Guide
Savory, bite-sized treats with a ground beef filling and creamy cheese mixture, wrapped in biscuit dough and baked until golden.
Ingredients
**Suggestions for Improvement:**
* **Ingredient Clarity:**
* **Quantify “Salt and Pepper to Taste”:** While “to taste” is subjective, providing a range (e.g., “1/4 – 1/2 teaspoon salt and 1/8 – 1/4 teaspoon pepper”) gives beginners a starting point.
* **Specify Mozzarella Type:** Mention whether to use low-moisture, part-skim mozzarella or whole milk mozzarella. This impacts the texture and melt.
* **Biscuit Dough Size:** While you mention Pillsbury Grands!, specifying the *number* of biscuits in the can (usually 8) reinforces the yield.
* **Instructional Clarity:**
* **Ground Beef Mixing Technique:** Expand on “Gently mix until just combined.” Emphasize *not* to overwork the meat, as this can lead to tough patties. Suggest using hands for gentle mixing.
* **Patty Size Guidance:** Instead of just “small patty,” consider giving a diameter (e.g., “2-inch diameter”). This helps with consistency.
* **Cream Cheese Softening:** Specify *how* to soften the cream cheese (e.g., “leave at room temperature for 30 minutes, or microwave in 15-second intervals”).
* **Sealing Technique:** Add a visual cue for sealing. For example: “Pinch the edges together firmly to create a tight seal. If the dough is sticky, lightly dampen your fingers with water to help seal.”
* **Baking Sheet Spacing:** Mention leaving some space between the bombs on the baking sheet to allow for even browning.
* **Tips and Variations Enhancement:**
* **Spice Level Guidance:** For the “Spice it up” tip, quantify the cayenne pepper amount (e.g., “Add 1/8 – 1/4 teaspoon cayenne pepper”).
* **Bacon Preparation:** For “Bacon bliss,” specify *how* the bacon should be cooked (e.g., “crisply cooked and crumbled”).
* **Make Ahead – Refrigeration:** Clarify *when* to brush with butter and add sesame seeds if refrigerating before baking. (Best to do *right before* baking).
* **Freezing – Thawing:** Mention that thawing in the refrigerator is the safest method.
* **Ground Meat Cooking Times:** Acknowledge that cooking times may vary slightly depending on the type of ground meat used.
* **Visual Appeal (If Applicable):**
* If this recipe is for a website or blog, consider adding photos or videos of each step. This is incredibly helpful for visual learners.
**Revised Example Snippets Incorporating Suggestions:**
* **Ingredients:**
* “Salt and freshly ground black pepper to taste (approximately 1/4 – 1/2 teaspoon salt and 1/8 – 1/4 teaspoon pepper)”
* “1/4 cup shredded mozzarella cheese (low-moisture, part-skim recommended)”
* “1 (10 ounce) can refrigerated biscuit dough (Pillsbury Grands!, 8 biscuits)”
* **Instructions – A. Preparing the Cheeseburger Filling:**
* “Gently mix until just combined, using your hands to avoid overworking the meat. Overmixing can result in tough patties.”
* “Form each portion into a small patty (approximately 2 inches in diameter).”
* **Instructions – B. Making the Cream Cheese Mixture:**
* “Soften the cream cheese by leaving it at room temperature for 30 minutes, or microwaving in 15-second intervals until soft.”
* **Instructions – C. Assembling the Cheeseburger Bombs:**
* “Carefully bring the edges of the biscuit dough up and around the filling, pinching them together firmly at the top to create a tight seal. If the dough is sticky, lightly dampen your fingers with water to help seal.”
* **Tips and Variations:**
* “Spice it up: Add 1/8 – 1/4 teaspoon cayenne pepper to the ground beef.”
* “Bacon bliss: Add crisply cooked and crumbled bacon to the cream cheese mixture or sprinkle on top.”
* “Make Ahead: Assemble and refrigerate for up to 24 hours before baking. Brush with melted butter and sprinkle with sesame seeds *right before* baking. Add extra baking time.”
* “Freezing: Assemble, freeze until solid, then transfer to a freezer bag. Thaw overnight in the refrigerator before baking (add extra baking time).”
**In summary, your recipe breakdown is already excellent. These suggestions are just minor tweaks to enhance clarity and provide even more guidance for cooks of all skill levels.**
Instructions
- In a large bowl, combine ground beef, 1/4 cup Parmesan cheese, minced garlic, garlic powder, onion powder, and red pepper flakes (if using). Season with salt and pepper.
- Gently mix until just combined (avoid overmixing).
- Divide the mixture into 8 equal portions.
- Form each portion into a small patty.
- Cook patties in a large skillet over medium-high heat until browned on all sides and cooked through (internal temperature of 160°F/71°C), about 5-7 minutes per side.
- Remove from skillet and set aside to cool slightly.
- In a medium bowl, combine softened cream cheese and mayonnaise.
- Beat until smooth and creamy.
- Stir in shredded mozzarella cheese and the remaining 1/4 cup grated Parmesan cheese.
- Mix well.
- Preheat oven to 375°F (190°C). Line a baking sheet with parchment paper.
- Open the can of refrigerated biscuit dough (8 biscuits).
- On a lightly floured surface, flatten each biscuit into a 4-inch circle.
- Place a cooked beef patty in the center of each flattened biscuit.
- Top each patty with a generous spoonful of the cream cheese mixture.
- Carefully bring the edges of the biscuit dough up and around the filling, pinching them together at the top to seal.
- Place the assembled cheeseburger bombs, seam-side down, on the prepared baking sheet.
- Melt the butter.
- Brush the tops of the cheeseburger bombs with the melted butter.
- Sprinkle the tops of the cheeseburger bombs with sesame seeds, if desired.
- Bake in the preheated oven for 15-20 minutes, or until the biscuits are golden brown and the filling is heated through.
- Remove from the oven and let them cool slightly on the baking sheet before serving.
- Garnish with chopped fresh parsley, if desired.
Notes
**Minor Suggestions for Improvement:**
* **Ingredient Clarity:** While generally good, consider adding specific quantities for the “Salt and freshly ground black pepper to taste” in the Ground Beef Filling. Even a range (e.g., 1/2 tsp – 1 tsp salt, 1/4 tsp – 1/2 tsp pepper) would be helpful for less experienced cooks.
* **Step-by-Step Clarity:** In section A.5, “Cook patties in a large skillet over medium-high heat until browned on all sides and cooked through (internal temperature of 160°F/71°C), about 5-7 minutes per side.” Consider adding a note about *not overcrowding the pan*. Overcrowding lowers the pan temperature and leads to steaming instead of browning. Suggest cooking in batches if necessary.
* **Assembly Clarity:** In section C.6, “Carefully bring the edges of the biscuit dough up and around the filling, pinching them together at the top to seal.” Add a sentence about *moistening the edges of the biscuit dough with a little water* to help them seal better. This is a common trick for sealing dough.
* **Baking Clarity:** In section D.4, “Bake in the preheated oven for 15-20 minutes, or until the biscuits are golden brown and the filling is heated through.” Add a note about *checking the internal temperature of the filling* to ensure it’s heated through, especially if using the make-ahead or frozen options. A target temperature of 165°F (74°C) would be ideal.
* **Air Fryer Specifics:** For the Air Fryer option, specify if the cheeseburger bombs should be placed seam-side down or not. Also, suggest checking for doneness a few minutes early, as air fryers can vary.
* **Make Ahead/Freezing Clarity:** For the Make Ahead and Freezing sections, be more specific about the *extra baking time* needed. A range (e.g., “add 5-10 minutes”) would be helpful. Also, for the freezing instructions, clarify that the bombs should be frozen *before* baking.
* **Visual Aid Suggestion (Optional):** While not necessary, consider mentioning that a visual aid (like a photo or video) could be helpful for the assembly process, especially for beginners.
**Revised Sections (incorporating suggestions):**
* **Ground Beef Filling:**
* 1 pound ground beef (80/20 blend recommended)
* 1/2 cup grated Parmesan cheese, divided (use 1/4 cup for the filling and 1/4 cup for the cream cheese mixture)
* 2 cloves garlic, minced
* 1 teaspoon garlic powder
* 1/2 teaspoon onion powder
* 1/4 teaspoon red pepper flakes (optional)
* Salt to taste (1/2 tsp – 1 tsp recommended)
* Freshly ground black pepper to taste (1/4 tsp – 1/2 tsp recommended)
* **A. Preparing the Cheeseburger Filling:**
5. Cook patties in a large skillet over medium-high heat until browned on all sides and cooked through (internal temperature of 160°F/71°C), about 5-7 minutes per side. *Avoid overcrowding the pan; cook in batches if necessary.*
* **C. Assembling the Cheeseburger Bombs:**
6. Carefully bring the edges of the biscuit dough up and around the filling, pinching them together at the top to seal. *Moisten the edges of the biscuit dough with a little water to help them seal better.*
* **D. Baking and Finishing Touches:**
4. Bake in the preheated oven for 15-20 minutes, or until the biscuits are golden brown and the filling is heated through. *Check the internal temperature of the filling to ensure it reaches 165°F (74°C), especially if using the make-ahead or frozen options.*
* **Air Fryer Option:** Preheat air fryer to 350°F (175°C). Cook for 12-15 minutes, *checking for doneness a few minutes early*. *Place the cheeseburger bombs seam-side down.*
* **Make Ahead:** Assemble and refrigerate for up to 24 hours before baking (add *approximately 5-10 minutes* extra baking time).
* **Freezing:** Assemble *but do not bake*. Freeze until solid, then transfer to a freezer bag. Thaw overnight before baking (add *approximately 5-10 minutes* extra baking time).
These are just minor tweaks. Your original breakdown is already very good! The added clarity will just make it even more foolproof for cooks of all skill levels.
Printable Recipe Card
Want just the essential recipe details without scrolling through the article? Get our printable recipe card with just the ingredients and instructions.
Leave a Comment