
Crispy Chilli Beef Rice
Crispy Chilli Beef Rice – oh my goodness, where do I even begin? If you’re anything like me, you’ve probably fallen head over heels for that irresistible takeaway favourite, and dreamt of recreating its magic at home. Well, get ready, because today we’re making that dream a delicious reality!
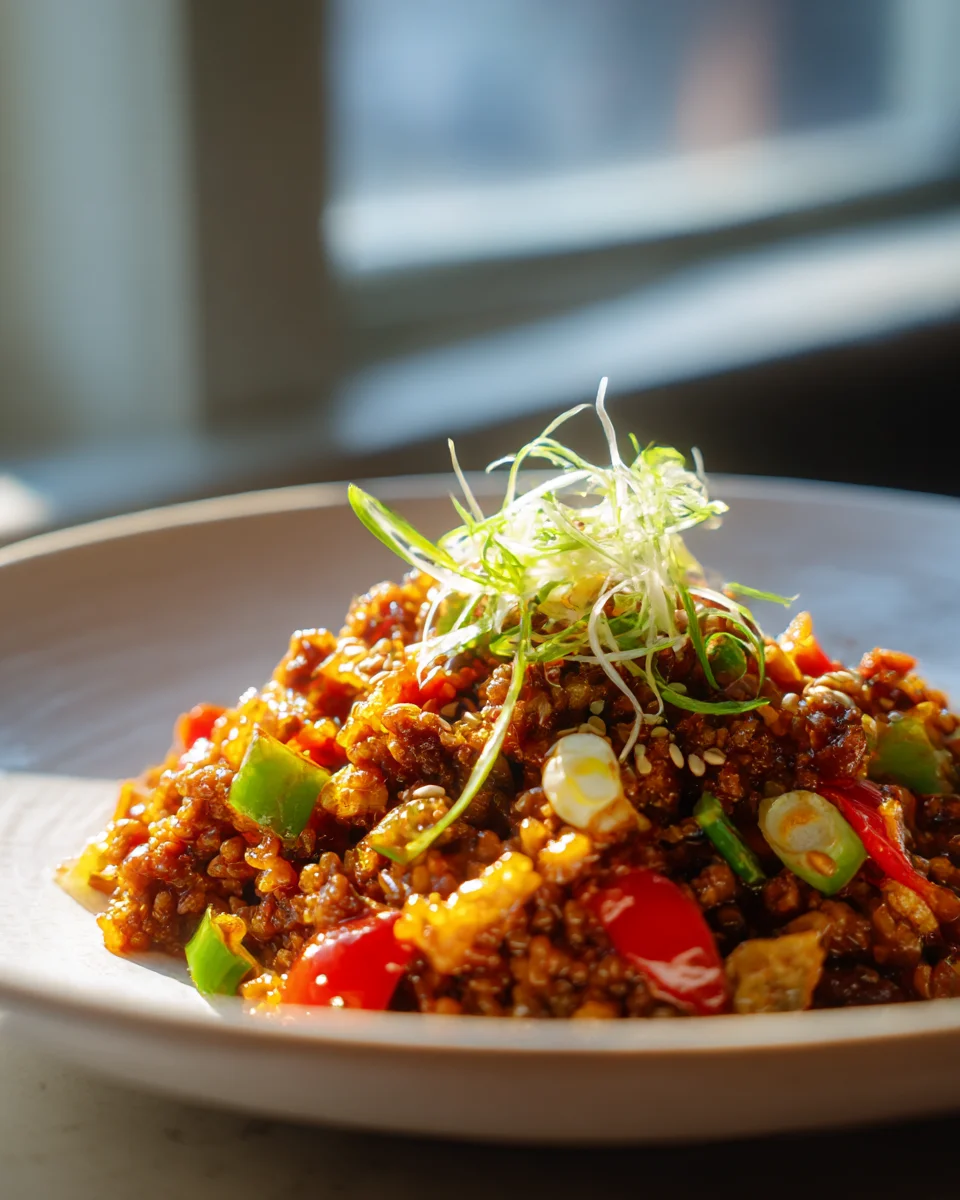
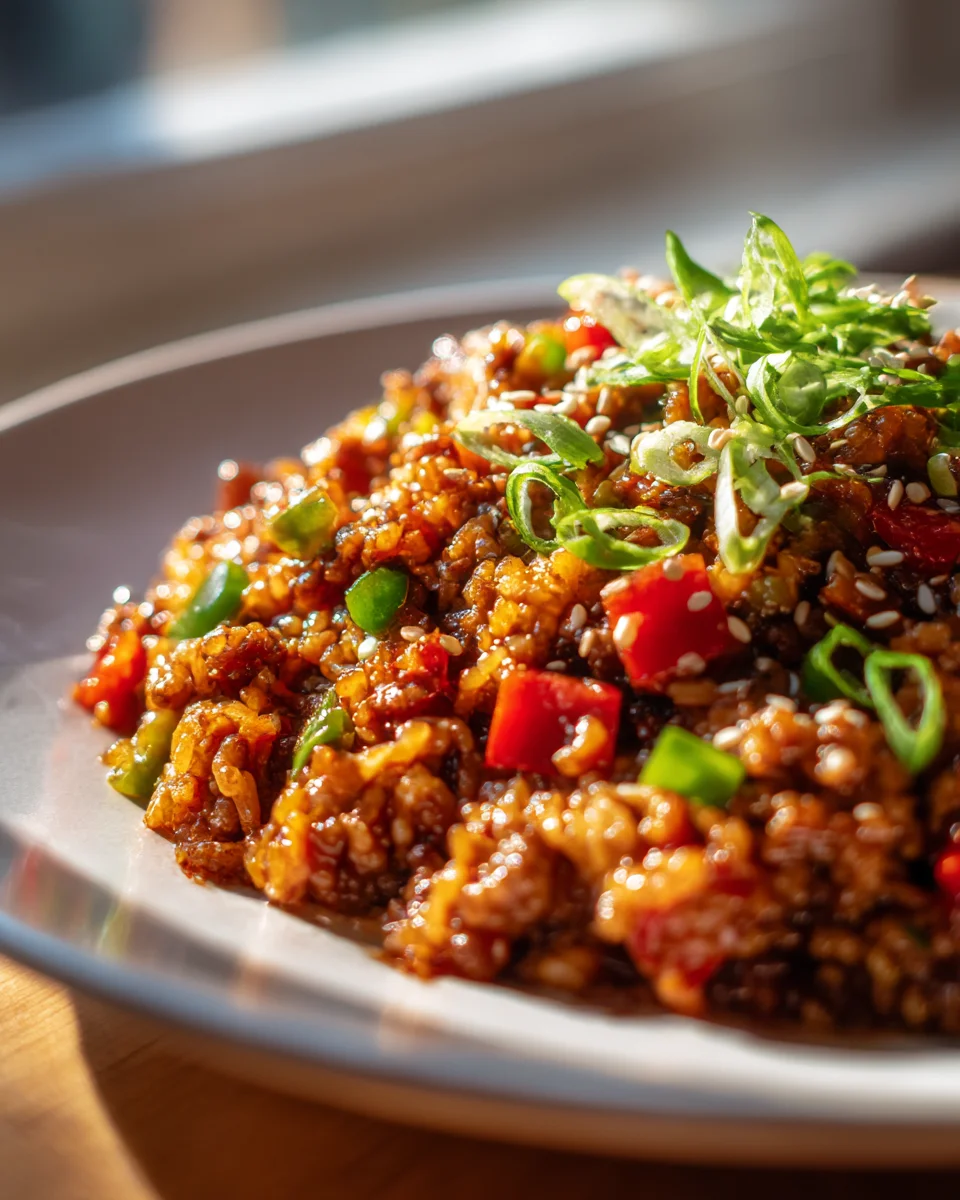
What makes this Crispy Chilli Beef Rice so incredibly special? It’s all about the symphony of textures and tastes. We’re talking about beautiful strips of beef, fried until they are shatteringly crisp and golden brown, then enveloped in a vibrant, sticky, sweet, and spicy chilli sauce that has just the right amount of kick. Every single bite delivers that satisfying crunch followed by an explosion of flavour – it’s truly addictive!
You are absolutely going to love this recipe because it brings that restaurant-quality experience right to your dining table, often quicker and healthier than ordering out. Imagine serving up a plate piled high with fluffy steamed rice, topped with those glorious crispy beef morsels glistening in their incredible sauce. It’s a dish that promises to ignite your taste buds, impress your family and friends, and quickly become a go-to weeknight hero. Get ready for a flavour adventure!
Ingredient Notes
Creating a truly magnificent Crispy Chilli Beef Rice starts with understanding our key players. I’ve put a lot of thought into selecting ingredients that deliver on flavour, texture, and that irresistible ‘crispy’ factor we’re aiming for.
- The Beef: For that perfect crisp, I highly recommend using a lean cut of beef such as flank steak, sirloin, or even beef tenderloin, thinly sliced against the grain. This helps ensure it cooks quickly and becomes wonderfully tender on the inside while achieving maximum crunch on the outside. Don’t be tempted to use fattier cuts as they tend to become chewy rather than crispy when fried.
- Substitution: If flank or sirloin isn’t available, top round or even thinly sliced strips of stew beef can work, just be sure to slice them as uniformly and thinly as possible.
- The Crisp Coating: Cornflour (cornstarch) is your best friend here! A generous coating creates that essential crunchy crust. I like to add a pinch of salt and white pepper to the cornflour for a little seasoning boost.
- The Chilli Power: This dish is called Crispy Chilli Beef, so we need some heat! I typically use a combination of fresh red bird’s eye chillies (finely sliced for vibrant heat), dried chillies (for a more aromatic, smoky heat), and a touch of chilli flakes.
- Substitution: Adjust the amount of chillies to your personal heat preference. For less spice, deseed the fresh chillies. For more, add a dash of chilli oil to the finished sauce. Sriracha can also be added to the sauce for an extra kick.
- The Flavourful Sauce: This is where the magic happens! My go-to base includes:
- Soy Sauce: A mix of light soy sauce for saltiness and a touch of dark soy sauce for colour and depth.
- Non-Alcoholic Rice Vinegar: This provides a lovely tang that cuts through the richness. Make sure you’re using a non-alcoholic version.
- Sugar: Brown sugar or granulated sugar balances the heat and tang, creating that delicious sweet-savoury profile.
- Garlic & Ginger: Freshly minced is non-negotiable for that aromatic foundation.
- Tomato Paste or Ketchup: A spoonful adds body, a slight acidity, and a touch of sweetness, contributing to that classic takeaway-style flavour.
- Sesame Oil: A tiny drizzle at the end adds a wonderful nutty aroma.
- Cornflour Slurry: A small amount mixed with water is crucial for thickening the sauce to perfectly coat our crispy beef.
- Substitution: If non-alcoholic rice vinegar isn’t available, you can use apple cider vinegar diluted with a little water (about 1:1) or simply omit it and rely on the tomato paste for acidity. For gluten-free options, use tamari instead of soy sauce.
- The Vegetables: I love the crunch and colour that thinly sliced bell peppers (red and green are great) and onions bring to the sauce. Spring onions and toasted sesame seeds are essential for garnish, adding freshness and a nutty finish.
- Substitution: Feel free to add other crunchy vegetables like shredded carrots or mangetout.
- The Rice: Jasmine rice is my top choice here. Its fragrant aroma and slightly sticky texture are the perfect canvas for soaking up all that incredible chilli beef sauce.
- Substitution: Basmati rice or even long-grain white rice can work, but jasmine offers the best texture for this dish.
- Frying Oil: Choose a neutral oil with a high smoke point, like vegetable oil, canola oil, or sunflower oil, for frying the beef.
Step-by-Step Instructions
Let’s get cooking! This recipe is all about creating layers of flavour and texture, culminating in that incredibly satisfying crispy chilli beef over fluffy rice. Follow these steps for success!
- Prepare Your Rice: Start by cooking your jasmine rice according to package directions or your preferred method. I usually rinse mine thoroughly until the water runs clear, then cook with a 1:1.25 rice to water ratio. Once cooked, keep it warm and covered.
- Slice and Coat the Beef: Take your chosen beef cut and slice it very thinly, against the grain, into bite-sized strips. Pat the beef dry with paper towels – this is crucial for crispiness! In a shallow dish, combine cornflour with a pinch of salt and white pepper. Toss the beef strips thoroughly in the cornflour mixture, ensuring each piece is fully coated. Shake off any excess.
- Fry the Crispy Beef: Heat a generous amount of neutral frying oil in a wok or deep frying pan over medium-high heat until it reaches about 170°C (340°F). Carefully add the coated beef strips in batches, making sure not to overcrowd the pan. Fry for 2-3 minutes until golden brown and crispy. Remove with a slotted spoon and drain on a wire rack lined with paper towels. For extra crispiness, you can double-fry: let the first batch cool slightly, then return it to the hot oil for another 30-60 seconds until deeply golden and super crunchy.
- Prepare the Sauce Ingredients: While the beef is cooling, prepare your sauce. In a small bowl, whisk together the light soy sauce, dark soy sauce, non-alcoholic rice vinegar, sugar, tomato paste (or ketchup), and a tablespoon of cornflour with a splash of water (this is your thickening slurry). Mince your garlic and ginger, and thinly slice your fresh chillies, bell peppers, and onions.
- Sauté Aromatics and Vegetables: Carefully pour out most of the frying oil from your wok, leaving about 1-2 tablespoons. Heat over medium-high heat. Add the minced garlic, ginger, fresh chillies, and dried chillies (if using). Sauté for 30 seconds until fragrant, being careful not to burn the garlic.
- Build the Sauce: Add the sliced bell peppers and onions to the wok. Stir-fry for 2-3 minutes until they start to soften slightly but still retain some crunch.
- Thicken and Combine: Give your prepared sauce mixture a quick whisk again (as cornflour settles) and pour it into the wok with the vegetables. Bring it to a gentle simmer, stirring constantly. The sauce will thicken quite quickly. If it’s too thick, add a tablespoon of water at a time until it reaches your desired consistency.
- Add the Crispy Beef: Once the sauce has thickened and is bubbling, immediately add the crispy beef strips to the wok. Toss gently but quickly to coat all the beef in the glorious chilli sauce. You want to do this just before serving to maintain maximum crispness.
- Serve Immediately: Divide the hot, fluffy jasmine rice among serving bowls or plates. Spoon a generous portion of the Crispy Chilli Beef over the rice. Garnish with freshly sliced spring onions and a sprinkle of toasted sesame seeds. Serve immediately and enjoy!
Tips & Suggestions
Achieving that perfect Crispy Chilli Beef Rice is an art, and I’ve gathered my best tips and tricks to help you master it. These little adjustments can make a big difference in the final dish!
- The Secret to Super Crispy Beef: Double Frying! I cannot stress this enough – if you want truly restaurant-quality crispy beef, double-frying is the way to go. The first fry cooks the beef and creates a initial crust. The second, shorter fry at a slightly higher temperature, expels any remaining moisture and makes the exterior incredibly shatteringly crisp. Always drain on a wire rack, not directly on paper towels, to allow air circulation and prevent steaming.
- Dry Beef is Happy Beef: Before coating your beef in cornflour, ensure it’s as dry as possible. Excess moisture can prevent the cornflour from adhering properly and will lead to a softer, rather than crispy, crust. Pat it thoroughly with paper towels.
- Don’t Overcrowd the Pan: When frying the beef, work in batches. Overcrowding the pan will drop the oil temperature too much, causing the beef to steam rather than fry, resulting in a soggy rather than crispy texture.
- Adjust the Heat to Your Liking: The amount of chilli is entirely up to you! For a milder version, remove the seeds from fresh chillies and reduce the number of dried chillies. For a fiery kick, add extra fresh chillies or a drizzle of your favourite chilli oil directly into the sauce or over the finished dish.
- Perfecting the Sauce Consistency: The cornflour slurry is key for thickening. If your sauce seems too thick after simmering, add a tablespoon of hot water at a time until it reaches your preferred consistency. If it’s too thin, you can whisk in a tiny bit more cornflour mixed with cold water and simmer briefly.
- Maintain Vegetable Crunch: When stir-frying the bell peppers and onions, don’t overcook them. We want them tender-crisp, not mushy, to add another layer of texture to the dish.
- Serve Immediately for Best Results: The crispy beef is at its absolute best right after it’s tossed in the sauce and served. If it sits too long, the sauce will start to soften the crisp coating. That said, it’s still delicious warmed up, just less crispy.
- Prep Ahead for Quick Dinners: You can slice your beef, chop your vegetables, and whisk together your sauce ingredients (keeping the cornflour slurry separate until cooking) an hour or two in advance. This makes assembly much quicker for a weeknight meal.
- Alternative Serving Suggestion: While fantastic with rice, this crispy chilli beef also makes a delicious filling for lettuce wraps or served alongside a simple noodle dish.
Storage
While Crispy Chilli Beef Rice is truly best enjoyed fresh, I understand that sometimes there are leftovers, or you might want to make components ahead of time. Here’s how I recommend storing and reheating to maintain as much of that deliciousness as possible.
- Refrigeration:
- Ideal Scenario (for Crispiness): If you anticipate leftovers, I highly recommend storing the crispy beef separately from the sauce. Let both cool completely before transferring to airtight containers. The rice should also be stored separately once cooled. This prevents the sauce from immediately softening the beef’s crisp coating.
- Combined Dish: If you’ve already mixed the beef into the sauce, or have a combined portion of Crispy Chilli Beef Rice, allow it to cool completely before transferring to an airtight container. Store in the refrigerator for up to 2-3 days.
- Reheating for Best Texture:
- For Separate Components: This is my preferred method for maintaining crispness!
- Beef: Reheat the crispy beef in an air fryer at 180°C (350°F) for 5-8 minutes, or in a preheated oven at 200°C (400°F) for 10-15 minutes, flipping once. This helps restore some of its crispiness.
- Sauce & Rice: Reheat the sauce gently in a saucepan on the stovetop over low heat, stirring occasionally. Reheat the rice in the microwave with a splash of water, or steam it.
- For Combined Dish: Reheating the entire dish will likely result in a softer beef texture, but it will still be flavourful!
- Microwave: Place the desired portion in a microwave-safe dish, cover loosely, and heat on medium power, stirring occasionally, until thoroughly hot.
- Stovetop: Heat in a non-stick pan over medium heat, adding a splash of water or broth if it seems too dry, and stirring gently until heated through.
- Oven: Spread the dish in an oven-safe dish, cover with foil, and bake at 160°C (325°F) for about 15-20 minutes, or until hot.
- Freezing:
- Freezing is generally not recommended for the crispy beef component of this dish. The crispy coating will become soggy and lose its texture upon thawing and reheating.
- The sauce itself, however, can be frozen in an airtight container for up to 1 month. Thaw in the refrigerator overnight before reheating and combining with freshly fried beef and rice.
- Safety First: Always ensure that all reheated food is piping hot throughout before consuming. Do not reheat leftovers more than once.
Final Thoughts
And there you have it! I truly hope you’ve enjoyed this culinary journey to create the ultimate Crispy Chilli Beef Rice. This isn’t just another weeknight meal; it’s an experience in contrasting textures and vibrant flavors that will awaken your taste buds. The delightful crunch of the beef, perfectly coated in that sweet and spicy chilli glaze, served over fluffy rice, creates a symphony of sensations in every single bite. It’s incredibly satisfying, remarkably flavorful, and surprisingly achievable at home. Trust me, once you taste your homemade Crispy Chilli Beef Rice, you’ll understand why it’s become a firm favorite. It’s a dish that promises to impress, comfort, and leave everyone wanting more. So go on, give it a try – I know you’re going to love it!


Leave a Comment