
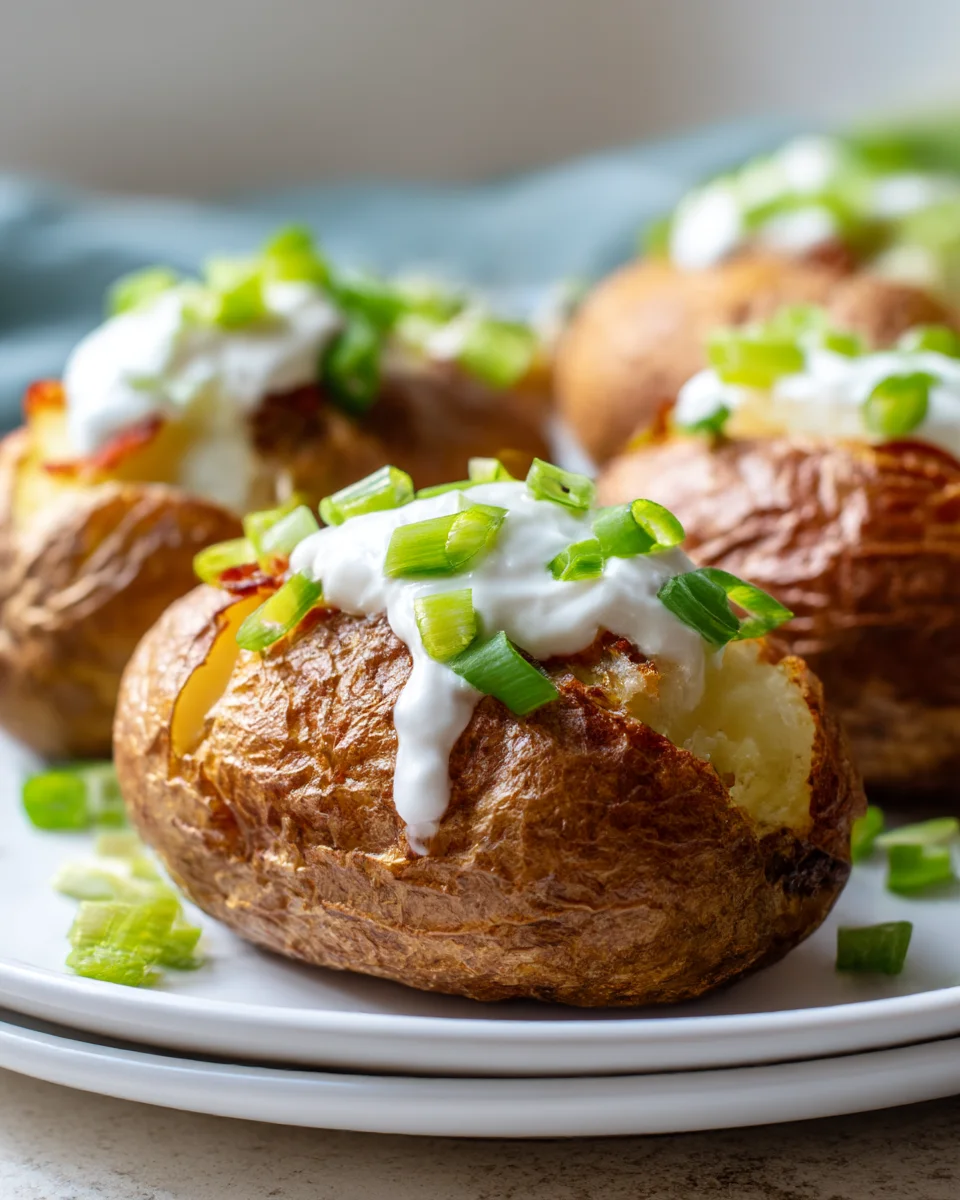
Loaded Mud Potatoes With Sour Cream And Green Onions
Oh, prepare yourselves for something truly special because today, I’m absolutely thrilled to share the recipe for Loaded Mud Potatoes With Sour Cream And Green Onions! This isn’t just another potato dish; it’s a culinary hug in a bowl, designed to be the ultimate comfort food experience.
What makes these “mud potatoes” so incredibly special, you ask? Well, imagine perfectly cooked, tender potatoes, mashed to a glorious, rustic consistency – not too smooth, just right for soaking up all the deliciousness. We’re talking about a base that’s rich, savory, and wonderfully satisfying, often infused with hearty beef to make it a truly substantial meal. But that’s just the beginning!
You’ll absolutely adore how incredibly easy it is to bring this cozy masterpiece to life, and even more, you’ll fall head over heels for its irresistible taste. Each spoonful is a delightful medley of textures and flavors: the creamy, earthy potatoes, the savory beef, all generously blanketed with cool, tangy sour cream and then brightened with the crisp, zesty kick of fresh green onions. It’s warm, it’s comforting, it’s packed with flavor, and it’s unbelievably satisfying. Whether you’re serving it as a hearty main course or a show-stopping side, these loaded mud potatoes are guaranteed to become a new favorite in your kitchen. Get ready to dig in and experience pure potato bliss!
Ingredient Notes
Oh, hello there, fellow food lover! I’m so excited to share with you my take on these utterly delightful Loaded Mud Potatoes. What exactly are “mud potatoes,” you ask? Think of them as the best parts of a mashed potato, a baked potato, and a roasted potato all rolled into one glorious, rustic bite. They’re creamy on the inside, wonderfully seasoned, and have just enough texture to make them incredibly satisfying, especially when loaded up with all the good stuff. Let’s dive into the essential ingredients that make this dish sing.
- Potatoes: This is where the magic begins for our “mud.” I highly recommend using smaller, waxy potatoes like new potatoes, creamer potatoes, or even small Yukon Golds. Their skins are thin and edible, which means less peeling for you (hooray!) and they hold their shape beautifully when smashed, giving us that perfect “muddy” texture. Avoid large, starchy Russets for this particular dish, as they tend to fall apart into a fluffier mash rather than a textured smash.
- Butter & Olive Oil: These two fats are crucial for flavor and texture. Butter provides richness and that irresistible golden hue, while olive oil helps achieve a lovely crispy edge if you choose to finish them in the oven, and adds a fruity depth. Don’t be shy here; they contribute significantly to the “loaded” feel.
- Garlic: Freshly minced garlic, or even a good quality garlic powder, is a must. It infuses the potatoes with a savory warmth that complements all the other toppings. Roasting whole garlic cloves with the potatoes can also add a wonderful, mellow sweetness.
- Sour Cream: The namesake! A generous dollop of full-fat sour cream is non-negotiable. It brings a tangy creaminess that cuts through the richness of the potatoes and other toppings, creating a perfect balance. For a slightly lighter or tangier alternative, you could use Greek yogurt, but for that classic “loaded” experience, sour cream is king.
- Green Onions (Scallions): Another star of the show! Freshly chopped green onions provide a vibrant, mild oniony bite and a beautiful pop of color. They are essential for that fresh, crisp contrast against the warm, soft potatoes. Chives can also be used if you prefer a milder, more delicate onion flavor.
- Cheese: For me, a sharp cheddar or a Monterey Jack works wonders. You want a cheese that melts beautifully and adds a savory, salty kick. A good quality, freshly grated cheese makes all the difference compared to pre-shredded options, as it melts smoother and tastes more vibrant.
- Beef Bacon Bits: To get that satisfying smoky, salty crunch without using pork, beef bacon bits are a fantastic addition. Cook them until wonderfully crispy, then crumble them over your potatoes. If you’re looking for a vegetarian option, consider smoked paprika mixed with a little nutritional yeast for a cheesy, smoky flavor, or even crispy fried onions.
- Salt & Freshly Ground Black Pepper: Simple, yet vital. Seasoning your potatoes generously throughout the cooking process ensures every bite is flavorful. Don’t underestimate the power of freshly ground black pepper for that extra zing.
- Optional Additions: A sprinkle of smoked paprika for extra depth, a dash of onion powder, or even a pinch of dried herbs like thyme or rosemary can elevate the potato base. A few red pepper flakes can add a lovely kick if you enjoy a bit of heat.
Step-by-Step Instructions
Get ready to create some rustic, comforting magic! These mud potatoes are surprisingly simple to make and incredibly satisfying. Here’s how I prepare them:
- Prepare the Potatoes:
- First things first, let’s get those potatoes ready! I like to give my small potatoes a good scrub under cold running water. Since we’re keeping the skins on for that authentic “mud” texture, make sure they’re nice and clean.
- Place the scrubbed potatoes in a large pot and cover them with cold water by about an inch. Add a generous pinch of salt to the water – this seasons the potatoes from the inside out.
- Bring the water to a boil over medium-high heat, then reduce the heat to a simmer. Cook until the potatoes are fork-tender, usually about 15-20 minutes depending on their size. You want them soft enough to easily smash, but not falling apart completely.
- Drain the potatoes thoroughly in a colander. Let them sit for a minute or two to allow any excess steam to escape – this helps prevent watery potatoes.
- Smash and Season the “Mud”:
- Transfer the drained, hot potatoes back to the empty pot or a large mixing bowl.
- Add a generous knob of butter (about 2-3 tablespoons), a drizzle of olive oil, and your minced garlic (or garlic powder).
- Using a potato masher, fork, or even the bottom of a sturdy glass, gently smash each potato until it’s flattened and broken open, but still retains some of its rustic shape and texture. Don’t aim for a perfectly smooth mash; the goal is an uneven, “muddy” consistency with some chunks and crispy bits.
- Season generously with salt and freshly ground black pepper. Taste and adjust seasoning as needed – remember, flavor is key!
- Optional Oven Finish (Highly Recommended!):
- For an extra layer of flavor and some delightful crispy edges, I love to transfer the smashed potatoes to a baking sheet lined with parchment paper. Spread them out in a single layer.
- Bake in a preheated oven at 400°F (200°C) for 15-20 minutes, or until some of the edges are golden brown and slightly crisp. This step isn’t strictly necessary, but it truly elevates the dish!
- Prepare Your Toppings:
- While the potatoes are cooking or finishing in the oven, it’s time to get our toppings ready.
- Cook your beef bacon until wonderfully crispy, then let it cool slightly before crumbling it into small pieces.
- Grate your cheese.
- Chop your green onions (both white and green parts are great for flavor and color).
- Assemble Your Loaded Mud Potatoes:
- Once the potatoes are ready (warm and inviting!), either serve them directly from the pot or transfer them to individual plates.
- Dollop a generous spoonful (or two!) of sour cream over the warm potatoes.
- Sprinkle generously with your grated cheese, allowing it to melt slightly from the residual heat.
- Scatter the crispy beef bacon bits over the top.
- Finally, garnish with a generous showering of fresh green onions.
- Serve immediately and dig in!
Tips & Suggestions
Making these Loaded Mud Potatoes is already a treat, but with a few extra tips and tricks, you can elevate them even further and make them truly your own. I’ve learned a few things along the way that I love to share!
- The Potato Choice is Paramount: While I recommended specific types, experiment with what you find locally. Smaller, firmer potatoes are always best for that “mud” texture. If you can only find larger potatoes, cut them into golf-ball sized pieces before boiling, but aim to keep the skin on for maximum flavor and nutrition.
- Don’t Overcrowd the Pan: If you opt for the oven-finish step (and I really hope you do!), make sure to spread the smashed potatoes in a single layer on your baking sheet. Giving them space allows the heat to circulate properly, resulting in those irresistible crispy edges. If they’re too crowded, they’ll steam instead of crisp.
- Seasoning in Layers: Don’t just season at the end! Salt the boiling water for the potatoes, then season them again with salt and pepper after smashing. This builds flavor from the inside out and ensures every bite is delicious.
- Warm Your Sour Cream (Optional): For a smoother, less jarring temperature contrast, sometimes I’ll let my sour cream sit out at room temperature for 15-20 minutes before serving. You can also whisk a tiny bit of warm milk or potato water into your sour cream to make it even creamier and easier to dollop.
- Beyond the Basics – Topping Variations:
- Spicy Kick: Add a pinch of red pepper flakes to your potatoes, or drizzle with a bit of sriracha or your favorite hot sauce.
- Herbaceous Twist: Fresh dill, chives (if not using green onions), or even a sprinkle of dried parsley can add another layer of fresh flavor.
- Cheesy Deluxe: Try a blend of cheeses! Smoked gouda, white cheddar, or a pepper jack could be amazing.
- Make it a Meal: Transform these into a heartier main course by adding seasoned ground beef (think taco seasoning or a simple blend of cumin, chili powder, and onion powder), leftover pulled beef, or even a dollop of your favorite beef chili.
- Vegetarian Power-Up: For a delicious vegetarian option, sauté some mushrooms and onions until caramelized, then season with smoked paprika and add as a topping instead of beef bacon. A sprinkle of toasted pumpkin seeds or sunflower seeds can add crunch.
- Serving Suggestions: These Loaded Mud Potatoes can absolutely be a standalone light meal, but they also make an incredible side dish for grilled beef, roasted chicken, or a hearty vegetarian main.
Storage
While these Loaded Mud Potatoes are truly at their best served fresh and warm, sometimes you have leftovers, or you might want to get a head start on some components. Here’s how I handle storing them:
- Storing the Plain Mud Potatoes:
- If you have leftover smashed and seasoned potatoes without the toppings, allow them to cool completely to room temperature.
- Transfer them to an airtight container and store in the refrigerator for up to 3-4 days.
- Reheating: For the best results, reheat them in the oven. Spread them on a baking sheet and warm at 350°F (175°C) for about 15-20 minutes, or until heated through and slightly crispy again. You can also microwave them, but they tend to lose some of their crispy texture. If microwaving, stir occasionally to ensure even heating.
- Storing Toppings Separately:
- This is my preferred method if I’m preparing components ahead of time or if I anticipate having leftovers.
- Sour Cream: Keep your sour cream in its original container, sealed, in the refrigerator.
- Cheese: Store grated cheese in an airtight container or zip-top bag in the refrigerator for up to a week.
- Green Onions: Chop green onions and store them in a small airtight container with a damp paper towel in the refrigerator. They’ll stay fresh for 3-4 days.
- Beef Bacon Bits: Once cooked and crumbled, store crispy beef bacon bits in an airtight container at room temperature for a day or two, or in the refrigerator for up to a week. Keeping them separate prevents them from becoming soggy.
- Storing Assembled Leftovers:
- If you have fully assembled Loaded Mud Potatoes leftover, you can store them in an airtight container in the refrigerator for 1-2 days.
- Be aware that the sour cream and green onions will release some moisture, and the beef bacon bits will lose their crispness when stored with the warm potatoes. The cheese will also solidify.
- Reheating Assembled Potatoes: For best results, I recommend gently reheating in the oven at 300°F (150°C) until warmed through, about 15 minutes. The sour cream will melt a bit, and the green onions might soften. You won’t get the same fresh quality, but they’ll still be tasty. Microwaving is also an option but will result in a softer texture.
- Freezing: I generally don’t recommend freezing these potatoes once they’ve been smashed and seasoned, especially with the toppings. Potatoes can sometimes become grainy or watery after freezing and thawing, and the dairy-based toppings won’t fare well. It’s best to enjoy these fresh!

Final Thoughts
So there you have it! My take on the incredibly satisfying and utterly delicious Loaded Mud Potatoes With Sour Cream And Green Onions. I truly believe this dish is more than just a side; it’s a heartwarming, comforting meal that brings a smile to your face. The way the fluffy, earthy potato blends with the rich, savory toppings – think tender, seasoned beef, if you choose to add it – and then gets that bright, tangy kick from the cool sour cream and fresh crunch of green onions… it’s a symphony of textures and flavors. It’s an experience that is both grounded and wonderfully indulgent, making it absolutely irresistible. I genuinely hope you give these Loaded Mud Potatoes With Sour Cream And Green Onions a try soon. They are guaranteed to become a new favorite in your kitchen, offering warmth and deliciousness on any occasion!

Leave a Comment