
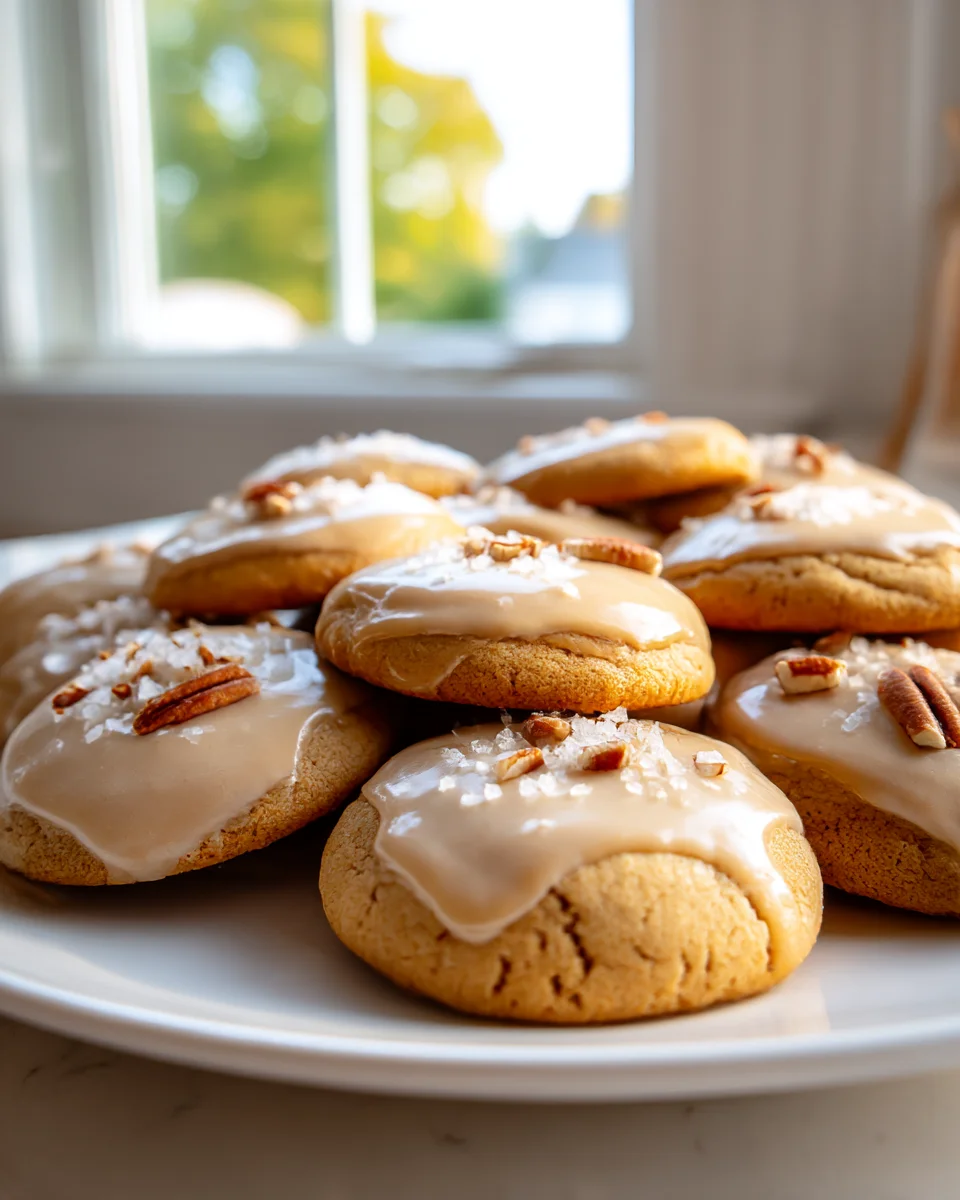
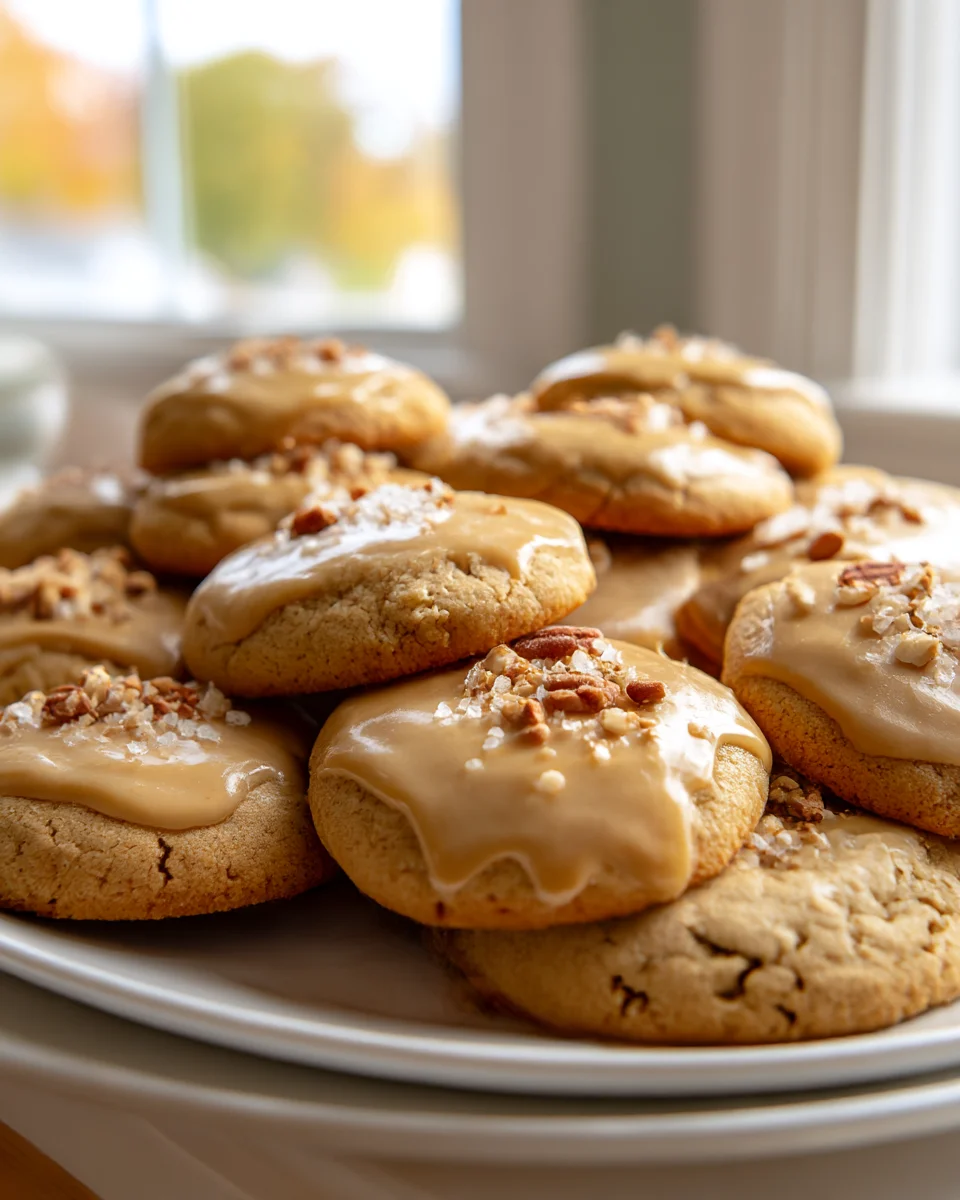
Soft Maple Cookies With Brown Butter Icing
Oh, friends, get ready for a treat that will absolutely sweep you off your feet! When I first envisioned these Soft Maple Cookies With Brown Butter Icing, I knew I wanted something truly special, a dessert that felt like a warm hug on a crisp autumn day, but honestly, they’ve surpassed all my expectations. What makes these cookies stand out in a sea of sweets? It’s that irresistible dance between the deeply comforting, almost soulful sweetness of pure maple syrup baked right into a pillowy-soft cookie, perfectly contrasted by an icing that is nothing short of pure magic.
You’re going to fall head over heels for the tender, melt-in-your-mouth texture of the cookie itself, which provides the perfect canvas for the show-stopping brown butter icing. That nutty, slightly caramelized flavor from the browned butter adds an incredible depth and sophistication that elevates these simple-looking cookies into something truly extraordinary. It’s not just a sweet topping; it’s an experience – rich, fragrant, and utterly addictive. Imagine biting into a cloud of maple goodness, followed by the complex, toasty notes of brown butter. It’s a flavor combination that will have everyone asking for the recipe, making them perfect for gatherings, a cozy evening in, or just because you deserve a little bit of delicious joy.
Trust me, once you try them, you’ll understand why these cookies are destined to become a new favorite in your baking repertoire. Let’s get baking and fill your home with the incredible aroma of maple and brown butter!
Ingredient Notes
Crafting truly wonderful Soft Maple Cookies with Brown Butter Icing starts with understanding the role each ingredient plays. I’ve carefully selected these to ensure the best possible flavor and texture for your cookies and their irresistible topping.
For the Soft Maple Cookies:
- All-Purpose Flour: This is our base, providing structure to the cookies. I always measure flour using the spoon-and-level method—spooning it into the measuring cup and leveling off with a straight edge—to avoid compacting it, which can lead to dense cookies.
- Unsalted Butter (Softened): For the cookies, softened butter is key to creating that light, airy, and creamy base when creamed with sugar. It helps incorporate air, resulting in a tender crumb. If you only have salted butter, omit the added salt from the recipe.
- Brown Sugar & Granulated Sugar: The combination of both sugars is intentional. Brown sugar contributes moisture, chewiness, and a subtle molasses note that complements the maple beautifully, while granulated sugar ensures proper spread and crisp edges, balancing the softness.
- Egg (Room Temperature): A room temperature egg emulsifies better with the creamed butter and sugar, leading to a smoother, more uniform cookie dough and a better texture in the final cookie.
- Pure Maple Syrup: This is the star of our cookies! Please, please use pure maple syrup (preferably Grade A Amber or Dark) and not imitation pancake syrup. The depth of flavor from real maple syrup is irreplaceable and essential for that authentic maple taste we’re after.
- Vanilla Extract: Just a touch enhances all the other flavors, especially the maple and brown sugar.
- Baking Soda: Our leavening agent. It helps the cookies rise slightly and contributes to their soft, chewy texture.
- Salt: A crucial ingredient that balances the sweetness and brings out the full range of flavors in the cookies. Don’t skip it!
- Ground Cinnamon/Nutmeg (Optional): For an extra layer of warmth and spice, I sometimes add a pinch of cinnamon or nutmeg. It’s not strictly necessary, but it beautifully complements the maple.
For the Brown Butter Icing:
- Unsalted Butter: This is for browning! Browning the butter adds an incredible nutty, caramel-like depth of flavor that elevates the simple icing into something truly special and pairs wonderfully with the maple.
- Powdered Sugar: Essential for a smooth, lump-free icing. Sifting it isn’t always necessary if you whisk well, but it helps.
- Pure Maple Syrup: We’re doubling down on maple flavor in the icing! Just like with the cookies, use pure maple syrup for the best results.
- Milk or Cream: Used to thin the icing to the perfect drizzly or spreadable consistency. Any milk works fine, but cream will yield a slightly richer icing.
- Vanilla Extract & Pinch of Salt: Again, for enhanced flavor and balance in the icing.
Step-by-Step Instructions
Let’s get baking! Follow these steps closely to create your perfect batch of Soft Maple Cookies with Brown Butter Icing.
Part 1: Making the Soft Maple Cookies
- Prepare Your Oven & Pans: First, preheat your oven to 350°F (175°C). Line two baking sheets with parchment paper or silicone baking mats. This helps prevent sticking and ensures even baking.
- Combine Dry Ingredients: In a medium bowl, whisk together your all-purpose flour, baking soda, and salt. If you’re adding optional cinnamon or nutmeg, mix them in here too. Set this aside.
- Cream Wet Ingredients (Part 1): In a large mixing bowl, using an electric mixer (stand mixer with paddle attachment or hand mixer), cream together the softened unsalted butter, brown sugar, and granulated sugar. Beat on medium-high speed until the mixture is light, fluffy, and pale in color, usually about 2-3 minutes. Make sure to scrape down the sides of the bowl occasionally.
- Add Remaining Wet Ingredients: Beat in the room temperature egg until just combined. Then, add the pure maple syrup and vanilla extract, mixing on low speed until fully incorporated. The mixture might look a little curdled at this point, but don’t worry, it will come together once the dry ingredients are added.
- Combine Wet and Dry: Gradually add the dry ingredient mixture to the wet ingredients, mixing on low speed until just combined. Be careful not to overmix; overmixing can develop the gluten too much, leading to tough cookies. Stop as soon as you see no more streaks of flour.
- Scoop the Dough: Use a cookie scoop (about 1.5-2 tablespoons) or two spoons to drop uniform balls of dough onto your prepared baking sheets, leaving about 2 inches between each cookie as they will spread.
- Bake the Cookies: Bake for 9-11 minutes, or until the edges are lightly golden and set, but the centers still look soft and slightly underbaked. Remember, these are “soft maple cookies,” so we don’t want to overbake them.
- Cool: Let the cookies cool on the baking sheets for about 5 minutes before carefully transferring them to a wire rack to cool completely. It’s crucial that they are fully cool before icing!
Part 2: Making the Brown Butter Icing
- Brown the Butter: In a light-colored saucepan (so you can easily see the color change), melt the unsalted butter over medium heat. Continue to cook, swirling occasionally, until the butter turns an amber color and delightful nutty specks appear at the bottom. This usually takes 5-7 minutes. Watch it very closely, as it can go from perfect to burnt quickly!
- Cool the Brown Butter: Immediately remove the pan from the heat and pour the browned butter, including all the nutty bits, into a heatproof bowl. Let it cool for about 10-15 minutes until it’s still liquid but no longer piping hot. This prevents the icing from becoming too runny.
- Prepare the Icing: To the cooled brown butter, add the powdered sugar, pure maple syrup, vanilla extract, and a pinch of salt. Whisk everything together until the icing is completely smooth and creamy.
- Adjust Consistency: If your icing is too thick to drizzle or spread easily, add milk or cream, 1 teaspoon at a time, whisking after each addition, until you reach your desired consistency. If it’s too thin, add a bit more powdered sugar.
- Ice the Cookies: Once the maple cookies are completely cool, drizzle or spread the brown butter icing generously over each cookie. For a cleaner look, you can use a small offset spatula or the back of a spoon.
- Allow Icing to Set: Let the iced cookies sit at room temperature for about 30 minutes to an hour, or until the icing has slightly firmed up.
Tips & Suggestions
Achieving the perfect Soft Maple Cookies with Brown Butter Icing is all about paying attention to a few key details. Here are my top tips for success:
- Embrace Pure Maple Syrup: I really can’t stress this enough – the quality of your maple syrup makes all the difference for these cookies. Invest in pure maple syrup, preferably a Grade A Amber or Dark for a richer flavor. Imitation syrup will simply not yield the same delicious, authentic maple taste.
- Don’t Overbake Your Cookies: These are called “soft” maple cookies for a reason! Pull them from the oven when the edges are just set and lightly golden, and the centers still look a bit soft and perhaps even slightly underdone. They will continue to set as they cool on the baking sheet, ensuring that wonderfully tender, chewy texture.
- Room Temperature Ingredients are Your Friend: For the cookie dough, ensure your butter and egg are at room temperature. This allows them to cream together much more efficiently, creating a smooth, emulsified dough that results in a better texture for your finished cookies.
- Mastering Brown Butter: Browning butter adds an incredible depth of nutty, caramel flavor to the icing. Use a light-colored saucepan so you can easily monitor the color change. Stay at the stove and swirl frequently! It can go from perfectly golden to burnt in a matter of seconds. Once it’s amber with fragrant nutty bits, remove it from the heat immediately.
- Patience with Cooling: It’s tempting, but resist the urge to ice warm cookies! The brown butter icing will simply melt and run off, making a sticky mess. Ensure your cookies are completely cool to the touch before you even think about applying that delicious icing.
- Adjusting Icing Consistency: The beauty of this brown butter icing is its flexibility. If you prefer a thicker, more spreadable icing, add powdered sugar by the tablespoon. For a thinner, drizzly consistency, add milk or cream, a teaspoon at a time, until you reach your desired texture.
- Add a Pinch of Warm Spice: For an extra layer of coziness, consider adding a tiny pinch of ground cinnamon or nutmeg to your cookie dough. It enhances the maple flavor beautifully.
- For an Extra Maple Punch: If you want to really amplify the maple flavor in your icing, you could add a tiny drop (and I mean a tiny drop!) of maple extract along with the maple syrup. Be careful not to overdo it, as it can be very strong.
Storage
Proper storage ensures your Soft Maple Cookies with Brown Butter Icing stay fresh and delicious for as long as possible. Here’s how I like to store mine:
- Airtight Container at Room Temperature: Once the brown butter icing has fully set, stack the iced cookies in a single layer or separate layers with parchment paper in an airtight container. Store them at room temperature for up to 3-5 days. This method helps keep them soft and prevents the icing from drying out too quickly.
- Freezing Cookie Dough: If you want to enjoy fresh-baked cookies anytime, scoop the unbaked cookie dough into balls and place them on a parchment-lined baking sheet. Freeze until solid (about 1-2 hours), then transfer the frozen dough balls to a freezer-safe zip-top bag or airtight container. They can be stored in the freezer for up to 3 months. When you’re ready to bake, place the frozen dough balls on a prepared baking sheet and bake as directed, adding 1-3 minutes to the baking time.
- Freezing Baked Cookies (Un-Iced): You can freeze the baked maple cookies before icing them. Once completely cooled, arrange them in a single layer on a baking sheet and freeze until solid. Then, transfer them to a freezer-safe bag or container, separating layers with parchment paper. They will keep for up to 2 months. Thaw at room temperature for a couple of hours before making and applying the brown butter icing.
- Freezing Iced Cookies: While technically possible, I generally don’t recommend freezing these cookies once they’ve been iced. The texture of the brown butter icing can sometimes change slightly upon thawing, becoming a bit softer or more grainy. If you must freeze them iced, ensure the icing is completely set, then freeze in a single layer in an airtight container, separated by parchment. Thaw completely at room temperature before serving.
Final Thoughts
There’s something truly special about a homemade treat that marries comforting flavors with an irresistible texture, and I genuinely believe these Soft Maple Cookies With Brown Butter Icing are the epitome of that. The moment you take that first bite, you’ll understand why this recipe is an absolute must-try. The cookies themselves are incredibly soft and chewy, infused with the warm, rich essence of maple that instantly brings a cozy feeling. But what truly elevates them is the luxurious brown butter icing – its nutty, caramelized notes create a depth of flavor that complements the maple beautifully, making each cookie a perfectly balanced symphony for your taste buds.
I can’t recommend enough that you bake a batch of these Soft Maple Cookies With Brown Butter Icing. Whether you’re sharing them with loved ones, enjoying a quiet moment with a cup of coffee, or simply craving something wonderfully sweet and sophisticated, they are guaranteed to bring a smile. Go ahead, treat yourself and experience the delightful magic of these cookies!
Leave a Comment