
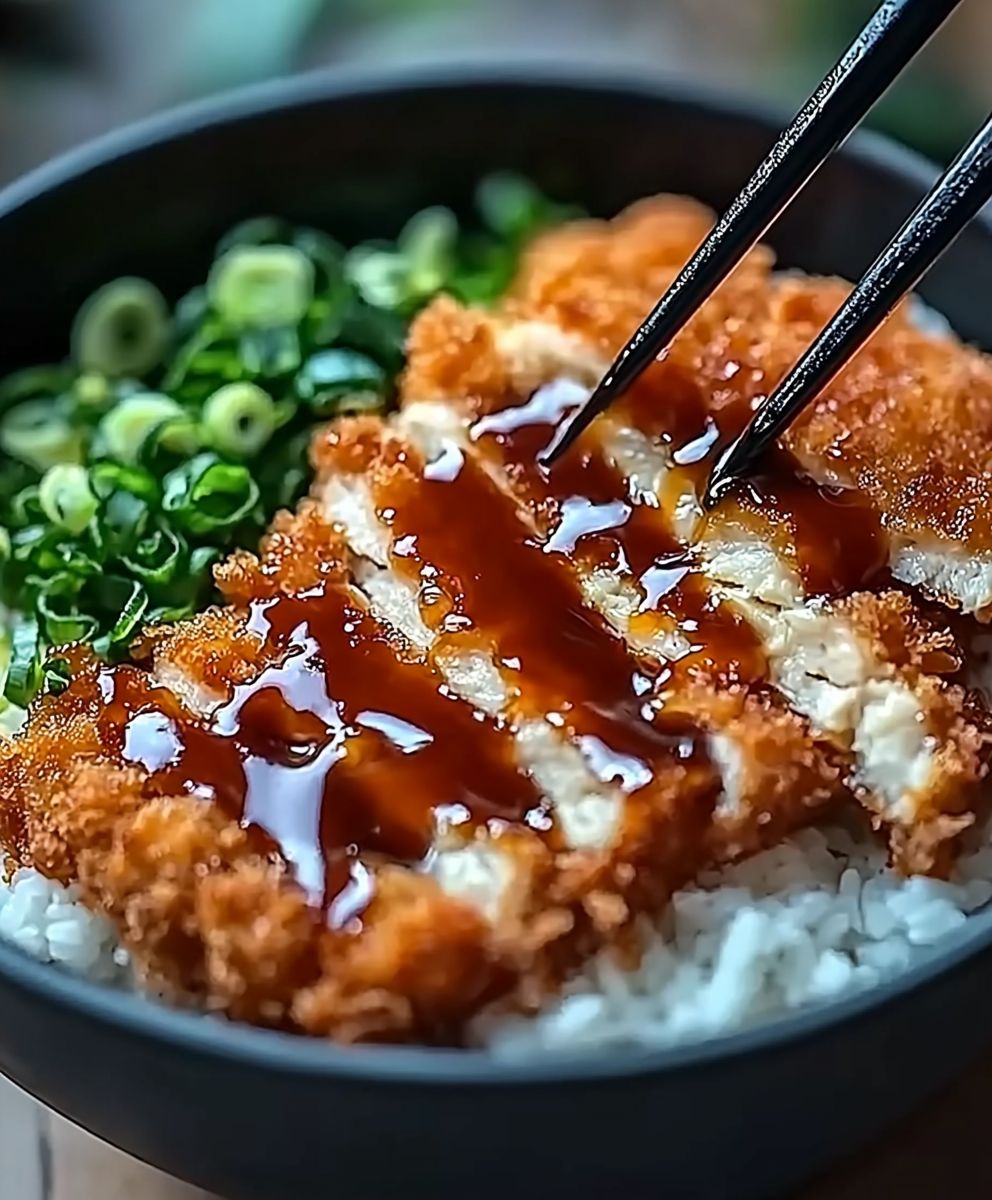
Japanese Katsu Bowls are a delightful fusion of flavors and textures that transport you straight to the heart of Japan with every bite. This dish, featuring crispy breaded meat served over a bed of fluffy rice, has become a beloved staple not just in Japanese cuisine but around the world. The origins of katsu can be traced back to the late 19th century, when Western-style breaded cutlets were introduced to Japan, evolving into the delicious katsu we know today.
What makes Japanese Katsu Bowls so irresistible is the perfect combination of crunchy, golden-brown katsu paired with tender, savory rice, often accompanied by a rich, tangy sauce. People love this dish not only for its mouthwatering taste but also for its satisfying texture and the convenience it offers as a quick yet hearty meal. Whether you’re enjoying it at a local restaurant or making it at home, Japanese Katsu Bowls are sure to become a favorite in your culinary repertoire.
Ingredients:
- For the Katsu:
- 2 boneless chicken breasts (or pork loin, if preferred)
- Salt and pepper, to taste
- 1 cup all-purpose flour
- 2 large eggs
- 1 cup panko breadcrumbs
- Vegetable oil, for frying
- For the Rice:
- 2 cups Japanese short-grain rice
- 2 ½ cups water
- 1 tablespoon rice vinegar
- 1 tablespoon sugar
- ½ teaspoon salt
- For the Sauce:
- ¼ cup tonkatsu sauce (or store-bought if you prefer)
- 1 tablespoon soy sauce
- 1 teaspoon Worcestershire sauce
- For Toppings:
- 1 cup shredded cabbage
- 2 green onions, sliced
- Sesame seeds, for garnish
- Pickled ginger (optional)
Preparing the Rice
1. Start by rinsing the rice. Place the 2 cups of Japanese short-grain rice in a fine-mesh strainer and rinse it under cold water. I usually do this until the water runs clear, which helps remove excess starch and prevents the rice from becoming too sticky.
2. Once rinsed, transfer the rice to a medium saucepan and add 2 ½ cups of water. Let it soak for about 30 minutes. This soaking step is crucial as it allows the rice to absorb some water, leading to a better texture when cooked.
3. After soaking, cover the saucepan with a lid and bring the water to a boil over medium-high heat. Once it starts boiling, reduce the heat to low and let it simmer for about 15 minutes. Do not lift the lid during this time, as the steam is essential for cooking the rice evenly.
4. After 15 minutes, turn off the heat and let the rice sit, covered, for another 10 minutes. This resting period allows the rice to finish cooking in its own steam.
5. While the rice is resting, prepare the seasoning. In a small bowl, mix together 1 tablespoon of rice vinegar, 1 tablespoon of sugar, and ½ teaspoon of salt. Microwave it for about 20 seconds or until the sugar dissolves.
6. Once the rice has rested, transfer it to a large bowl and gently fold in the vinegar mixture. Be careful not to mash the rice; you want to keep the grains intact. Set the seasoned rice aside while you prepare the katsu.
Preparing the Katsu
1. Begin by preparing the chicken breasts. If they are thick, I like to slice them in half horizontally to create thinner cutlets. This helps them cook more evenly and quickly. Season both sides with salt and pepper.
2. Set up a breading station. In one shallow dish, place 1 cup of all-purpose flour. In a second dish, beat 2 large eggs until well combined. In a third dish, add 1 cup of panko breadcrumbs.
3. Take one piece of chicken and dredge it in the flour, making sure to coat it evenly. Shake off any excess flour, then dip it into the beaten eggs, allowing any excess to drip off. Finally, coat it in the panko breadcrumbs, pressing gently to ensure the breadcrumbs adhere well. Repeat this process for all the chicken pieces.
4. In a large skillet, heat about ½ inch of vegetable oil over medium heat. To check if the oil is hot enough, I usually drop a small piece of bread into the oil; if it sizzles and turns golden brown, it’s ready.
5. Carefully place the breaded chicken cutlets into the hot oil, making sure not to overcrowd the pan. Fry them for about 3-4 minutes on each side or until they are golden brown and cooked through. You can check for doneness by cutting into the thickest part of the chicken; it should be opaque and juices should run clear.
6. Once cooked, transfer the katsu to a paper towel-lined plate to drain any excess oil. Let them rest for a few minutes before slicing them into strips. This resting period helps keep the chicken juicy.
Preparing the Sauce
Conclusion:
In summary, Japanese Katsu Bowls are an absolute must-try for anyone looking to indulge in a delicious and satisfying meal. The combination of crispy, golden-brown katsu, fluffy rice, and savory sauce creates a flavor explosion that is sure to please your taste buds. Plus, the versatility of this dish means you can easily customize it to suit your preferences. Whether you choose to serve it with a side of steamed vegetables, a fresh salad, or even a drizzle of spicy mayo, the possibilities are endless!
I encourage you to give this recipe a go and experience the joy of creating your very own Japanese Katsu Bowl at home. Don’t forget to share your experience with friends and family, and let them in on the secret of this delightful dish. If you have any variations or personal twists you’d like to add, I’d love to hear about them! So roll up your sleeves, gather your ingredients, and get ready to enjoy a meal that’s not only delicious but also a fun cooking adventure. Happy cooking!
Japanese Katsu Bowls: A Delicious Guide to Making Authentic Katsu at Home
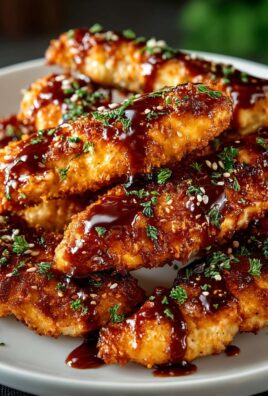
Savor the flavors of homemade Chicken Katsu, featuring crispy breaded chicken cutlets served alongside seasoned rice and a tangy sauce. This Japanese-inspired dish is perfect for any occasion, offering a delightful combination of textures and tastes with fresh toppings.
Ingredients
- 2 boneless chicken breasts (or pork loin, if preferred)
- Salt and pepper, to taste
- 1 cup all-purpose flour
- 2 large eggs
- 1 cup panko breadcrumbs
- Vegetable oil, for frying
- 2 cups Japanese short-grain rice
- 2 ½ cups water
- 1 tablespoon rice vinegar
- 1 tablespoon sugar
- ½ teaspoon salt
- ¼ cup tonkatsu sauce (or store-bought if you prefer)
- 1 tablespoon soy sauce
- 1 teaspoon Worcestershire sauce
- 1 cup shredded cabbage
- 2 green onions, sliced
- Sesame seeds, for garnish
- Pickled ginger (optional)
Instructions
- Rinse the rice in a fine-mesh strainer under cold water until the water runs clear to remove excess starch.
- Transfer the rinsed rice to a medium saucepan and add 2 ½ cups of water. Soak for 30 minutes.
- Cover the saucepan and bring the water to a boil over medium-high heat. Once boiling, reduce the heat to low and simmer for 15 minutes without lifting the lid.
- After 15 minutes, turn off the heat and let the rice sit, covered, for another 10 minutes.
- In a small bowl, mix together rice vinegar, sugar, and salt. Microwave for about 20 seconds until the sugar dissolves.
- Transfer the rice to a large bowl and gently fold in the vinegar mixture, keeping the grains intact. Set aside.
- If the chicken breasts are thick, slice them in half horizontally to create thinner cutlets. Season with salt and pepper.
- Set up a breading station with flour in one dish, beaten eggs in a second dish, and panko breadcrumbs in a third dish.
- Dredge each chicken piece in flour, dip in eggs, and coat with panko breadcrumbs, pressing gently to adhere.
- Heat about ½ inch of vegetable oil in a large skillet over medium heat. Test the oil by dropping in a small piece of bread; it should sizzle.
- Fry the breaded chicken cutlets for 3-4 minutes on each side until golden brown and cooked through. Check for doneness by cutting into the thickest part.
- Transfer the cooked katsu to a paper towel-lined plate to drain excess oil. Let rest for a few minutes before slicing into strips.
- In a small bowl, combine tonkatsu sauce, soy sauce, and Worcestershire sauce. Mix well and set aside.
Notes
- For a healthier option, you can bake the katsu instead of frying.
- Feel free to customize the toppings based on your preference.
Printable Recipe Card
Want just the essential recipe details without scrolling through the article? Get our printable recipe card with just the ingredients and instructions.

Leave a Comment