
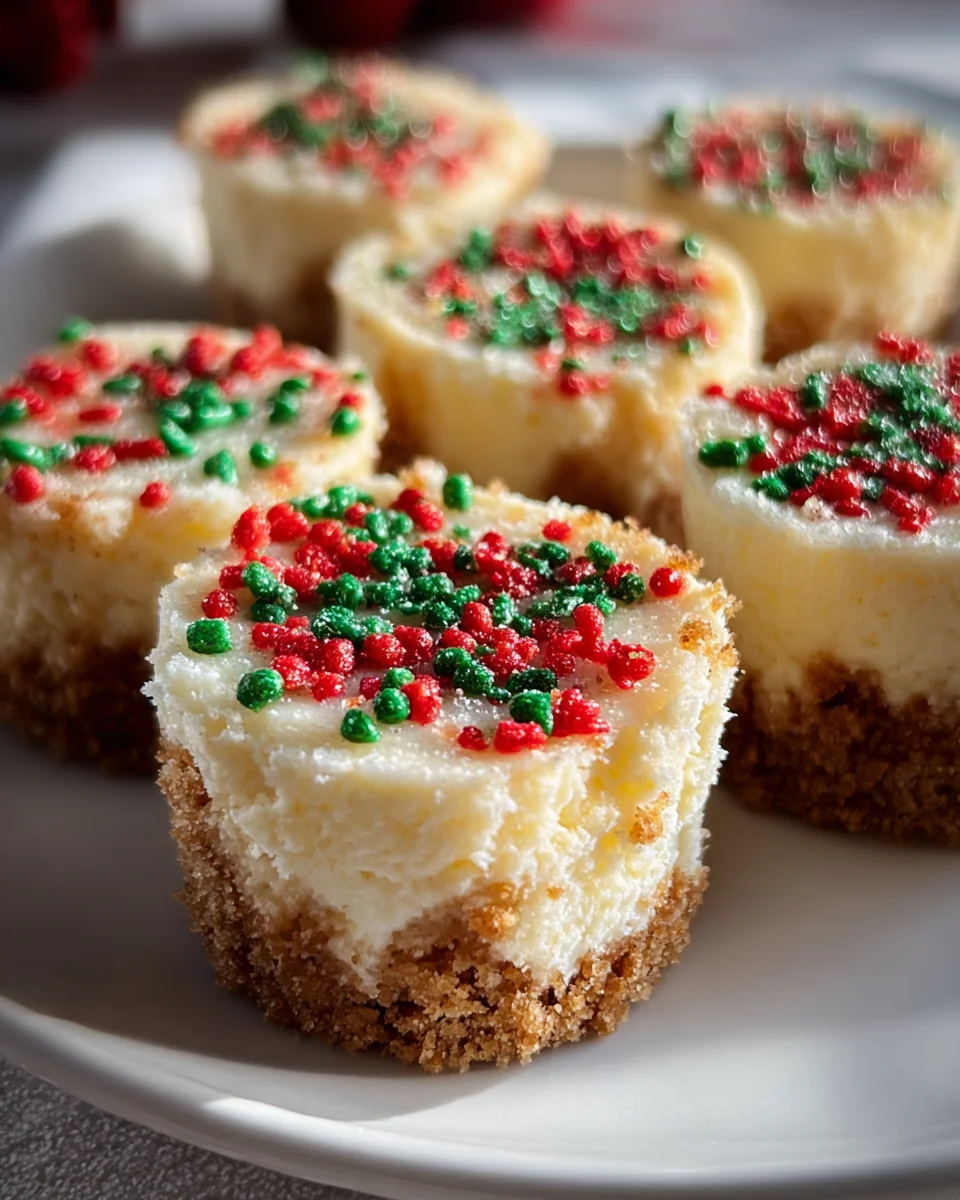
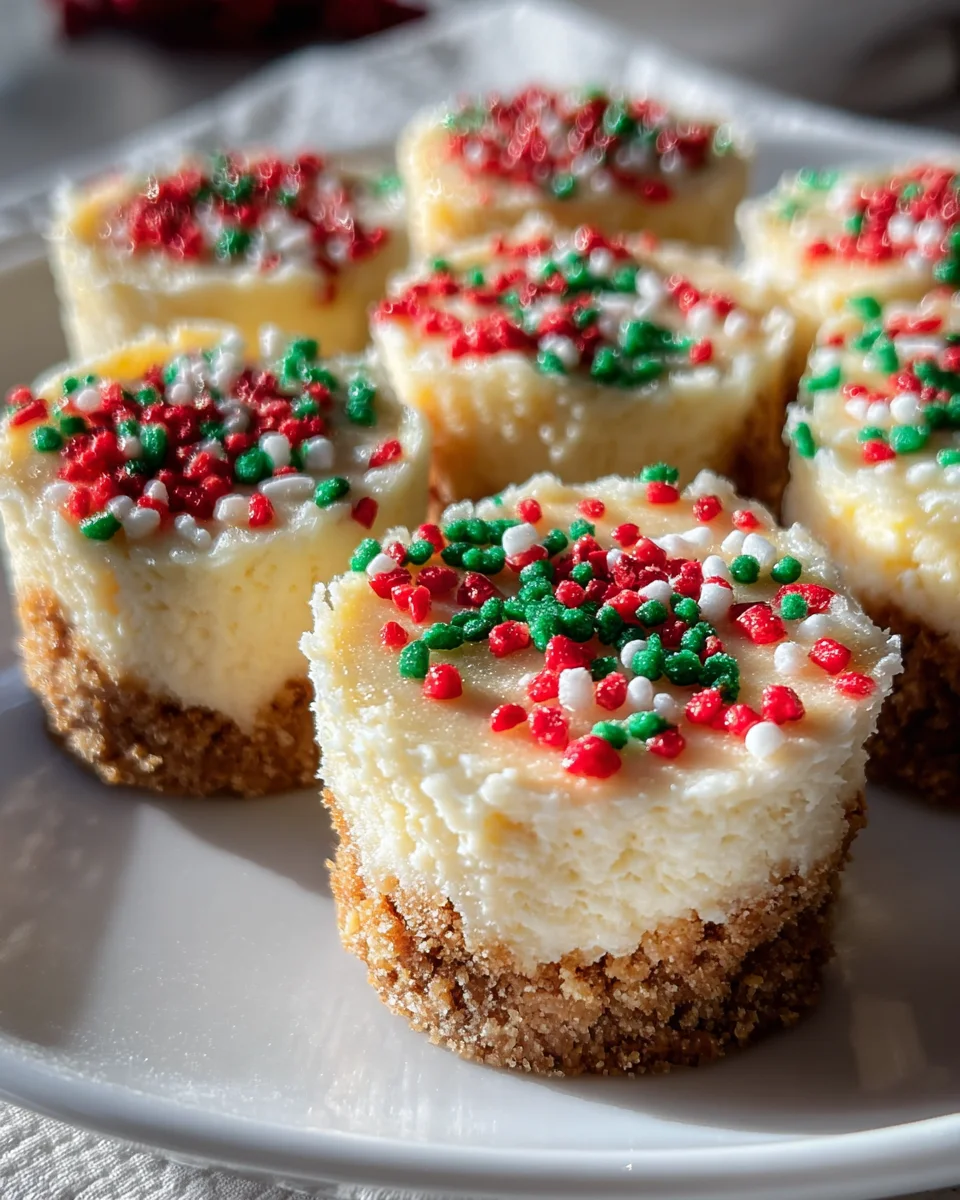
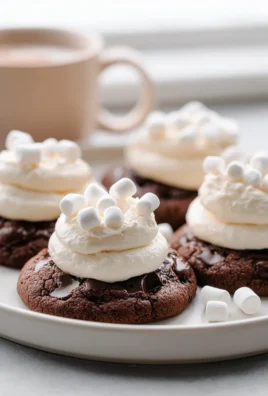
Mini Christmas Cheesecakes Recipe is more than just a dessert; it’s an invitation to elevate your holiday table with individual portions of pure, creamy joy. Imagine the delight on your guests’ faces as they are presented with their own perfectly sized, festive cheesecake, elegantly adorned with cranberries and a delicate sprig of rosemary. No messy slicing, no fuss – just elegant, effortless indulgence that captures the very essence of Christmas celebration in every delightful bite.
While cheesecake itself boasts a rich history dating back to ancient Greece, its modern evolution into a beloved holiday staple, especially in convenient mini forms, speaks volumes about its enduring appeal. People adore cheesecakes for their luscious, velvety texture, the delightful balance of sweet and tangy flavors, and that satisfying crunch from the biscuit base. For the festive season, transforming this classic into a mini version makes it incredibly practical and charming for any gathering.
What makes this Mini Christmas Cheesecakes Recipe truly special?
It’s the perfect blend of traditional holiday flavors with the unmatched convenience of individual servings. These delightful treats are ideal for entertaining, ensuring everyone gets a beautiful, personal dessert without the usual hassle of serving. I’m thrilled to share a recipe that promises to be a memorable and much-loved addition to your holiday spread, bringing smiles and delicious satisfaction to all.
Ingredients:
- For the Graham Cracker Crust:
- 1 ½ cups (about 10-12 full sheets) graham cracker crumbs (finely crushed)
- ¼ cup granulated sugar
- ½ teaspoon ground cinnamon (optional, but highly recommended for a festive touch)
- 6 tablespoons unsalted butter, melted
- For the Cheesecake Filling:
- 3 (8-ounce) packages full-fat cream cheese, softened to room temperature
- 1 cup granulated sugar
- 2 large eggs, at room temperature
- 1 teaspoon pure vanilla extract
- ¼ teaspoon salt
- 2 tablespoons heavy cream or sour cream, at room temperature (this adds extra richness and creaminess)
- For the Festive Toppings & Garnishes (for your Mini Christmas Cheesecakes Recipe):
- 1 cup heavy whipping cream, very cold
- 2 tablespoons powdered sugar
- ½ teaspoon pure vanilla extract
- Fresh cranberries, for decoration
- Fresh mint leaves, for decoration
- White chocolate, shaved or melted for drizzling (optional)
- Red and green festive sprinkles (optional)
- Confectioners’ sugar, for dusting (optional, for a “snowy” effect)
Phase 1: Preparing the Festive Crust
- Preheat Your Oven and Prepare Your Muffin Tins: Before we dive into the delicious details, let’s get the oven ready. Preheat your oven to 325°F (160°C). This temperature is ideal for baking cheesecakes gently, preventing cracks and ensuring a smooth texture. Next, prepare two standard 12-cup muffin tins by lining them with paper cupcake liners. These liners are absolutely essential for easily removing your delicate mini cheesecakes once they are baked and chilled. You’ll want to make sure they fit snugly. If you only have one muffin tin, you can bake in batches, but ensure the second batch of batter is kept refrigerated until ready to go into the oven.
-
Crush the Graham Crackers: Now, for the foundation of our delightful Mini Christmas Cheesecakes Recipe – the crust! Take your graham crackers and crush them until they are very fine crumbs. You have a couple of excellent options here:
- Food Processor Method: The quickest and easiest way is to break the graham crackers into pieces and pulse them in a food processor until you have a fine, even crumb. This ensures a consistent texture, which is key for a sturdy crust.
- Ziploc Bag Method: If you don’t have a food processor, no worries! Place the graham cracker sheets into a large, sturdy resealable plastic bag. Seal it, pressing out as much air as possible. Then, use a rolling pin or the bottom of a heavy skillet to crush the crackers until they are finely ground. Make sure there are no large chunks left; finer crumbs create a more cohesive crust.
You should aim for about 1 ½ cups of these fine crumbs.
- Combine Dry Crust Ingredients: In a medium-sized mixing bowl, combine the finely crushed graham cracker crumbs, ¼ cup of granulated sugar, and the optional but highly recommended ½ teaspoon of ground cinnamon. The cinnamon adds a wonderfully warm, festive aroma and flavor that perfectly complements the rich cheesecake and really enhances the “Christmas” aspect of our Mini Christmas Cheesecakes Recipe. Stir these dry ingredients together thoroughly with a spoon or whisk until they are well combined. You want to ensure the sugar and cinnamon are evenly distributed amongst the crumbs.
- Add Melted Butter: Next, pour the 6 tablespoons of melted unsalted butter into the dry crumb mixture. Using unsalted butter allows you to control the overall saltiness of the dish. Stir everything together with a fork until all the crumbs are moistened and resemble wet sand. This might take a minute or two of persistent mixing, but it’s important that every crumb gets coated with butter. The butter acts as the binding agent, holding the crust together.
- Form the Crusts: Spoon about 1 to 1 ½ tablespoons of the graham cracker mixture into the bottom of each prepared cupcake liner. Using the back of a spoon, your fingers, or a small tamper (like the bottom of a shot glass or a spice jar), press the crumbs firmly and evenly into the bottom of each liner. The goal here is a compact, uniform crust. If it’s too loose, it won’t hold together well when you try to eat your Mini Christmas Cheesecakes. Pressing firmly helps create a nice, solid base that can support the creamy cheesecake filling.
- Pre-bake the Crusts (Optional but Recommended): While some recipes skip this step for mini cheesecakes, I find that a quick pre-bake truly sets the crust and prevents it from becoming soggy. Place the muffin tins with the pressed crusts into your preheated 325°F (160°C) oven for 5 minutes. This brief baking time helps to crisp up the crust slightly and solidify the butter, ensuring it remains firm. After 5 minutes, remove the tins from the oven and set them aside to cool slightly while you prepare the cheesecake filling. You can even pop them in the refrigerator for a few minutes to speed up the cooling process.
Phase 2: Crafting the Creamy Cheesecake Filling
- Ensure Room Temperature Ingredients: This is arguably one of the most critical steps for achieving a perfectly smooth and lump-free cheesecake filling. It’s imperative that your three 8-ounce packages of full-fat cream cheese, two large eggs, and two tablespoons of heavy cream (or sour cream) are all at room temperature. If they are cold, they won’t incorporate smoothly, leading to lumps in your batter and potentially an overmixed cheesecake, which can cause cracks. To quickly soften cream cheese, unwrap it and microwave it for 15-20 seconds on low power, checking frequently. For eggs, place them in a bowl of warm water for 5-10 minutes.
- Cream the Cream Cheese and Sugar: In a large mixing bowl, using an electric mixer (either a stand mixer with the paddle attachment or a hand mixer), beat the softened cream cheese on medium speed for about 2-3 minutes until it is completely smooth and fluffy, with no lumps whatsoever. Stop the mixer occasionally to scrape down the sides and bottom of the bowl with a rubber spatula. This ensures everything gets evenly mixed. Then, gradually add the 1 cup of granulated sugar, continuing to beat on medium speed for another 2-3 minutes. The mixture should become light, airy, and well combined. This step is crucial for dissolving the sugar crystals into the cream cheese, leading to a smooth texture in your finished Mini Christmas Cheesecakes.
- Add Eggs, One at a Time: Reduce the mixer speed to low. Add the eggs, one at a time, beating just until each egg is incorporated before adding the next. The key here is to avoid overmixing once the eggs are added. Overmixing introduces too much air into the batter, which can cause the cheesecake to puff up too much during baking and then collapse, leading to cracks. Scrape down the sides of the bowl after each egg addition to ensure everything is fully combined.
- Incorporate Vanilla, Salt, and Cream: With the mixer still on low speed, add the 1 teaspoon of pure vanilla extract, ¼ teaspoon of salt, and 2 tablespoons of room temperature heavy cream (or sour cream). Mix just until these ingredients are fully combined. Again, avoid overmixing. The vanilla adds a beautiful aromatic depth, the salt balances the sweetness, and the heavy cream or sour cream contributes to an incredibly rich and velvety texture that really elevates these Mini Christmas Cheesecakes. Once everything is just combined, turn off the mixer. Give the batter one final scrape down with your spatula to catch any unmixed bits from the bottom. The batter should be incredibly smooth and luscious.
Phase 3: Baking and Chilling Your Mini Christmas Cheesecakes
- Fill the Liners with Batter: Carefully spoon or scoop the cheesecake batter into each of the prepared graham cracker crusts in the muffin tins. Fill each liner about ¾ full. You can use a small cookie scoop for even portions, or simply spoon it in. Ensure the tops are relatively even, but don’t worry about perfection just yet. Gently tap the muffin tins a few times on your counter to release any trapped air bubbles from the batter. This helps prevent large air pockets in the finished cheesecake.
- Prepare the Water Bath (Bain-Marie): While a full-sized cheesecake almost always requires a water bath to bake evenly and prevent cracks, for mini cheesecakes, you have a slight variation that still provides excellent results. Instead of placing the muffin tins directly in water, we’ll create a humid environment in the oven. Place a shallow baking pan (like a roasting pan or a 9×13 inch baking dish) on the bottom rack of your preheated oven. Carefully pour about 1 inch of hot water into this pan. The steam generated from this hot water will create a moist environment in the oven, which is essential for baking creamy, crack-free cheesecakes. This technique is especially helpful for small individual cheesecakes.
- Bake the Mini Cheesecakes: Carefully place your muffin tins (with the filled cheesecake batter) on the middle rack of your oven, above the pan of hot water. Bake for 18-22 minutes. The baking time can vary slightly depending on your oven. You’ll know they are done when the edges appear set, and the centers are mostly set but still have a slight jiggle to them when you gently shake the pan. They will continue to set as they cool. Avoid overbaking, as this is a common cause of cracks. The tops should be light, not browned.
- Cooling Process: Once baked, turn off the oven but leave the cheesecakes inside with the oven door ajar for about 10-15 minutes. This gradual cooling process helps prevent sudden temperature changes that can lead to cracks. After this initial cooling, remove the muffin tins from the oven and place them on a wire rack to cool completely to room temperature. This can take anywhere from 1 to 2 hours. Patience is a virtue here!
- The All-Important Chill: Once the Mini Christmas Cheesecakes have reached room temperature, carefully transfer the muffin tins to the refrigerator. Cover them loosely with plastic wrap. Chill them for at least 4 hours, but preferably overnight. This extended chilling time is absolutely crucial for the cheesecake to firm up, develop its full flavor, and achieve that iconic dense, creamy texture we all love. Do not rush this step; it truly makes all the difference in the final product of your Mini Christmas Cheesecakes Recipe.
Phase 4: Festive Toppings and Decoration for Your Mini Christmas Cheesecakes
- Make the Vanilla Whipped Cream: When your Mini Christmas Cheesecakes are thoroughly chilled and you’re ready to serve, it’s time to prepare the dreamy, cloud-like topping. In a very cold mixing bowl (you can chill the bowl and whisk attachment in the freezer for 10-15 minutes beforehand), combine the 1 cup of very cold heavy whipping cream, 2 tablespoons of powdered sugar, and ½ teaspoon of pure vanilla extract. Using an electric mixer, beat on medium-high speed until stiff peaks form. Be careful not to overbeat, or you’ll end up with butter! The whipped cream should be light, airy, and hold its shape beautifully.
- Remove Cheesecakes from Liners: Gently peel away the paper liners from each chilled mini cheesecake. They should come off quite easily, revealing your perfectly formed, creamy creations. If any seem a bit sticky, you can run a thin knife around the edge of the liner before peeling.
-
Decorate Your Mini Christmas Cheesecakes: Now for the fun part – making these truly festive!
- Whipped Cream Dollop: Use a spoon or a piping bag fitted with a star tip to place a generous dollop of the freshly whipped cream on top of each cheesecake. The contrast of the white cream against the creamy cheesecake looks wonderfully inviting.
- Cranberry & Mint Garnish: Arrange a few fresh cranberries on top of the whipped cream. The vibrant red of the cranberries provides that perfect pop of Christmas color. Tuck a small, fresh mint leaf (or a few tiny sprigs) alongside the cranberries to add a touch of green and a fresh aroma. This combination instantly evokes a festive holiday feel, truly embodying the “Mini Christmas Cheesecakes Recipe.”
- Optional White Chocolate Drizzle: For an extra touch of elegance and sweetness, you can melt some white chocolate (either in a double boiler or carefully in the microwave) and drizzle it artfully over the cranberries and cream. This adds a beautiful snowy effect.
- Optional Festive Sprinkles: If you’re making these for children or just love extra sparkle, scatter a few red and green festive sprinkles over the whipped cream. They add a playful touch.
- Dusting of Confectioners’ Sugar: For a final, delicate touch, you can lightly dust the finished Mini Christmas Cheesecakes with confectioners’ sugar just before serving. This creates a beautiful “fresh snow” effect, making them even more enchanting for your holiday table.
Present your beautifully decorated Mini Christmas Cheesecakes on a festive platter. These are not just desserts; they are edible decorations that will bring joy to any holiday gathering. Enjoy the fruits of your labor!
Conclusion:
And there you have it, my friends! We’ve journeyed through the delightful process of creating what I truly believe will become a staple in your holiday baking repertoire. This isn’t just another dessert; it’s an experience, a moment of joy wrapped up in a perfectly portioned, creamy delight. From the first bite to the last, these mini cheesecakes are designed to impress, to comfort, and to bring a smile to everyone’s face, making them an absolute must-try for your festive celebrations.
What makes this particular creation so special, you ask? Well, beyond the undeniable deliciousness, it’s the sheer elegance and convenience that sets it apart. Imagine a bustling holiday gathering; instead of struggling to cut and serve a large, messy cheesecake, you simply present a tray of these individual masterpieces. Each guest gets their own perfect serving, no fuss, no mess, just pure, unadulterated enjoyment. The vibrant colors of the festive toppings, the delicate crumble of the crust, and the incredibly smooth, rich filling create a symphony of textures and flavors that are truly irresistible. I promise you, these cheesecakes are not just desserts; they are edible works of art that are surprisingly simple to master, even for novice bakers. The robust, creamy cheese filling combined with the subtle sweetness and the perfect tang creates a balanced flavor profile that appeals to all palates, making it a universal crowd-pleaser. It’s a recipe that delivers both visual appeal and gourmet taste with minimal effort.
One of my favorite things about this recipe is its versatility. While the base Mini Christmas Cheesecakes Recipe itself is a showstopper, there are countless ways to customize it to your heart’s content. For a classic holiday look, try topping them with fresh cranberries and a sprig of mint, or a generous dollop of homemade whipped cream dusted with edible glitter for that extra sparkle. If you’re a chocolate lover, a drizzle of melted dark chocolate or a sprinkle of chocolate shavings would be absolutely divine. Feeling adventurous? Consider a different crust! Instead of the traditional graham cracker, a crushed ginger snap cookie crust would add a delightful warmth and spice, perfectly complementing the creamy cheesecake, especially during the colder months. Or, for a truly decadent twist, use crushed Oreos for a cookies-and-cream vibe that kids and adults alike will adore. You could even infuse the cheesecake batter itself with a hint of peppermint extract for a refreshing holiday mint flavor, or a touch of eggnog for an even richer, seasonal treat. Don’t be afraid to experiment with different fruit compotes either – a homemade cherry or berry compote could add a wonderful burst of fresh flavor and color. The possibilities are truly endless, allowing you to tailor these mini delights to any occasion or preference.
Make Them Your Own and Share the Joy!
I genuinely encourage you to roll up your sleeves and give this recipe a try. You’ll find immense satisfaction in creating something so beautiful and delicious from scratch. Imagine the gasps of delight when your family and friends see these adorable, festive treats gracing your dessert table. They’re perfect for Christmas parties, holiday dinners, a cozy night in, or even as a thoughtful homemade gift for neighbors and loved ones. There’s something truly special about sharing homemade treats during the festive season, and these mini cheesecakes embody that spirit perfectly.
Your Baking Adventure Awaits!
So, what are you waiting for? Grab your ingredients, put on some festive music, and embark on this wonderful baking adventure. I am absolutely certain that once you taste these incredible mini cheesecakes, they will become a cherished part of your holiday traditions for years to come. And please, please, please, when you do make them, I would absolutely love to hear about your experience! Share your photos, your variations, and your triumphs with me. Tag me on social media or leave a comment below – your creativity inspires me, and I can’t wait to see your stunning creations. Happy baking, and may your holidays be filled with deliciousness and joy!
Mini Christmas Cheesecakes
Elevate your holiday table with individual Mini Christmas Cheesecakes. These perfectly sized, festive cheesecakes offer creamy joy, elegantly adorned with sprinkles, capturing the essence of Christmas in every bite.
Ingredients
Instructions
Important Information
Nutrition Facts (Per Serving)
It is important to consider this information as approximate and not to use it as definitive health advice.
Allergy Information
Please check ingredients for potential allergens and consult a health professional if in doubt.
Leave a Comment