
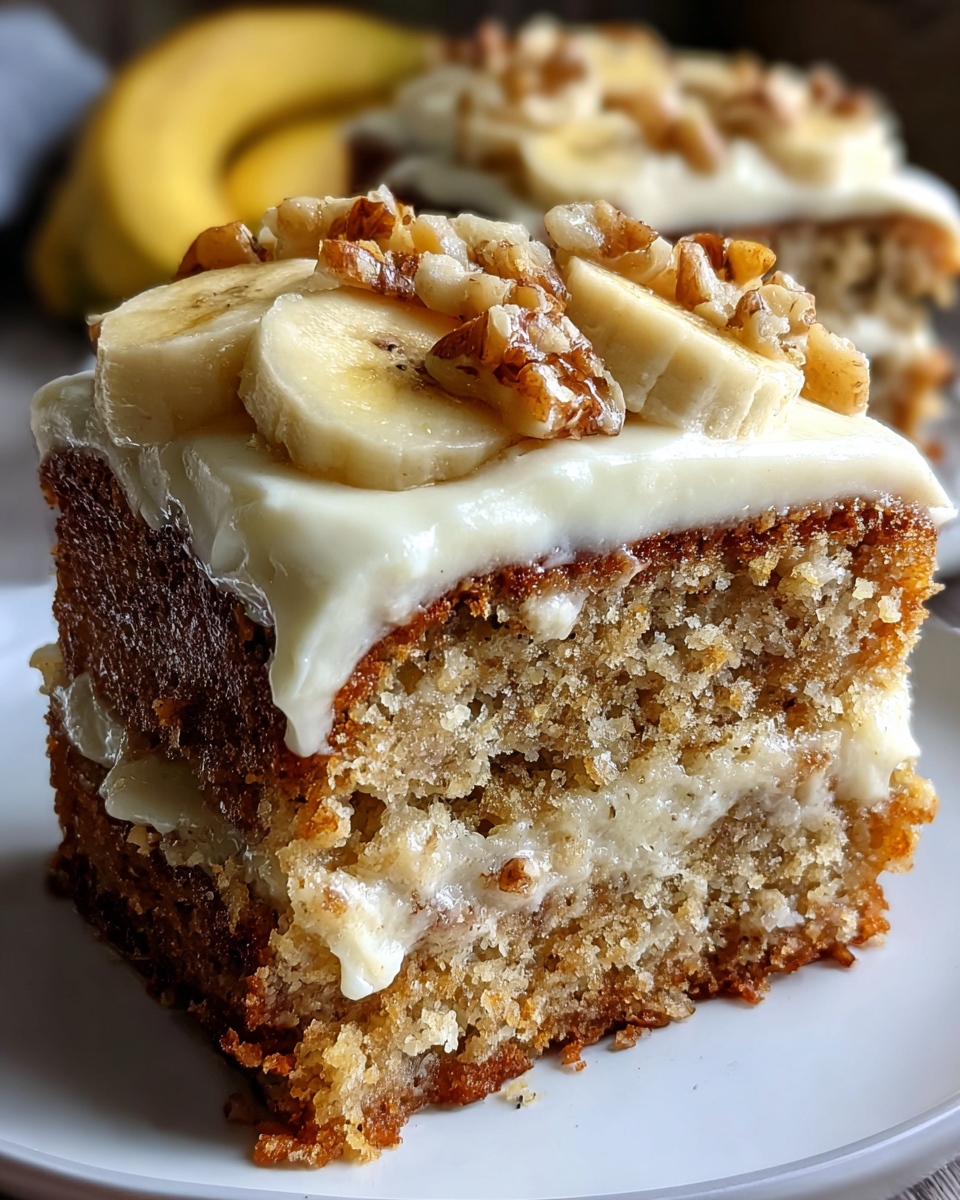
Recipe:best Banana Cake?utm_source=pinzk Have you ever craved a dessert that instantly transports you back to simpler times, a taste of pure comfort and nostalgic bliss? That’s precisely the magic of a truly exceptional banana cake. Forget dry, crumbly imitations – we’re talking about a moist, tender crumb bursting with rich banana flavor, perfectly balanced sweetness, and perhaps a hint of warm spice. This isn’t just any cake; it’s a culinary hug that promises to delight with every single bite.
The humble banana cake has a fascinating journey, often associated with the ingenuity of home bakers during economic downturns, particularly the Great Depression in America. Bananas, especially overripe ones, were too precious to waste, leading creative cooks to transform them into delicious, economical treats. This resourcefulness cemented banana cake as a beloved staple, a symbol of turning something seemingly past its prime into something utterly wonderful and indulgent. Its history is a testament to resourcefulness and the enduring joy of baking.
People adore this dish for countless reasons, making it a perennial favorite. Its inherent moistness, thanks to the mashed bananas, is legendary, ensuring a tender bite every time. The natural sweetness and depth of flavor from the fruit mean you often achieve a richer taste with less added sugar, contributing to its broad appeal. Whether enjoyed for breakfast, an afternoon snack, or a delightful dessert, a slice of the best Banana Cake offers a delightful blend of textures and an irresistible aroma that fills your kitchen with warmth. It’s easy to make, incredibly satisfying, and always a crowd-pleaser, delivering consistent joy to anyone lucky enough to try it.
Ingredients:
- For the Banana Cake:
- 2 ½ cups (300g) all-purpose flour, sifted
- 1 ½ teaspoons baking soda
- ¾ teaspoon salt
- 1 teaspoon ground cinnamon (optional, but highly recommended for depth of flavor!)
- 1 cup (226g) unsalted butter, softened to room temperature
- 1 ¾ cups (350g) granulated sugar
- 2 large eggs, at room temperature
- 1 teaspoon pure vanilla extract
- 1 cup (240ml) buttermilk, at room temperature
- 1 ½ cups (about 3-4 medium-sized) very ripe mashed bananas (about 360g), ideally with plenty of brown spots for maximum sweetness
- For the Cream Cheese Frosting:
- 12 ounces (340g) cream cheese, full-fat, softened to room temperature
- ½ cup (113g) unsalted butter, softened to room temperature
- 4 cups (480g) powdered sugar (confectioners’ sugar), sifted
- 1 teaspoon pure vanilla extract
- 1-2 tablespoons milk or cream (optional, for desired consistency)
Equipment You’ll Need:
- Two 9-inch round cake pans
- Parchment paper
- Stand mixer with paddle attachment, or a large mixing bowl and electric hand mixer
- Spatulas and whisks
- Measuring cups and spoons
- Wire cooling rack
- Large mixing bowls
Step-by-Step Instructions:
Preparation is Key!
- Preheat Your Oven and Prep Your Pans: First things first, let’s get that oven ready! I always preheat my oven to 350°F (175°C). While it’s warming up, prepare your two 9-inch round cake pans. This step is crucial for ensuring your beautiful cake doesn’t stick. I like to butter and flour them generously, making sure every inch of the bottom and sides is coated. For extra insurance against sticking, I then line the bottoms with parchment paper circles. This little trick makes transferring the cooled cakes so much easier, preventing any heartbreaking mishaps. After placing the parchment, I give it another light dusting of flour over the paper too. Trust me, a little extra effort here pays off immensely!
- Gather and Measure Your Ingredients: Before I even think about mixing, I always make sure all my ingredients are measured out and ready to go. This “mise en place” approach truly makes the baking process smoother and less stressful. It’s especially important to ensure your butter, eggs, and buttermilk are at room temperature. This allows them to emulsify properly, creating a smooth, homogenous batter that traps air beautifully, leading to a much lighter and fluffier cake. Cold ingredients can result in a lumpy batter and a denser cake, which we definitely don’t want for the best banana cake experience! For the bananas, make sure they are very ripe, with plenty of brown spots; these are the sweetest and most flavorful. Mash them well with a fork until mostly smooth, but a few small lumps are perfectly fine and add character.
Creating the Ultimate Banana Cake Batter:
Mixing the Dry Ingredients:
- Whisk Together the Dry Components: In a medium-sized bowl, I combine the sifted all-purpose flour, baking soda, salt, and cinnamon (if you’re using it – and I truly hope you do, it adds such a lovely warmth!). Sifting the flour beforehand ensures there are no lumps and helps aerate it, contributing to a tender crumb. Give these ingredients a good whisk until they are thoroughly combined. This ensures that the leavening agents and flavorings are evenly distributed throughout the batter, so every bite of your banana cake is consistently delicious. Set this bowl aside for now.
Combining the Wet Ingredients:
- Cream the Butter and Sugar: In the large bowl of your stand mixer (or using an electric hand mixer), add the softened unsalted butter and granulated sugar. Beat them together on medium-high speed for about 3-5 minutes, or until the mixture is light, fluffy, and pale yellow. This creaming process is vital! It incorporates air into the butter and sugar, which creates pockets that expand in the oven, giving your cake its beautiful texture and rise. Scrape down the sides of the bowl often with a spatula to ensure everything is evenly mixed.
- Incorporate Eggs and Vanilla: Reduce the mixer speed to medium-low. Add the eggs, one at a time, beating well after each addition until just combined. Don’t rush this step; allow each egg to fully integrate before adding the next. Once the eggs are in, stir in the pure vanilla extract. The mixture might look a little curdled at this point, but don’t worry, that’s completely normal and will smooth out as you add the other ingredients. Scrape down the bowl one last time to make sure all the eggy goodness is incorporated.
- Add the Mashed Bananas: Now for the star ingredient! Gently fold in the mashed ripe bananas into the wet mixture. Mix until just combined. You’ll notice the wonderful aroma of bananas already starting to fill your kitchen – a promise of the deliciousness to come with this truly best banana cake recipe!
Bringing It All Together:
- Alternating Dry and Wet Ingredients: This is where the magic happens! With the mixer on low speed, begin adding the dry ingredient mixture to the wet ingredients, alternating with the buttermilk. I typically add about one-third of the dry ingredients, mix until just incorporated, then half of the buttermilk, mix again, another third of the dry, the remaining buttermilk, and finally the last third of the dry ingredients.
- Mix Until Just Combined: The golden rule here is to mix until just combined. As soon as you no longer see streaks of dry flour, stop mixing! Overmixing develops the gluten in the flour, which can lead to a tough, dense cake. We want a moist, tender, and incredibly flavorful banana cake, so resist the urge to keep beating! A few small lumps of batter are much better than an overmixed, tough cake. Scrape down the bowl one final time with a spatula to catch any hidden dry spots at the bottom or sides.
Baking Your Banana Cake to Perfection:
- Divide and Bake: Evenly divide the cake batter between your two prepared 9-inch round cake pans. To ensure even baking and level cakes, I often use a kitchen scale to weigh the batter in each pan. Tap the pans gently on the counter a couple of times to release any large air bubbles. Place them in your preheated 350°F (175°C) oven.
- Baking Time and Doneness: Bake for 28-35 minutes. Baking times can vary slightly depending on your oven, so I recommend keeping a close eye on them. The cakes are done when a wooden skewer or toothpick inserted into the center comes out clean or with just a few moist crumbs attached. The tops should be golden brown and spring back lightly when gently pressed.
- Cooling the Cakes: Once baked, remove the cakes from the oven and let them cool in their pans on a wire rack for about 10-15 minutes. This allows them to firm up slightly before you attempt to invert them. After this initial cooling period, carefully invert the cakes onto the wire rack, peel off the parchment paper, and let them cool completely. It’s absolutely crucial that the cakes are completely cool before you even think about frosting them. Trying to frost a warm cake will result in a melty, messy frosting and a frustrating experience. This can take anywhere from 1.5 to 2 hours at room temperature, or you can speed it up by placing them in the fridge for about 30-45 minutes once they’re no longer hot to the touch.
Crafting the Cream Cheese Frosting:
- Prepare Your Frosting Ingredients: Just like with the cake batter, ensuring your cream cheese and butter are at proper room temperature is paramount for a smooth, luscious cream cheese frosting. If they’re too cold, you’ll end up with lumpy frosting, which no one wants on their best banana cake!
- Cream the Cream Cheese and Butter: In the bowl of your stand mixer fitted with the paddle attachment (or using an electric hand mixer), beat the softened cream cheese and unsalted butter together on medium speed for about 2-3 minutes. You want this mixture to be super creamy, smooth, and completely free of lumps. Scrape down the sides of the bowl frequently to ensure everything is thoroughly combined. This creates the essential fluffy base for our frosting.
- Gradually Add Powdered Sugar: Reduce the mixer speed to low. Gradually add the sifted powdered sugar, one cup at a time, mixing until fully incorporated after each addition. Adding it slowly prevents a huge cloud of sugar from erupting in your kitchen! Once all the sugar is in, increase the speed to medium-high and beat for another 2-3 minutes until the frosting is light, fluffy, and beautifully smooth.
- Stir in Vanilla and Adjust Consistency: Finally, add the pure vanilla extract and beat for another 30 seconds to combine. At this point, I assess the frosting’s consistency. If it seems too thick for spreading, I’ll add milk or cream, one tablespoon at a time, beating after each addition until I reach the perfect, spreadable consistency. Remember, you want it to be thick enough to hold its shape but soft enough to glide smoothly over the cake. This cream cheese frosting is the perfect complement to the moist banana cake, striking a wonderful balance of sweet and tangy.
Assembling Your Masterpiece:
- Level the Cake Layers (Optional but Recommended): If your cake layers have domed tops, I recommend using a serrated knife or a cake leveler to gently slice off the domes, creating flat surfaces. This makes for a more stable and professional-looking cake. You can snack on the trimmed bits – a chef’s perk!
- Stack and Frost the Layers: Place one cooled cake layer on your serving plate or cake stand. Spread about 1 to 1 ½ cups of cream cheese frosting evenly over the top, reaching close to the edges. Gently place the second cake layer on top, lining it up as best you can.
- Apply the Crumb Coat: Now, apply a thin layer of frosting all over the top and sides of the entire cake. This is called a “crumb coat,” and its purpose is to trap any loose crumbs, preventing them from mixing into your final layer of frosting. Don’t worry about perfection here; it’s just the base!
- Chill the Crumb-Coated Cake: Transfer the crumb-coated cake to the refrigerator for about 20-30 minutes. This chilling time allows the crumb coat to firm up, making the final frosting much easier and cleaner.
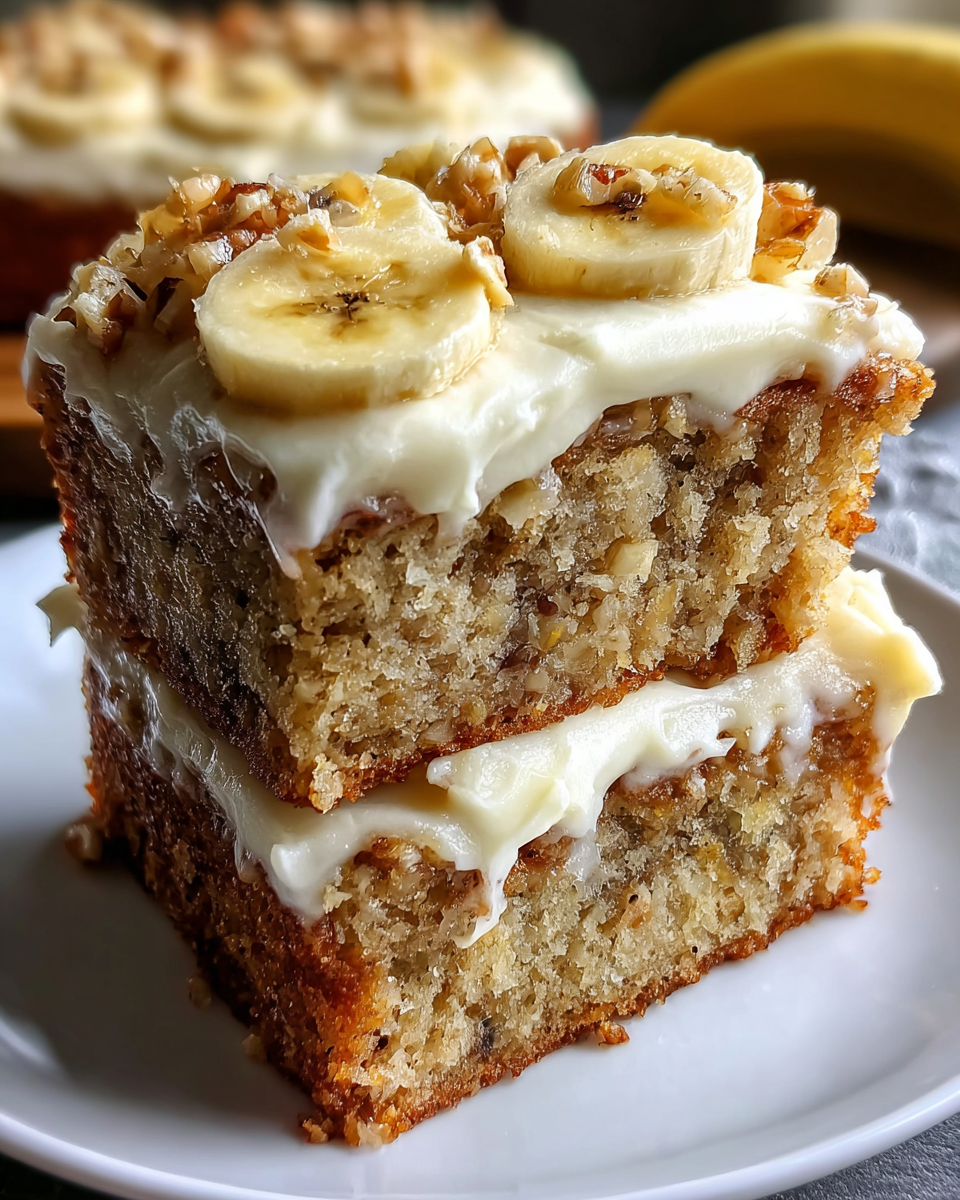
- Apply the Final Layer of Frosting: Once the crumb coat is firm, remove the cake from the refrigerator. Apply the remaining cream cheese frosting to the top and sides of the cake. Use an offset spatula or a bench scraper to smooth the frosting to your desired finish. You can create decorative swirls or a perfectly smooth surface – it’s your artistic choice! For a truly “best banana cake” presentation, sometimes I sprinkle a little extra cinnamon or finely chopped walnuts on top.
- Serve and Store: Your beautiful, moist, and utterly delicious banana cake is now ready to be enjoyed! Slice into generous pieces and serve. Leftovers, if there are any (which is rare in my house!), should be stored in an airtight container in the refrigerator due to the cream cheese frosting. Allow it to come to room temperature for about 15-20 minutes before serving for the best flavor and texture experience. Enjoy every single bite of this incredible homemade treat!
Conclusion:
And there you have it, my friends – the journey to baking what I truly believe is the most exquisite banana cake has reached its delicious culmination! I know you’ve read through the steps, imagined the aromas filling your kitchen, and perhaps even started gathering your ingredients. Now, it’s time for the final push, the ultimate encouragement to dive headfirst into this truly rewarding baking experience. This isn’t just another recipe; it’s a promise of pure, unadulterated comfort and joy in every single bite. We’re talking about a cake so incredibly moist it practically melts in your mouth, bursting with the sweet, caramelized essence of ripe bananas, perfectly balanced with subtle hints of spice. It’s the kind of cake that evokes childhood memories, brightens a rainy afternoon, and becomes an instant star at any gathering. Its simplicity belies a depth of flavor that will genuinely surprise and delight you, and I can confidently say that after trying this, you’ll understand why I’m so passionate about it.
What makes this particular recipe an absolute must-try, you ask? Well, it’s a harmonious blend of several crucial factors. First, the texture – it’s consistently tender and incredibly fluffy, never dry or crumbly. Then there’s the phenomenal flavor, which truly celebrates the natural sweetness of bananas without being cloyingly sweet. It’s robust, comforting, and utterly satisfying. Beyond that, it’s remarkably forgiving for bakers of all skill levels. Whether you’re a seasoned pro or just starting your baking adventure, you’ll find the process straightforward and the results consistently fantastic. It’s truly a testament to how simple ingredients can create something extraordinary with just a little love and the right guidance.
Elevate Your Banana Cake Experience
Now, let’s talk about taking this masterpiece to the next level, or simply adapting it to your personal preferences. While a slice of this banana cake on its own is absolute perfection, there are so many delightful ways to enjoy it. For a classic touch, I absolutely adore serving it with a generous smear of tangy cream cheese frosting – that sweet and sour combination is a match made in heaven. Alternatively, a simple dusting of powdered sugar adds an elegant finish without overwhelming the inherent flavors of the cake. Imagine a warm slice, fresh from the oven, served with a scoop of vanilla bean ice cream melting slowly over its tender crumb, or a dollop of homemade whipped cream for an extra touch of indulgence. These are simple additions that transform a wonderful cake into an unforgettable dessert experience.
Beyond the classic pairings, don’t be afraid to experiment with variations during the baking process itself. Consider folding in a cup of chopped walnuts or pecans for a delightful textural contrast and nutty flavor. Chocolate chip lovers, rejoice! A handful of semi-sweet or dark chocolate chips will melt into gooey pockets of deliciousness throughout the cake, creating another layer of decadence. You could also try adding a pinch of freshly grated nutmeg alongside the cinnamon for an even warmer spice profile, or a touch of cardamom for an exotic twist. If you’re looking to turn this into a breakfast or brunch treat, consider baking it in a loaf pan for easier slicing and serving, perhaps even adding a crunchy streusel topping before baking. For a slightly different presentation, divide the batter into muffin tins and bake delightful banana muffins, perfect for grab-and-go treats or school lunchboxes. The versatility of this base recipe is truly boundless, allowing you to tailor it to any occasion or craving.
Your Turn to Bake and Share!
So, what are you waiting for? I wholeheartedly encourage you to roll up your sleeves, preheat your oven, and embark on this wonderful baking journey. Trust me, the aroma alone as this cake bakes will be enough to lift your spirits, and that first bite? Pure bliss. This isn’t just any banana cake; it’s truly the Recipe:best Banana Cake?utm_source=pinzk you’ll ever make, a recipe designed to bring joy and deliciousness to your kitchen. I am so excited for you to experience the magic firsthand. Once you’ve pulled your beautiful creation from the oven, shared it with loved ones, and savored every single morsel, please come back and share your experience with me! I absolutely love hearing from you. Did you add chocolate chips? Did you serve it with a special frosting? Did your family rave about it? Share your photos, your triumphs, and your delightful stories in the comments section below, or wherever you found this recipe. Your feedback and personal touches inspire me and enrich our baking community. Happy baking, my dear readers – may your kitchens be filled with warmth, your hearts with joy, and your plates with the most incredible banana cake imaginable!
Moist & Flavorful Banana Cake
A moist, tender banana cake bursting with rich banana flavor and balanced sweetness. This comforting dessert transforms overripe bananas into an irresistible treat, perfect for any occasion.
Ingredients
Instructions
Important Information
Nutrition Facts (Per Serving)
It is important to consider this information as approximate and not to use it as definitive health advice.
Allergy Information
Please check ingredients for potential allergens and consult a health professional if in doubt.
Leave a Comment