
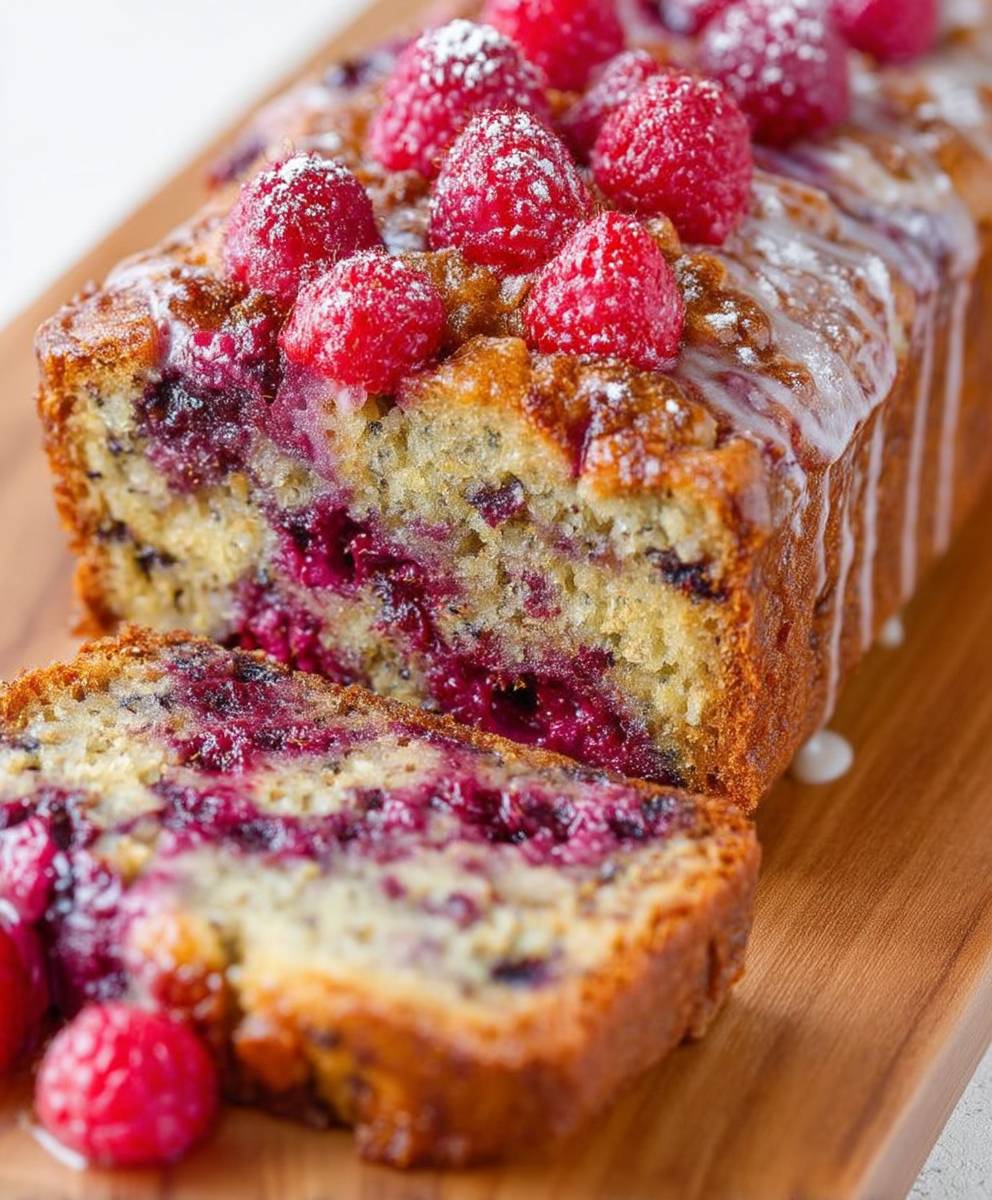
Raspberry Bread: Just the name conjures images of cozy mornings, the aroma of warm baking filling the air, and a slice of sweet, tangy goodness melting in your mouth. Have you ever experienced that perfect balance of sweet and tart in a single bite? That’s precisely what this recipe delivers, and trust me, it’s an experience you won’t soon forget.
While the exact origins of fruit bread are somewhat shrouded in history, the concept of incorporating fruits into baked goods dates back centuries. Think of the traditional fruitcakes enjoyed during the holidays, or the simple yet satisfying apple breads passed down through generations. Our Raspberry Bread builds upon this rich heritage, adding a vibrant twist with the inclusion of juicy, ripe raspberries.
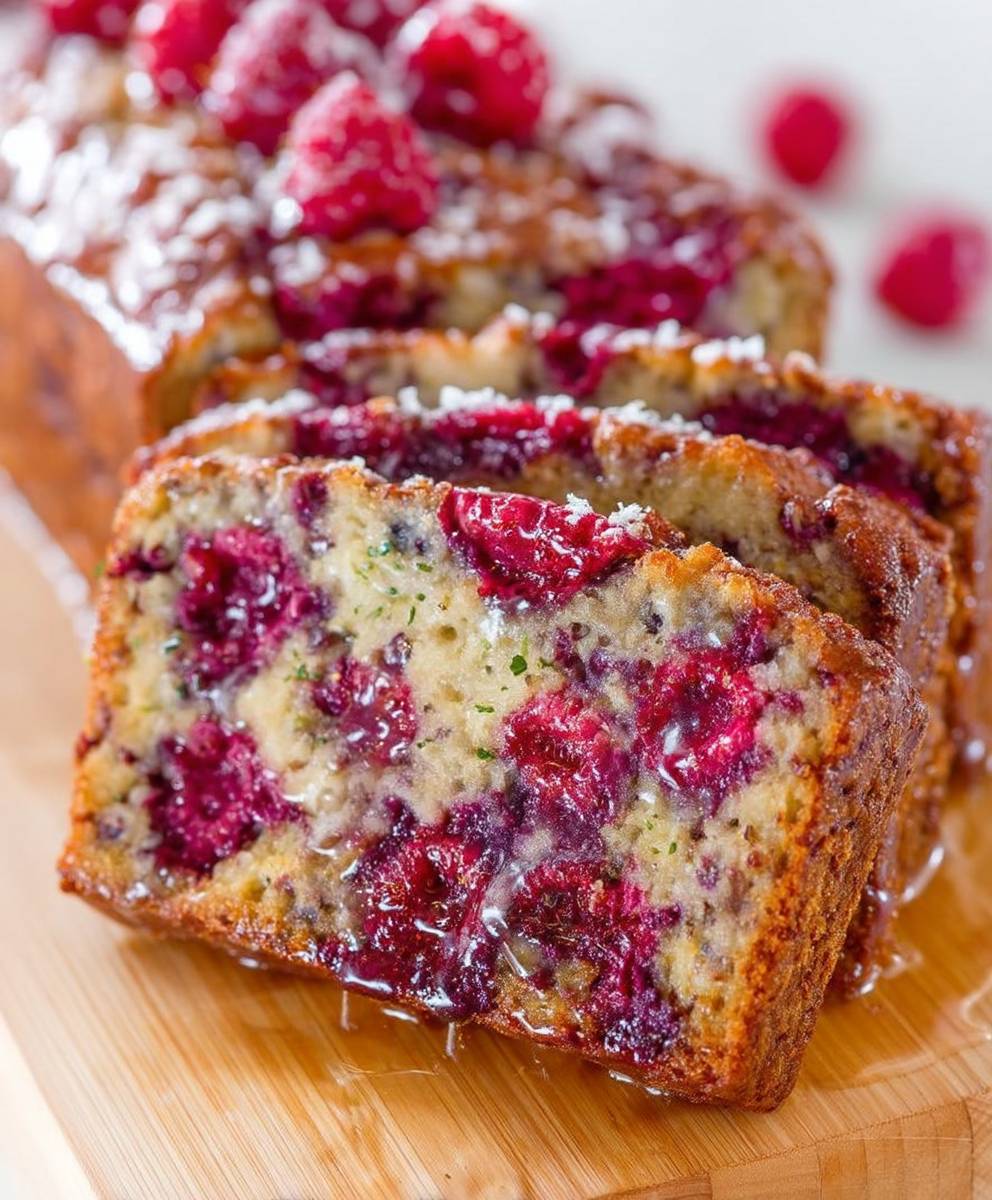
What makes this bread so irresistible? It’s the symphony of flavors and textures. The slight tang of the raspberries perfectly complements the sweetness of the bread, creating a delightful dance on your palate. The moist, tender crumb, studded with bursts of raspberry goodness, is simply divine. Plus, it’s incredibly easy to make! Whether you’re a seasoned baker or just starting out, this recipe is foolproof and guaranteed to impress. So, let’s get baking and create a loaf of pure raspberry bliss!
Ingredients:
- 3 cups all-purpose flour, plus more for dusting
- 1 teaspoon baking soda
- 1 teaspoon ground cinnamon
- 1/2 teaspoon salt
- 1 cup (2 sticks) unsalted butter, softened
- 1 3/4 cups granulated sugar
- 2 large eggs
- 1 teaspoon vanilla extract
- 1 cup sour cream
- 1/2 cup milk
- 2 cups fresh or frozen raspberries (if frozen, do not thaw)
- 1/4 cup all-purpose flour (for tossing with raspberries)
Preparing the Raspberry Bread Batter
- Preheat your oven and prepare your loaf pan. First things first, let’s get that oven preheated to 350°F (175°C). While it’s heating up, grease and flour a 9×5 inch loaf pan. I like to use a cooking spray that contains flour for extra insurance against sticking, but the classic butter and flour method works just as well. Make sure you get into all the corners!
- Whisk together the dry ingredients. In a large bowl, whisk together the 3 cups of all-purpose flour, baking soda, cinnamon, and salt. Whisking is important here to ensure the baking soda and cinnamon are evenly distributed throughout the flour. This will help your bread rise properly and have a consistent flavor. Set this bowl aside for now.
- Cream together the butter and sugar. In a separate, large mixing bowl (or the bowl of your stand mixer), cream together the softened butter and granulated sugar until light and fluffy. This usually takes about 3-5 minutes with an electric mixer. The mixture should be pale in color and almost doubled in volume. This step is crucial for incorporating air into the batter, which will contribute to a tender crumb. If you’re using a stand mixer, use the paddle attachment.
- Beat in the eggs and vanilla. Add the eggs one at a time, beating well after each addition. Make sure each egg is fully incorporated before adding the next. Then, stir in the vanilla extract. The vanilla adds a lovely warmth and enhances the other flavors in the bread.
- Combine the wet and dry ingredients. Gradually add the dry ingredients to the wet ingredients, alternating with the sour cream and milk. Begin and end with the dry ingredients. So, add about 1/3 of the dry ingredients, then 1/2 of the sour cream, then another 1/3 of the dry ingredients, then the remaining sour cream, and finally the last 1/3 of the dry ingredients. Mix until just combined. Be careful not to overmix the batter, as this can lead to a tough bread. Overmixing develops the gluten in the flour, which we want to avoid.
- Prepare the raspberries. In a small bowl, gently toss the raspberries with the 1/4 cup of all-purpose flour. This helps to prevent the raspberries from sinking to the bottom of the loaf during baking. The flour also absorbs some of the excess moisture from the raspberries, which can prevent the bread from becoming soggy.
- Fold in the raspberries. Gently fold the floured raspberries into the batter. Be careful not to crush the raspberries, as this will turn the batter pink and can make the bread a bit mushy. Just gently incorporate them until they are evenly distributed throughout the batter.
Baking the Raspberry Bread
- Pour the batter into the prepared loaf pan. Pour the batter into the prepared 9×5 inch loaf pan, spreading it evenly.
- Bake the bread. Bake in the preheated oven for 50-60 minutes, or until a wooden skewer inserted into the center comes out clean or with just a few moist crumbs attached. The baking time may vary depending on your oven, so it’s always a good idea to check the bread after about 50 minutes. If the top of the bread is browning too quickly, you can tent it with aluminum foil to prevent it from burning.
- Cool the bread. Let the bread cool in the pan for 10-15 minutes before transferring it to a wire rack to cool completely. This allows the bread to set up a bit and prevents it from breaking when you try to remove it from the pan.
Serving and Storing Your Raspberry Bread
- Slice and serve. Once the bread is completely cool, slice it and serve. It’s delicious on its own, or you can spread it with butter, cream cheese, or a dollop of whipped cream.
- Storing the bread. To store the bread, wrap it tightly in plastic wrap or place it in an airtight container. It will keep at room temperature for 2-3 days, or in the refrigerator for up to a week. You can also freeze the bread for longer storage. To freeze, wrap the bread tightly in plastic wrap and then in aluminum foil. It will keep in the freezer for up to 2-3 months. Thaw the bread overnight in the refrigerator before serving.
Tips for the Best Raspberry Bread
- Use room temperature ingredients. Using room temperature butter, eggs, and sour cream will help the batter come together more smoothly and evenly. This will result in a more tender and evenly baked bread.
- Don’t overmix the batter. Overmixing the batter can develop the gluten in the flour, which can lead to a tough bread. Mix the batter until just combined.
- Don’t overbake the bread. Overbaking the bread can make it dry. Check the bread after about 50 minutes and bake until a wooden skewer inserted into the center comes out clean or with just a few moist crumbs attached.
- Use fresh, high-quality raspberries. The quality of the raspberries will greatly affect the flavor of the bread. Use fresh, ripe raspberries for the best flavor. If you’re using frozen raspberries, don’t thaw them before adding them to the batter.
- Add a glaze (optional). For an extra touch of sweetness, you can add a simple glaze to the top of the bread. To make a glaze, whisk together 1 cup of powdered sugar with 2-3 tablespoons of milk or lemon juice until smooth. Drizzle the glaze over the cooled bread.
Variations
- Lemon Raspberry Bread: Add the zest of one lemon to the batter for a bright, citrusy flavor.
- Chocolate Chip Raspberry Bread: Add 1 cup of chocolate chips to the batter for a decadent treat.
- Nut Raspberry Bread: Add 1/2 cup of chopped nuts (such as walnuts or pecans) to the batter for added texture and flavor.
- Whole Wheat Raspberry Bread: Substitute 1 cup of the all-purpose flour with whole wheat flour for a healthier option.
Conclusion:
This Raspberry Bread recipe isn’t just another baked good; it’s a slice of pure joy, a burst of summer sunshine captured in every crumb. From the vibrant color to the tantalizing aroma that fills your kitchen, this bread is a sensory experience you won’t soon forget. I truly believe this recipe is a must-try for anyone who loves baking, raspberries, or simply wants to brighten their day with a delicious treat.
But why is it so special? It’s the perfect balance of sweet and tart, the moist and tender texture, and the sheer simplicity of the recipe. You don’t need to be a seasoned baker to achieve bakery-worthy results. This recipe is designed to be foolproof, ensuring that even beginners can create a stunning loaf that will impress family and friends. Plus, the fresh raspberries add a nutritional boost, making it a guilt-free indulgence.
Beyond its inherent deliciousness, this Raspberry Bread is incredibly versatile. Imagine serving warm slices with a dollop of whipped cream or a scoop of vanilla ice cream for a delightful dessert. It’s also fantastic toasted and spread with butter or cream cheese for a satisfying breakfast or brunch. For a truly decadent experience, try grilling a slice and topping it with mascarpone cheese and a drizzle of honey.
And the variations are endless! Feel free to experiment with different types of berries. Blueberries, blackberries, or even a mixed berry medley would work beautifully. You could also add a handful of chopped nuts, such as almonds or pecans, for extra crunch and flavor. A sprinkle of lemon zest would enhance the raspberry flavor and add a touch of brightness. For a richer flavor, consider using brown butter instead of melted butter. Or, if you’re feeling adventurous, try adding a swirl of raspberry jam to the batter before baking for an extra layer of raspberry goodness.
Serving Suggestions:
* Warm slices with whipped cream or ice cream
* Toasted with butter or cream cheese
* Grilled with mascarpone cheese and honey
* As a base for French toast
Variations:
* Substitute other berries like blueberries or blackberries
* Add chopped nuts for extra crunch
* Incorporate lemon zest for a brighter flavor
* Use brown butter for a richer taste
* Swirl in raspberry jam for an extra layer of flavor
I’m so excited for you to try this recipe and experience the magic of homemade Raspberry Bread for yourself. I’m confident that it will become a new favorite in your household.
So, gather your ingredients, preheat your oven, and get ready to bake a loaf of pure happiness. And most importantly, don’t forget to share your creations! I would absolutely love to see your photos and hear about your experiences with this recipe. Tag me on social media or leave a comment below to let me know how it turned out. Happy baking! I can’t wait to see your delicious Raspberry Bread creations!
Raspberry Bread: The Ultimate Guide to Baking Delicious Bread
Moist and delicious Raspberry Bread, bursting with fresh raspberries and a hint of cinnamon. Perfect for breakfast, brunch, or a sweet treat any time of day!
Ingredients
Instructions
Recipe Notes
- Use room temperature ingredients for a smoother batter.
- Don’t overmix the batter to avoid a tough bread.
- Don’t overbake the bread to prevent dryness.
- Use fresh, high-quality raspberries for the best flavor. If using frozen, do not thaw.
- Optional: Add a glaze by whisking together 1 cup powdered sugar with 2-3 tablespoons milk or lemon juice.
- Variations: Lemon Raspberry Bread (add lemon zest), Chocolate Chip Raspberry Bread (add chocolate chips), Nut Raspberry Bread (add chopped nuts), Whole Wheat Raspberry Bread (substitute 1 cup all-purpose flour with whole wheat flour).
Frequently Asked Questions
Printable Recipe Card
Want just the essential recipe details without scrolling through the article? Get our printable recipe card with just the ingredients and instructions.


Leave a Comment