
Salted Honey Pie – prepare to have your taste buds utterly captivated by a dessert that is both surprisingly simple and profoundly sophisticated. I remember the first time I encountered this marvelous creation; it was an instant love affair. This isn’t just just another pie; it’s an experience, a delicate dance between robust sweetness and a subtle, yet crucial, hint of salinity that elevates every single bite.
Originating from the creative kitchens of innovative American bakeries, particularly gaining prominence in recent years, this pie has quickly become a modern classic. It’s a testament to how simple, quality ingredients can be transformed into something truly extraordinary.
Why People Love This Dish: The Magic of Sweet and Salty
What truly makes people fall head over heels for this dish is the ingenious contrast: the rich, golden, almost caramel-like sweetness of honey perfectly balanced by a delicate sprinkle of sea salt that cuts through the richness, leaving a clean, satisfying finish. The texture is often a dreamy, almost custardy set that melts in your mouth, making it incredibly comforting yet elegant. If you’re looking to impress guests, or simply treat yourself to something truly special, baking your own Salted Honey Pie is a journey worth taking. I am thrilled to guide you through crafting this exceptional dessert, promising a result that is nothing short of spectacular.
Ingredients:
- For the Pie Crust: (I prefer a homemade all-butter crust for the best texture, but a good quality store-bought crust works beautifully for this Salted Honey Pie too!)
- 1 ½ cups (180g) all-purpose flour, plus more for dusting
- ½ teaspoon salt
- ½ cup (113g) unsalted butter, very cold and cut into ½-inch cubes
- ½ cup (120ml) ice water, plus more if needed
- Alternatively, one 9-inch store-bought pie crust, thawed if frozen.
- For the Salted Honey Filling:
- ¾ cup (255g) good quality honey (I recommend a rich clover or wildflower honey for the best, most complex flavor in your Salted Honey Pie)
- ½ cup (100g) granulated sugar
- ¼ cup (50g) packed light brown sugar
- ½ cup (113g) unsalted butter, melted and slightly cooled
- 3 large eggs, at room temperature
- 1 large egg yolk, at room temperature
- 1 tablespoon all-purpose flour or cornstarch (this helps prevent the filling from separating and gives a wonderfully stable, yet gooey, texture to your Salted Honey Pie)
- 1 teaspoon pure vanilla extract
- ½ teaspoon kosher salt (or fine sea salt)
- Optional: 1-2 tablespoons heavy cream, for an even richer and creamier custard (I sometimes add this for an extra touch of indulgence and depth to the Salted Honey Pie)
- For Finishing:
- Flaky sea salt, for sprinkling (this is absolutely crucial for the “Salted” aspect of our Salted Honey Pie, providing that delightful textural crunch and flavor contrast!)
Preparing Your Pie Crust: The Foundation of a Perfect Salted Honey Pie
- If You’re Making Homemade Pie Crust: Begin by combining the all-purpose flour and salt in a large mixing bowl. Whisk them together thoroughly. Add the very cold, cubed unsalted butter to the flour mixture. Using a pastry blender, your fingertips, or even a food processor (pulsing briefly), cut the butter into the flour until the mixture resembles coarse meal. You should still see some pea-sized pieces of butter throughout the mixture; this is a critical step for achieving a wonderfully flaky crust for your Salted Honey Pie. The cold butter creates pockets of steam during baking, which separate the layers of crust.
- Next, gradually add the ice water, 1 tablespoon at a time, mixing until the dough just begins to come together. Be very careful not to overmix, as excessive handling can develop the gluten too much, resulting in a tough crust. The dough should appear somewhat shaggy but cohesive enough to hold together when you squeeze a small portion in your hand.
- Turn the dough out onto a lightly floured surface and gently form it into a flat disk. Wrap the disk tightly in plastic wrap and refrigerate for at least 30 minutes. Ideally, I chill my dough for at least an hour, or even overnight, up to 2 days. Chilling the dough is an essential step; it allows the gluten to relax, making the dough easier to roll out, and firms up the butter, which contributes significantly to the flakiness of your Salted Honey Pie crust.
- Once adequately chilled, unwrap the dough and place it on a lightly floured surface. Roll the dough out evenly into a 12-inch circle, aiming for approximately ⅛-inch thickness. Carefully transfer the rolled dough into a 9-inch pie plate. Trim the edges, leaving about a ½-inch overhang. Fold this overhang under itself and then crimp the edges decoratively using your fingers or the tines of a fork. This not only makes your Salted Honey Pie look beautiful but also helps to contain the filling.
- Blind Baking the Crust: This step is paramount to prevent a soggy bottom for your Salted Honey Pie, especially with a moist filling like this one. Line the unbaked pie crust with parchment paper or aluminum foil and fill it with pie weights, dried beans, or uncooked rice. Bake in a preheated oven at 375°F (190°C) for 15-20 minutes, or until the edges of the crust are lightly golden brown.
- Carefully remove the weights and parchment paper/foil. Using a fork, prick the bottom of the crust several times. Return the crust to the oven and bake for another 5-10 minutes, or until the bottom is lightly golden and appears set. Remove the pre-baked crust from the oven and let it cool completely on a wire rack while you prepare the irresistible filling.
- If You’re Using a Store-Bought Pie Crust: Follow the package directions for pre-baking (often referred to as “blind baking”). Most store-bought crusts will also greatly benefit from this step to ensure a crisp, firm base for the rich, decadent Salted Honey Pie filling. After blind baking, ensure it cools completely before adding the filling.
Crafting the Irresistible Salted Honey Pie Filling
- Prepare Your Workstation and Oven: Preheat your oven to a precise 325°F (160°C). Make sure your pre-baked and cooled pie crust is resting comfortably in its pie plate, ready for its golden liquid gold. The success of your Salted Honey Pie truly hinges on a smooth, homogenous filling, so attention to detail here is key.
- In a large, heatproof bowl, combine the good quality honey, granulated sugar, and light brown sugar. I always emphasize using a honey with distinct character, such as a rich clover or a fragrant wildflower honey, because its nuanced flavor truly shines as the star of this Salted Honey Pie. Avoid anything too bland here!
- Place the bowl over a saucepan of simmering water, creating a gentle double boiler setup. Whisk the mixture gently and continuously until all the sugars are completely dissolved and the mixture is wonderfully warm, smooth, and runny. This usually takes about 5-7 minutes. Heating it gently ensures that the sugars dissolve without any risk of scorching, contributing significantly to the wonderfully silky-smooth texture we’re aiming for in our Salted Honey Pie filling. Once dissolved, remove the bowl from the heat.
- Stir the melted and slightly cooled unsalted butter into the warm honey-sugar mixture. Whisk until it is fully and seamlessly incorporated. The butter adds a luxurious richness and a beautiful, inviting gloss to the finished Salted Honey Pie.
- In a separate medium bowl, whisk together the three large eggs and the one large egg yolk until they are thoroughly combined and slightly frothy. It’s crucial that your eggs are at room temperature; this helps them to emulsify much better with the other ingredients, leading to a much smoother and more consistent custard for your Salted Honey Pie.
- Temper the Eggs – Do Not Skip This! This is a critical step to prevent the eggs from scrambling when they meet the warm honey mixture. Slowly, in a thin, steady stream, pour about half of the warm honey-butter mixture into the whisked eggs, whisking continuously and vigorously the entire time. This gradually raises the temperature of the eggs without cooking them, preparing them for the rest of the warm ingredients.
- Once half of the honey mixture has been incorporated into the eggs, pour the tempered egg mixture back into the remaining honey-butter mixture in the large bowl, whisking constantly until everything is thoroughly combined. You should now have a uniform, creamy, and beautifully consistent base for your Salted Honey Pie.
- Add the all-purpose flour or cornstarch, pure vanilla extract, and kosher salt to the filling mixture. Whisk everything exceptionally well until there are absolutely no lumps of flour or cornstarch remaining. The flour or cornstarch acts as a crucial stabilizer, preventing the filling from weeping and giving it that perfect, slightly gooey-yet-set consistency that defines an outstanding Salted Honey Pie. If you opted for heavy cream, now is the perfect time to whisk it in too.
- Strain the Filling (Optional, but Highly Recommended for Ultra-Smoothness): For an exceptionally silky, restaurant-quality smooth Salted Honey Pie, I always recommend passing the entire filling mixture through a fine-mesh sieve into another clean bowl. This extra step removes any potential tiny lumps from the flour or any minuscule bits of cooked egg that might have formed despite careful tempering. Trust me, the difference in texture is noticeable!
- Carefully pour the strained Salted Honey Pie filling into your cooled, pre-baked pie crust. To make transferring the pie into and out of the oven easier and to catch any potential drips, place the pie plate onto a sturdy baking sheet.
Baking Your Salted Honey Pie to Golden Perfection
- Carefully transfer the baking sheet with the Salted Honey Pie to your preheated 325°F (160°C) oven. Be gentle to avoid sloshing the filling!
- Bake the Salted Honey Pie for approximately 45-60 minutes. Please note that baking time can vary significantly depending on the calibration of your oven and the exact depth of your pie plate, so it’s essential to keep a close eye on it. The Salted Honey Pie is done when the edges of the filling are set and appear slightly puffed, but the very center still has a slight, delicate wobble when you gently shake the pie plate. It should develop a gorgeous golden-brown color around the edges and a rich, amber hue in the center.
- Monitor Crust Browning: If you notice that the pie crust edges are starting to brown too quickly before the filling is fully set, don’t fret! Simply create a loose tent of aluminum foil and carefully place it over the edges of the pie. This prevents them from burning while allowing the filling to continue cooking to perfection. This is a common and very effective trick for any custard-based pie like our Salted Honey Pie.
- To confirm doneness, you can carefully insert a thin knife or a wooden skewer into the filling about an inch from the edge. If it comes out mostly clean, with perhaps just a few moist crumbs clinging to it, your Salted Honey Pie is likely done. Remember, the center will continue to set and firm up considerably as the pie cools. It’s better to err on the side of a slight wobble than to overbake, which can lead to a dry, cracked filling.
Cooling, Finishing, and Serving Your Exquisite Salted Honey Pie
- Once your magnificent Salted Honey Pie is baked to perfection, carefully remove it from the oven (still on its baking sheet) and place it on a wire rack to cool completely at room temperature. This cooling period is absolutely crucial for the filling to fully set and achieve that perfect, sliceable, yet tender consistency. Resist the strong urge to cut into it too early! It typically needs at least 3-4 hours, or even longer, to firm up properly. If you cut it prematurely, the filling might still be too runny.
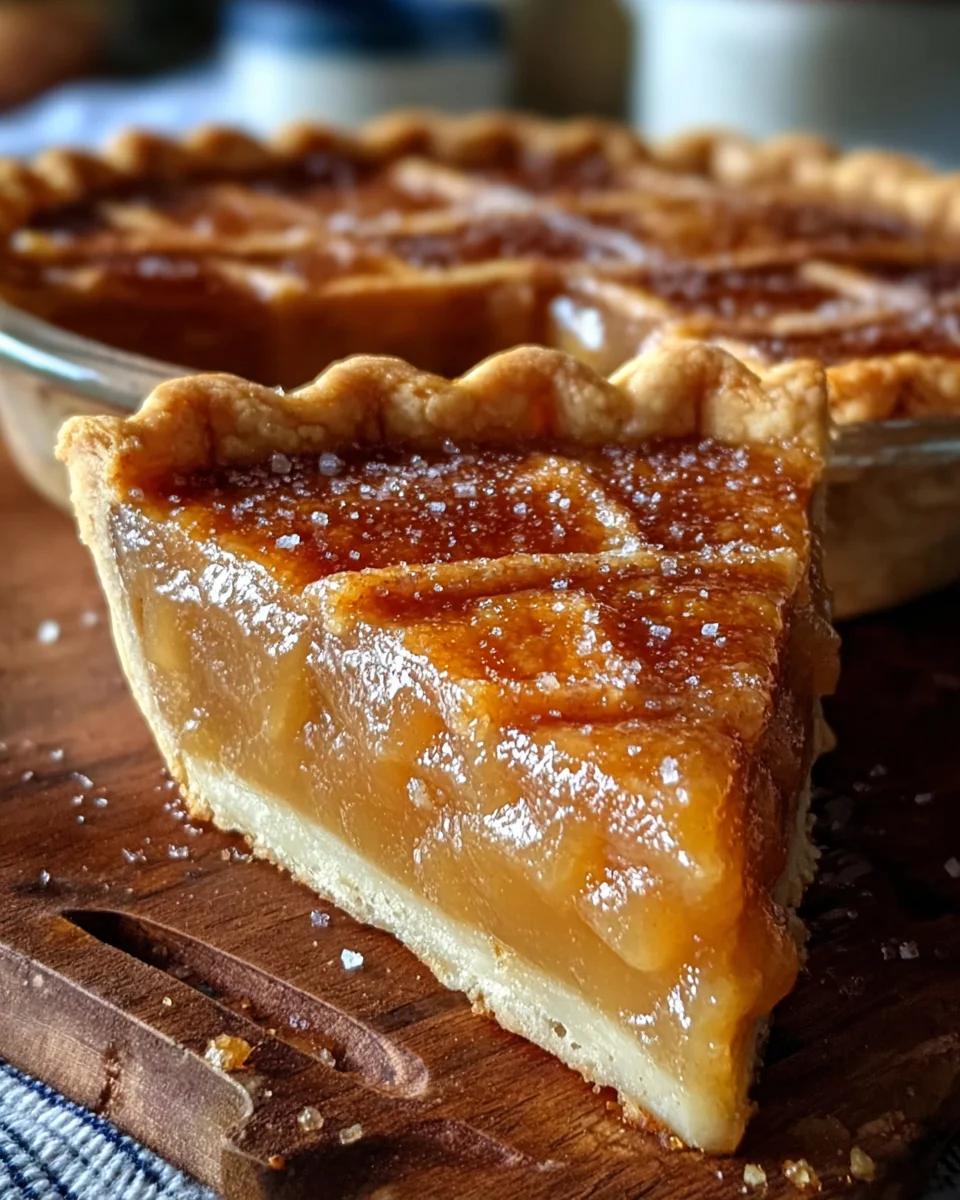
- Once your Salted Honey Pie is completely cooled and fully set, just before you’re ready to serve it, sprinkle generously with flaky sea salt. This is the moment where the “Salted” in Salted Honey Pie truly comes to life and makes all the difference! The delightful contrast between the intensely sweet, rich honey filling and the delicate crunch and briny burst of the sea salt is utterly divine and elevates this dessert from merely good to truly unforgettable.
- Serving Suggestions: I personally adore serving my Salted Honey Pie at room temperature. Its flavors are most vibrant and its texture most appealing when not too cold. It’s absolutely fantastic on its own, allowing the pure, complex flavors of honey and salt to shine through. However, for an extra touch of decadence, a dollop of freshly whipped cream, perhaps lightly sweetened with a whisper of vanilla, or a scoop of excellent quality vanilla bean ice cream makes an exceptional accompaniment. For true honey enthusiasts, a very light drizzle of extra honey just before serving can add another layer of sweetness and aroma.
- Storage: Should you be so fortunate to have any glorious Salted Honey Pie left over (a rare occurrence in my home, I must admit!), cover it loosely with plastic wrap. You can store it at room temperature for up to 2 days, or if you prefer, in the refrigerator for up to 4 days. If refrigerated, I recommend allowing it to come closer to room temperature for about 30 minutes before serving to fully appreciate its sublime texture and profound flavors. You might even find that the flavors of your Salted Honey Pie deepen and meld together beautifully overnight!
- Whether you’re making this for a special celebration, a cozy family gathering, or simply to satisfy a deep, sweet craving, this Salted Honey Pie recipe is a true showstopper. Its rich, complex sweetness, perfectly balanced by the elegant kiss of salt, makes it an unforgettable dessert that will surely impress anyone lucky enough to try a slice. I hope you enjoy the rewarding baking process and, of course, the incredibly delicious reward!

Conclusion:
Well, my friends, we’ve reached the end of our journey through this truly magical recipe, and I hope by now you’re feeling as excited as I am about getting into the kitchen to whip up this absolute showstopper. If there’s one dessert I could insist you try, it would undoubtedly be this incredible creation. It’s more than just a pie; it’s an experience, a symphony of flavors that dances on your palate in the most delightful way. The Salted Honey Pie is, quite simply, a revelation. Imagine that perfect balance: the rich, golden sweetness of honey, deepened and made complex by a hint of caramelization, beautifully contrasted by a delicate whisper of sea salt that cuts through the richness and brightens every single bite. Then, you have that luxuriously gooey, almost custardy filling, encased in a buttery, flaky crust that provides the ideal textural counterpoint. It’s comforting, sophisticated, and utterly irresistible all at once. I promise you, this pie isn’t just a dessert; it’s an instant classic that will have everyone asking for the recipe, making you the undisputed star of any gathering. The relative simplicity of its preparation belies the incredible depth of flavor it achieves, making it a perfect project for bakers of all skill levels who are looking to create something truly extraordinary without undue stress.
Now, let’s talk about making this already divine dessert even more special. While the pie is absolutely stunning on its own, I have a few suggestions to elevate your serving experience. For me, nothing beats a slice of warm Salted Honey Pie straight from the oven, served with a generous scoop of good quality vanilla bean ice cream. The cold, creamy ice cream slowly melting into the warm, gooey filling is pure bliss. Alternatively, a dollop of freshly whipped cream, perhaps infused with a touch of bourbon or a whisper of orange zest, can add another layer of elegance. If you prefer something a little lighter, a spoonful of tangy crème fraîche offers a beautiful contrast to the pie’s sweetness. This pie also pairs wonderfully with a strong cup of coffee after dinner, or even a glass of sparkling wine or a dessert wine if you’re feeling particularly celebratory. Don’t be afraid to experiment with how you present it; a sprinkle of extra flaky sea salt just before serving can not only enhance the flavor but also add a beautiful visual appeal, catching the light and hinting at the delicious surprise within. For a truly decadent experience, consider serving it alongside a small bowl of fresh berries, like raspberries or blackberries, whose slight tartness provides yet another delightful counterpoint to the pie’s rich profile.
But the fun doesn’t stop there! One of the joys of baking is making a recipe your own, and this Salted Honey Pie is wonderfully adaptable. If you’re a nut lover, consider adding a layer of toasted pecans or walnuts to the bottom of your pie crust before pouring in the filling; they’ll add a fantastic crunch and depth of flavor. A subtle hint of spice, like a pinch of cardamom or cinnamon, can also be folded into the filling mixture for an extra layer of warmth, especially if you’re serving it during the cooler months. You could even experiment with different types of honey – a dark, robust buckwheat honey will yield a more intensely flavored pie, while a delicate orange blossom honey will give it a lighter, floral note. For those looking to create individual portions, this recipe works beautifully in mini tart pans, perfect for elegant dinner parties or a personal treat. Simply reduce the baking time accordingly until the centers are just set.
So, what are you waiting for? This is your invitation to dive in and discover the magic of this unique dessert. I truly believe that once you experience the sheer joy of creating and tasting this Salted Honey Pie, it will earn a permanent spot in your recipe repertoire. Don’t be intimidated; follow the steps, trust the process, and you’ll be rewarded with something truly spectacular. I wholeheartedly encourage you to give this recipe a try very soon! And when you do, please, please, please share your experiences with me! I absolutely adore hearing about your baking adventures. Did you make any variations? What did your family and friends think? Snap a photo, tell me your favorite serving suggestion, or just let me know how much you loved it. Your feedback and stories are what make this community so wonderful. Happy baking, my friends, and get ready to fall head over heels for your new favorite pie!
Salted Honey Pie: Sweet, Salty, & Irresistible Dessert
Prepare to have your taste buds captivated by Salted Honey Pie, a surprisingly simple yet profoundly sophisticated dessert. This modern classic offers a delicate dance between robust sweetness and a crucial hint of salinity, with a dreamy, custardy texture that melts in your mouth.
Ingredients
Instructions
Important Information
Nutrition Facts (Per Serving)
It is important to consider this information as approximate and not to use it as definitive health advice.
Allergy Information
Please check ingredients for potential allergens and consult a health professional if in doubt.


Leave a Comment