
Simple focaccia: the very words conjure images of sun-drenched Italian terraces, the aroma of olive oil and herbs hanging in the air. But forget the fantasy – you can bring that taste of Italy right into your own kitchen with this incredibly easy recipe! I’m going to show you how to make a truly delightful focaccia without any fuss.
Focaccia, a flatbread cousin of pizza, boasts a history stretching back to ancient times. Some believe its origins lie with the Etruscans, predating even the Roman Empire! Throughout the centuries, it has remained a staple in Italian cuisine, evolving from a simple peasant bread to a versatile canvas for countless toppings and flavor combinations. It’s more than just bread; it’s a taste of history.
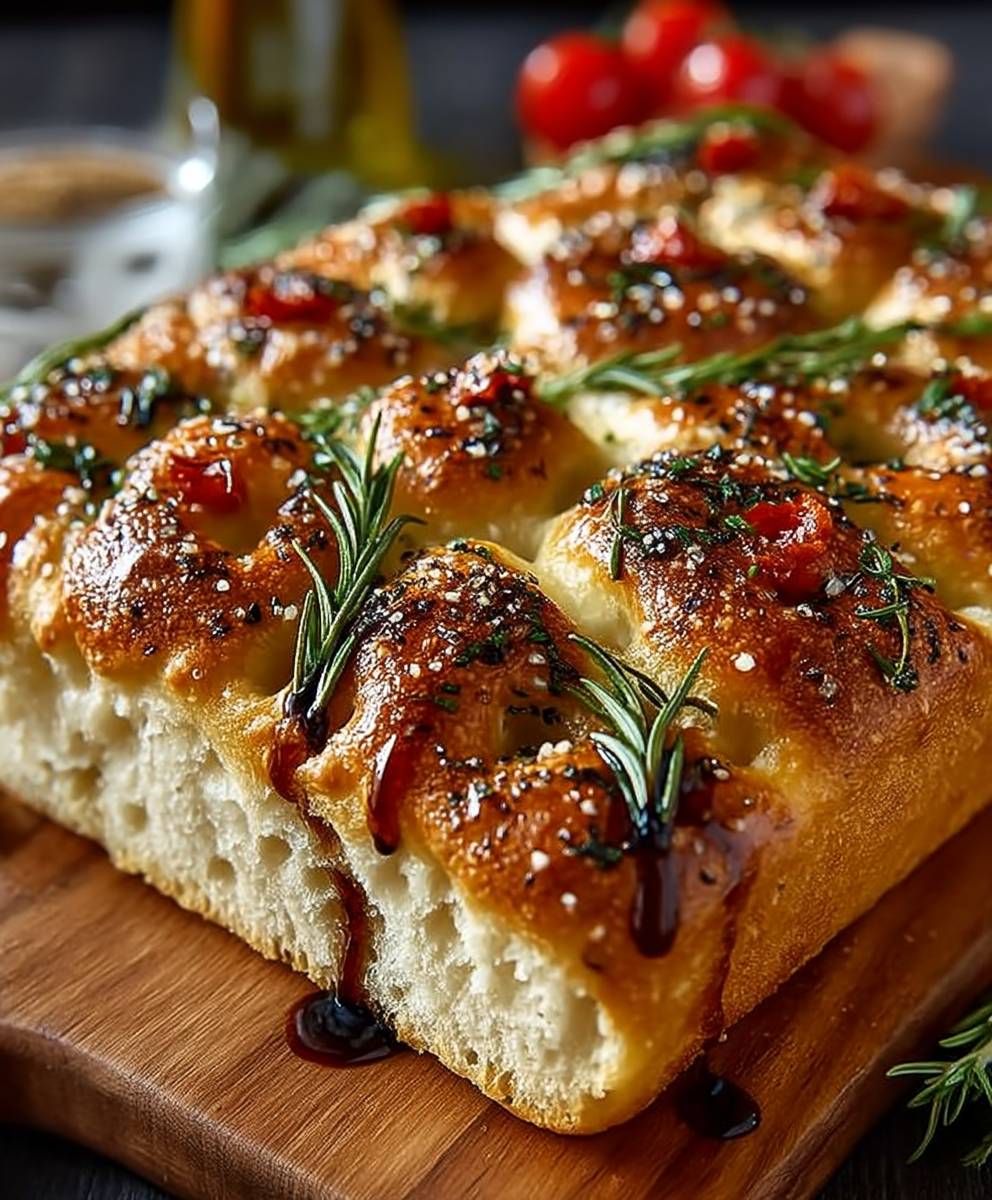
What makes focaccia so universally loved? It’s the perfect marriage of textures: a crisp, golden crust giving way to a soft, airy interior, all generously infused with olive oil. The dimples, those characteristic indentations, are not just for show; they create pools for the oil and herbs to settle, ensuring every bite is bursting with flavor. Plus, its simplicity makes it incredibly adaptable. Whether you enjoy it plain, topped with rosemary and sea salt, or loaded with vegetables and cheese, simple focaccia is always a crowd-pleaser. I find it’s the perfect accompaniment to soups, salads, or simply enjoyed on its own as a satisfying snack. Let’s get baking!
Ingredients:
- 500g strong bread flour, plus extra for dusting
- 10g instant dried yeast
- 10g fine sea salt
- 400ml lukewarm water
- 6 tbsp extra virgin olive oil, plus extra for greasing
- Toppings of your choice (e.g., rosemary, sea salt flakes, cherry tomatoes, olives, red onion)
Preparing the Dough: The Foundation of Flavor
Okay, let’s get started! This focaccia recipe is surprisingly simple, but the key is patience and good ingredients. First, we need to create the perfect dough. Don’t be intimidated; I’ll walk you through it step-by-step.
- Combine Dry Ingredients: In a large bowl, whisk together the bread flour, instant dried yeast, and fine sea salt. Make sure the yeast is evenly distributed throughout the flour. This ensures a consistent rise. I like to use a whisk for this, but a fork works just as well.
- Add Water and Oil: Gradually pour in the lukewarm water while mixing with your hand or a wooden spoon. The water should be warm to the touch, but not hot, as hot water can kill the yeast. Add 2 tablespoons of the extra virgin olive oil.
- Mix to Form a Shaggy Dough: Continue mixing until a shaggy dough forms. It will be quite sticky, and that’s perfectly normal. Don’t worry about making it perfectly smooth at this stage. The goal is just to bring all the ingredients together.
- First Rise (Bulk Fermentation): Cover the bowl with plastic wrap or a damp kitchen towel. Place it in a warm place and let it rise for about 1-1.5 hours, or until doubled in size. This first rise is crucial for developing the flavor and texture of the focaccia. The warmer the environment, the faster it will rise. I often put mine in a slightly warmed oven (turned off, of course!).
- Stretch and Fold (Optional but Recommended): After the first rise, gently deflate the dough in the bowl. This helps to redistribute the yeast and gluten, resulting in a better crumb structure. Now, perform a series of stretch and folds. To do this, wet your hand, reach under one side of the dough, stretch it upwards, and fold it over onto itself. Rotate the bowl 90 degrees and repeat. Do this 4-5 times until the dough feels a bit tighter. Cover the bowl again and let it rest for another 30 minutes. This step is optional, but I highly recommend it for a more open and airy crumb.
Preparing the Pan and Second Rise: Setting the Stage
Now that our dough has had its initial rise, it’s time to prepare the pan and give it a second, shorter rise. This step is important for creating that signature focaccia shape and texture.
- Grease the Baking Pan: Generously grease a 9×13 inch baking pan with extra virgin olive oil. Don’t be shy with the oil; it will help prevent the focaccia from sticking and contribute to a crispy crust. I usually pour about 2 tablespoons of oil into the pan and spread it around with my hands, making sure to coat the bottom and sides thoroughly.
- Transfer the Dough to the Pan: Gently transfer the dough to the prepared baking pan. It will be quite soft and pliable.
- Stretch the Dough: Using your fingertips, gently stretch the dough to fill the pan. If it resists, let it rest for a few minutes and then try again. The goal is to get it evenly distributed in the pan. Don’t worry if it doesn’t reach the corners perfectly; it will spread out during the second rise.
- Second Rise (Proofing): Cover the pan with plastic wrap or a damp kitchen towel and let it rise for another 30-45 minutes, or until puffy. This second rise allows the dough to relax and develop even more flavor.
Dimpling and Topping: The Art of Focaccia
This is where the fun begins! Dimpling and topping the focaccia is where you can really get creative and customize it to your liking. The dimples create little pockets for the olive oil and toppings to pool, resulting in a burst of flavor in every bite.
- Preheat the Oven: Preheat your oven to 220°C (425°F). Make sure your oven is properly preheated before proceeding to the next step.
- Dimpling: Using your fingertips, press deep dimples all over the surface of the dough. Don’t be afraid to really press down; you want to create those characteristic focaccia dimples. The dimples should be evenly spaced and cover the entire surface of the dough.
- Drizzle with Olive Oil: Drizzle the remaining 4 tablespoons of extra virgin olive oil over the dimpled dough. Make sure the oil gets into all the dimples.
- Add Toppings: Now it’s time to add your toppings! Here are some of my favorite combinations:
- Rosemary and Sea Salt: Sprinkle generously with fresh rosemary leaves and sea salt flakes. This is a classic and simple combination that never disappoints.
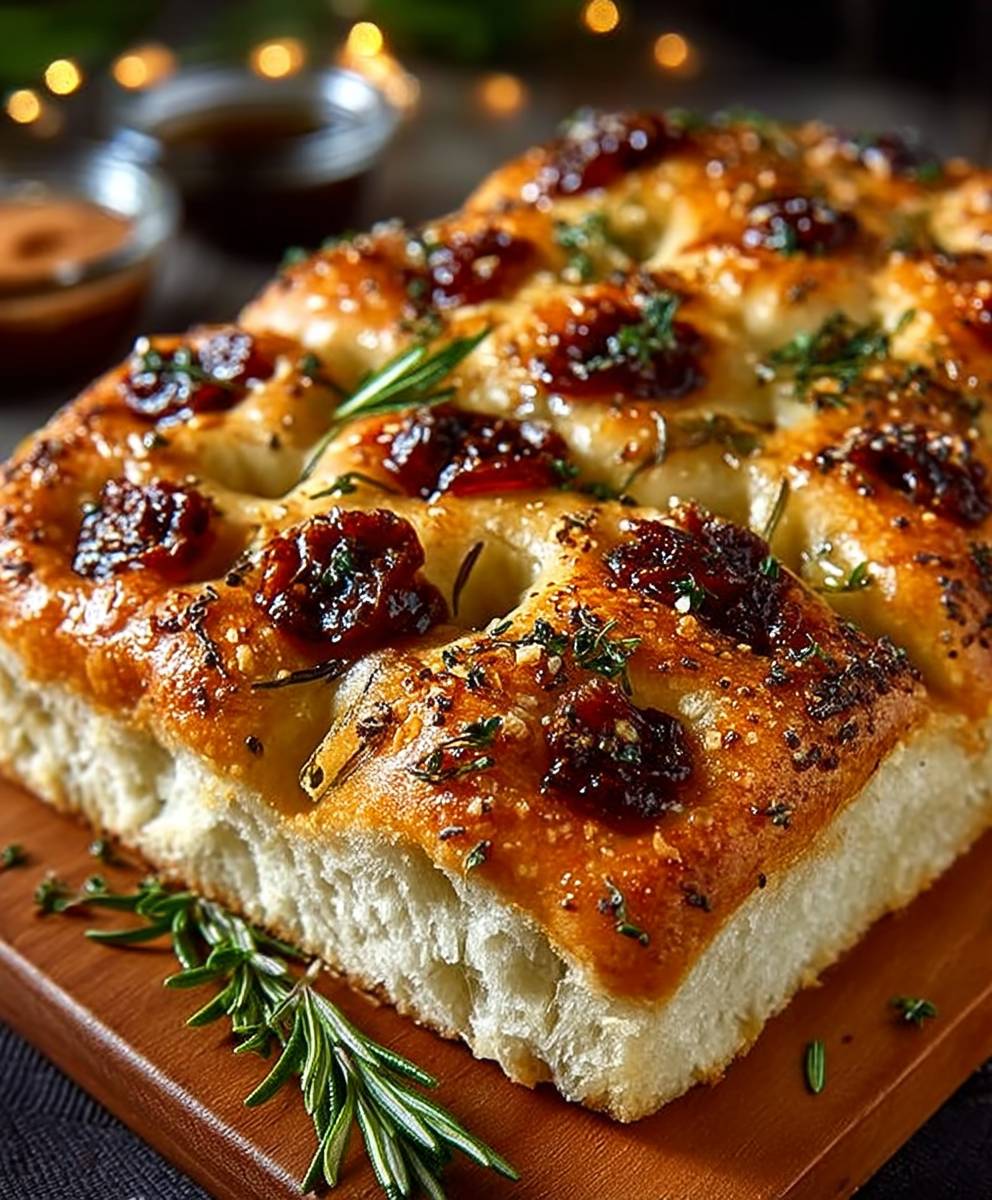
- Cherry Tomatoes and Olives: Halve or quarter cherry tomatoes and scatter them over the dough, along with pitted olives. This adds a burst of sweetness and saltiness.
- Red Onion and Thyme: Thinly slice red onion and sprinkle it over the dough, along with fresh thyme leaves. This combination is savory and aromatic.
- Garlic and Parmesan: Mince garlic and sprinkle it over the dough, along with grated Parmesan cheese. This is a rich and flavorful option.
Feel free to experiment with your own favorite toppings! Just make sure not to overload the dough, as this can prevent it from baking evenly.
- Final Sprinkle of Sea Salt: Give the focaccia one final sprinkle of sea salt flakes. This adds a nice crunch and enhances the flavor of the toppings.
Baking: The Grand Finale
We’re almost there! Baking is the final step in creating our delicious focaccia. The oven’s heat will transform the dough into a golden-brown masterpiece with a crispy crust and a soft, airy interior.
- Bake: Bake in the preheated oven for 20-25 minutes, or until golden brown and cooked through. The baking time may vary depending on your oven, so keep an eye on it. The focaccia is done when it’s golden brown on top and the bottom sounds hollow when tapped.
- Cool Slightly: Remove the focaccia from the oven and let it cool in the pan for a few minutes before transferring it to a wire rack to cool completely. This prevents the bottom from becoming soggy.
- Slice and Serve: Slice the focaccia into squares or rectangles and serve warm or at room temperature. It’s delicious on its own, or you can use it to make sandwiches or as a side dish.
Tips and Variations: Elevating Your Focaccia Game
Want to take your focaccia to the next level? Here are a few tips and variations to help you customize your recipe and impress your friends and family.
- Use High-Quality Olive Oil: The flavor of the olive oil really shines through in focaccia, so it’s worth using a good quality extra virgin olive oil.
- Experiment with Different Flours: While strong bread flour is recommended for the best results, you can experiment with other flours, such as whole wheat flour or semolina flour. Just keep in mind that these flours may require more or less water.
- Add Herbs to the Dough: For an extra layer of flavor, you can add chopped fresh herbs, such as rosemary, thyme, or oregano, directly to the dough.
- Make it Gluten-Free: You can adapt this recipe to be gluten-free by using a gluten-free bread flour blend. Just be sure to follow the instructions on the package and adjust the amount of water as needed.
- Add Cheese: Sprinkle grated cheese, such as Parmesan, mozzarella, or provolone, over the dough before baking for a cheesy focaccia.
- Make it Sweet: For a sweet focaccia, omit the salt and add a few tablespoons of sugar to the dough. Top with fruit, such as berries or apples, and a sprinkle of cinnamon.
- Freezing: Focaccia freezes well. Once cooled, wrap it tightly in plastic wrap and then in foil. Freeze for up to 2 months. Thaw at room temperature before reheating in a warm oven.
Enjoy your homemade focaccia! I hope this recipe helps you create
Conclusion:
This simple focaccia recipe isn’t just another bread recipe; it’s an invitation to create something truly special, something that will fill your kitchen with the most incredible aroma and your taste buds with pure joy. From its delightfully crispy crust to its soft, airy interior, every bite is a testament to the magic that happens when simple ingredients are treated with a little love and patience. It’s the kind of bread that elevates any meal, turning an ordinary lunch into a memorable feast.
But why is this focaccia a must-try? Because it’s incredibly versatile! It’s not just about following the recipe to the letter; it’s about making it your own. Think of it as a blank canvas for your culinary creativity. Want to add some roasted garlic and rosemary for an earthy, aromatic twist? Go for it! Craving a Mediterranean vibe? Sun-dried tomatoes, olives, and a sprinkle of oregano will transport you straight to the Italian coast. And if you’re feeling adventurous, why not experiment with different cheeses, like crumbled feta or shaved Parmesan, for an extra layer of savory goodness?
Beyond the endless topping possibilities, this focaccia is also incredibly adaptable in how you serve it. It’s fantastic as a simple appetizer, drizzled with olive oil and balsamic vinegar. It makes an amazing sandwich bread, perfect for layering with your favorite deli meats, cheeses, and veggies. And it’s an absolute showstopper when served alongside a hearty bowl of soup or a vibrant salad. Imagine dipping chunks of warm, crusty focaccia into a creamy tomato soup on a chilly evening – pure comfort food bliss!
Here are a few serving suggestions to get you started:
* Focaccia Sandwiches: Slice the focaccia horizontally and fill it with prosciutto, mozzarella, roasted red peppers, and a drizzle of pesto.
* Focaccia Pizza: Top the focaccia with your favorite pizza toppings and bake until the cheese is melted and bubbly.
* Focaccia Croutons: Cube the focaccia, toss it with olive oil and herbs, and bake until crispy for delicious homemade croutons.
* Focaccia Bruschetta: Toast slices of focaccia and top them with diced tomatoes, basil, garlic, and a balsamic glaze.
* Focaccia with Dips: Serve warm focaccia with a selection of dips, such as hummus, baba ghanoush, or olive tapenade.
I truly believe that this simple focaccia recipe is a game-changer. It’s easy enough for even beginner bakers to master, yet impressive enough to wow your friends and family. It’s a recipe that you’ll find yourself coming back to again and again, not just because it’s delicious, but because it’s so much fun to experiment with and make your own.
So, what are you waiting for? Preheat your oven, gather your ingredients, and get ready to embark on a focaccia-making adventure! I’m confident that you’ll be thrilled with the results. And more importantly, I’d love to hear about your experience. Did you try any variations? What were your favorite toppings? What did you serve it with? Share your photos and stories in the comments below – I can’t wait to see what you create! Happy baking!
Simple Focaccia: The Easiest Recipe for Beginners
This focaccia recipe yields a flavorful and airy Italian flatbread. The dough is made with strong bread flour, yeast, and olive oil, then proofed twice for optimal texture. Dimple the dough, drizzle with olive oil, and add your favorite toppings before baking to golden perfection.
Ingredients
**Strengths:**
* **Clear and Concise:** The instructions are straightforward and easy to understand.
* **Well-Organized:** The recipe is logically divided into sections (Ingredients, Preparing the Dough, Preparing the Pan, Dimpling and Topping, Baking, Tips and Variations).
* **Specific Measurements:** Provides precise measurements for ingredients.
* **Helpful Notes:** The “Tips and Variations” section offers valuable suggestions for customization.
* **Temperature and Time Guidance:** Includes oven temperature and baking time.
* **Visual Cues:** Uses descriptive language like “shaggy dough,” “doubled in size,” and “golden brown” to help the baker know what to look for.
* **Optional Step:** Clearly marks the stretch and fold as optional, catering to different skill levels and time constraints.
**Potential Improvements and Suggestions:**
* **Water Temperature:** While “lukewarm” is common, specifying a temperature range (e.g., 105-115°F or 40-46°C) would be more precise and helpful, especially for beginners.
* **Yeast Type Clarification:** While “instant dried yeast” is specified, it might be helpful to mention that it can be added directly to the flour without proofing. If using active dry yeast, proofing instructions would be necessary.
* **Dough Consistency Description:** Expand on the description of the dough consistency after the first rise. Is it sticky? How much does it deflate when touched?
* **Pan Size Alternative:** While 9×13 is standard, mentioning that a slightly smaller pan will result in a thicker focaccia could be helpful.
* **Dimpling Depth:** Specify how deep the dimples should be (e.g., “almost to the bottom of the pan”).
* **Baking Time Adjustment:** Suggest checking the internal temperature of the focaccia (around 200-210°F or 93-99°C) for doneness, especially if using different toppings that might affect baking time.
* **Cooling Time:** Specify a more precise cooling time on the wire rack (e.g., “cool on a wire rack for at least 30 minutes”).
* **Freezing Instructions Detail:** Add details about how to prevent freezer burn (e.g., double-wrapping in plastic wrap and then foil). Also, suggest reheating instructions (e.g., “reheat in a 350°F oven for 10-15 minutes”).
* **Troubleshooting:** Consider adding a brief troubleshooting section. For example:
* “If the dough is too sticky, add a tablespoon of flour at a time until it’s manageable.”
* “If the dough isn’t rising, make sure your yeast is fresh and your water isn’t too hot or too cold.”
**Overall:**
This is a great focaccia recipe! The suggestions above are just minor tweaks that could make it even better, especially for less experienced bakers. The clarity and detail already present make it a recipe that’s likely to produce delicious results.
Instructions
- Combine Dry Ingredients: In a large bowl, whisk together the bread flour, instant dried yeast, and fine sea salt.
- Add Water and Oil: Gradually pour in the lukewarm water while mixing with your hand or a wooden spoon. Add 2 tablespoons of the extra virgin olive oil.
- Mix to Form a Shaggy Dough: Continue mixing until a shaggy dough forms.
- First Rise (Bulk Fermentation): Cover the bowl with plastic wrap or a damp kitchen towel. Place it in a warm place and let it rise for about 1-1.5 hours, or until doubled in size.
- Stretch and Fold (Optional but Recommended): After the first rise, gently deflate the dough in the bowl. Wet your hand, reach under one side of the dough, stretch it upwards, and fold it over onto itself. Rotate the bowl 90 degrees and repeat. Do this 4-5 times until the dough feels a bit tighter. Cover the bowl again and let it rest for another 30 minutes.
- Grease the Baking Pan: Generously grease a 9×13 inch baking pan with extra virgin olive oil.
- Transfer the Dough to the Pan: Gently transfer the dough to the prepared baking pan.
- Stretch the Dough: Using your fingertips, gently stretch the dough to fill the pan. If it resists, let it rest for a few minutes and then try again.
- Second Rise (Proofing): Cover the pan with plastic wrap or a damp kitchen towel and let it rise for another 30-45 minutes, or until puffy.
- Preheat the Oven: Preheat your oven to 220°C (425°F).
- Dimpling: Using your fingertips, press deep dimples all over the surface of the dough.
- Drizzle with Olive Oil: Drizzle the remaining 4 tablespoons of extra virgin olive oil over the dimpled dough.
- Add Toppings: Add your toppings of choice. Some suggestions:
- Rosemary and Sea Salt
- Cherry Tomatoes and Olives
- Red Onion and Thyme
- Garlic and Parmesan
- Final Sprinkle of Sea Salt: Give the focaccia one final sprinkle of sea salt flakes.
- Bake: Bake in the preheated oven for 20-25 minutes, or until golden brown and cooked through.
- Cool Slightly: Remove the focaccia from the oven and let it cool in the pan for a few minutes before transferring it to a wire rack to cool completely.
- Slice and Serve: Slice the focaccia into squares or rectangles and serve warm or at room temperature.
Notes
**Strengths:**
* **Clear and Concise Language:** The instructions are easy to understand.
* **Well-Organized:** The recipe is logically divided into sections (Ingredients, Preparing the Dough, Preparing the Pan, Dimpling and Topping, Baking).
* **Specific Measurements:** Precise measurements are provided for all ingredients.
* **Helpful Notes:** The “Tips and Variations” section offers valuable suggestions for customization.
* **Temperature and Time Guidance:** Oven temperature and baking time are clearly stated.
* **Visual Cues:** Descriptive language like “shaggy dough,” “doubled in size,” and “golden brown” helps the baker understand what to look for.
* **Optional Step:** Including the stretch and fold as optional but recommended is a good balance.
* **Freezing Instructions:** Providing freezing instructions is a great addition.
**Potential Improvements and Suggestions:**
* **Water Temperature:** While “lukewarm” is common, specifying a temperature range (e.g., 105-115°F or 40-46°C) would be more precise and helpful for beginners.
* **Yeast Activation (Optional):** While instant yeast is used, mentioning the option to proof the yeast in the lukewarm water for a few minutes to ensure it’s active could be beneficial, especially for those less experienced. (e.g., “If you’re unsure about your yeast’s viability, you can proof it by dissolving it in the lukewarm water with a pinch of sugar for 5-10 minutes. It should become foamy.”)
* **Dough Stickiness:** Mentioning that the dough will be quite sticky is important. Perhaps add a sentence like, “The dough will be quite sticky, which is normal for focaccia. Resist the urge to add more flour unless it’s completely unmanageable.”
* **Stretching the Dough in the Pan:** Elaborate slightly on how to stretch the dough in the pan. For example: “Gently press and stretch the dough with your fingertips, working from the center outwards. If the dough resists and springs back, cover it and let it rest for 5-10 minutes before trying again. This allows the gluten to relax.”
* **Dimpling Technique:** Consider adding a note about the depth and spacing of the dimples. For example: “Press your fingertips firmly into the dough, creating deep dimples about 1-2 inches apart. These dimples will hold the olive oil and toppings.”
* **Cooling Time:** Specify a more precise cooling time before transferring to a wire rack. “Let it cool in the pan for 5-10 minutes…”
* **Serving Suggestions:** Expand on serving suggestions. For example: “Serve warm or at room temperature as an appetizer, side dish, or sandwich bread. It’s delicious with dips, cheeses, or cured meats.”
* **Troubleshooting:** A small troubleshooting section could be helpful. For example:
* “If your focaccia is browning too quickly, tent it with foil.”
* “If your focaccia is not rising enough, ensure your yeast is fresh and your rising environment is warm enough.”
* **Nutritional Information (Optional):** While not always necessary, some people appreciate having approximate nutritional information per serving.
**Revised Snippets Incorporating Suggestions:**
* **Water Temperature:** “400ml lukewarm water (105-115°F or 40-46°C)”
* **Yeast Activation (Optional):** “If you’re unsure about your yeast’s viability, you can proof it by dissolving it in the lukewarm water with a pinch of sugar for 5-10 minutes. It should become foamy.”
* **Dough Stickiness:** “Continue mixing until a shaggy dough forms. The dough will be quite sticky, which is normal for focaccia. Resist the urge to add more flour unless it’s completely unmanageable.”
* **Stretching the Dough in the Pan:** “Using your fingertips, gently press and stretch the dough, working from the center outwards, to fill the pan. If the dough resists and springs back, cover it and let it rest for 5-10 minutes before trying again. This allows the gluten to relax.”
* **Dimpling Technique:** “Using your fingertips, press firmly into the dough, creating deep dimples about 1-2 inches apart. These dimples will hold the olive oil and toppings.”
* **Cooling Time:** “Remove the focaccia from the oven and let it cool in the pan for 5-10 minutes before transferring it to a wire rack to cool completely.”
**Overall:**
This is a great focaccia recipe! The suggested improvements are minor and aimed at making it even more accessible and foolproof for bakers of all skill levels. Good job!
Printable Recipe Card
Want just the essential recipe details without scrolling through the article? Get our printable recipe card with just the ingredients and instructions.


Leave a Comment