
S’mores Rolls – are you ready to transform your favorite campfire treat into an irresistible, handheld delight that’s perfect for any occasion? Forget the smoke, the sticky fingers, and the hunt for the perfect roasting stick. I’m absolutely thrilled to share a recipe that brings all the nostalgic magic of s’mores directly to your kitchen, in a remarkably convenient and incredibly delicious form.
The classic s’more, a beloved American tradition dating back to the Girl Scouts, has long symbolized warmth, camaraderie, and simple indulgence. It’s that perfect trifecta of toasted marshmallow, melted chocolate, and crisp graham cracker that evokes cherished memories around a crackling fire. But what if you could experience that same gooey, chocolatey bliss anytime, anywhere, without the need for a bonfire? This is where the brilliance of our recipe comes in.
Why You’ll Adore These S’mores Rolls
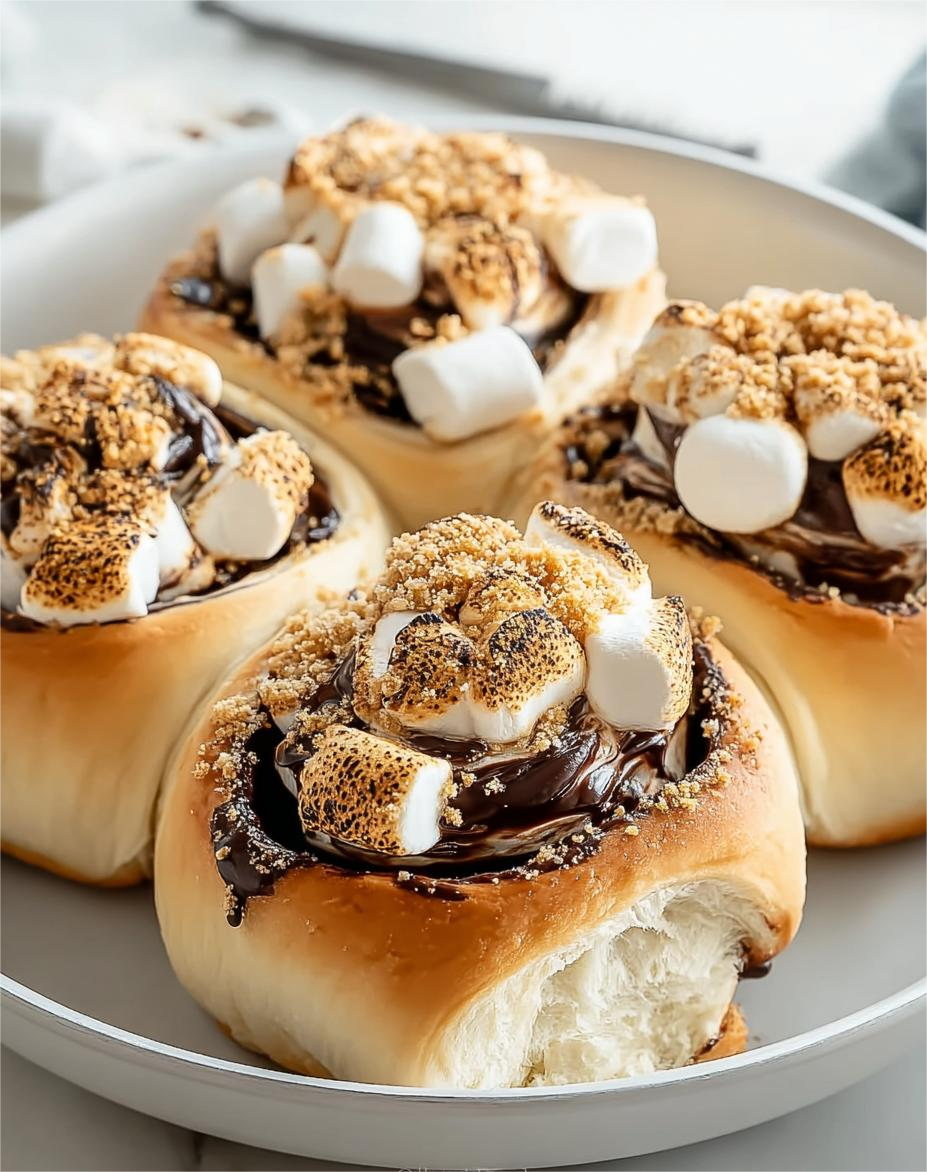
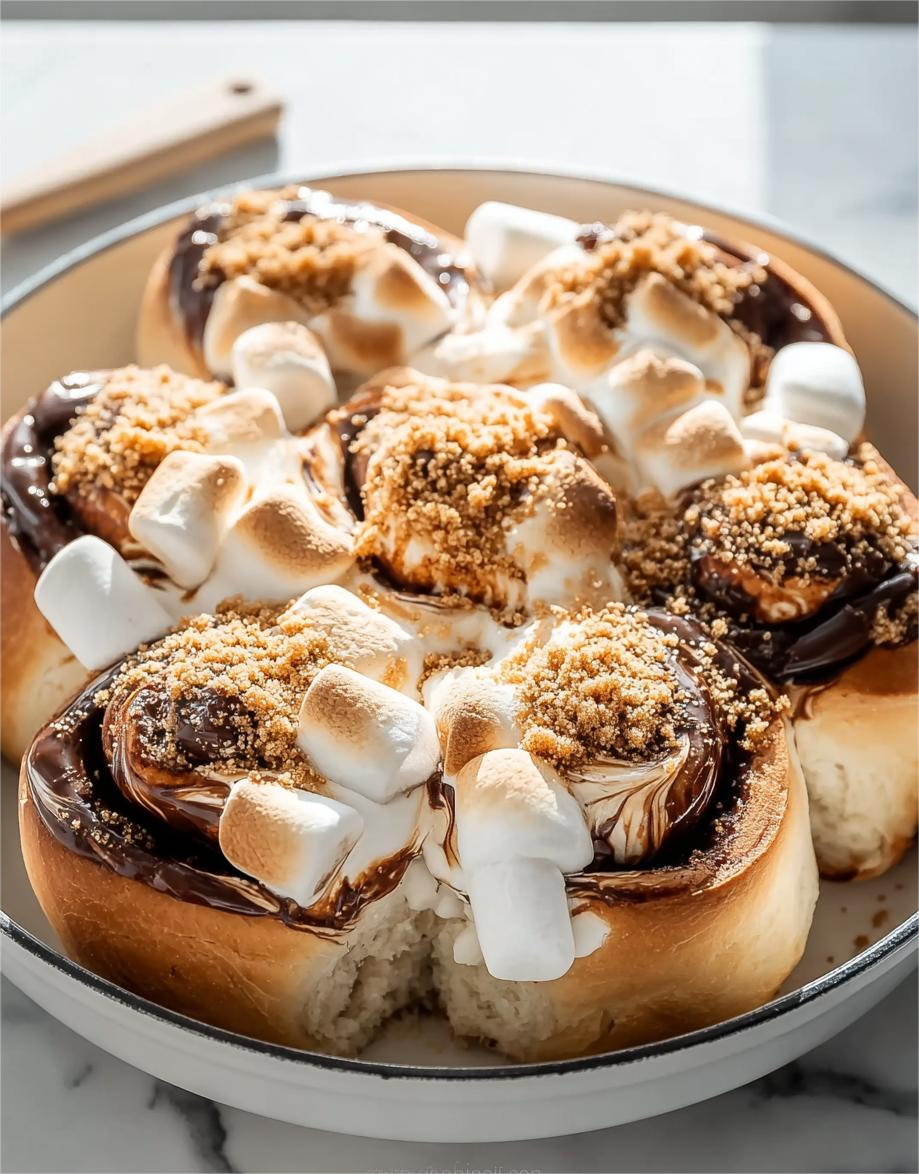
People absolutely adore this dish because it takes everything wonderful about s’mores and enhances the experience. You get the ultimate blend of textures – the soft, yielding interior of golden-brown pastry, the explosion of rich, melted chocolate, and the unmistakable crunch of graham crackers, all perfectly encased. These S’mores Rolls offer a delightful twist on a classic, providing a less messy, deeply satisfying dessert that’s fantastic for gatherings, a cozy night in, or simply when that s’mores craving strikes. Prepare for smiles all around!
Ingredients:
Creating these delightful S’mores Rolls is an exciting culinary adventure, and it all begins with gathering the right ingredients. I’ve broken them down into sections to make sure you have everything organized for each part of the process, from the tender, yielding dough to the irresistible gooey filling and the perfect finishing glaze. Pay attention to the details for the best results!
For the Dough:
- Active Dry Yeast: 2 ¼ teaspoons (one standard packet). This is the magic that makes our S’mores Rolls light and fluffy!
- Warm Milk: 1 cup, full-fat is best, heated to between 105-115°F (40-46°C). It’s crucial for activating the yeast without killing it. I usually test it with my finger – warm bath water temperature is perfect.
- Granulated Sugar: ½ cup, divided. A little for the yeast, the rest for sweetness and tenderizing the dough.
- Large Eggs: 2, at room temperature. Room temperature eggs incorporate better into the dough, leading to a smoother, more uniform texture.
- Unsalted Butter: ½ cup (1 stick), melted and cooled slightly. Using unsalted butter gives me full control over the salt content in my S’mores Rolls.
- All-Purpose Flour: 4 cups, plus an additional ¼ cup for dusting. I always measure my flour by weight (around 480-500g) for accuracy, or spoon it into the measuring cup and level it off.
- Salt: 1 teaspoon. Don’t skip the salt; it balances the sweetness and enhances all the flavors.
For the S’mores Filling:
- Unsalted Butter: ½ cup (1 stick), softened to room temperature. This helps create a spreadable base for our filling.
- Light Brown Sugar: ½ cup, packed. Its molasses content adds a deeper, more caramelized flavor that complements the S’mores perfectly.
- Ground Cinnamon: 1 teaspoon. A touch of cinnamon enhances the warmth of the S’mores profile.
- Graham Cracker Crumbs: 1 ½ cups. You can buy pre-crushed crumbs or crush about 10-12 full sheets of graham crackers yourself. I often put them in a zip-top bag and crush them with a rolling pin – it’s quite therapeutic!
- Semi-Sweet Chocolate Chips: 1 cup. Feel free to use milk chocolate chips if you prefer a sweeter profile for your S’mores Rolls.
- Mini Marshmallows: 1 ½ cups. These melt beautifully into pockets of gooey deliciousness inside the rolls.
For the Vanilla Glaze:
- Powdered Sugar (Confectioners’ Sugar): 1 ½ cups. Sifted, if possible, to avoid lumps.
- Milk: 2-3 tablespoons, any type. Start with two and add more gradually to reach your desired consistency.
- Vanilla Extract: ½ teaspoon. Pure vanilla extract adds a lovely aromatic finish to our S’mores Rolls.
Optional Topping:
- Extra Graham Cracker Crumbs or Mini Marshmallows: For garnishing your baked S’mores Rolls, if desired.
Preparing the Dough for Your S’mores Rolls
The foundation of truly exceptional S’mores Rolls is a soft, fluffy dough. This process requires a little patience, but trust me, the results are incredibly rewarding. I always find the smell of yeast activating and dough rising to be one of the most comforting aromas in my kitchen.
- Activate the Yeast: In a large mixing bowl (or the bowl of a stand mixer fitted with the dough hook attachment), pour in your warm milk. Sprinkle the 2 ¼ teaspoons of active dry yeast over the milk, followed by 1 tablespoon of the granulated sugar. Gently stir and then let it sit undisturbed for 5-10 minutes. You’ll know the yeast is active when it becomes foamy and bubbly on the surface, indicating it’s alive and ready to make your S’mores Rolls rise beautifully. If it doesn’t foam, your milk might have been too hot or too cold, or your yeast may be old, and it’s best to start this step over.
- Combine Wet Ingredients: Once your yeast is wonderfully bubbly, add the remaining granulated sugar (½ cup minus 1 tablespoon), the two room temperature large eggs, and the ½ cup of melted and slightly cooled unsalted butter to the bowl. Whisk everything together until it’s well combined. The mixture should look slightly milky and pale yellow.
- Incorporate Flour and Salt: Gradually add 3 cups of the all-purpose flour and the 1 teaspoon of salt to the wet mixture. If using a stand mixer, start mixing on low speed until just combined, then add the remaining 1 cup of flour slowly, about ½ cup at a time. If mixing by hand, use a sturdy spoon or a Danish dough whisk to mix until a shaggy dough forms.
- Knead the Dough:
If using a Stand Mixer:
Increase the speed to medium-low and knead for 8-10 minutes. The dough will start sticky but should eventually pull away from the sides of the bowl, becoming smooth, elastic, and supple. It should feel soft to the touch and spring back when gently poked.
If kneading by hand:
Turn the shaggy dough out onto a lightly floured surface. Knead for 10-15 minutes, adding small amounts of flour only if the dough is excessively sticky. Resist the urge to add too much flour, as this can make your S’mores Rolls tough. The dough is properly kneaded when it’s smooth, elastic, and passes the “windowpane test” – you can stretch a small piece thin enough to see light through it without tearing.
- First Rise (Bulk Fermentation): Lightly grease a clean large bowl with a little oil or non-stick spray. Place the kneaded dough into the bowl, turning it once to coat the top. Cover the bowl tightly with plastic wrap or a clean kitchen towel. Find a warm, draft-free spot in your kitchen (like an oven with just the light on) and let the dough rise for 1 to 1 ½ hours, or until it has doubled in size. This is a critical step for developing flavor and creating that airy texture for your S’mores Rolls.
- Punch Down the Dough: Once the dough has doubled, gently punch it down to release the air. This step evens out the temperature, redistributes the yeast, and prevents over-proofing. It will deflate quite a bit, but that’s perfectly normal.
Preparing the S’mores Filling
While your dough is on its first rise, this is the perfect time to prepare the delectable S’mores filling. This part is incredibly straightforward and will create the heart of your amazing S’mores Rolls.
- Prepare the Filling Base: In a medium bowl, combine the ½ cup of softened unsalted butter, ½ cup of packed light brown sugar, and 1 teaspoon of ground cinnamon. Use a fork or a spoon to cream these ingredients together until they are well combined and form a thick, spreadable paste. I find that softened butter is key here for a smooth, lump-free mixture that will spread evenly over our dough.
- Gather S’mores Components: Have your 1 ½ cups of graham cracker crumbs, 1 cup of semi-sweet chocolate chips, and 1 ½ cups of mini marshmallows ready. I usually put them in separate small bowls so they are easy to grab during the assembly process. This pre-measured approach ensures a smooth workflow when constructing your S’mores Rolls.
Assembling Your S’mores Rolls
This is where the magic truly begins to happen! Transforming simple dough into beautiful rolls filled with S’mores goodness is incredibly satisfying. Take your time with these steps to ensure uniform and attractive S’mores Rolls.
- Roll Out the Dough: Lightly flour a clean work surface. Turn the punched-down dough out onto the floured surface. Using a rolling pin, roll the dough into a large rectangle, approximately 12×18 inches and about ¼ inch thick. Try to keep the edges as straight as possible, as this will help you get uniform S’mores Rolls later. If the dough resists rolling, let it rest for 5 minutes to relax the gluten, then continue.
- Spread the Filling: Evenly spread the butter, brown sugar, and cinnamon mixture over the entire surface of the rolled-out dough, leaving about a ½-inch border free on one of the longer edges. This border will help seal the roll. Ensure the spread is consistent so every bite of your S’mores Rolls has that rich flavor.
- Layer the S’mores Goodness: Generously sprinkle the 1 ½ cups of graham cracker crumbs evenly over the brown sugar mixture. Then, scatter the 1 cup of semi-sweet chocolate chips over the crumbs. Finally, distribute the 1 ½ cups of mini marshmallows over the chocolate chips. Try to get an even layer so that each roll is packed with all the delicious S’mores components.
- Roll Up the Dough: Starting from one of the longer edges (the one without the ½-inch border), carefully and tightly roll the dough into a log. The tighter you roll it, the more defined your spirals will be and the less likely the filling will spill out. Make sure to keep the rolling even. Once rolled, pinch the seam closed along the ½-inch border you left earlier to seal the log. Gently tuck in the ends to create a neat cylinder. This log is the precursor to your many individual S’mores Rolls.
- Slice the Rolls: Using a very sharp knife, a serrated knife, or even unflavored dental floss, cut the log into 12 equal slices, each about 1 to 1 ½ inches thick. I often use dental floss for the cleanest cuts; just slide it under the log, cross the ends over the top, and pull to slice. This method helps maintain the round shape of your future S’mores Rolls.
- Prepare for Second Rise: Lightly grease a 9×13-inch baking dish or a 10-inch round baking pan. Arrange the sliced S’mores Rolls in the prepared pan, leaving a little space between each roll for them to expand during their second rise. They’ll cozy up together as they bake.
Proofing and Baking Your S’mores Rolls
The final steps before enjoying your homemade S’mores masterpiece involve a gentle second rise and then the glorious baking process. This is when the aroma will really start to fill your kitchen, a delightful preview of the treat to come.
- Second Rise (Proofing): Cover the baking dish loosely with plastic wrap or a clean kitchen towel. Place it back in that warm, draft-free spot (or just on your counter if your kitchen is warm) and let the S’mores Rolls rise for another 30-45 minutes, or until they look puffy and have nearly doubled in size again. They should be visibly larger and slightly touching each other in the pan. This second rise is crucial for light and airy rolls.
- Preheat the Oven: Towards the end of the second rise, preheat your oven to 375°F (190°C). Make sure your oven rack is in the middle position for even baking.
- Bake the S’mores Rolls: Once the oven is preheated and the rolls are nicely puffed, remove the cover and place the baking dish into the preheated oven. Bake for 20-25 minutes, or until the tops are golden brown and the rolls are cooked through. The exact baking time can vary depending on your oven, so keep an eye on them. You’ll notice the marshmallows inside might puff up and toast slightly, creating that classic S’mores char.
Pro Tip:
If the tops of your S’mores Rolls are browning too quickly, you can loosely tent the pan with aluminum foil for the last 5-10 minutes of baking.
- Cool Slightly: Once baked, carefully remove the pan from the oven. Let the S’mores Rolls cool in the pan on a wire rack for about 10-15 minutes before glazing. This allows them to set slightly and cool enough to absorb the glaze without melting it completely into a puddle. The residual heat will keep them wonderfully soft.
The Finishing Touch: Vanilla Glaze
No roll is complete without a luscious glaze! This simple vanilla glaze adds a touch of sweetness and moisture, perfectly complementing the rich flavors of your S’mores Rolls. It’s the final flourish that makes them truly irresistible.
- Prepare the Glaze: While your S’mores Rolls are cooling, prepare the glaze. In a medium bowl, whisk together the 1 ½ cups of powdered sugar, 2 tablespoons of milk, and ½ teaspoon of vanilla extract until smooth. The consistency should be thick but pourable. If it’s too thick, add more milk, ½ teaspoon at a time, until you reach your desired consistency. If it’s too thin, add a little more powdered sugar. I prefer a glaze that slowly drizzles off the whisk.
- Glaze the S’mores Rolls: Drizzle the vanilla glaze evenly over the warm (but not hot!) S’mores Rolls. You can use a spoon or simply pour it over. The warmth of the rolls will help the glaze spread and melt ever so slightly, creating a beautiful sheen. For an extra touch of S’mores flair, you can sprinkle a few extra graham cracker crumbs or mini marshmallows on top of the glaze immediately after applying it.
- Serve and Enjoy: Serve your incredible S’mores Rolls warm, straight from the pan. They are best enjoyed on the day they are baked, when the dough is soft, the chocolate is melted, and the marshmallows are gloriously gooey. Get ready for an explosion of classic campfire flavors in a delightful roll format! These are truly a treat for any occasion, bringing comfort and joy with every bite.
Conclusion:
Well, my friends, we’ve reached the sweet end of our journey, and I genuinely hope you’re feeling as excited as I am about this incredible recipe. I’ve poured my heart into sharing this creation because I truly believe it’s more than just a dessert; it’s an experience, a memory waiting to be made. This recipe isn’t just another item to add to your baking list; it’s an absolute game-changer, promising to deliver pure joy and undeniable deliciousness with every single bite. The combination of warm, pillowy dough, gooey, melted marshmallow, and rich, decadent chocolate is a symphony for the senses that is both nostalgic and utterly innovative. It perfectly captures the essence of a classic campfire treat, elevating it into something sophisticated enough for a dinner party, yet simple enough for a cozy night in.
What makes this particular recipe a must-try, in my humble opinion, is its unparalleled ability to impress with minimal effort. You don’t need to be a pastry chef or a seasoned baker to achieve spectacular results. The magic truly happens almost effortlessly, transforming humble ingredients into something extraordinary. Imagine the delight on your loved ones’ faces when they bite into that warm, gooey center! It’s the kind of treat that brings people together, sparking conversations and smiles. It’s the perfect antidote to a long day, a celebratory dessert, or simply a delightful indulgence because you deserve it. I can’t stress enough how much this recipe has become a staple in my own kitchen, and I have a feeling it’s about to become one in yours too. Its unique combination of textures and flavors stands out, offering a fresh take on a beloved classic without any of the outdoor fuss or smoky smell.
Now, let’s talk about making these beauties even more irresistible. While they are undeniably perfect straight out of the oven, perhaps with just a simple dusting of powdered sugar, I have a few serving suggestions that elevate them to an entirely new level. Picture this: a warm S’mores Roll nestled beside a scoop of your favorite vanilla bean ice cream, the cold cream melting ever so slightly into the warm, gooey filling. Or, for a truly decadent breakfast or brunch, serve them alongside some fresh berries and a dollop of whipped cream. They also pair exquisitely with a robust cup of coffee or, for the ultimate comfort, a mug of rich hot chocolate, especially on a chilly evening. For a more elegant presentation, you could arrange them on a platter with a small bowl of melted chocolate or caramel for dipping, allowing guests to customize their sweetness. Consider garnishing with a few extra mini marshmallows or a drizzle of chocolate syrup right before serving for that extra visual appeal and burst of flavor.
And the fun doesn’t stop there! One of the things I adore most about baking is the freedom to experiment and personalize, and this recipe is wonderfully adaptable. Don’t hesitate to play around with the fillings. Instead of classic milk chocolate, why not try dark chocolate for a more intense flavor, or even white chocolate chips for a sweeter, creamier profile? Peanut butter cups chopped into pieces would add a fantastic nutty and salty counterpoint, taking these treats in a delightful new direction. You could also experiment with different types of marshmallows – perhaps a flavored variety if you can find them, like caramel swirl or even peppermint around the holidays. For those who love a bit of crunch, a sprinkle of finely chopped nuts, such as pecans or walnuts, folded into the filling would be absolutely divine. Another idea is to incorporate a thin slice of banana before rolling for a bananas foster-inspired twist, or even a tiny spoon of raspberry jam for a fruitier note. The possibilities truly are endless, and each variation promises a new adventure for your taste buds, ensuring that you can tailor these delicious treats to any preference or occasion.
A New Family Favorite Awaits
I truly hope I’ve managed to convey just how special these S’mores Rolls are. They are a celebration of simplicity, nostalgia, and pure, unadulterated flavor. They offer the joy of a campfire s’more without the smoke, the mess, or the need for perfect weather. They are versatile, easy to make, and guaranteed to bring smiles to everyone who tries them. This isn’t just a recipe; it’s an invitation to create, to share, and to indulge in a little bit of magic right in your own kitchen. It’s an opportunity to create new traditions and memorable moments with loved ones, all centered around a deliciously gooey, chocolatey pastry.
Your Turn to Create and Share!
Now it’s your turn! I absolutely cannot wait for you to experience the magic of baking these rolls for yourself. Seriously, don’t put it off. Gather your ingredients, put on some music, and prepare for your home to be filled with the most incredible aroma. Once you’ve pulled your beautiful creations from the oven and tasted that first glorious bite, I would be absolutely thrilled if you’d share your experience. Did you stick to the classic? Did you try a daring variation? What was your favorite part? Your feedback and photos mean the world to me and to our community of bakers. Share your thoughts, your successes, and any fun twists you discover. Let’s spread the sweetness! Your culinary adventures inspire me and countless others to keep exploring the wonderful world of baking.
So, go forth and bake! You won’t regret it. Happy baking, my friends!
S’mores Rolls: The Ultimate Sweet Treat, Ready in Minutes!
Transform your favorite campfire treat into an irresistible, handheld delight with these S’mores Rolls. Enjoy gooey chocolate and crunchy graham crackers encased in soft, chocolate-infused pastry, topped with a light meringue, all without the campfire mess.
Ingredients
Instructions
Important Information
Nutrition Facts (Per Serving)
It is important to consider this information as approximate and not to use it as definitive health advice.
Allergy Information
Please check ingredients for potential allergens and consult a health professional if in doubt.


Leave a Comment