
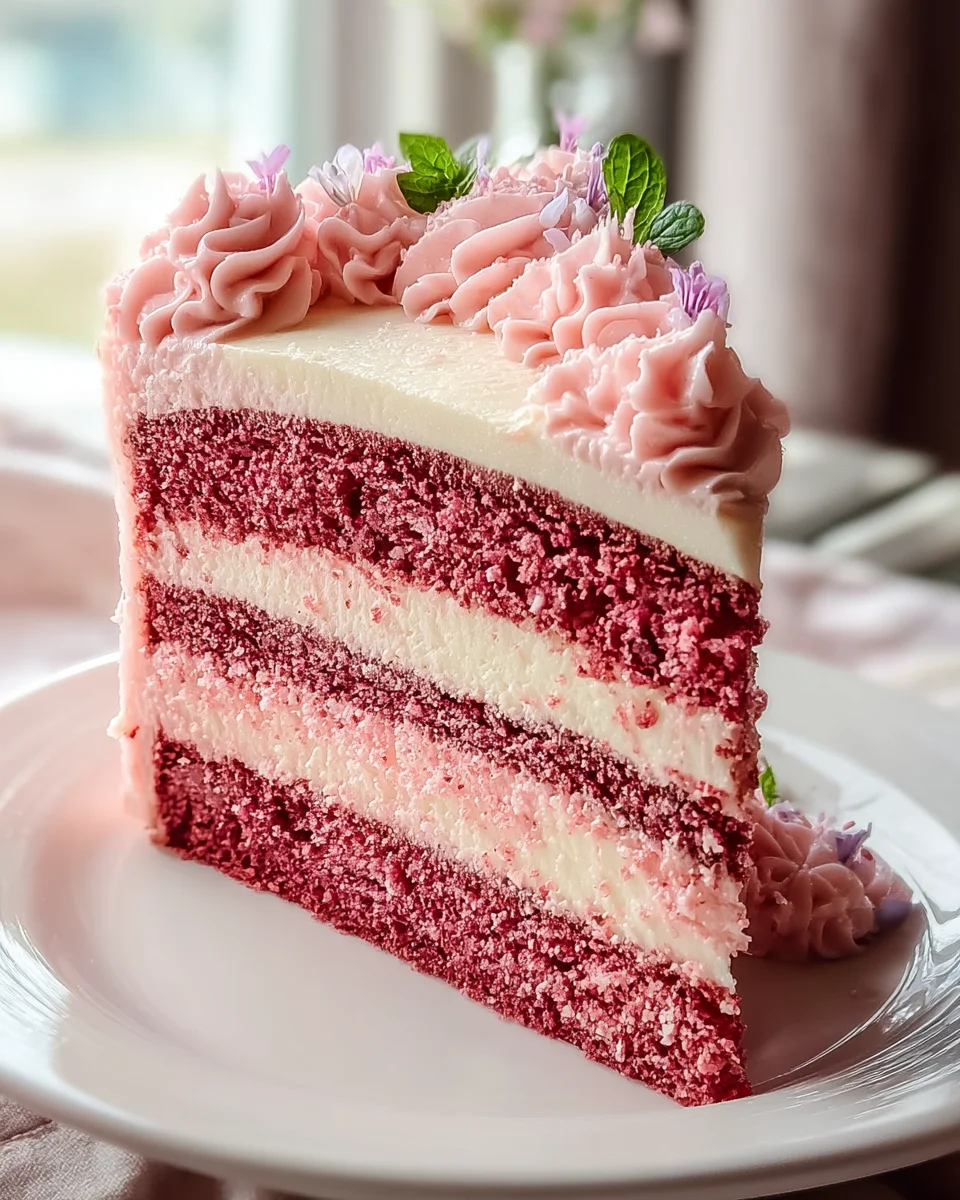
Mothers Day Pink Velvet Cake
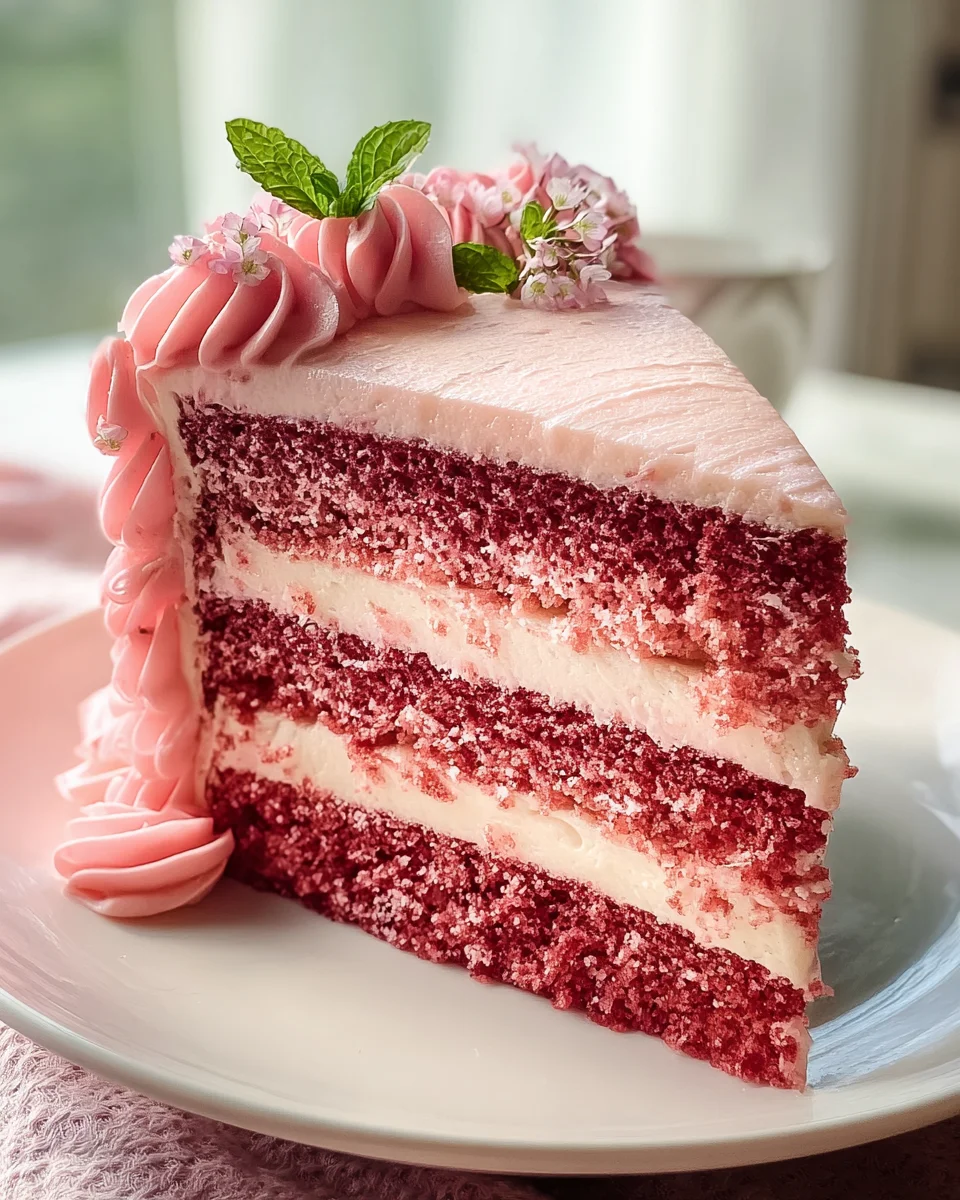
Mothers Day Pink Velvet Cake! Oh, trust me, this isn’t just any cake; it’s a hug in cake form, specifically designed to make Mom feel utterly cherished. I wanted to create something truly special and visually stunning for Mother’s Day, and that’s exactly what this Pink Velvet Cake delivers. What makes it so incredibly special? It’s its unbelievably tender, moist crumb, tinted a beautiful blush pink, then generously slathered with the most decadent, tangy cream cheese frosting. Every single bite is a delightful combination of subtle vanilla notes and that signature velvety texture that just melts in your mouth.
You, dear reader, will absolutely adore making this cake because it’s a true showstopper that tastes as incredible as it looks. There’s nothing quite like the joy and pride of presenting a homemade masterpiece to the amazing woman who means so much to you. This isn’t just a dessert; it’s a heartfelt gesture, a labor of love wrapped in edible beauty, destined to make Mom’s special day even more memorable. Get ready to bake a memory!
Ingredient Notes
Creating this special Pink Velvet Cake for Mother’s Day begins with understanding the role each ingredient plays. It’s not just about mixing; it’s about balancing flavors, textures, and that gorgeous hue. Here’s what you’ll need and some helpful notes:
- Cake Flour: This is my go-to for a tender, fine crumb, which is essential for a velvety texture. It has a lower protein content than all-purpose flour.
- Substitution: If you don’t have cake flour, you can easily make your own. For every cup of cake flour needed, measure out 1 cup of all-purpose flour, remove 2 tablespoons, and then replace those 2 tablespoons with 2 tablespoons of cornstarch. Sift this mixture together a couple of times to ensure it’s well combined.
- Unsweetened Cocoa Powder: While Red Velvet traditionally uses cocoa to react with buttermilk and vinegar for its color, in Pink Velvet, it’s primarily for a subtle chocolate depth and richness, complementing the vanilla. I use natural unsweetened cocoa, not Dutch-processed, as the latter can be too dark for a vibrant pink.
- Buttermilk: The acidity in buttermilk reacts with the baking soda to create a light and airy texture. It also contributes to the cake’s moistness and slight tang.
- Substitution: No buttermilk? No problem! Pour 1 cup of milk (whole or 2%) into a measuring cup, remove 1 tablespoon, and then stir in 1 tablespoon of fresh lemon juice or white vinegar. Let it sit for 5-10 minutes until it slightly curdles.
- Pink Gel Food Coloring: This is crucial for achieving that beautiful, vibrant Mother’s Day pink. Gel coloring is much more concentrated than liquid, meaning you use less, which helps maintain the batter’s consistency and ensures a vivid hue.
- Vanilla Extract: I use a good quality pure vanilla extract to enhance all the other flavors. It’s a cornerstone of any good cake.
- Unsalted Butter: Using unsalted butter allows me to control the salt content in the recipe. Make sure it’s at room temperature for proper creaming.
- Eggs: Large eggs, at room temperature, help create an emulsion with the butter and sugar, leading to a smoother batter and a better rise.
- Baking Soda and White Vinegar: This dynamic duo is key for the lift and fluffy texture. The baking soda reacts with the acidic vinegar, creating carbon dioxide bubbles that make the cake light and airy.
- Cream Cheese (Full-Fat): For the classic cream cheese frosting, full-fat cream cheese is a must for richness and stability. Ensure it’s softened to room temperature for a lump-free frosting.
- Powdered Sugar: Also known as confectioners’ sugar, this provides sweetness and structure to the frosting. Sift it for the smoothest consistency.
Step-by-Step Instructions
Baking this Mother’s Day Pink Velvet Cake is a labor of love, but the process is straightforward and incredibly rewarding. Follow these steps for a perfect cake every time:
- Prepare Your Workspace: Start by preheating your oven to 350°F (175°C). Grease and flour two 8-inch round cake pans (or line with parchment paper circles and grease). This ensures your beautiful cake layers won’t stick.
- Sift Dry Ingredients: In a medium bowl, whisk together the sifted cake flour, unsweetened cocoa powder, baking soda, and salt. Sifting is important for removing lumps and aerating the flour, contributing to that delicate crumb.
- Cream Butter and Sugar: In a large mixing bowl, using an electric mixer, cream the softened unsalted butter and granulated sugar together on medium-high speed until the mixture is light, pale, and fluffy. This can take 3-5 minutes.
- Add Eggs and Vanilla: Beat in the room temperature eggs one at a time, mixing well after each addition. Scrape down the sides of the bowl as needed. Stir in the vanilla extract until just combined.
- Combine Buttermilk and Color: In a separate small bowl or measuring cup, whisk together the buttermilk and the pink gel food coloring. Start with a moderate amount of food coloring and add more if you desire a deeper pink.
- Alternate Wet and Dry: With the mixer on low speed, gradually add the dry ingredients to the butter mixture in three additions, alternating with the buttermilk mixture in two additions. Begin and end with the dry ingredients. Mix only until just combined after each addition; do not overmix, as this can lead to a tough cake.
- The Vinegar Boost: In a very small bowl, combine the white vinegar. Pour this into the cake batter and quickly fold it in gently for about 10-15 seconds. You might see a slight fizz; this is the baking soda reacting, creating lift.
- Bake the Layers: Divide the batter evenly between the two prepared cake pans. I often weigh them to ensure even layers. Bake for 28-32 minutes, or until a wooden skewer inserted into the center comes out clean.
- Cool Completely: Let the cake layers cool in their pans on a wire rack for about 10-15 minutes. Then, carefully invert them onto the wire rack to cool completely. They must be entirely cool before frosting to prevent the frosting from melting.
- Prepare the Cream Cheese Frosting: While the cakes cool, beat the softened cream cheese and softened butter together in a large bowl with an electric mixer until smooth and creamy. Gradually add the sifted powdered sugar, one cup at a time, mixing on low speed until combined, then increase to medium-high until fluffy. Stir in the vanilla extract.
- Assemble and Frost: Once the cake layers are completely cool, level them with a serrated knife if necessary. Place one cake layer on your serving plate or cake stand. Spread a generous layer of cream cheese frosting evenly over the top. Carefully place the second cake layer on top. Frost the top and sides of the entire cake.
- Decorate: Garnish with fresh berries, delicate edible flowers, or sprinkles for a festive Mother’s Day touch.
Tips & Suggestions
To ensure your Mother’s Day Pink Velvet Cake turns out absolutely perfect and truly memorable, I have a few extra tips for you:
- Room Temperature Ingredients are Key: This is not just a suggestion; it’s a critical step! Softened butter, cream cheese, and eggs emulsify properly with the other ingredients, creating a smooth, homogenous batter and frosting. Cold ingredients can lead to a lumpy batter or a split frosting.
- Don’t Overmix the Batter: Once you add the flour, mix only until the ingredients are just combined. Overmixing develops the gluten in the flour, which can lead to a tough, dense cake rather than the desired light and velvety crumb. A few small lumps are better than an overmixed batter.
- Achieve Vibrant Pink: For that show-stopping Mother’s Day pink, I highly recommend using gel food coloring over liquid. Gel colors are concentrated, so you use less, which prevents thinning the batter, and they provide a much richer, more vibrant hue. Add it gradually until you reach your desired shade.
- Even Cake Layers: For a beautifully structured cake, ensure your layers are even. After mixing the batter, I like to weigh the batter into each pan using a kitchen scale. This guarantees that both layers bake up to the same thickness. If they dome slightly, you can level them with a serrated knife once cooled.
- Chill Your Layers: Before frosting, place the cooled cake layers in the refrigerator for about 20-30 minutes. Chilling makes them firmer and easier to handle, significantly reducing crumbs when you apply the frosting.
- Mother’s Day Decoration Ideas: Elevate your cake with thoughtful decorations. Fresh raspberries, strawberries, or delicate edible flowers (like pansies or violas) arranged on top create an elegant touch. A sprinkle of pink or gold sprinkles can add sparkle. For a personal touch, you could pipe “Happy Mother’s Day” on top with leftover frosting or place a decorative cake topper.
- Serving Suggestion: This cake is delightful on its own, but for an extra special treat, serve it with a side of fresh berries or a light dusting of powdered sugar. A warm cup of tea or coffee makes it the perfect accompaniment for a Mother’s Day brunch or dessert.
Storage
After all the effort you put into baking this beautiful Mother’s Day Pink Velvet Cake, you’ll want to store it properly to keep it fresh and delicious.
- Refrigeration is Essential: Due to the luscious cream cheese frosting, this Pink Velvet Cake must be stored in the refrigerator. The dairy in the frosting (cream cheese and butter) can spoil if left at room temperature for too long.
- Airtight Container: To prevent the cake from drying out and absorbing any lingering odors from your refrigerator, store it in an airtight cake carrier or a large container with a tight-fitting lid. If you don’t have one, you can lightly tent it with plastic wrap, ensuring it doesn’t touch the frosting, and then tightly wrap it again.
- Shelf Life: When properly stored in the refrigerator, your Pink Velvet Cake will remain fresh and delicious for 3-4 days.
- Serving Temperature: For the best flavor and texture of both the cake and the frosting, I highly recommend letting the cake sit out at room temperature for about 30-60 minutes before serving. This allows the frosting to soften slightly and the cake layers to become incredibly tender.
- Freezing Unfrosted Layers: If you’re planning ahead, unfrosted cake layers can be wrapped individually and tightly in plastic wrap, then again in aluminum foil, and frozen for up to 2 months. Thaw them in the refrigerator overnight before frosting and assembling.
- Freezing a Frosted Cake: You can also freeze a fully frosted cake. To do this, place the entire cake (uncovered) in the freezer until the frosting is completely firm (this usually takes a few hours). Once firm, wrap the cake tightly in several layers of plastic wrap, then a layer of aluminum foil. It can be frozen for up to 1 month. Thaw the wrapped cake in the refrigerator overnight, then unwrap it and let it come to room temperature for serving.
Final Thoughts
Finally, as we wrap up our delightful journey with the Mothers Day Pink Velvet Cake, I truly hope you’re feeling inspired to bake this exquisite treat. This isn’t just any cake; it’s a vibrant, tender expression of love, perfectly suited to celebrate the incredible mothers in our lives. The gorgeous pink hue, combined with the signature velvet texture and a luscious cream cheese frosting, makes the Mothers Day Pink Velvet Cake an unforgettable centerpiece for her special day. Imagine the joy on her face when she sees and tastes this beautiful creation, made with your own hands. It’s a heartfelt gesture that goes beyond words, a delicious way to show how much you care. So, gather your ingredients, put on your apron, and get ready to create something truly magical. I promise, the Mothers Day Pink Velvet Cake will make her feel cherished and adored. Happy baking, and Happy Mother’s Day!

Leave a Comment