
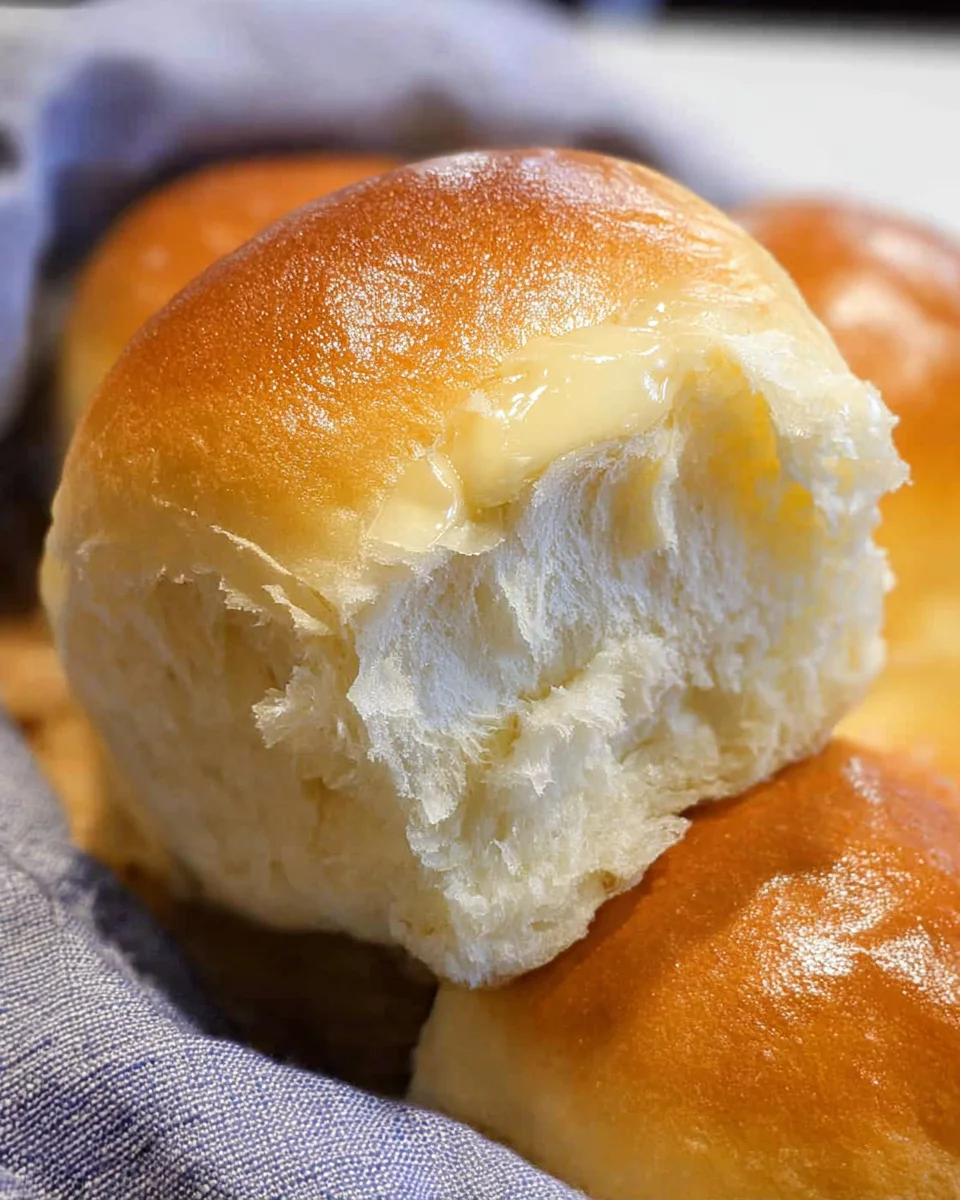
Texas Roadhouse Rolls are more than just a side dish; they’re a culinary experience that countless diners eagerly anticipate. That moment when a warm basket arrives at your table, filled with fluffy, golden-brown delights, accompanied by a generous serving of sweet cinnamon honey butter – it’s pure bliss. I know I’m not alone in saying those rolls are often the highlight of the entire dining experience, beckoning you back for just one more.
A Legacy of Warmth and Flavor
For over two decades, Texas Roadhouse restaurants across the country have perfected this iconic recipe, making these rolls a cornerstone of their welcoming, family-friendly atmosphere. They’ve become synonymous with hearty American comfort food and generous hospitality, creating a distinct cultural footprint in casual dining. The secret to their universal appeal lies in their incredible softness, a slightly sweet yeast flavor, and that irresistible, tender crumb that practically melts in your mouth. They’re dangerously addictive, and for good reason!
Now, imagine being able to recreate that beloved taste right in your own kitchen. My goal today is to guide you through mastering these legendary Texas Roadhouse Rolls, ensuring you can enjoy that restaurant-quality warmth and flavor anytime you wish, making any meal feel a little bit more special.
Ingredients:
- For the Dough:
- 1 cup (240ml) warm water (105-115°F / 40-46°C)
- 2 ½ teaspoons (about 1 packet) active dry yeast
- ½ cup (120ml) milk, warmed to lukewarm
- ½ cup (113g) unsalted butter, melted and cooled slightly, plus extra for greasing
- ½ cup (100g) granulated sugar
- 1 teaspoon salt
- 4 ½ to 5 cups (540-600g) all-purpose flour, plus more for dusting
- 1 large egg, at room temperature (optional, for richer color and texture)
- For the Butter Topping (optional but highly recommended):
- 2 tablespoons unsalted butter, melted
- For the Honey-Cinnamon Butter:
- ½ cup (113g) unsalted butter, softened
- ¼ cup (60g) honey
- 1 teaspoon ground cinnamon
- Pinch of salt
Activating the Yeast and Preparing the Dough
- Let’s begin by awakening our yeast, which is crucial for those wonderfully light and fluffy Texas Roadhouse Rolls. In a large bowl or the bowl of your stand mixer, combine the warm water (make sure it’s between 105-115°F, otherwise it could kill the yeast or not activate it) and 1 teaspoon of the granulated sugar. Sprinkle the active dry yeast over the top of this mixture. Give it a gentle stir and then let it sit undisturbed for about 5 to 10 minutes. You’ll know your yeast is alive and ready to work its magic when it becomes foamy and bubbly on the surface. If it doesn’t foam, your yeast might be old or your water temperature was off, and it’s best to start again with fresh yeast. This step is non-negotiable for successful rolls!
- While your yeast is proofing, let’s prepare the rest of our wet ingredients. In a small saucepan or microwave-safe bowl, gently warm the milk until it’s lukewarm (around 100°F). You don’t want it hot, just slightly warm to the touch. Then, add the ½ cup of melted butter (make sure it’s cooled slightly so it doesn’t cook the egg or yeast), the remaining granulated sugar, and the salt to the warm milk. Stir everything together until the sugar and salt have dissolved completely. This creates a beautifully rich base for our dough.
- Once your yeast mixture is foamy, pour the warm milk and butter mixture into the bowl with the activated yeast. If you’re using the optional egg, now is the time to whisk it in. The egg adds a lovely richness, helps with the texture, and gives the rolls a beautiful golden hue. Stir everything together until it’s well combined.
- Now it’s time to introduce the flour. Gradually add the all-purpose flour, about 1 cup at a time, to the wet ingredients. If you’re using a stand mixer with a dough hook attachment, start mixing on low speed. If you’re mixing by hand, use a sturdy wooden spoon. Continue adding flour until the dough starts to come together and pull away from the sides of the bowl. You might not need all 5 cups of flour, or you might need a tiny bit more; the exact amount can vary depending on humidity and how accurately you’ve measured. The goal is to have a dough that is soft, slightly tacky, but not overly sticky.
- Once the dough has formed, it’s time for kneading. If you’re using a stand mixer, increase the speed to medium-low and knead for 7-10 minutes. If you’re kneading by hand, turn the dough out onto a lightly floured surface and knead vigorously for 10-15 minutes. Kneading is essential! It develops the gluten in the flour, which gives the rolls their structure and chewiness. You’ll know the dough is properly kneaded when it becomes smooth, elastic, and springs back when gently poked with your finger.
The First Rise: Developing Flavor and Texture
- Lightly grease a large bowl with a little bit of melted butter or cooking spray. Place your perfectly kneaded dough into the greased bowl, turning it once to coat the entire surface. This prevents a dry crust from forming during the rise. Cover the bowl tightly with plastic wrap or a clean kitchen towel.
- Find a warm, draft-free spot for your dough to rise. A common trick is to place it in an oven that has been turned off but previously warmed to about 100°F (just enough to create a cozy environment, not hot enough to bake it). Alternatively, a sunny spot on your counter works well. Let the dough rise until it has doubled in size. This usually takes about 1 to 1 ½ hours, but times can vary significantly based on room temperature and yeast activity. Patience is key here; don’t rush the rise! The dough needs this time to ferment and develop its signature flavor.
- Once the dough has doubled, gently punch it down. This releases the gases produced during fermentation and helps to redistribute the yeast, ensuring an even texture in the final rolls. Don’t be afraid to give it a good punch – it’s quite satisfying!
Shaping the Texas Roadhouse Rolls
- Lightly flour your work surface. Turn the punched-down dough out onto the floured surface. Gently press the dough into a rough rectangle.
- Using a rolling pin, roll the dough out evenly until it’s about ½ inch thick. Try to maintain a rectangular shape as much as possible. A uniform thickness ensures even baking.
- Now for the iconic square shape of Texas Roadhouse Rolls! Using a sharp knife or a pizza cutter, trim the edges to make a clean rectangle. Then, cut the dough into squares, approximately 2×2 inches. You can make them slightly larger or smaller depending on your preference, but this size yields classic, shareable rolls. As you cut, you’ll feel the dough’s softness and elasticity.
- Grease a 9×13-inch baking pan (or two smaller pans) with butter or cooking spray. Carefully arrange the cut dough squares in the prepared pan, leaving a little bit of space between each roll. They don’t need a lot of space, as they’ll puff up and connect during the second rise, which is exactly what we want for that pull-apart texture.
The Second Rise: Achieving Lightness
- Cover the baking pan loosely with plastic wrap or a clean kitchen towel. Return the pan to that same warm, draft-free spot you used for the first rise.
- Allow the rolls to rise again until they are visibly puffy and have nearly doubled in size. This second rise typically takes about 30-45 minutes. They should be touching each other in the pan, forming a lovely patchwork of soft dough. This second rise contributes significantly to the rolls’ airy texture.
- About 15 minutes before the end of the second rise, preheat your oven to 350°F (175°C). Getting your oven to the correct temperature beforehand is important for even baking.
Baking the Texas Roadhouse Rolls
- Once your oven is preheated and your rolls are beautifully puffed up, carefully place the baking pan into the preheated oven.
- Bake for 15-20 minutes, or until the tops of the rolls are golden brown. Keep a close eye on them, as oven temperatures can vary. If you notice them browning too quickly, you can loosely tent the pan with aluminum foil. For an even bake, you might want to rotate the pan halfway through the baking time. Don’t overbake! These rolls are meant to be soft and tender, and overbaking will make them dry.
- As soon as the rolls come out of the oven, while they are still piping hot, brush them generously with the 2 tablespoons of melted butter (from the “Butter Topping” ingredients list). This extra step adds a gorgeous sheen, incredible flavor, and keeps the crust soft. The warmth of the rolls will absorb the butter beautifully.
Preparing the Honey-Cinnamon Butter
- While your rolls are in their final stages of baking, let’s whip up the magical honey-cinnamon butter that makes these rolls truly irresistible. In a small bowl, combine the softened unsalted butter, honey, ground cinnamon, and a tiny pinch of salt.
- Using an electric mixer or a whisk, beat the ingredients together until the butter is light, fluffy, and all the ingredients are well incorporated. Scrape down the sides of the bowl as needed to ensure everything is mixed evenly. The cinnamon should be distributed throughout, and the butter should be pale and airy.
Finishing Touches and Serving
- Your Texas Roadhouse Rolls are now ready to be devoured! Let them cool in the pan for just a few minutes, maybe 5-10, before serving. This allows them to set slightly but keeps them wonderfully warm.
- Serve the warm, pillowy rolls immediately with generous dollops of the homemade honey-cinnamon butter. These rolls are best enjoyed fresh from the oven, when they are at their absolute peak of softness and flavor. Leftovers, if you have any, can be stored in an airtight container at room temperature for a day or two and gently reheated.
- Enjoy every single bite of these perfect, buttery Texas Roadhouse Rolls! They’re truly a labor of love that pays off with every tender, sweet, and cinnamon-kissed mouthful.
Conclusion:
Well, my fellow food enthusiasts, we’ve reached the sweet, buttery end of our culinary journey for today. If you’ve followed along, you now hold the key to unlocking an absolutely transformative baking experience right in your own kitchen. I truly believe that trying this recipe isn’t just about making bread; it’s about creating a moment of pure comfort and joy that will linger long after the last crumb is gone. This isn’t just another dinner roll recipe; it’s an invitation to elevate your meals, impress your loved ones, and rediscover the simple, profound satisfaction of baking from scratch.
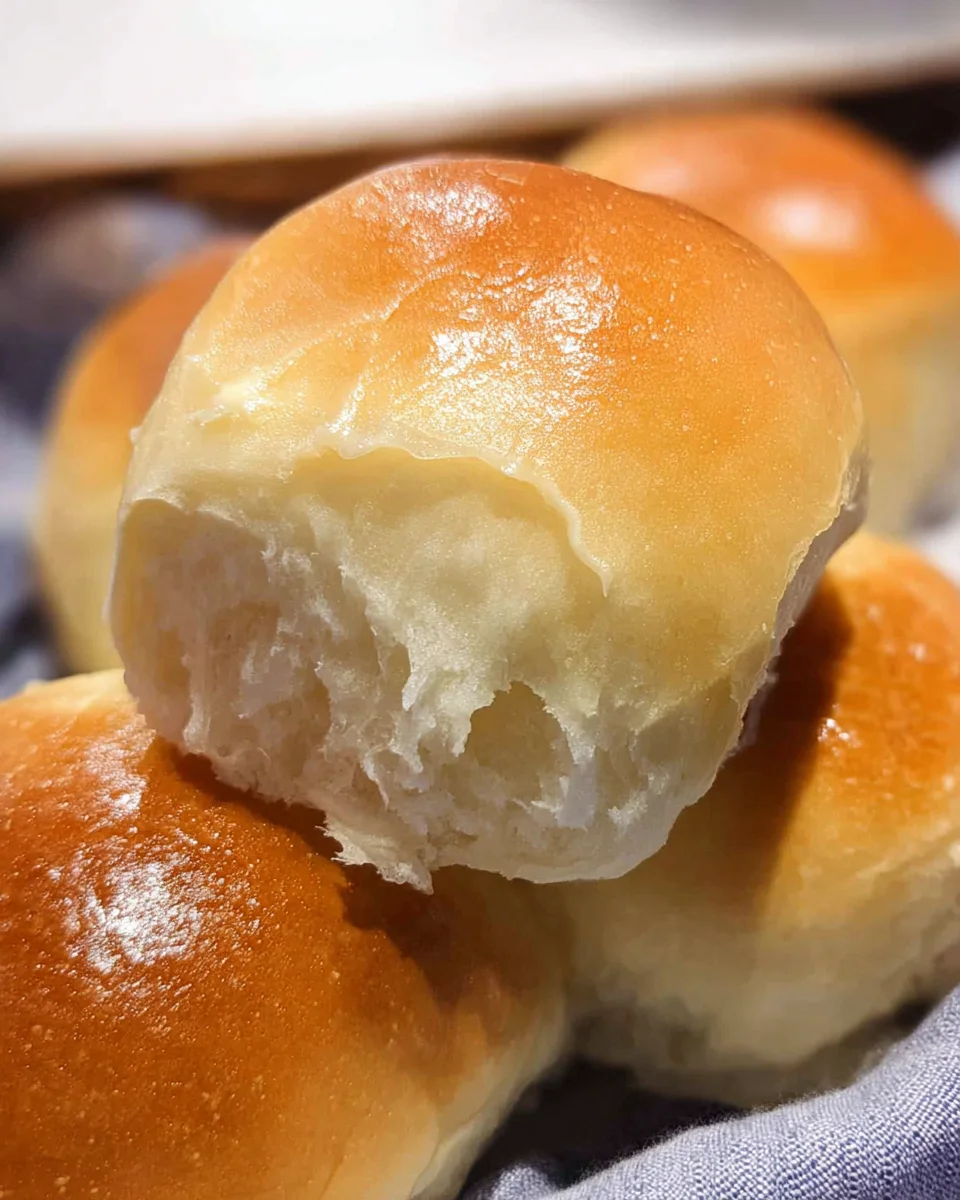
What truly makes these rolls a non-negotiable addition to your baking repertoire? It’s that irresistible combination of tender, cloud-like texture and a subtly sweet, yeasty flavor that practically melts in your mouth. There’s a reason why certain restaurant bread achieves legendary status, and I promise you, with this recipe, you’ll understand exactly why. Imagine pulling apart a warm roll, the steam gently rising, revealing an airy interior just begging to be slathered with butter. That’s the magic we’re talking about here. They possess a versatility that few other bread recipes can boast, making them perfect for almost any occasion, from a casual weeknight dinner to the grandest holiday feast. They are a testament to the fact that sometimes, the simplest things, when done right, can be the most extraordinary.
Beyond the Basket: Creative Serving & Variation Ideas!
Now, while these rolls are undeniably divine straight from the oven with a simple pat of butter, let’s talk about how to truly make them sing. For the ultimate experience, a generous spread of homemade cinnamon-honey butter is a game-changer, transforming each bite into a little piece of heaven. I always encourage my readers to get creative in the kitchen, and these rolls offer a fantastic canvas for experimentation. Beyond the classic serving with butter, consider them the perfect accompaniment to hearty stews, slow-cooked roasts, or a vibrant pasta dish. They’re also magnificent for breakfast or brunch; split them open, toast lightly, and top with scrambled eggs and a sprinkle of chives for an elevated morning treat. Or, for a truly decadent dessert, try them with a dollop of fruit preserves or a smear of Nutella – trust me on this one, it’s surprisingly delicious!
For those feeling adventurous, why not explore a few delicious variations? You could knead a tablespoon of dried rosemary or thyme into the dough for an herbaceous twist that pairs wonderfully with savory meals. Or, for a sweeter rendition, gently swirl some cinnamon sugar into the dough before the final rise, transforming them into a delightful morning bun. You could even experiment with different shapes – small knots, twists, or even mini pull-apart buns baked in a muffin tin – to add a touch of flair to your serving presentation. The possibilities are truly endless, and each adaptation allows you to put your unique spin on this incredible base recipe.
But here’s the real kicker, the secret ingredient that truly elevates this entire experience: it’s the sheer joy of creating something so wonderfully delicious with your own hands. There’s an immense sense of accomplishment that comes with baking fresh bread, and even more so when it’s as universally loved as these. When you present a basket of these warm, golden delights, you’re not just offering food; you’re offering comfort, care, and a little piece of your heart. And for those who have a special place in their heart for that distinct restaurant-style bread, I can confidently say that these homemade Texas Roadhouse Rolls will absolutely blow you away. The flavor, the texture, the aroma – it’s all there, recreated with love and precision in your very own home.
So, what are you waiting for? Clear your schedule, gather your ingredients, and prepare for a truly rewarding baking adventure. I wholeheartedly urge you to give this recipe a try. Don’t be intimidated by yeast or kneading; the process is incredibly forgiving, and the payoff is immense. And please, once you’ve experienced the magic of these rolls, don’t keep it to yourself! I would absolutely love to hear about your baking triumphs, your personal twists, and how these rolls were received at your table. Share your experiences in the comments below, or better yet, snap a photo and share it on your favorite social media platforms, tagging me so I can see your magnificent creations. Let’s spread the joy of homemade baking far and wide! Happy baking, my friends!
Texas Roadhouse Rolls
Recreate the iconic soft, fluffy, and buttery Texas Roadhouse Rolls right in your own kitchen, perfect with a side of sweet cinnamon honey butter.
Ingredients
Instructions
Important Information
Nutrition Facts (Per Serving)
It is important to consider this information as approximate and not to use it as definitive health advice.
Allergy Information
Please check ingredients for potential allergens and consult a health professional if in doubt.


Leave a Comment