
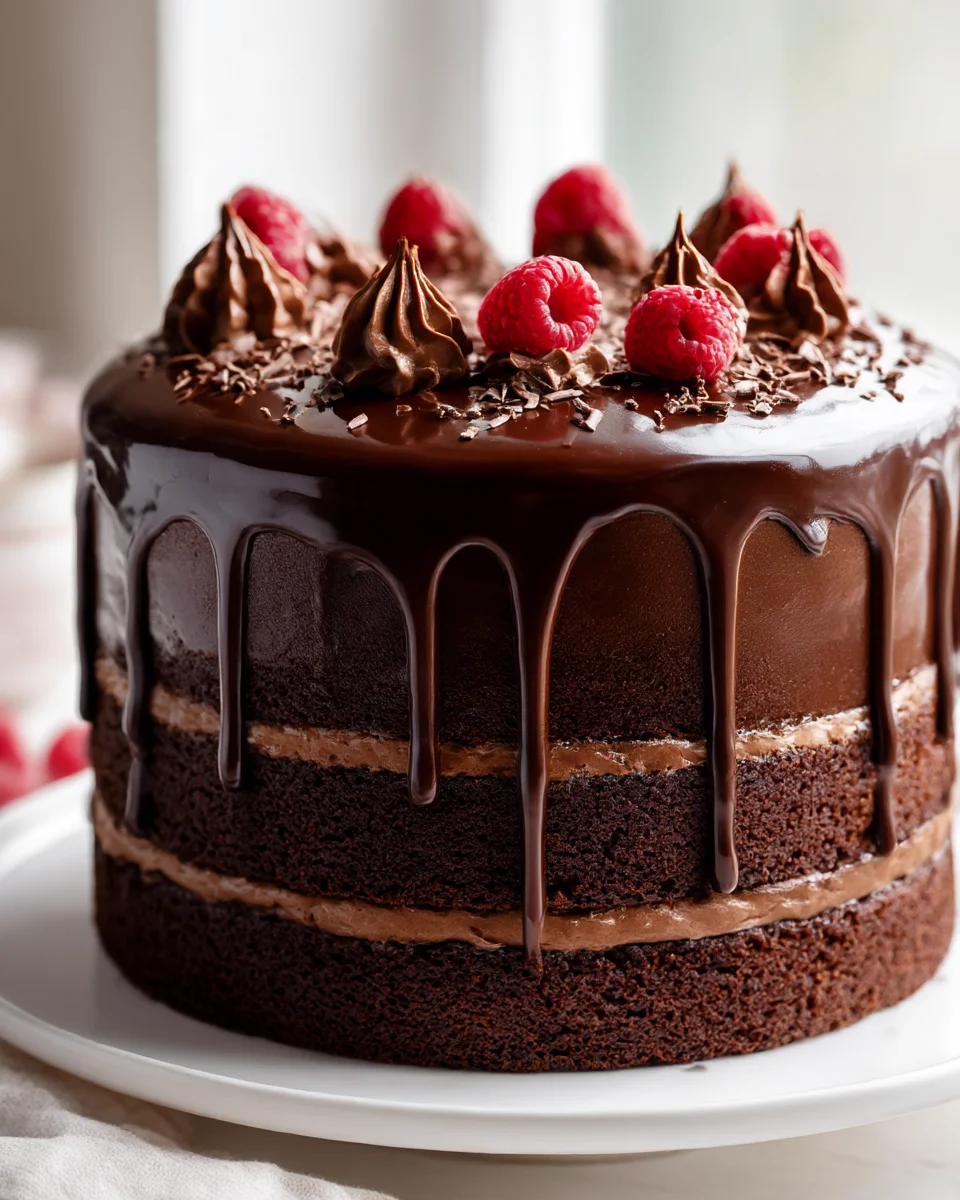
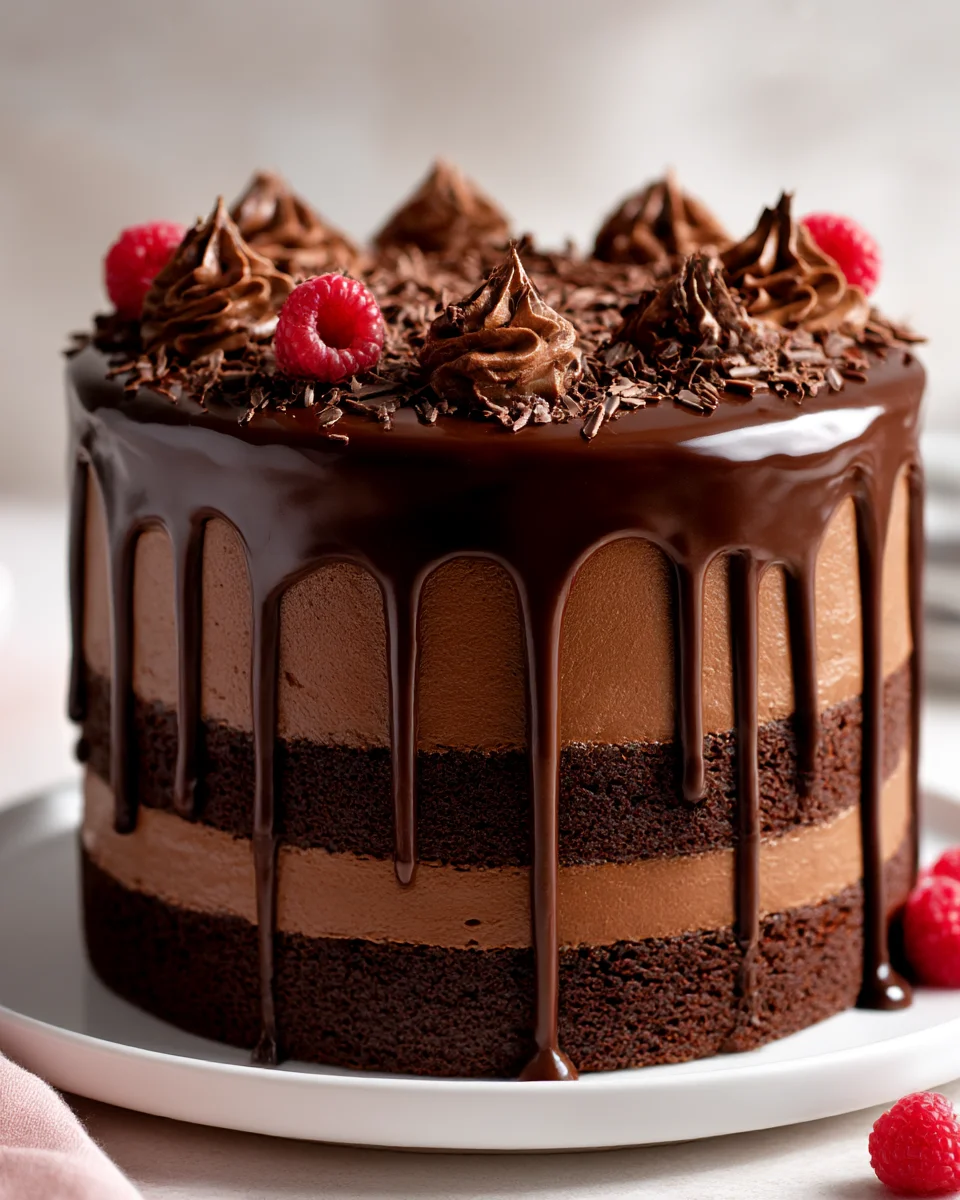
Chocolate Ganache Drip Birthday Layer Cake
Oh boy, get ready to dive into the world of pure chocolate bliss! When I think about celebrating a special day, my mind immediately conjures up images of something truly spectacular, and that, my friends, is exactly what the Chocolate Ganache Drip Birthday Layer Cake delivers. This isn’t just any cake; it’s a centerpiece, a showstopper, and an edible work of art that will have everyone reaching for a slice (or two!).
What makes this particular recipe so incredibly special, you ask? It’s all about that dramatic, glossy chocolate ganache cascading down the sides, creating an irresistible visual and textural contrast with the tall, elegant layers of moist chocolate cake beneath. Every bite is an experience – from the tender crumb of the cake to the creamy frosting, all capped off with that intense, rich ganache. Trust me, it’s a symphony of chocolate that’s both sophisticated and incredibly fun.
You are absolutely going to adore making and serving this cake. Why? Because it brings an undeniable “wow” factor to any birthday table, making the guest of honor feel extra celebrated. It looks incredibly impressive, yet with my step-by-step guidance, it’s totally achievable for home bakers. Imagine the gasps of delight when you present this beauty! It’s the ultimate indulgence, a true celebration of chocolate in every form. Get ready to bake a memory!
Ingredient Notes
Creating a showstopper like my Chocolate Ganache Drip Birthday Layer Cake relies on a few key ingredients working in harmony. Here’s a breakdown of what I love to use and some handy substitutions:
For the Chocolate Cake Layers
- All-Purpose Flour: This forms the structure of our moist cake. If you’re looking for a gluten-free option, a good quality 1:1 gluten-free baking blend will work wonderfully. Just make sure it contains xanthan gum.
- Unsweetened Cocoa Powder: I always reach for Dutch-processed cocoa powder. It gives a darker, richer chocolate flavor and a beautiful deep color, which I think is perfect for a birthday cake. Natural cocoa powder will also work, but the cake might be a touch lighter in color and flavor.
- Granulated Sugar: Essential for sweetness and moisture.
- Eggs: Large eggs provide structure and richness. If you need a vegan alternative, flax eggs (1 tbsp ground flaxseed + 3 tbsp water per egg, let sit for 5 minutes) can often be substituted, though the cake might be slightly denser.
- Vegetable Oil: For incredible moisture. Melted unsalted butter can be used for a richer flavor, but oil typically yields a moister cake that stays soft longer.
- Buttermilk: This tenderizes the cake crumb and reacts with the baking soda for a great rise. If you don’t have buttermilk, you can make your own by adding 1 tablespoon of white vinegar or lemon juice to a measuring cup, then filling the rest with milk (dairy or non-dairy) to reach 1 cup. Let it sit for 5-10 minutes until it curdles slightly.
- Hot Water or Coffee: This ingredient is magical for chocolate cakes! It helps bloom the cocoa powder, intensifying the chocolate flavor, and keeps the cake incredibly moist. Coffee (decaf works too) further enhances the chocolate notes without making the cake taste like coffee.
- Baking Soda and Baking Powder: Our leavening agents. Baking soda reacts with the acidic buttermilk, and baking powder provides an extra lift.
- Vanilla Extract: A touch of vanilla always complements chocolate beautifully.
For the Chocolate Buttercream
- Unsalted Butter: Make sure it’s at room temperature – this is crucial for a smooth, fluffy buttercream. For a dairy-free version, use a high-quality vegan butter stick.
- Powdered Sugar (Confectioners’ Sugar): For sweetness and structure. Sifting it prevents lumps.
- Unsweetened Cocoa Powder: Again, Dutch-processed for that deep chocolate flavor and color.
- Heavy Cream or Milk: Adjusts the consistency. You can use dairy or a good non-dairy milk (like oat or almond milk).
- Vanilla Extract: Another dash to round out the flavors.
For the Chocolate Ganache Drip
- High-Quality Dark Chocolate: This is where you don’t want to skimp! I recommend a chocolate with 60-70% cocoa solids for the best flavor and consistency. Chocolate chips work, but a chopped bar of good quality baking chocolate melts more smoothly and gives a superior ganache. For a sweeter ganache, you could use milk chocolate, but be aware it will be thinner due to its lower cocoa solids content, so you might need to adjust the cream ratio slightly.
- Heavy Cream: Full-fat heavy cream (at least 36% milk fat) is essential for a rich, emulsified ganache. For a dairy-free alternative, full-fat canned coconut milk (just the thick cream from the top of the can) can be used, but the ganache might have a slight coconut flavor and a slightly different texture.
Step-by-Step Instructions
Let’s get baking! Follow these steps to create your magnificent Chocolate Ganache Drip Birthday Layer Cake.
For the Chocolate Cake Layers:
- Prepare your pans: Preheat your oven to 350°F (175°C). Grease and flour three 8-inch round cake pans, or line the bottoms with parchment paper rounds and grease the sides.
- Combine dry ingredients: In a large bowl, whisk together the all-purpose flour, granulated sugar, Dutch-processed cocoa powder, baking soda, baking powder, and salt. Set aside.
- Mix wet ingredients: In a separate medium bowl, whisk together the eggs, buttermilk, vegetable oil, and vanilla extract until well combined.
- Combine wet and dry: Pour the wet ingredients into the dry ingredients. Mix on low speed with an electric mixer, or by hand with a whisk, until just combined. Be careful not to overmix!
- Add hot liquid: Gradually pour in the hot water or coffee, mixing until the batter is smooth. The batter will be thin, and that’s perfectly normal.
- Bake: Divide the batter evenly among the prepared cake pans. Bake for 25-30 minutes, or until a wooden skewer inserted into the center comes out with moist crumbs, not wet batter.
- Cool: Let the cakes cool in their pans on a wire rack for 10-15 minutes before inverting them onto the wire rack to cool completely. They must be completely cool before frosting!
For the Chocolate Buttercream:
- Cream the butter: In a large bowl, using an electric mixer, beat the softened unsalted butter on medium speed for 2-3 minutes until light and fluffy.
- Add dry ingredients: Gradually add the powdered sugar, cocoa powder, and salt, beating on low speed until combined. Scrape down the sides of the bowl.
- Whip it up: Add the vanilla extract and 2 tablespoons of heavy cream. Beat on medium-high speed for another 3-5 minutes, adding more heavy cream a tablespoon at a time, until the buttercream is light, fluffy, and spreadable.
For the Chocolate Ganache Drip:
- Prepare chocolate: Place the chopped dark chocolate (or chocolate chips) in a heatproof bowl.
- Heat cream: In a small saucepan, heat the heavy cream over medium heat until it just begins to simmer around the edges, but do not boil.
- Pour and rest: Pour the hot cream over the chocolate. Let it sit undisturbed for 5 minutes to allow the chocolate to melt.
- Stir to combine: Gently stir the mixture from the center outwards until the ganache is completely smooth and shiny.
- Cool to drip consistency: Let the ganache cool at room temperature, stirring occasionally, until it reaches a thick but still pourable consistency, similar to warm syrup (this can take 30-60 minutes, depending on room temperature). It should be cool enough that it won’t melt the buttercream, but warm enough to drip easily.
Assembling the Cake:
- Level the cakes: If your cake layers have domed tops, use a serrated knife or a cake leveler to level them flat.
- Stack and fill: Place one cake layer on your serving plate or cake stand. Spread about 1/2 cup of chocolate buttercream evenly over the top. Repeat with the second and third cake layers.
- Crumb coat: Apply a thin layer of buttercream all over the top and sides of the stacked cake. This is called a crumb coat, and it traps any loose crumbs.
- Chill: Refrigerate the cake for 20-30 minutes to set the crumb coat. This is a crucial step!
- Final coat: Once chilled, apply the remaining buttercream evenly over the top and sides of the cake, smoothing it out with an offset spatula or bench scraper.
- Chill again: Return the cake to the refrigerator for at least 30 minutes, or until the buttercream is firm. This will ensure clean ganache drips.
- Apply the drip: Carefully spoon the cooled ganache around the top edge of the chilled cake. Use the back of the spoon to gently push some ganache over the edge, creating beautiful drips. Once the edges are done, pour the remaining ganache over the center of the cake and spread it out evenly with an offset spatula.
- Decorate and serve: If desired, decorate with sprinkles, candles, or other birthday cake embellishments. Allow the ganache to set slightly before serving, or chill briefly.
Tips & Suggestions
- Don’t Overmix the Batter: For the cake layers, mixing the batter too much can develop the gluten, resulting in a tough, dry cake. Mix just until the ingredients are combined.
- Cool Cakes Completely: This is non-negotiable! Warm cakes will melt your buttercream and make a messy situation. Patience is key here.
- The Crumb Coat is Your Best Friend: Seriously, don’t skip it. It locks in all those loose crumbs, ensuring your final layer of frosting is smooth and crumb-free.
- Ganache Temperature is Critical: This is the trickiest part of the drip! If the ganache is too hot, it will run right off the cake and create a very thin, almost clear drip. If it’s too cold, it will be too thick and chunky, and won’t drip nicely. Aim for a consistency like warm honey or thick syrup. I often test a small drip on the side of a chilled glass or a bowl first to check.
- Application Method for Drips: You can use a spoon, as described, or for more control, a squeeze bottle or a piping bag with a small round tip works wonders. Start with a small amount of ganache on the edge and let gravity do the work.
- Chill Between Steps: Chilling the cake after the crumb coat and after the final buttercream layer makes everything easier. It sets the frosting, creating a firm base for subsequent layers and a cold surface for those perfect ganache drips.
- Level Your Cakes: Even layers make for a much prettier and more stable cake. A serrated knife or a dedicated cake leveler makes this task simple.
- High-Quality Chocolate Matters: Especially for the ganache, using a good quality dark chocolate will elevate the flavor and give you a smoother, more appealing drip.
- Decorate Creatively: Once your ganache is set, feel free to add a personal touch! Sprinkles are a classic birthday choice, but fresh berries, chocolate shavings, or even small candies can make your cake extra special.
Storage
Once you’ve gone to all the effort of making this beautiful Chocolate Ganache Drip Birthday Layer Cake, you’ll want to ensure it stays fresh and delicious!
- Room Temperature: If you plan to serve the cake within 1-2 days and your kitchen isn’t excessively warm, you can store it loosely covered with a cake dome or plastic wrap at cool room temperature. The buttercream and ganache are stable at room temp for a short period.
- Refrigeration: For longer storage, or if your home is warm, I recommend refrigerating the cake. Cover it loosely with plastic wrap or place it in an airtight cake carrier. It will stay fresh for up to 3-5 days.
- Serving Refrigerated Cake: For the best texture and flavor, especially for the cake layers and buttercream, I always recommend letting the cake sit at room temperature for at least 1-2 hours before serving if it’s been in the fridge. This allows the butter in the buttercream to soften and the cake layers to become wonderfully moist again.
- Freezing: If you want to keep slices or even an undecorated whole cake for an extended period, freezing is a great option.
- Slices: Place individual slices on a plate and freeze until firm. Then, wrap each slice tightly in plastic wrap, followed by a layer of aluminum foil. Store in the freezer for up to 1 month.
- Whole Cake (Undecorated): If you haven’t applied the ganache or final decorations yet, you can freeze the frosted cake. Chill the frosted cake until the buttercream is firm, then wrap it tightly in several layers of plastic wrap, followed by aluminum foil. Freeze for up to 1 month.
- Thawing Frozen Cake: To thaw, transfer the wrapped cake (or slices) to the refrigerator overnight. Once thawed, bring it to room temperature for 1-2 hours before serving. If you froze an undecorated cake, apply the ganache and any final touches after it has thawed.
Final Thoughts
I truly hope you’re feeling inspired to create something magical because I know this Chocolate Ganache Drip Birthday Layer Cake is more than just a recipe; it’s an invitation to pure celebration! This isn’t just any cake; it’s a show-stopping masterpiece that promises to be the highlight of any birthday or special occasion. I absolutely adore how the rich, moist cake layers pair perfectly with the luxurious, cascading chocolate ganache drip, creating an experience that is both visually stunning and incredibly delicious. I promise you, every bite of this Chocolate Ganache Drip Birthday Layer Cake is pure chocolate bliss!
You don’t need to be a master baker to achieve impressive results with this particular recipe. It’s designed to guide you to success, leaving you with a dessert that will earn rave reviews and satisfied smiles. So, for your next big celebration, or even just a moment when you want to treat someone (or yourself!) to something truly extraordinary, I wholeheartedly recommend diving into making this incredible Chocolate Ganache Drip Birthday Layer Cake. It’s a joyful journey from start to finish, and the end result is simply unforgettable!
Leave a Comment