
Homemade Stuffing is more than just a side dish; it’s a culinary hug, a fragrant promise of warmth and tradition that fills your kitchen with an irresistible aroma long before the first bite. For many of us, the captivating scent of sage, thyme, and toasted breadcrumbs signals the true start of a holiday feast, instantly evoking cherished memories and bringing families closer around the table. I’ve always found something profoundly comforting in preparing this classic, knowing that each carefully chosen ingredient contributes to a symphony of flavors that will delight everyone.
The history of stuffing stretches back centuries, initially conceived as a practical and ingenious way to enhance the flavor and moisture of roasted meats and poultry. Over time, it evolved from a simple filler into a celebrated dish in its own right, becoming an indispensable part of festive meals, particularly Thanksgiving and Christmas here in North America. There’s a beautiful continuity in creating something that has been enjoyed across generations, connecting us to culinary traditions that truly stand the test of time.
Why We Absolutely Adore This Dish
What makes a great stuffing so universally beloved? It’s the delightful interplay of textures – the perfectly crisp, golden-brown top giving way to a moist, savory interior brimming with aromatic herbs, rich broth, and often a touch of sweetness or earthiness from additional ingredients. This perfect balance ensures that every forkful is a revelation, making it an utterly satisfying accompaniment to any main course. There’s truly nothing quite like the deeply satisfying flavor and comforting texture of a thoughtfully prepared Homemade Stuffing to complete a meal and create lasting memories.
Ingredients:
- 1 pound (approximately 14-16 cups) stale or day-old bread: I love using a good quality rustic white bread, sourdough, challah, or even a combination. The key here is for it to be stale so it can absorb all those wonderful flavors without becoming mushy. If your bread isn’t stale, you can cube it and spread it on baking sheets, then bake it in a 300°F (150°C) oven for 15-20 minutes, or until dried out but not toasted to a crisp.
- 1 cup (2 sticks) unsalted butter: We’re going to use a generous amount of butter to build an incredibly rich flavor base. Unsalted allows us to control the sodium levels precisely.
- 2 large yellow onions: Finely diced. These are foundational for flavor, adding a subtle sweetness and aromatic depth.
- 4-5 stalks celery: Finely diced. Celery brings a crucial earthy, slightly bitter note and textural contrast that is absolutely essential for classic Homemade Stuffing.
- 2 Granny Smith apples (optional, but highly recommended): Peeled, cored, and finely diced. The apples add a fantastic touch of tartness and a hint of sweetness that brightens the entire dish, preventing it from being too heavy. Trust me on this one!
- 4 cloves garlic: Minced. Garlic adds a pungent kick that complements the other aromatics perfectly.
- 1 tablespoon fresh sage: Finely chopped. Sage is the quintessential herb for stuffing, offering an earthy, slightly peppery, and pine-like aroma that screams comfort food.
- 1 tablespoon fresh thyme: Finely chopped. Thyme brings a subtle lemon and mint-like note that beautifully balances the sage.
- 1/2 teaspoon dried marjoram: This herb has a sweeter, milder flavor than oregano and pairs wonderfully with poultry and vegetables, enhancing the overall savory profile of our Homemade Stuffing.
- 1 teaspoon salt: Start with this amount, but remember we’ll be tasting and adjusting as we go.
- 1/2 teaspoon freshly ground black pepper: For a delightful bit of warmth and spice.
- 2 large eggs: Lightly beaten. Eggs act as a binder, helping the stuffing hold together beautifully and preventing it from becoming too crumbly.
- 4-6 cups low-sodium chicken or vegetable broth: Warmed. The exact amount will vary based on your bread type and desired moisture level. Using low-sodium broth gives us control over the final saltiness.
- 1/2 cup fresh parsley: Finely chopped. Added at the end for a burst of freshness and vibrant color.
- Optional additions for extra richness: 1/2 cup heavy cream, 1/2 cup chopped cooked sausage (like sage sausage), or 1/4 cup toasted pecans.
Prepping Your Ingredients
- Prepare the Bread: First things first, let’s get our bread ready. If you haven’t already, cube your stale bread into roughly 3/4-inch to 1-inch pieces. The size doesn’t need to be perfectly uniform, but try to keep them somewhat consistent so they toast and absorb liquid evenly. Place the bread cubes in a very large mixing bowl. This bowl needs to be big enough to accommodate all the bread and eventually, all the other ingredients, so don’t skimp on size here. If your bread isn’t stale, remember my tip from the ingredients list: spread it on baking sheets and dry it out in a low oven. This step is crucial for the texture of your ultimate Homemade Stuffing. We want the bread to be dry enough to soak up all the flavorful broth and butter without disintegrating into a mushy mess.
- Chop the Vegetables and Apples: Grab your cutting board and a sharp chef’s knife. Carefully peel and finely dice your yellow onions. We’re aiming for pieces that are roughly a quarter-inch in size. Small dice ensures they soften evenly and meld seamlessly into the stuffing without creating large, prominent chunks, and it allows for maximum flavor release when we sauté them. Next, wash and finely dice your celery stalks, aiming for a similar size. For the optional but highly recommended Granny Smith apples, peel, core, and then finely dice them as well. Again, consistent sizing is key for even cooking. Finally, peel and mince your garlic cloves. Don’t worry about the parsley or fresh herbs just yet; we’ll chop those closer to when they’re added to preserve their freshness. Having all your “mise en place” – everything in its place – before you start cooking makes the rest of the process flow so much smoother and more enjoyable.
Building the Flavor Base
- Sauté the Aromatics: Now, let’s get cooking and create the heart of our flavor. In a large, heavy-bottomed pot or Dutch oven, melt your entire cup of unsalted butter over medium heat. Don’t rush this; we want the butter to melt completely and become fragrant. Once the butter is shimmering, add your diced onions and celery to the pot. Stir them well to coat them in the rich butter. We’re going to sauté these gentle giants for about 8-10 minutes, stirring occasionally, until they’ve softened significantly and become translucent. You’re not looking for browning here, just a beautiful tenderness. This slow sauté allows the natural sugars in the vegetables to caramelize slightly, deepening their flavor and contributing to the overall complexity of your Homemade Stuffing.
- Infuse with Herbs and Garlic: Once the onions and celery are tender, it’s time to bring in the big guns of flavor: the herbs and garlic. Add your minced garlic, chopped fresh sage, chopped fresh thyme, and dried marjoram to the pot. Stir everything together and continue to cook for just 1-2 minutes more. Be careful not to burn the garlic, as burnt garlic can taste bitter. This brief sauté allows the aromatic oils in the herbs and garlic to bloom and release their incredible fragrances into the butter and softened vegetables. The kitchen should start smelling absolutely heavenly at this point – that’s how you know you’re on the right track!
- Add the Apples (if using): If you’ve opted to include the Granny Smith apples, now is the time to add them to the pot. Stir them in with the softened vegetables and herbs. Cook for another 3-5 minutes, just until the apples start to soften slightly but still retain a bit of their bite. We don’t want them turning into applesauce; a little texture is nice, and their tartness provides a fantastic counterpoint to the savory elements of our Homemade Stuffing. This step really elevates the flavor profile, adding a dimension you might not expect but will absolutely love.
- Season Generously: With all the aromatics beautifully softened and fragrant, it’s time to season. Add your teaspoon of salt and half teaspoon of freshly ground black pepper to the pot. Stir well to distribute the seasonings evenly throughout the vegetable mixture. Remember, this is the base of our stuffing, so we want it to be well-seasoned. We’ll have another opportunity to taste and adjust later, but starting strong here is important. The salt will also help draw out any remaining moisture from the vegetables, further concentrating their flavors.
Combining and Hydrating
- Combine Wet and Dry: Carefully scrape the entire contents of the pot – the fragrant, buttery, herb-infused vegetable and apple mixture – into the very large mixing bowl with your cubed stale bread. Use a sturdy spatula to ensure you get every last bit of that delicious butter and flavor base. Now, gently toss the bread cubes with the vegetable mixture. You want to distribute everything evenly, making sure that each piece of bread gets some of that glorious butter and those aromatic bits. Take your time with this step, handling the bread gently so it doesn’t break down too much just yet.
- Add Eggs: In a separate small bowl, lightly beat your two large eggs. Once beaten, pour the eggs over the bread and vegetable mixture in the large bowl. Toss everything together again, ensuring the eggs are well distributed. The eggs act as a binder, helping the stuffing hold its shape during baking and providing a lovely richness and tenderness to the final product. They’re what give our Homemade Stuffing that classic, slightly cohesive texture.
- Gradually Add Broth: Now comes the crucial step of hydrating our stuffing. Warm your low-sodium chicken or vegetable broth – just warm, not boiling hot. Begin by pouring 4 cups of the warm broth over the bread mixture. Gently toss and fold the ingredients together using your hands or a large spoon. The goal here is to moisten all the bread without making it soggy. The amount of broth needed can vary greatly depending on the type and dryness of your bread. Some breads are more absorbent than others.
Achieving the Perfect Moisture Level:
You’re looking for the bread to be fully moistened but still have some structure. It should feel damp to the touch but not swimming in liquid. If, after adding 4 cups, your stuffing still seems dry in places, add the remaining broth half a cup at a time, tossing gently after each addition, until you reach your desired consistency. I often find myself using around 5-5.5 cups of broth for a perfectly moist, but not wet, stuffing. This is where your personal preference comes into play – do you like a drier, crumbly stuffing or a very moist one? Keep tossing until you’re happy with the moisture level.
- Final Seasoning Check and Fresh Parsley: Once the broth is incorporated, it’s time for the most important step before baking: tasting! Take a small spoonful of the stuffing mixture (it’s raw, but safe to taste for seasoning). Adjust with more salt and pepper as needed. Remember, the flavors will concentrate slightly during baking, but you want it to taste well-seasoned now. If you’re going to add any optional ingredients like heavy cream, cooked sausage, or toasted pecans, stir them in at this point. Finally, add your finely chopped fresh parsley. The parsley adds a wonderful herbaceous freshness and vibrant color that really brightens up the entire dish, ensuring our Homemade Stuffing is as appealing to the eye as it is to the palate.
Baking Your Homemade Stuffing
- Prepare the Baking Dish: Preheat your oven to 375°F (190°C). Lightly grease a 9×13-inch baking dish or a similarly sized oven-safe casserole dish with a little butter or cooking spray. Transfer the prepared stuffing mixture into the greased dish, spreading it out evenly. Don’t press it down too firmly; we want some air circulation for that wonderful texture. A light hand here ensures a fluffier result.
- Baking Covered: Cover the baking dish tightly with aluminum foil. This step is crucial for ensuring the stuffing cooks through evenly and stays wonderfully moist. The foil traps the steam, allowing the bread to fully absorb the liquid and soften beautifully without drying out. Bake for 30 minutes with the foil on. This initial covered bake ensures that the interior of your Homemade Stuffing becomes perfectly tender and flavorful.
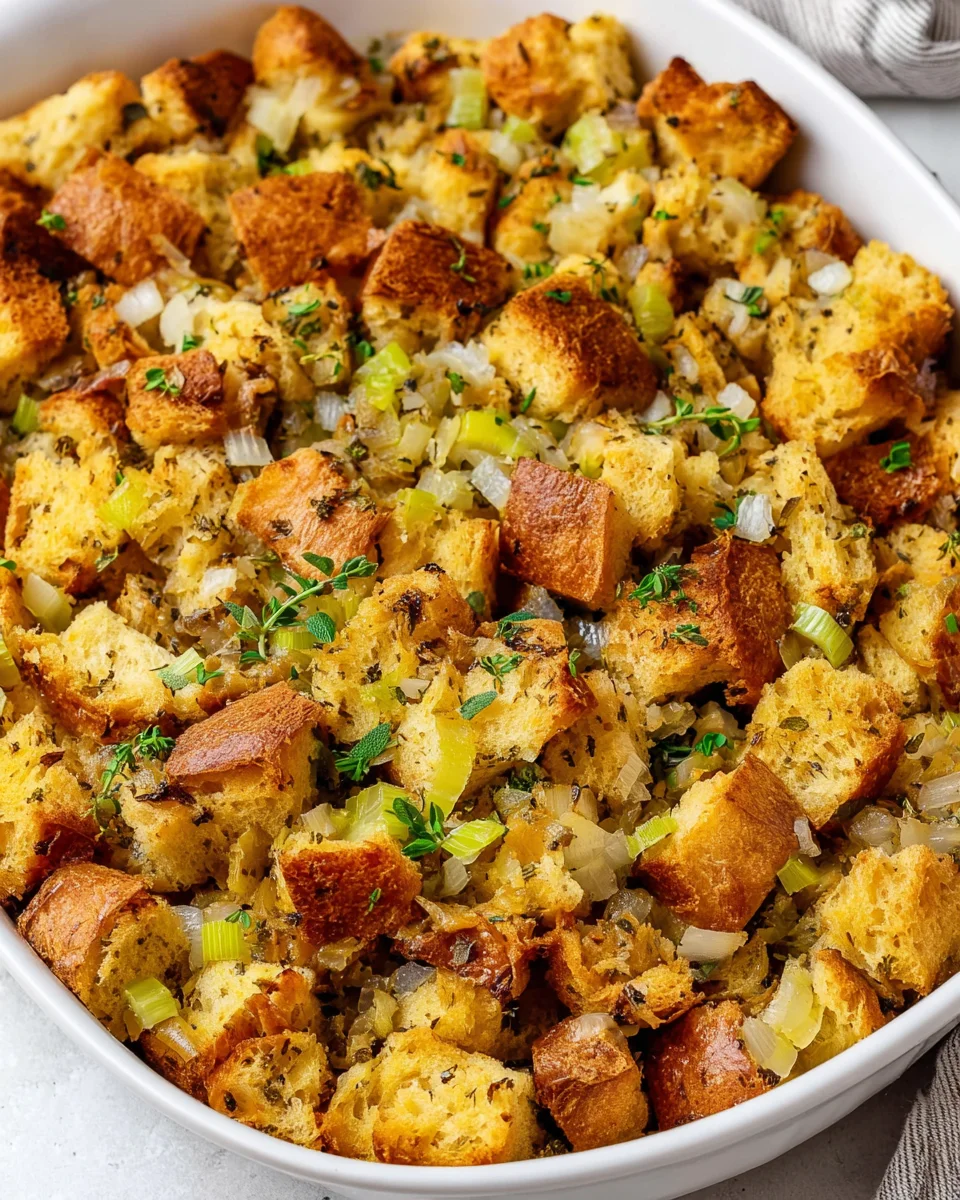
- Baking Uncovered for Crispy Top: After 30 minutes, carefully remove the foil. Now it’s time to get that glorious, golden-brown, slightly crispy top layer that everyone loves! Return the uncovered stuffing to the oven and continue baking for another 25-35 minutes, or until the top is beautifully golden brown and crispy, and the stuffing is heated through to at least 165°F (74°C) in the center. If you notice it browning too quickly, you can loosely tent it with foil again. For those who adore an extra-crispy top, you can even switch the oven to broiler mode for the last 5 minutes, keeping a very close eye on it to prevent burning. Every oven is different, so watch your stuffing closely during this stage to achieve your preferred level of crispiness.
- Rest Before Serving: Once your Homemade Stuffing is perfectly baked to your liking, remove it from the oven. Resist the urge to dive in immediately! Let the stuffing rest for at least 10-15 minutes before serving. This resting period allows the stuffing to set, the flavors to meld even further, and the internal temperature to equalize, resulting in a more cohesive and intensely flavored dish. It also prevents the stuffing from falling apart when you scoop it.
- Serve and Enjoy: Fluff the stuffing gently with a fork before serving. You’ll find a moist, flavorful interior with that delightful crispy top, packed with all the comforting flavors of home. This truly is the best Homemade Stuffing recipe, perfect for any holiday feast or Sunday dinner. Enjoy every delicious bite!

Conclusion:
And there you have it – the journey to creating what I genuinely believe will become a new staple in your kitchen. This isn’t just another side dish; it’s a culinary experience waiting to unfold. I’ve poured my heart into perfecting this recipe, and I truly hope you’re as excited as I am about its potential to transform your meals. What makes this recipe an absolute must-try, you ask? It’s the unparalleled depth of flavor, the perfect balance of savory herbs and aromatic vegetables, all coming together in a comforting, moist, yet beautifully textured bite. Forget everything you thought you knew about stuffing from a box; this is the real deal, a testament to how simple ingredients, given a little love and attention, can create something truly extraordinary. It elevates any meal from good to unforgettable, providing that comforting, nostalgic hug with every forkful. The aroma alone as it bakes will draw everyone to the kitchen, promising a feast for the senses.
The Unforgettable Difference of Homemade
I can tell you, the first time I served this to my family, there was a hushed silence followed by rave reviews and requests for seconds. That’s the magic of it – it’s a dish that brings people together, sparking conversations and creating cherished memories around the table. It’s more than just food; it’s an expression of warmth and hospitality. The rich, savory notes, combined with just the right amount of sweetness from sautéed onions and perhaps a hint of apple, create a symphony on the palate that will leave everyone utterly satisfied. It’s remarkably easy to prepare, making it accessible even for novice cooks, yet the results taste like they came from a gourmet kitchen. This recipe champions fresh, wholesome ingredients, ensuring every bite is bursting with natural goodness.
Now, let’s talk about how to truly enjoy this masterpiece. While it’s an undeniable star of any holiday spread, nestled perfectly alongside a golden-brown roasted turkey or a succulent ham, its versatility extends far beyond festive occasions. Imagine it as a decadent accompaniment to a simple weeknight roasted chicken or pork chops, adding an instant touch of gourmet flair. You could even get creative and transform leftovers into crispy stuffing patties, perfect for a brunch side, or crumble it over a baked casserole for an amazing textural contrast. For a unique appetizer, try spooning it into mushroom caps and baking until golden – a truly delightful bite! It also pairs beautifully with a hearty beef stew, soaking up all those rich juices, or as a flavorful base for a stuffed bell pepper.
And for those who love to experiment in the kitchen, this recipe is incredibly adaptable. Feel free to play with different types of bread – a rustic sourdough will lend a beautiful tang, while cornbread adds a delightful sweetness and crumbly texture. For an extra layer of richness, consider adding cooked sausage – sage sausage is a personal favorite – or diced, sautéed apples for a touch of fruitiness. Dried cranberries or cherries can introduce a lovely tart counterpoint, especially if you’re serving it with poultry. A handful of toasted pecans or walnuts can provide a satisfying crunch. Don’t be afraid to experiment with your herbs too; while sage, thyme, and rosemary are classic, a sprinkle of marjoram or a touch of parsley can brighten the profile. For a vegetarian twist, simply omit any meat products and boost the vegetable content with sautéed mushrooms or leeks. A sprinkle of Parmesan cheese on top during the last few minutes of baking will create a wonderfully cheesy crust.
So, I urge you, don’t just read about this incredible dish; roll up your sleeves and experience the magic for yourself. You’ll be amazed at how simple it is to create such a profoundly delicious and impressive side. This is your invitation to elevate your culinary game and bring that homemade touch to your table. Once you’ve made this, you’ll understand why store-bought simply can’t compare. I am genuinely excited for you to discover the immense satisfaction that comes from mastering your very own batch of this delightful Homemade Stuffing. After you’ve had a chance to try it, please come back and share your experience with me! I’d love to hear about any variations you tried, how your family enjoyed it, or any tips you discovered along the way. Your feedback truly makes my day, and it helps inspire others to give it a go too. Happy cooking!
Ultimate Homemade Stuffing: Savory Beef & Herb Flavor
Homemade Stuffing is more than just a side dish; it’s a culinary hug, a fragrant promise of warmth and tradition that fills your kitchen with an irresistible aroma long before the first bite. For many of us, the captivating scent of sage, thyme, and toasted breadcrumbs signals the true start of a holiday feast, instantly evoking cherished memories and bringing families closer around the table.
Ingredients
Instructions
Important Information
Nutrition Facts (Per Serving)
It is important to consider this information as approximate and not to use it as definitive health advice.
Allergy Information
Please check ingredients for potential allergens and consult a health professional if in doubt.


Leave a Comment