
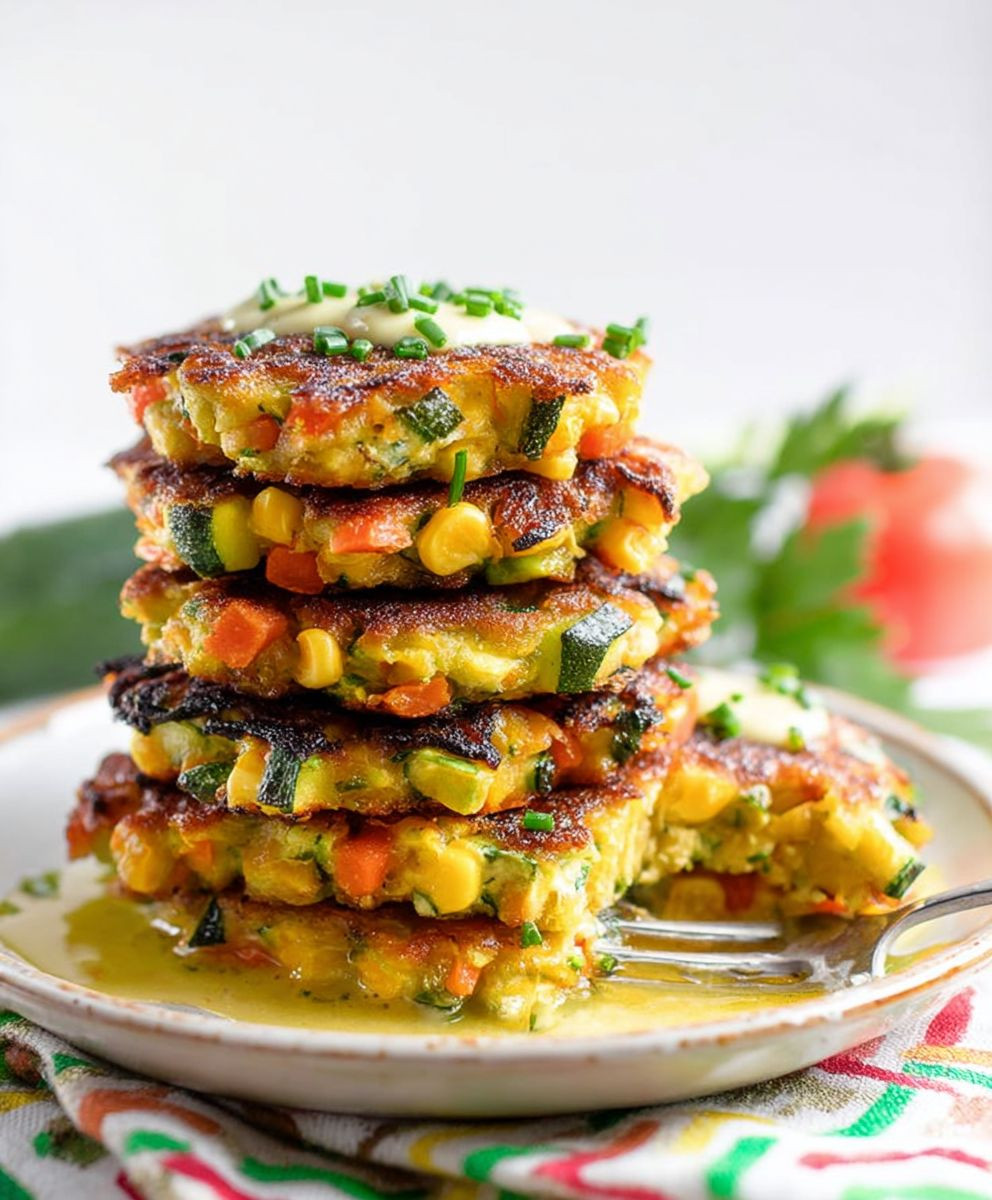
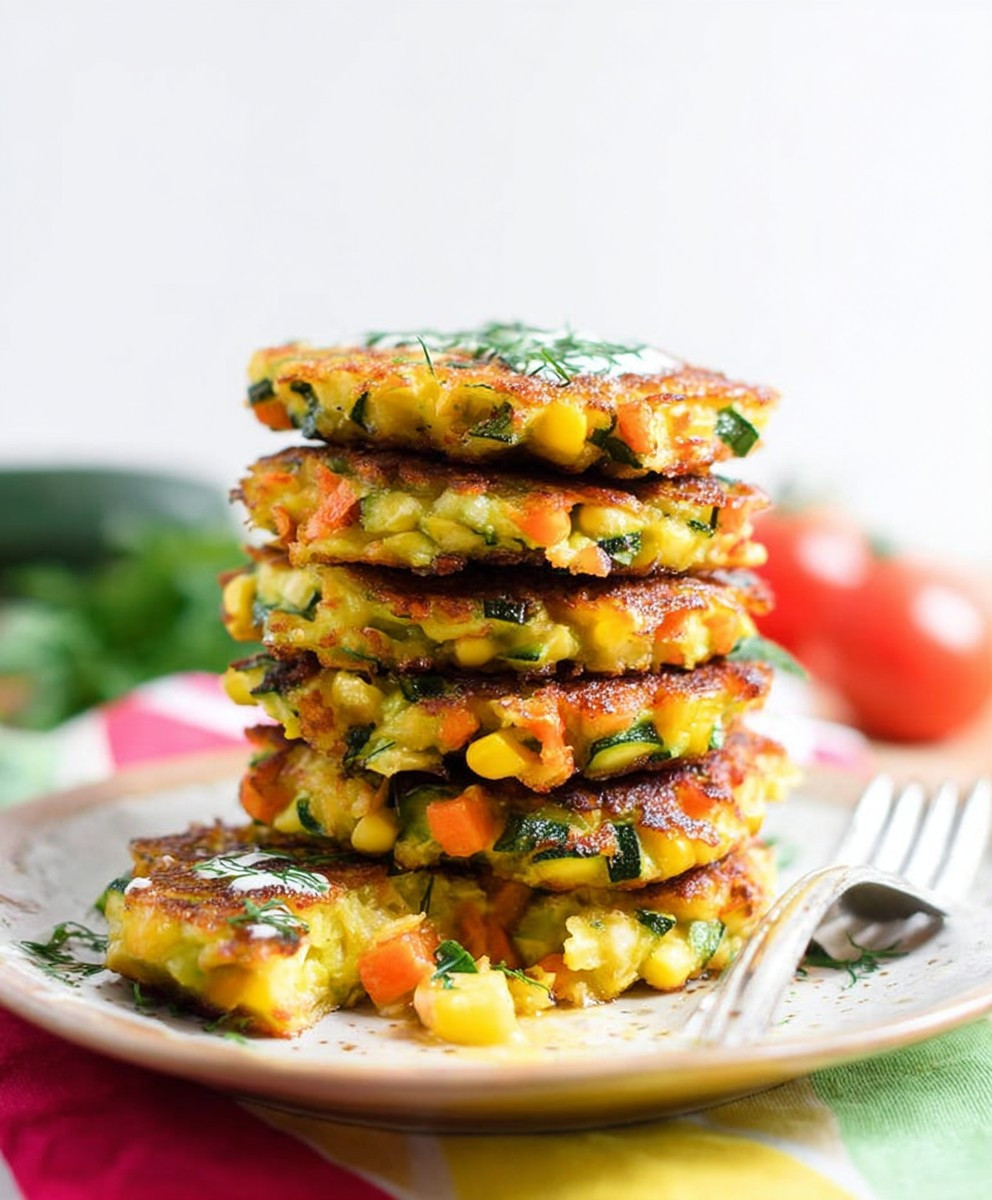
Vegetable Fritters: crispy, golden, and bursting with fresh flavors, these delightful bites are about to become your new favorite way to eat your veggies! Forget boring salads and steamed sides; we’re talking about a culinary adventure that transforms humble vegetables into irresistible treats. Have you ever struggled to get your kids (or even yourself!) to eat enough vegetables? Well, struggle no more! These fritters are so delicious, even the pickiest eaters will be begging for more.
The history of fritters stretches back centuries, with variations found in cuisines all over the world. From the tempura of Japan to the accras of the Caribbean, the concept of frying small, savory cakes is a universal culinary theme. These vegetable fritters draw inspiration from these global traditions, offering a versatile and adaptable recipe that can be tailored to your own taste and the vegetables you have on hand.
So, what makes these fritters so beloved? It’s the perfect combination of textures: a satisfying crunch on the outside, giving way to a soft, flavorful interior. The taste is equally appealing, with the natural sweetness of the vegetables enhanced by savory seasonings and a hint of spice. Plus, they’re incredibly convenient! Whip up a batch for a quick lunch, a satisfying snack, or a crowd-pleasing appetizer. Get ready to experience the magic of transforming ordinary vegetables into extraordinary fritters!
Ingredients:
- 1 cup all-purpose flour
- 1 teaspoon baking powder
- 1/2 teaspoon salt
- 1/4 teaspoon black pepper
- 1 large egg
- 3/4 cup milk (or more, as needed)
- 1 tablespoon vegetable oil
- 1 cup shredded carrots
- 1 cup shredded zucchini
- 1/2 cup finely chopped onion
- 1/2 cup chopped bell pepper (any color)
- 1/4 cup chopped fresh cilantro (optional)
- Vegetable oil, for frying
- Your favorite dipping sauce (e.g., sweet chili sauce, ranch dressing, yogurt dip)
Preparing the Vegetable Mixture:
Before we even think about the batter, let’s get our vegetables prepped and ready to go. This ensures that when we mix everything together, it’s a smooth and efficient process.
- Shred the Carrots and Zucchini: I like to use a box grater for this. Make sure you’re using the larger shredding side. You want the carrots and zucchini to be finely shredded so they cook evenly in the fritters. If your zucchini is particularly watery, you might want to squeeze out some of the excess moisture with a paper towel. This will prevent your fritters from becoming soggy.
- Chop the Onion and Bell Pepper: Finely chop the onion and bell pepper. The smaller the pieces, the better they’ll incorporate into the batter and cook through. I usually aim for pieces that are about 1/4 inch in size.
- Chop the Cilantro (Optional): If you’re using cilantro, give it a good chop. Cilantro adds a lovely fresh flavor to the fritters, but it’s totally optional if you’re not a fan.
- Combine the Vegetables: In a large bowl, combine the shredded carrots, shredded zucchini, chopped onion, chopped bell pepper, and chopped cilantro (if using). Give everything a good mix to ensure the vegetables are evenly distributed.
Making the Fritter Batter:
Now for the batter! This is what will hold our vegetables together and give the fritters their crispy texture. It’s important to get the consistency right – not too thick, not too thin.
- Whisk Dry Ingredients: In a separate medium bowl, whisk together the flour, baking powder, salt, and pepper. The baking powder is crucial for giving the fritters a light and airy texture. Make sure it’s evenly distributed throughout the flour mixture.
- Combine Wet Ingredients: In another small bowl, whisk together the egg, milk, and vegetable oil. The vegetable oil adds a little bit of richness to the batter and helps to prevent the fritters from sticking to the pan.
- Combine Wet and Dry Ingredients: Gradually add the wet ingredients to the dry ingredients, whisking constantly until just combined. Be careful not to overmix the batter. Overmixing can develop the gluten in the flour, resulting in tough fritters. A few lumps are perfectly fine.
- Adjust Consistency (If Needed): The batter should be thick enough to coat the vegetables but thin enough to pour easily. If the batter is too thick, add a little more milk, one tablespoon at a time, until you reach the desired consistency. If the batter is too thin, add a little more flour, one tablespoon at a time.
- Incorporate Vegetables into Batter: Add the prepared vegetable mixture to the batter and gently fold until the vegetables are evenly coated. Make sure all the vegetables are nicely incorporated into the batter.
Frying the Vegetable Fritters:
This is where the magic happens! Frying the fritters to golden-brown perfection. The key is to maintain a consistent oil temperature and not overcrowd the pan.
- Heat the Oil: Pour about 1/2 inch of vegetable oil into a large skillet or frying pan. Heat the oil over medium heat until it’s hot enough for frying. You can test the oil by dropping a small amount of batter into the pan. If it sizzles and turns golden brown in a few seconds, the oil is ready. Be careful not to overheat the oil, as this can cause the fritters to burn on the outside before they’re cooked through on the inside.
- Drop Batter into Hot Oil: Using a spoon or small ice cream scoop, drop spoonfuls of the batter into the hot oil. Don’t overcrowd the pan; fry the fritters in batches to maintain the oil temperature. I usually fry about 3-4 fritters at a time, depending on the size of my pan.
- Fry Until Golden Brown: Fry the fritters for about 2-3 minutes per side, or until they’re golden brown and cooked through. Use a spatula to flip the fritters carefully.
- Remove and Drain: Remove the fritters from the pan with a slotted spoon and place them on a wire rack lined with paper towels to drain excess oil. This will help keep them crispy.
- Repeat: Repeat the frying process with the remaining batter, adding more oil to the pan as needed.
Serving and Enjoying:
The best part! Serving up these delicious, crispy vegetable fritters and enjoying them with your favorite dipping sauce.
- Serve Immediately: Vegetable fritters are best served immediately while they’re still hot and crispy.
- Serve with Dipping Sauce: Serve the fritters with your favorite dipping sauce. Sweet chili sauce, ranch dressing, yogurt dip, or even a simple aioli are all great options.
- Garnish (Optional): Garnish the fritters with a sprinkle of fresh cilantro or a drizzle of your favorite sauce for an extra touch of flavor and presentation.
Tips and Variations:
- Add Cheese: For extra flavor, add 1/2 cup of shredded cheese (such as cheddar, mozzarella, or Parmesan) to the batter.
- Spice it Up: Add a pinch of red pepper flakes or a dash of hot sauce to the batter for a little kick.
- Use Different Vegetables: Feel free to experiment with different vegetables, such as corn, peas, or mushrooms.
- Make it Gluten-Free: Use a gluten-free all-purpose flour blend to make these fritters gluten-free.
- Baking Option: If you prefer to bake the fritters, preheat your oven to 400°F (200°C). Place the fritters on a baking sheet lined with parchment paper and bake for 15-20 minutes, or until golden brown, flipping halfway through.
Storing Leftovers:
If you have any leftover fritters, you can store them in an airtight container in the refrigerator for up to 3 days. Reheat them in the oven or toaster oven for the best results.
Conclusion:
And there you have it! These aren’t just any fritters; these Vegetable Fritters are a vibrant, flavorful explosion in every single bite. I truly believe this recipe is a must-try for anyone looking to add a healthy and delicious twist to their meals. The combination of textures – the crispy exterior giving way to the tender, flavorful vegetables inside – is simply irresistible. Plus, it’s a fantastic way to sneak in some extra veggies, even for the pickiest eaters!
But why is this recipe a must-try, you ask? Beyond the incredible taste and texture, it’s incredibly versatile. You can easily adapt it to use whatever vegetables you have on hand, making it a perfect way to reduce food waste and get creative in the kitchen. Don’t have zucchini? No problem! Substitute with yellow squash or even grated carrots. Feeling adventurous? Add a pinch of chili flakes for a little kick. The possibilities are truly endless!
Serving Suggestions and Variations
Now, let’s talk about serving suggestions. These Vegetable Fritters are fantastic as a light lunch, a satisfying snack, or even a side dish to your favorite protein. I personally love serving them with a dollop of Greek yogurt or a tangy sour cream dip. A squeeze of lemon juice also brightens up the flavors beautifully.
Here are a few more ideas to get your culinary creativity flowing:
* Dip it good: Experiment with different dipping sauces! Try a spicy sriracha mayo, a creamy avocado dip, or even a simple sweet chili sauce.
* Fritter Burgers: Use the fritters as patties in mini burgers! Top with your favorite burger fixings for a fun and flavorful twist.
* Salad Topper: Crumble the fritters over a fresh salad for added texture and flavor.
* Breakfast Fritters: Serve them alongside scrambled eggs and avocado for a hearty and healthy breakfast.
* Spice it up: Add different spices to the batter! Cumin, coriander, or even a touch of curry powder can add a unique and delicious flavor profile.
* Cheese, please!: Incorporate some grated cheese into the batter for an extra cheesy and savory fritter. Parmesan, cheddar, or even feta would work wonderfully.
I’ve tried all of these variations myself, and each one is a winner in its own right. The key is to have fun and experiment until you find your perfect combination.
I’m so excited for you to try this recipe and experience the joy of these delicious Vegetable Fritters for yourself. I truly believe you’ll love them as much as I do. They are easy to make, packed with flavor, and incredibly versatile. What more could you ask for?
So, go ahead, gather your ingredients, and get cooking! I can’t wait to hear about your experience. Did you try any of the variations I suggested? Did you come up with your own unique twist? Please, share your thoughts, photos, and feedback in the comments below. I’m always eager to learn from my readers and see how you’ve made this recipe your own. Happy fritter-making! Let me know what you think of this simple, yet delicious, recipe for Vegetable Fritters!
Vegetable Fritters: The Ultimate Crispy & Healthy Recipe
Crispy, flavorful vegetable fritters with carrots, zucchini, onion, and bell pepper. Great as an appetizer, side, or snack with your favorite dipping sauce.
Ingredients
Instructions
Recipe Notes
- For extra flavor, add 1/2 cup of shredded cheese (such as cheddar, mozzarella, or Parmesan) to the batter.
- Add a pinch of red pepper flakes or a dash of hot sauce to the batter for a little kick.
- Feel free to experiment with different vegetables, such as corn, peas, or mushrooms.
- Use a gluten-free all-purpose flour blend to make these fritters gluten-free.
- If you prefer to bake the fritters, preheat your oven to 400°F (200°C). Place the fritters on a baking sheet lined with parchment paper and bake for 15-20 minutes, or until golden brown, flipping halfway through.
- Store leftover fritters in an airtight container in the refrigerator for up to 3 days. Reheat them in the oven or toaster oven for the best results.
Leave a Comment